Precondition
✅ This guide is for WooCommerce, Opencart, Magento, PrestaShop, WordPress.
❎ Not use for Shopify, BigCommerce, Notion, Strapi.
Follow this guide to configure the Social Login:
Requirement
1. SHA-1 and SHA-256 keys
Get from Play Store: Once uploaded the app to Google Play Console, you get SHA-1 and SHA-256 keys under App signing key certificate & Upload key certificate

Save all of the SHA-1 keys to a note for later usage
2. Facebook App ID and Secret
- Go to facebook app and get them here
- Save them to a note for later usage
3. Add Facebook base64 keys
- Go to this site and convert the SHA-1 keys to base64. Copy the output base64 and paste them in Facebook Login -> QuickStart -> Android -> section 6.
4. iOS App id and Team id (Optional)
- Go to Apple Developer and get the Team ID
- Go to AppStoreConnect and get your Apple ID
- Save them to a note for later usage
Firebase Configuration
Precondition: refer to Firebase Settings to create your application on Firebase.
Then follow the steps below:
- Add SHA-1 keys to your Android App
- Add Team ID and Apple ID to your iOS App
- Enable Social Login Methods and add Facebook App ID/Secret ID to Facebook Login Method.
- Add a support email.
- Create FireStore Database and select the nearest location to your customers.
- Change the rule of FireStore Database
- You need to create a Google Map API Key at this point.
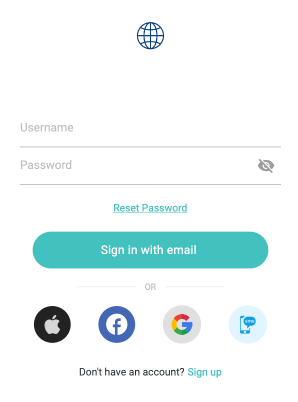
Social Login
After preparing the Requirement and configuring Firebase above, you can configure one or many login methods as below:
Apple Login
✅ This guide is for WooCommerce, Opencart, Magento, PrestaShop, WordPress.
❎ Not use for Shopify, BigCommerce, Notion, Strapi.
Follow steps below to enable Apple Login:
Enable the Apple Login option on the app builder
Enable the Apple Login option on Firebase https://tppr.me/yd1Yv - this option is used to register user's Apple account with the Firebase app.
Google Login
✅ This guide is for WooCommerce, Opencart, Magento, PrestaShop, WordPress.
❎ Not use for Shopify, BigCommerce, Notion, Strapi.
Follow steps below to enable Google Login:
Precondition: Follow Firebase Settings to create application on Firebase.
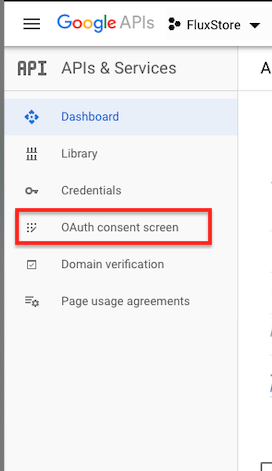
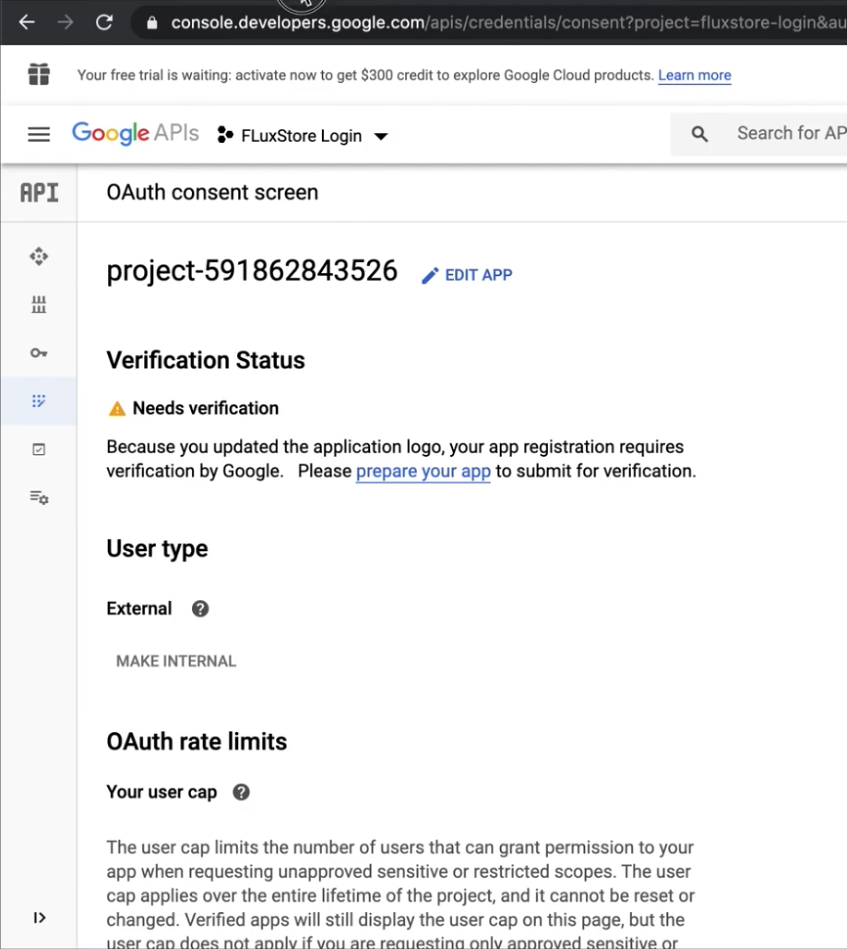
1. Setup OAuth consent screen
To set up a login with Google. First, you need to set up the Oauth consent Screen for your Firebase application.
Step 1: open the page https://console.developers.google.com
Step 2: In the upper right corner, click the button as shown in the picture (it could be any one of your project names)
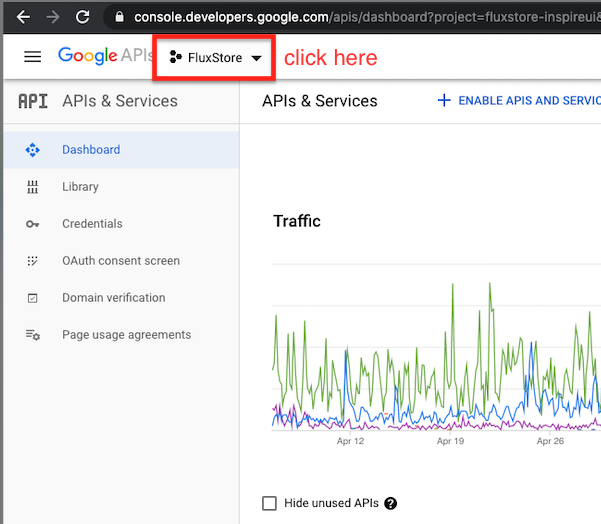
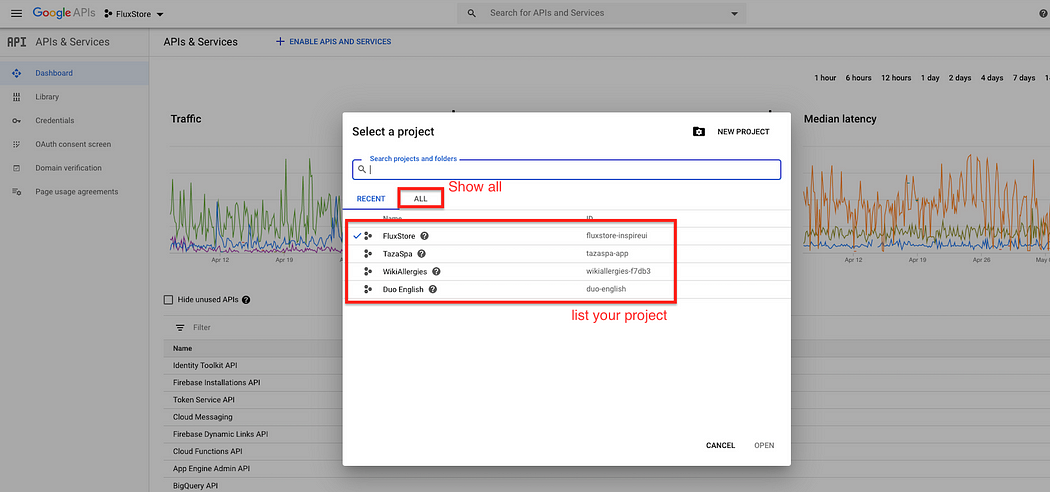
- Select the project you want to setup. If you cannot find them in the
RECENTproject list, please clickALLto display them all and select the project.

Step 3: on the left menu, select the OAuth consent screen
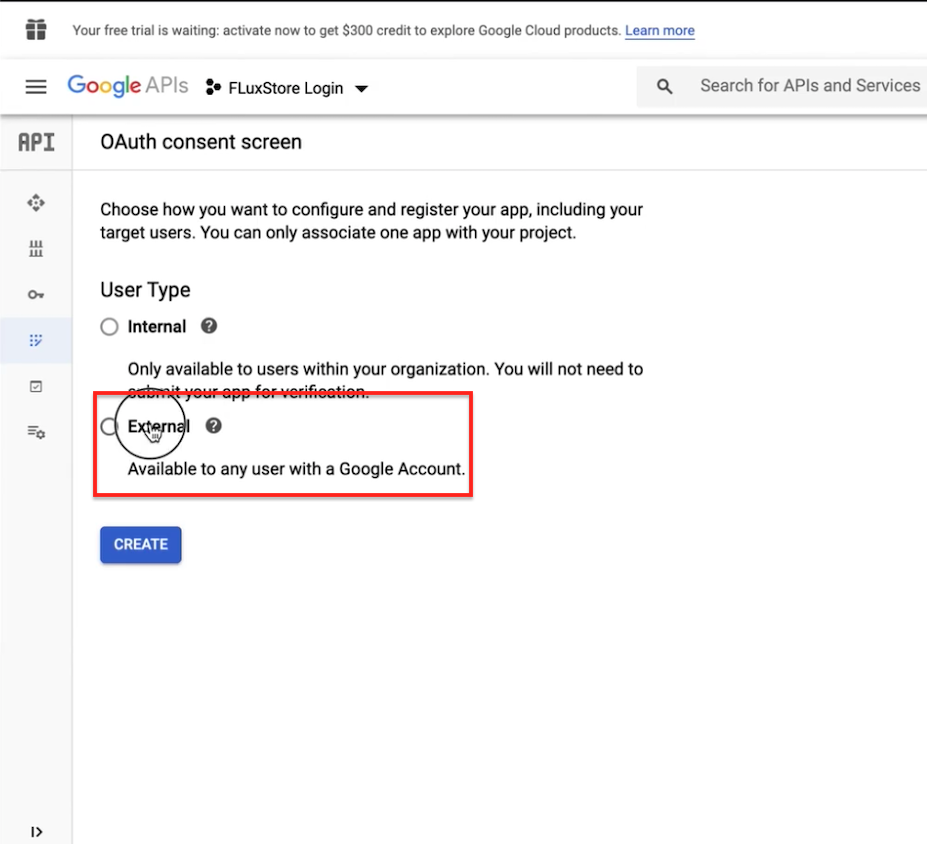
Step 4: Choose External and click CREATE
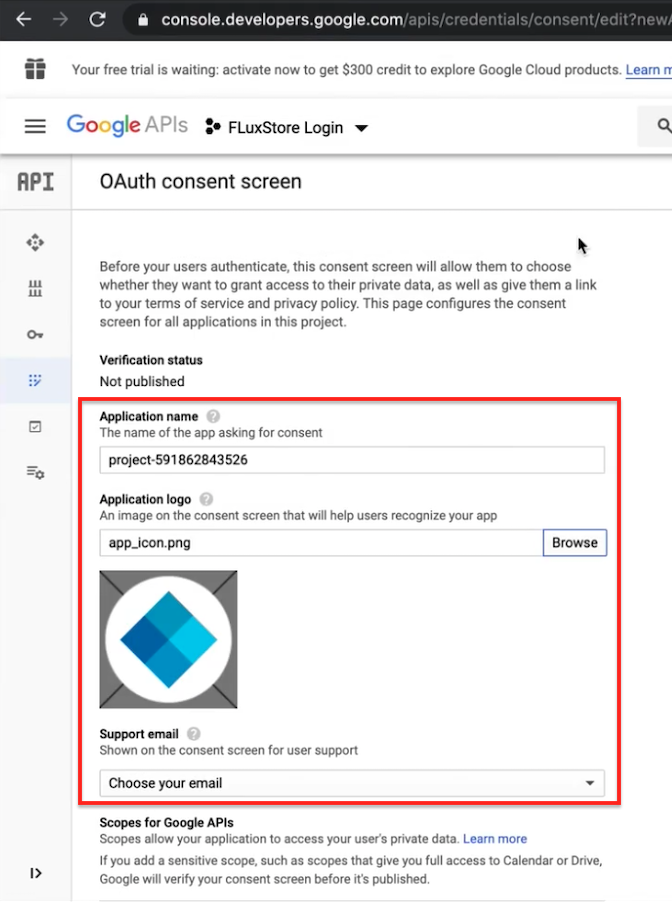
Step 5: Fill in some necessary information on the OAuth consent screen:
Add Application logo and choose Support email
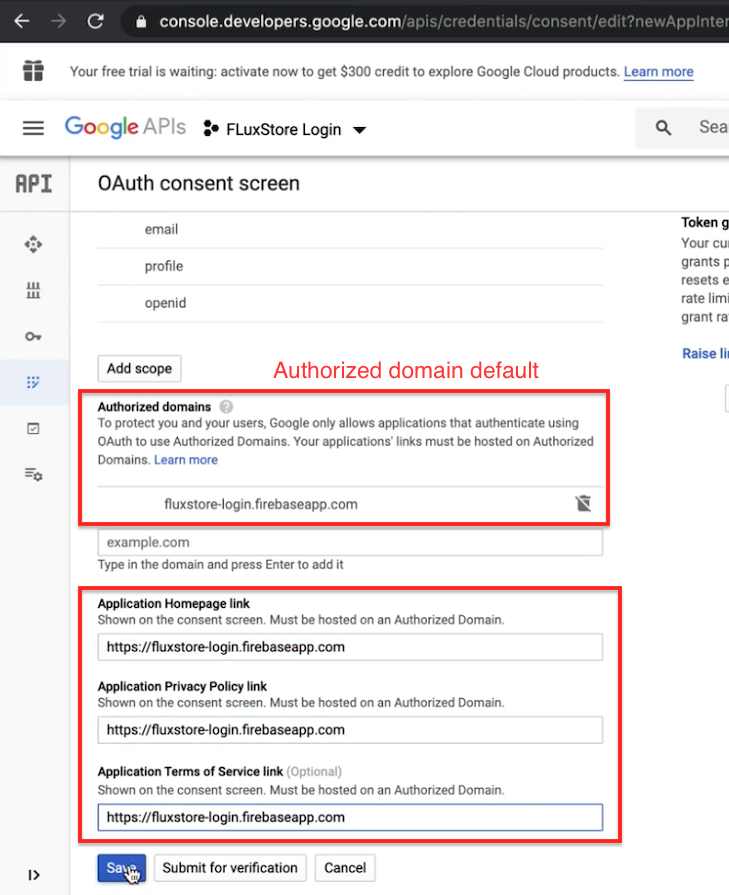
Add Authorized domains or use the default
Enter Application Homepage link, Privacy policy link, Terms of Service link. If not, use it with the default Authorized domains link (don't forget to add
https://).Click Save
Done
2. Setup for IOS
Step 1: Enable Authentication
Open your firebase project, in the left menu bar, select Authentication → Sign-in method → Google
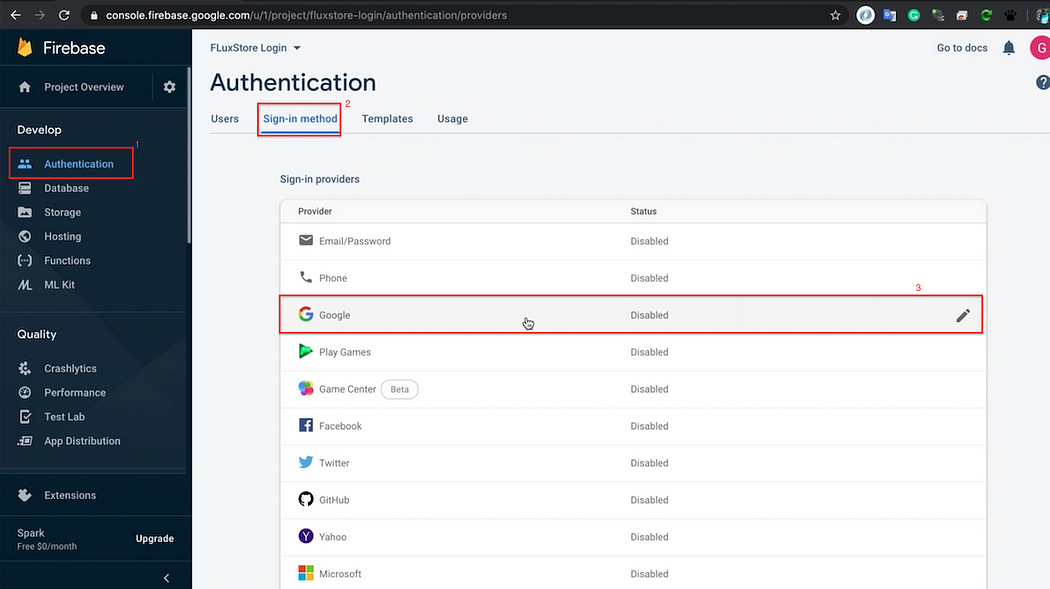
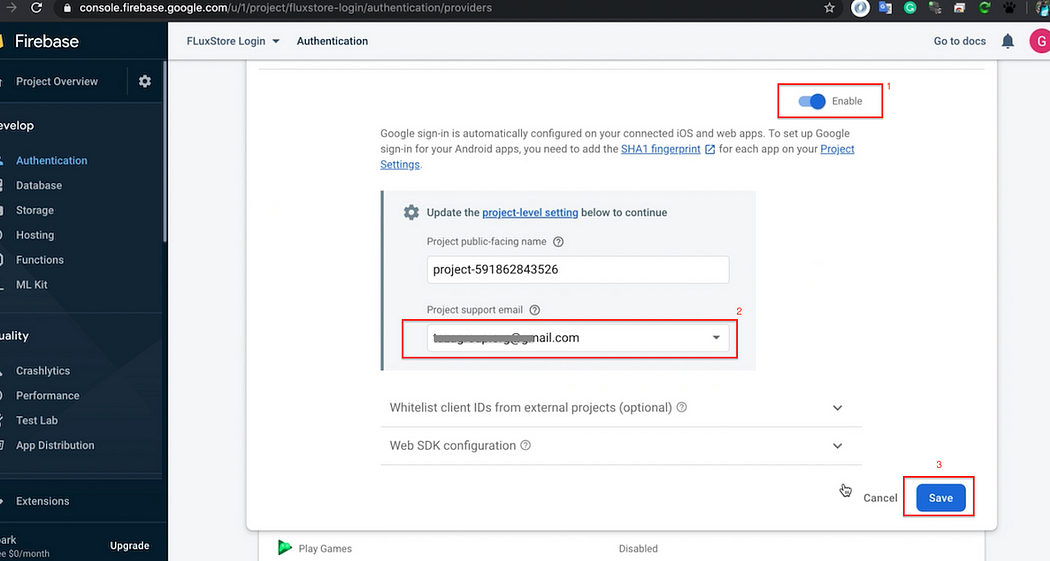
Step 2: Click Enable → choose Project support email and click Save
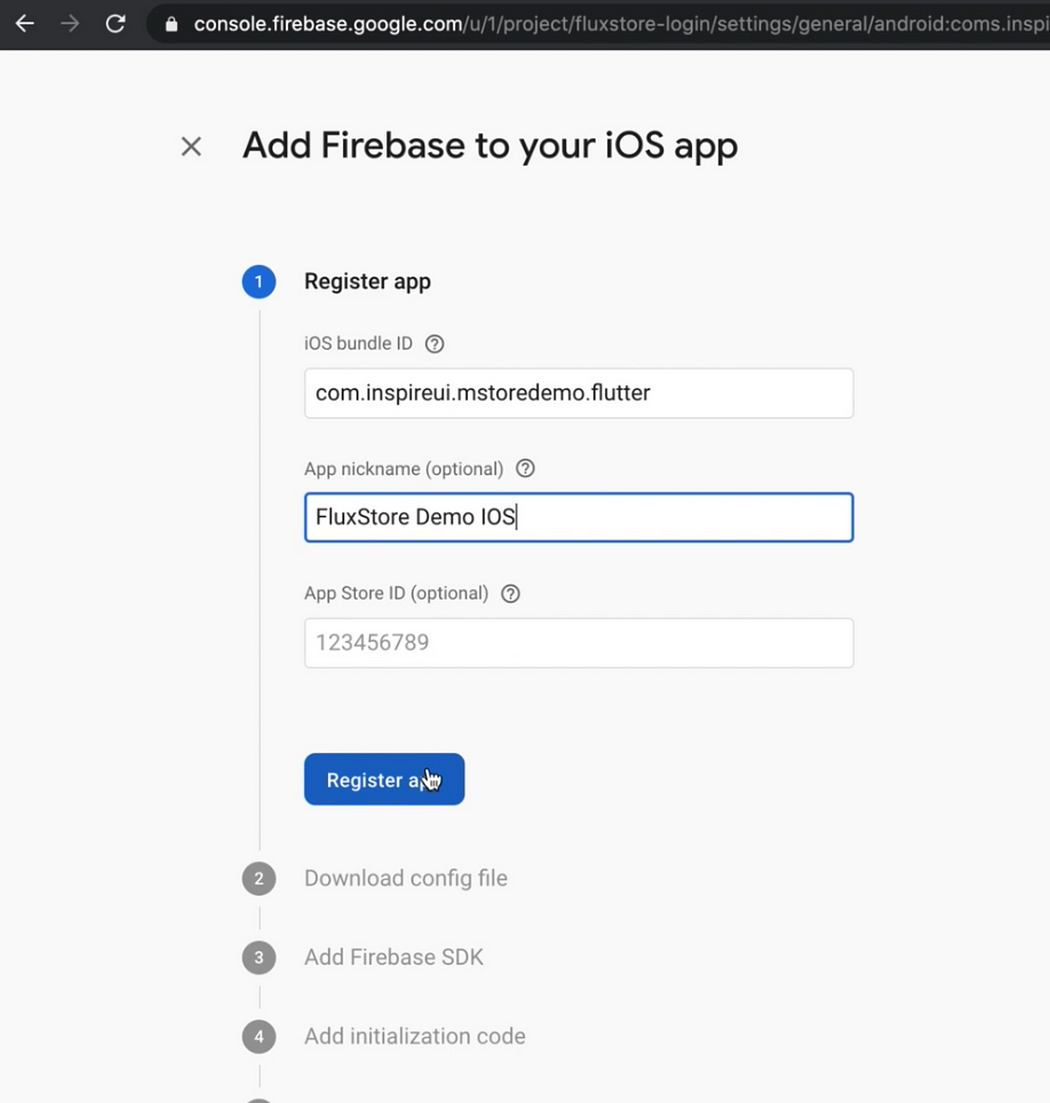
Step 3: Create App IOS in project firebase
- Back to the project settings page, add the ios application to your project:

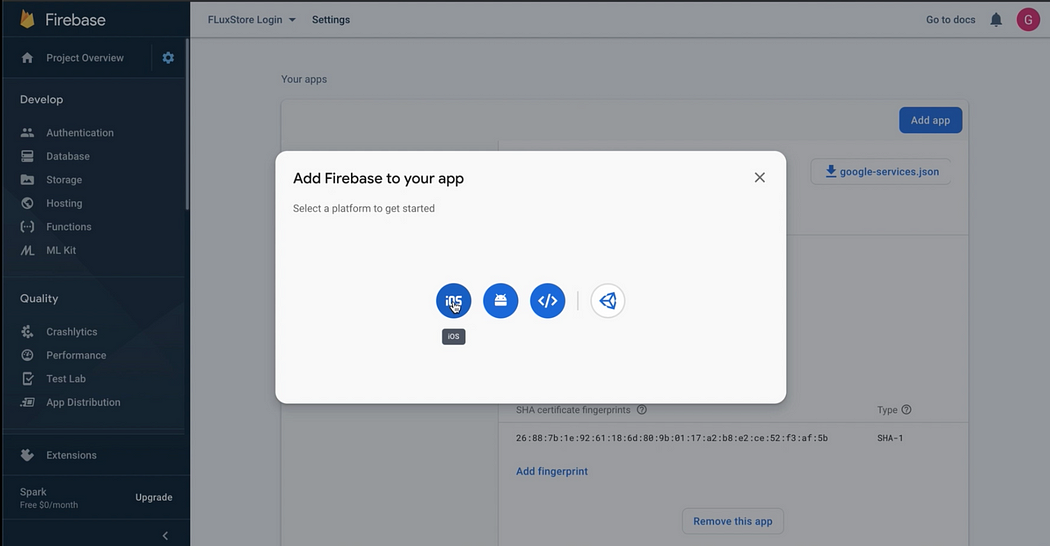
In this step, the Bundle ID of the IOS application is required. (Refer to [Problem Internal Link] to get the Bundle ID)

Enter Bundle ID and App nickname (optional). Then click Register app to continue
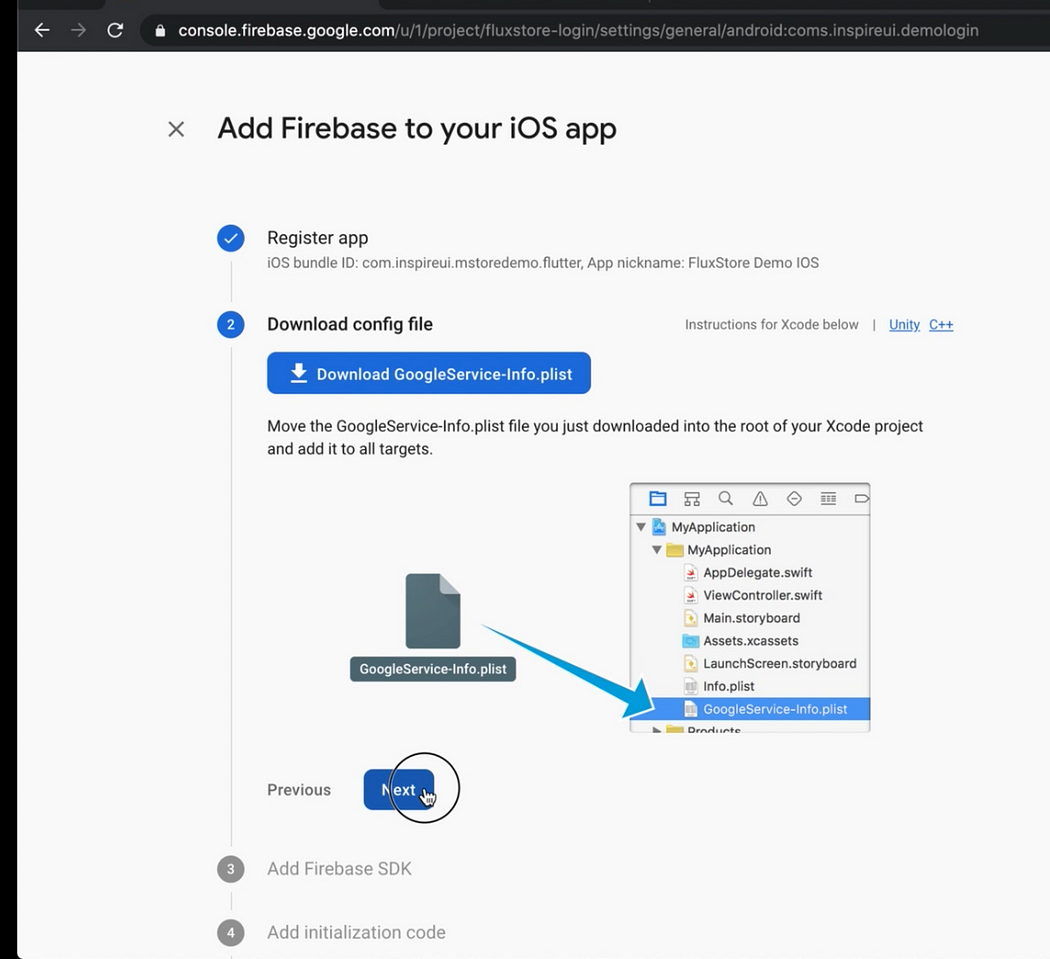
Download the GoogleService-info.plist file (save to use later):
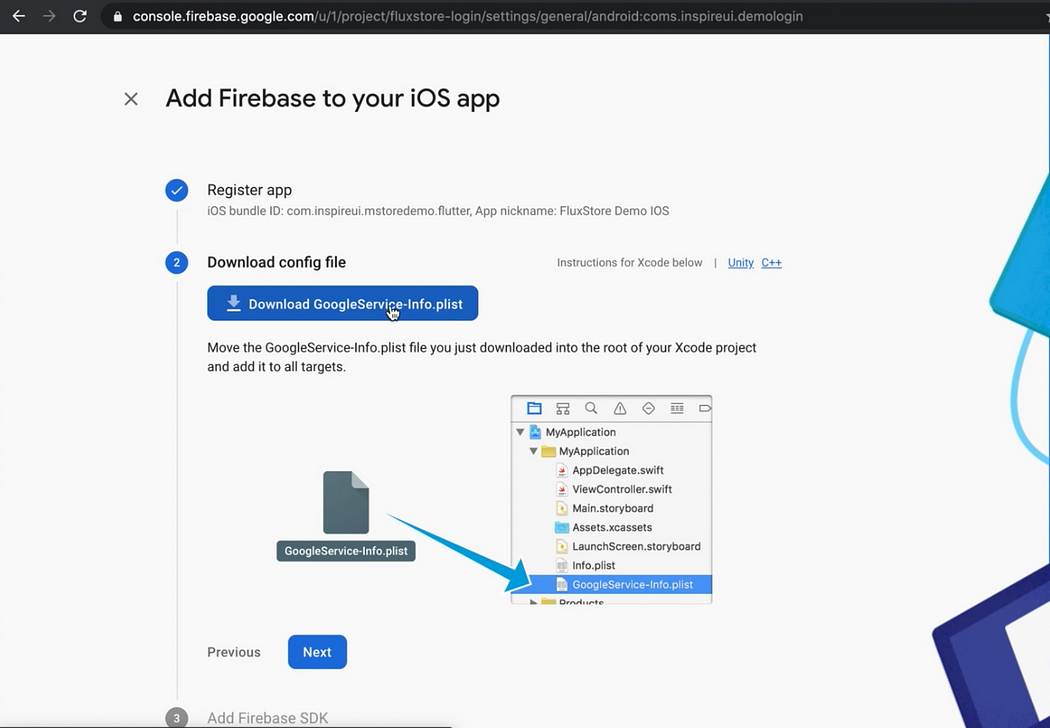
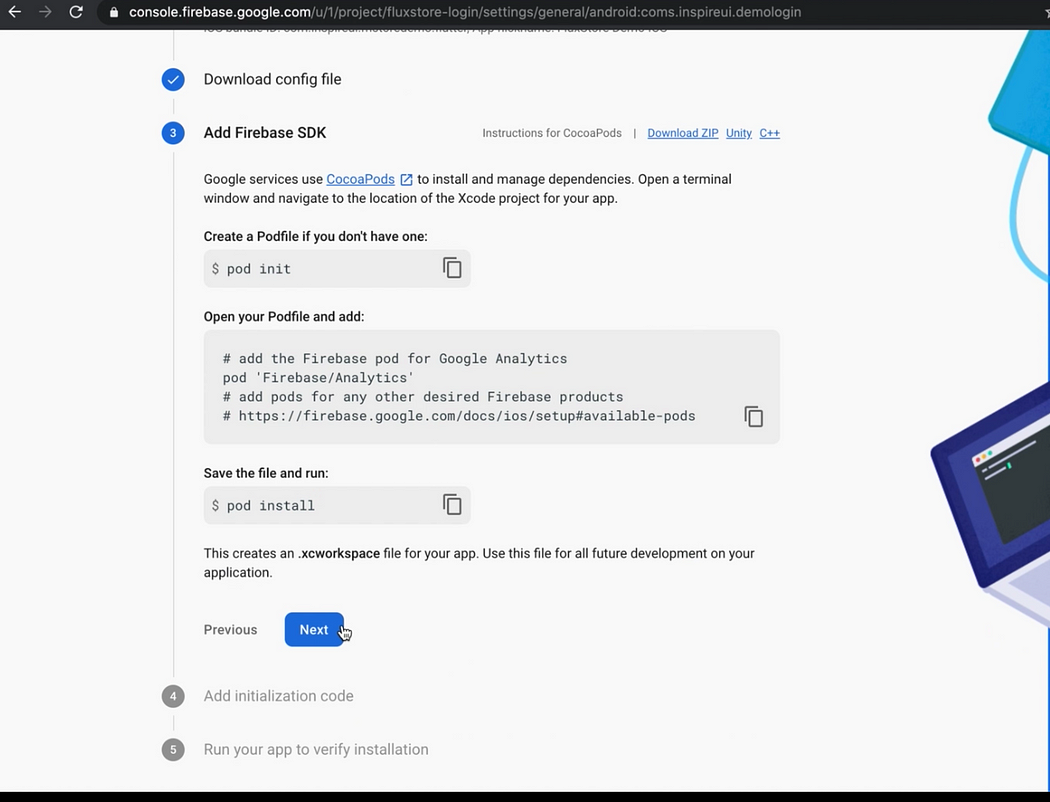
Click Next to continue
Next to continue
- Click
Skip this stepto complete

- Complete the setup process.
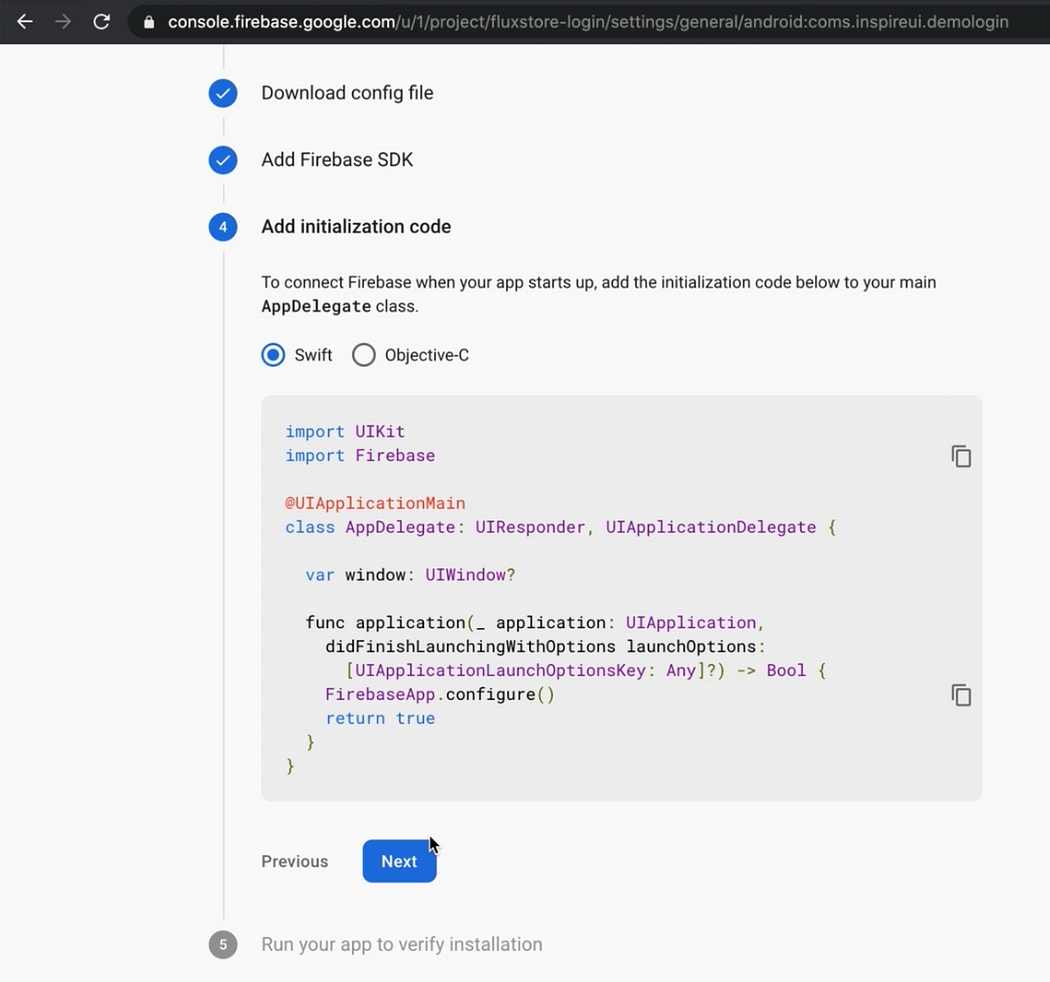
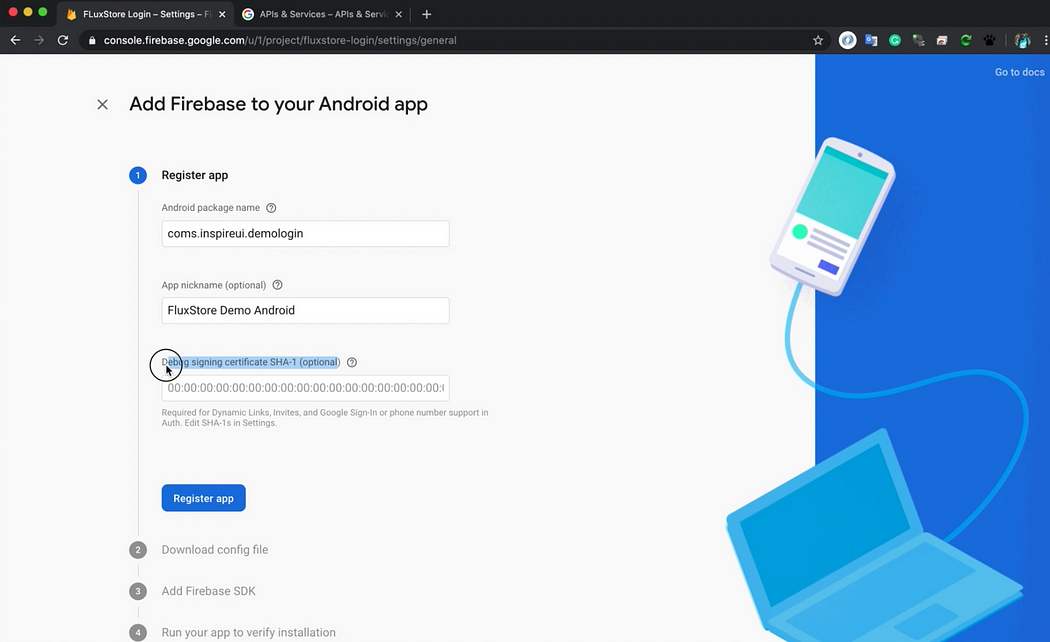
3. Setup for Android
Step 1: Open Project Settings in your project firebase, add new app android:

Step 2: Enter info your project
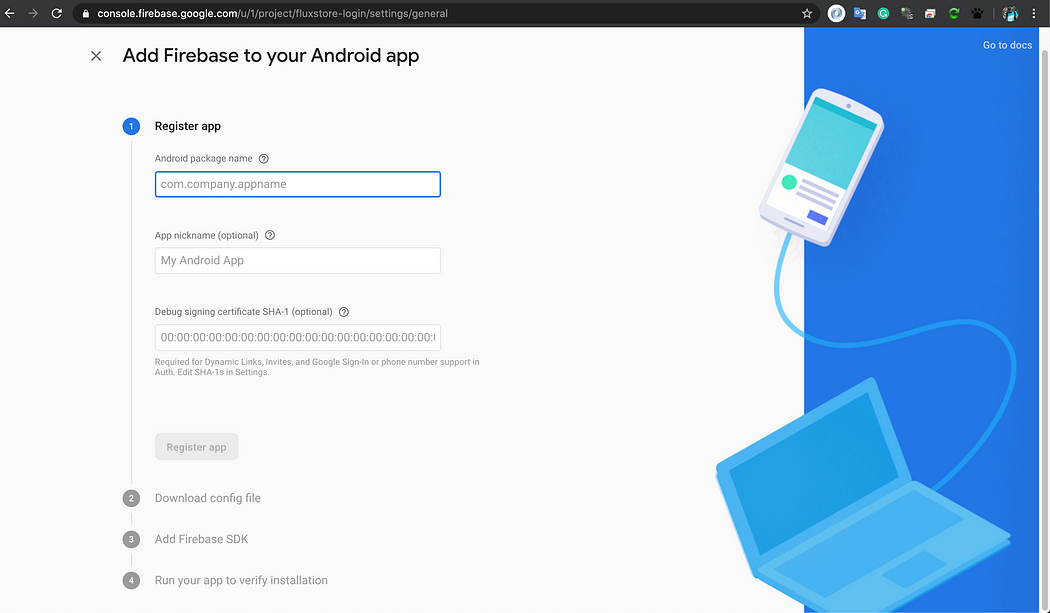
Android package name is the android package name in your project flutter.

Step 3: Download the file google-services.json (save to use later):
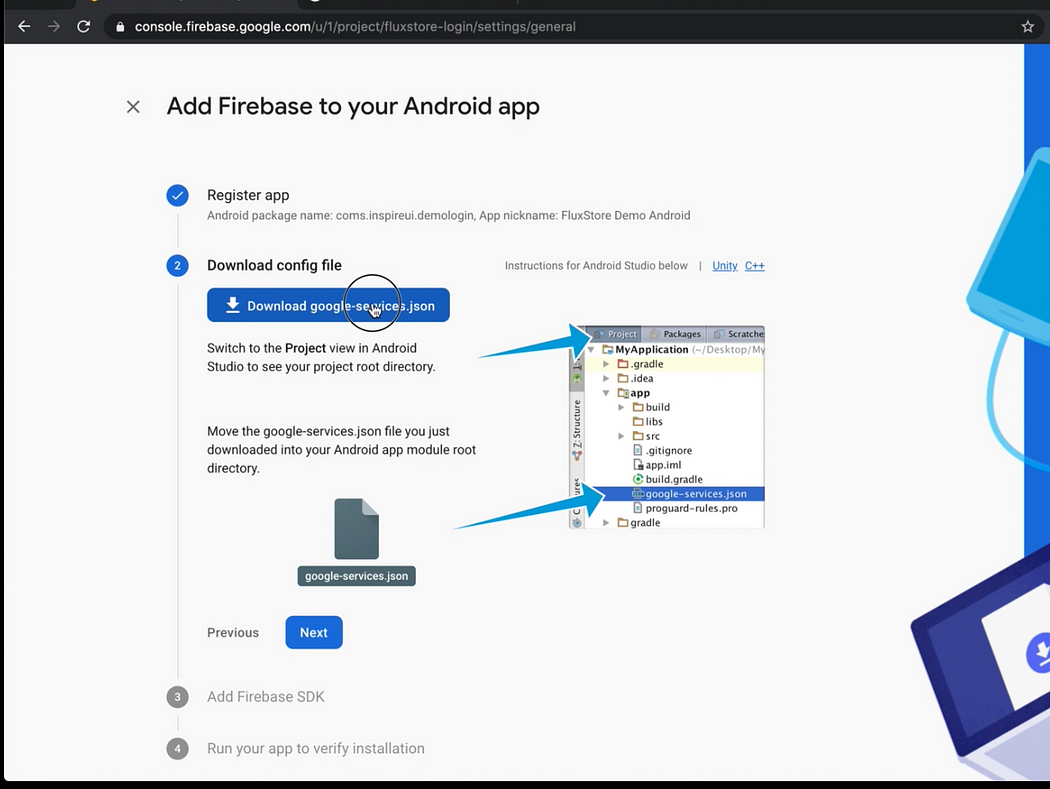
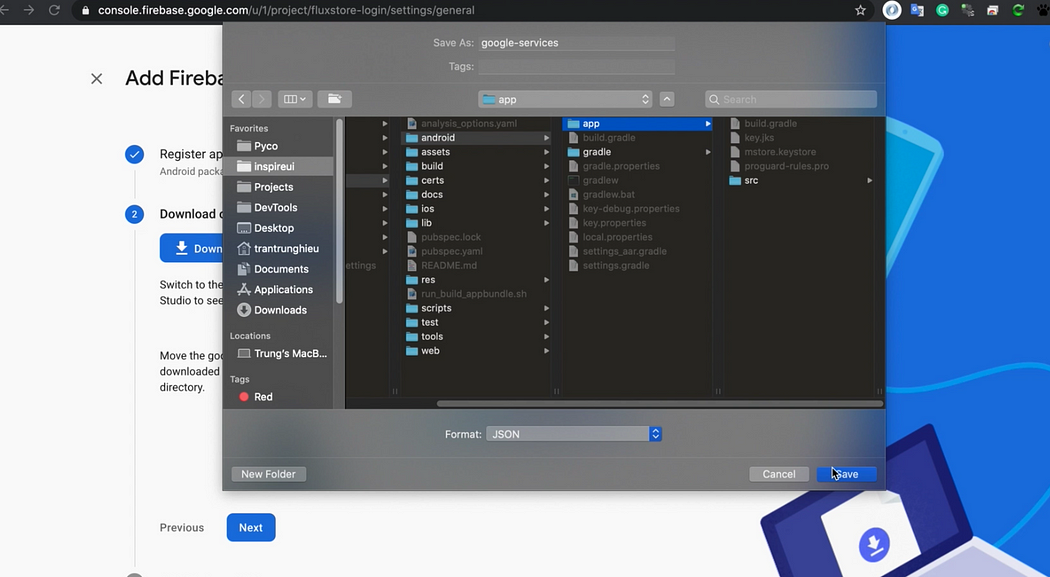
Step 4: Click Next to continue until the last step. Click button Skip this step to finish.
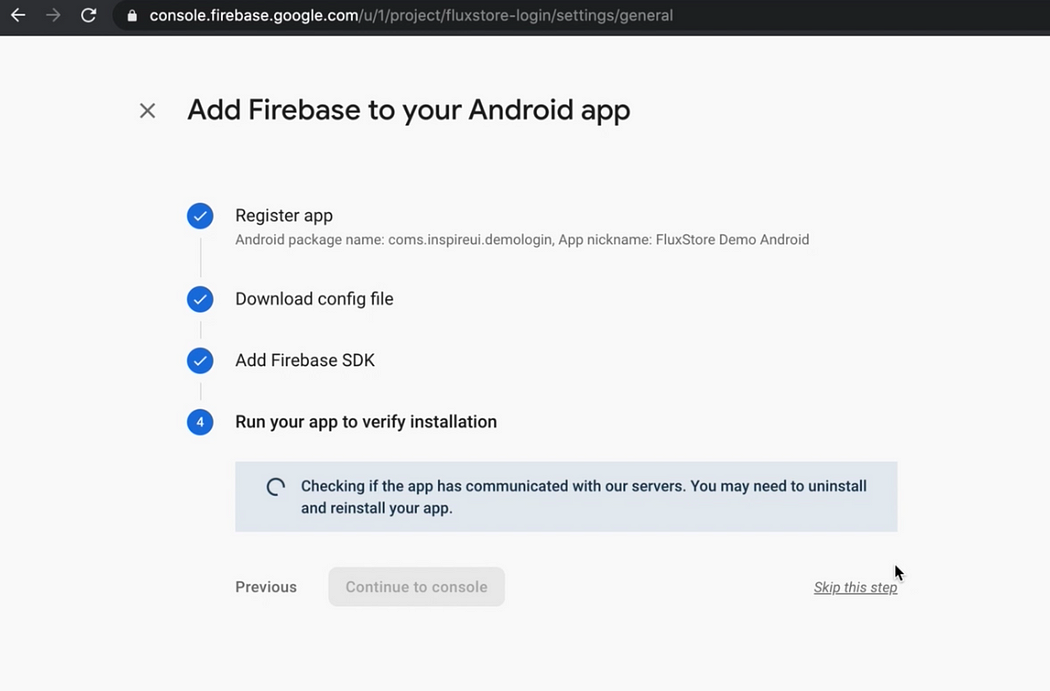
- Complete the setup process.
Facebook Login
✅ This guide is for WooCommerce, Opencart, Magento, PrestaShop, WordPress.
❎ Not use for Shopify, BigCommerce, Notion, Strapi.
Follow steps below to enter your Facebook’s information to App Builder:
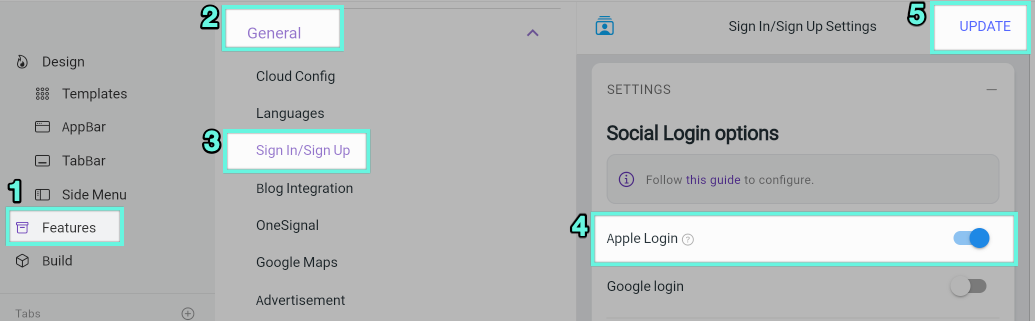
- Open your App Builder
- Open your App
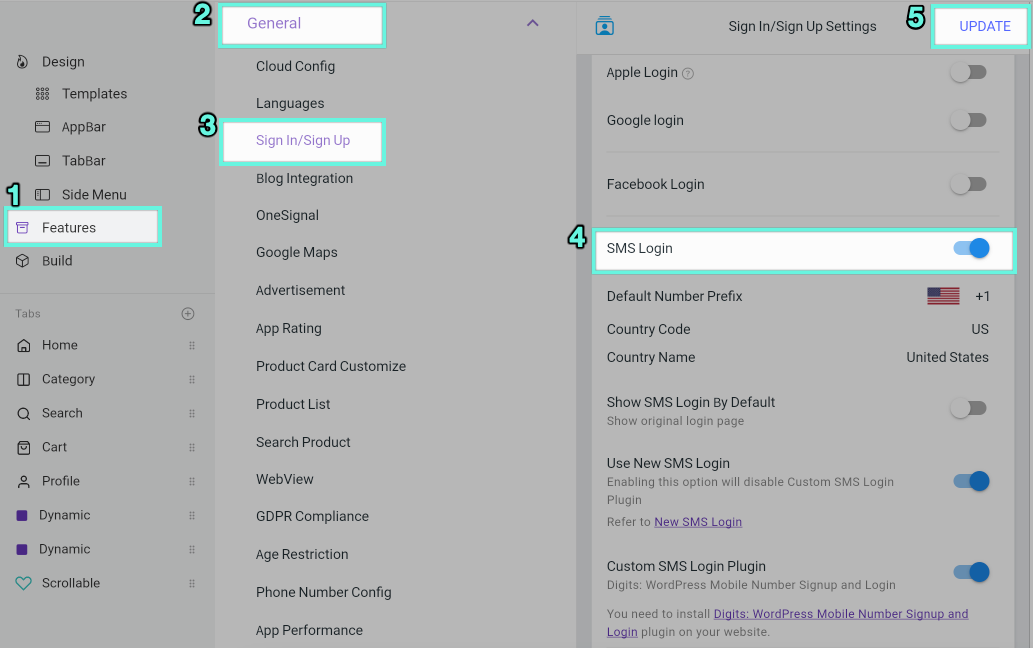
- Select Features, General, then Sign In / Sign Up
- Enter your Facebook’s information (at [Problem Internal Link])
- Click UPDATE

SMS Login
✅ This guide is for WooCommerce, Opencart, Magento, PrestaShop, WordPress.
❎ Not use for Shopify, BigCommerce, Notion, Strapi.
1. Setup SMS Login
Follow steps below to enable SMS Login:
Enable the SMS Login option on the app builder:
Configure Firebase:
Precondition: Follow Firebase Settings to create application on Firebase.
For Android, open the project on the **Firebase console**. Then move to **Settings/General**. You need to upload **SHA key** to firebase project. You can follow this guide to _**generate SHA key**_ [https://developers.google.com/android/guides/client-auth](https://developers.google.com/android/guides/client-auth)

In case you meet this issue: After creating APK and releasing the app in **App Stores**, you may get an error when logging in with **SMS Login**. You need to go to the **App stores** and copy the **SHA-1 key** and past to your **Firebase** setting:


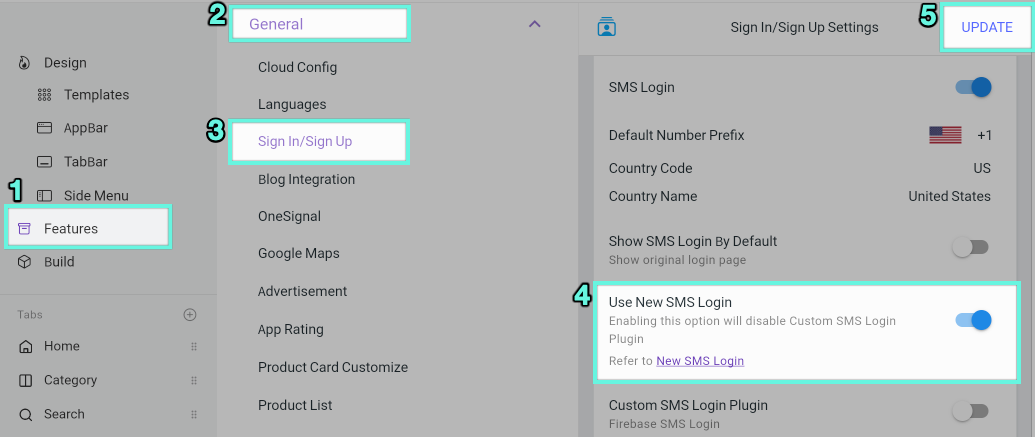
2. New SMS Login
- Another UI of Registration Form of SMS login:
- Allow updating Email, Password after registration.
- Enable this new feature by go to Features > General > Sign In/Sign Up > enable SMS Login > enable Use New SMS Login
3. SMS OTP Digits plugin
This Digits WordPress plugin is Not compatible with 'New SMS Login' above. It is available for SMS Login (OTP SMS).
Instead of remembering a password, the feature supports users signing up and logging in with their Phone Number and One Time Passcode (OTP) on SMS. The feature also helps to avoid fake orders.
First, install the Digits: WordPress Mobile Number Signup and Login plugin on your website. Make sure that the plugin works well on your backend.
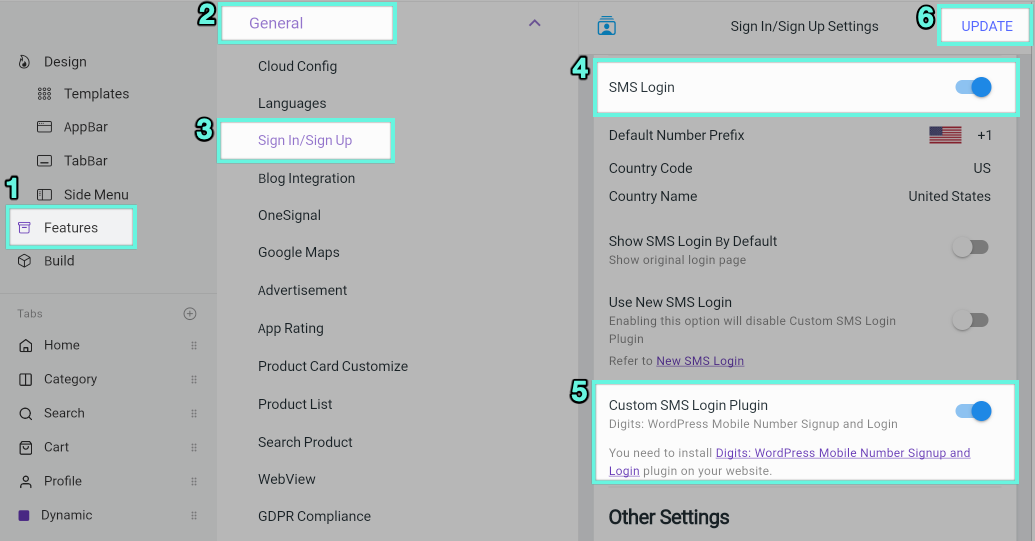
Then, open app on builder , go to Features > General > Sign In/Sign Up > enable SMS Login and Custom SMS Login Plugin
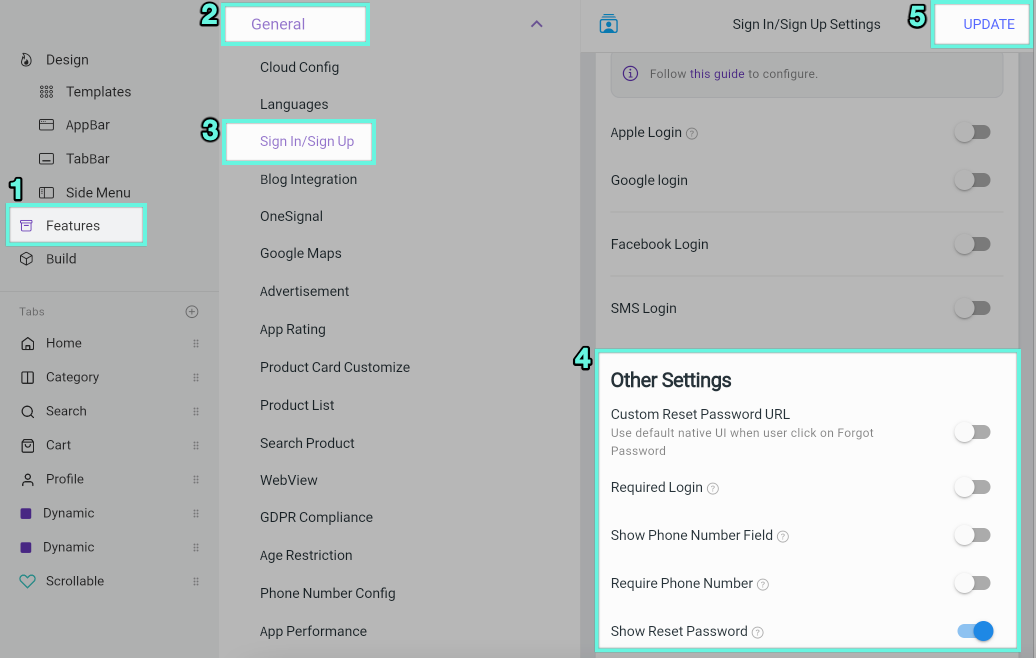
Logo and Others
This guide shows the way to:
- Change Logo on Sign Up and Sign In screen
- Require users to login before using the app
- Show Phone field on the Sign Up screen
- Require users to input Phone Number on the Sign Up screen
- Show Reset Password and URL to reset on the Sign In screen.
1. Logo
To change Logo on Login screen:
- Open app on builder
- go to Features > Branding > Theme and Logo
- Add Theme Logo > click Update

2. Others
Enable these items if you need:
- Required Login: Require users to login before using the app
- Show Phone Number Field: Show Phone field on the Sign Up screen
- Require Phone Number: Require users to input Phone Number on the Sign Up screen
- Show Reset Password on the Sign In screen
- Custom Reset Password URL: edit the url of reset password.