Create a WebView App
Already have a website and just want it inside an app shell, fast? A WebView app shows your website inside a mobile app. It's the quickest way to get something on a phone.
Is this you?
- You want your whole website to work inside an app, as-is.
- You don't need custom app screens, only your website's own pages.
- You want the fastest possible way to get an app.
- WebView apps don't need a plugin or API key — FluxBuilder simply shows your website's own pages inside the app.
Build Android • iOS • PWA apps ✨ AI-powered app building
⚡ CLI & MCP support
🎨 Drag-and-drop UI design
🔔 Push notifications for Free
Not sure this is you?
Want a full native app with your own design, not just your website shown as-is? Go to Create a Native App for Your Website 🚀 instead.
Don't have a website at all? Go to Create an App Without a Website →.
Want to build AI Assistant apps support ChatGPT & OpenAI? → Create an AI Assistant App 🚀
Create with AI
- This guide shows you how to use AI to create and build your WebView app faster.
- Choose one of the two methods to create your WebView app: “Create with AI” or “Create Manually — Drag & Drop” (below).
Follow these steps to take you from connecting your website to build and publish apps on the App Store and Google Play:
Step 1: Prepare your website
- Make sure your website is live and looks good on a phone screen (mobile-friendly).
- Prepare your app name, logo, and basic information.
Step 2: Create an app project
Create a new app project in FluxBuilder. Follow this guide to install and run FluxBuilder in your devices successfully.
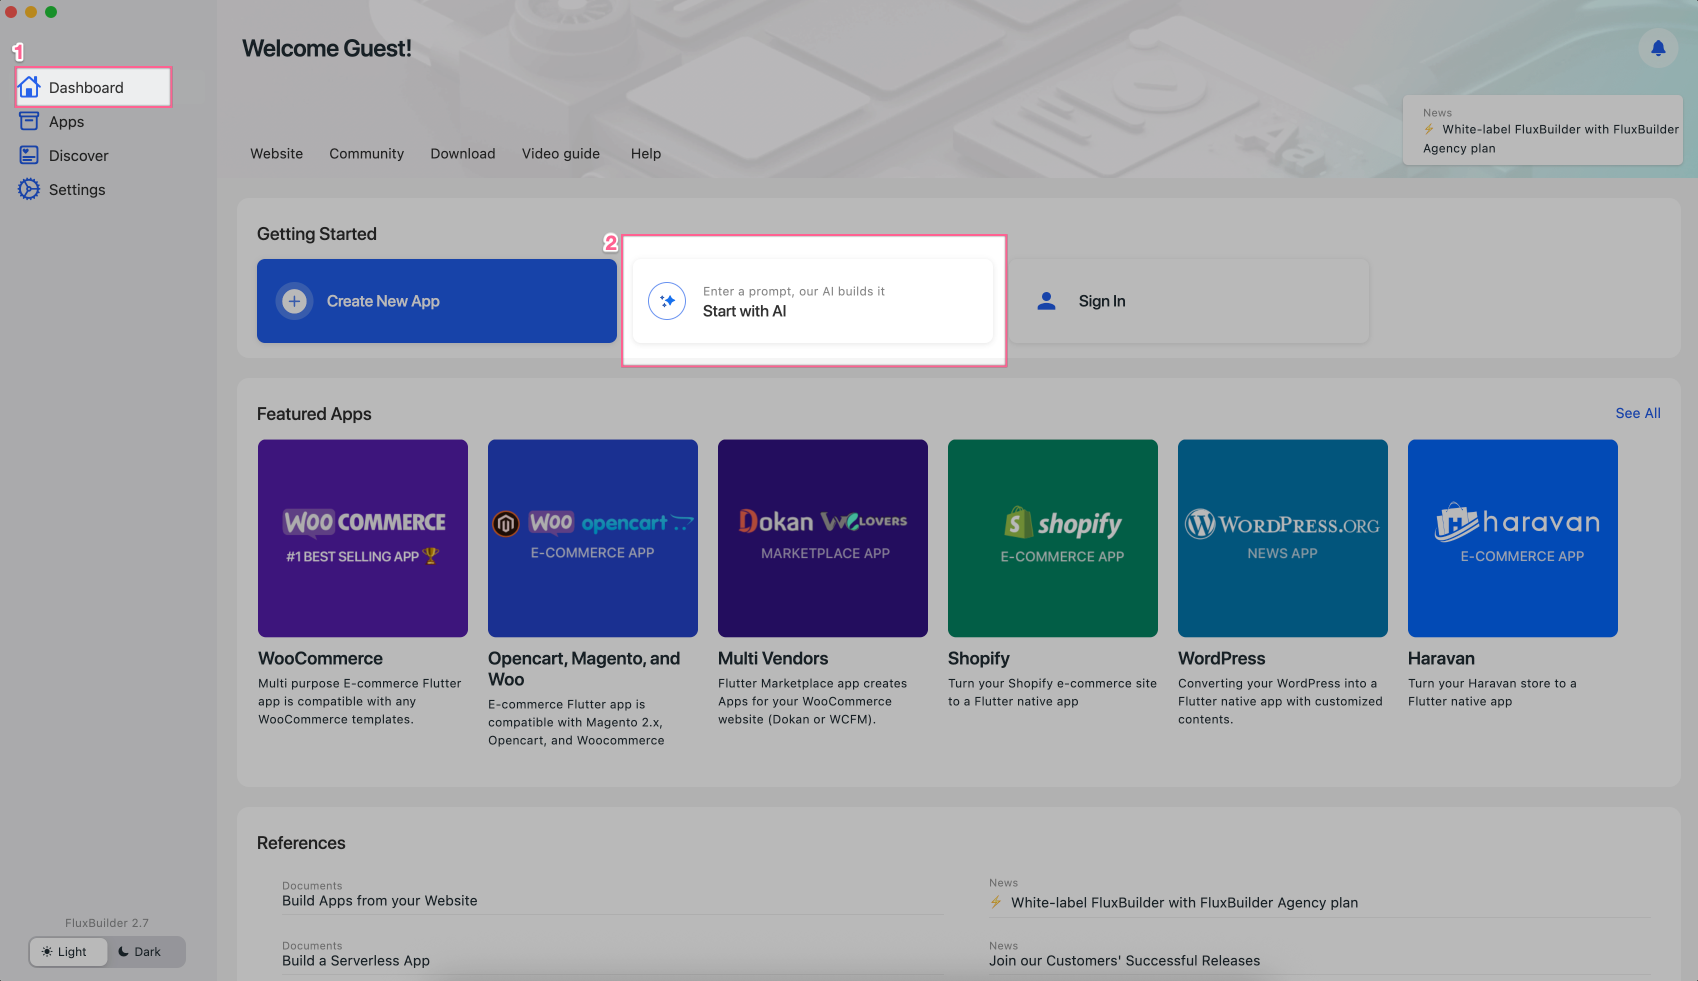
✨ If using the FluxBuilder Desktop version (recommended), open FluxBuilder, then select Dashboard > choose Start with AI:
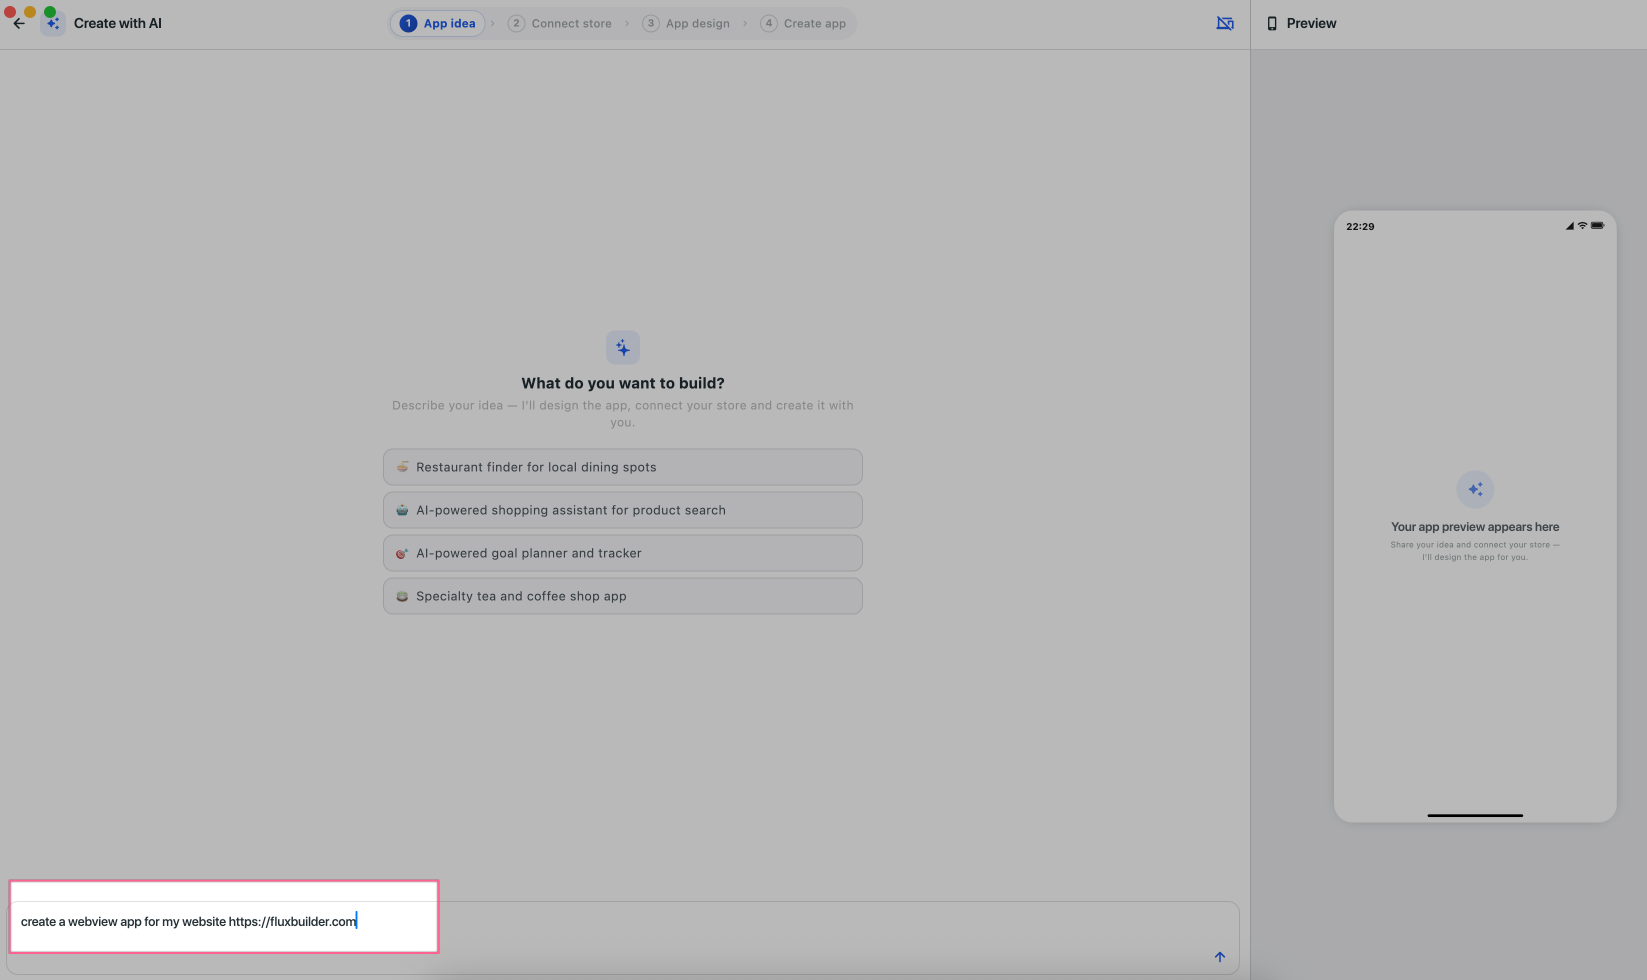
Type your request and press ENTER: (e.g., create a webview app for my website https://fluxbuilder.com )
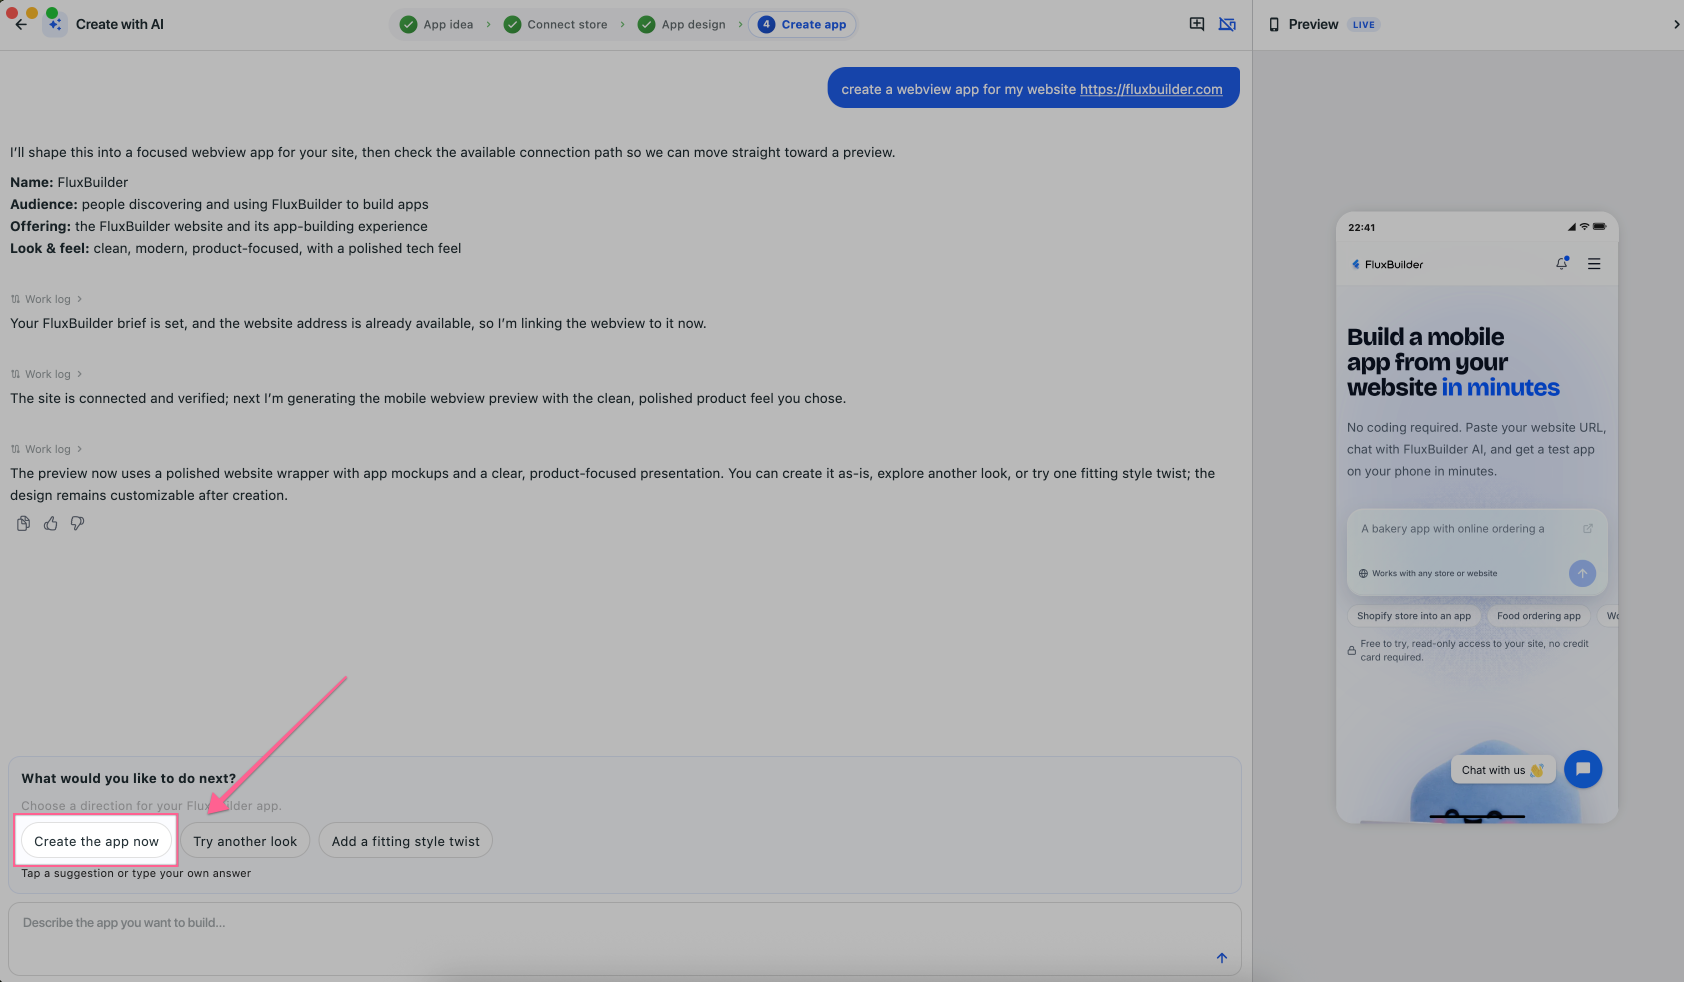
Click Create the app now:
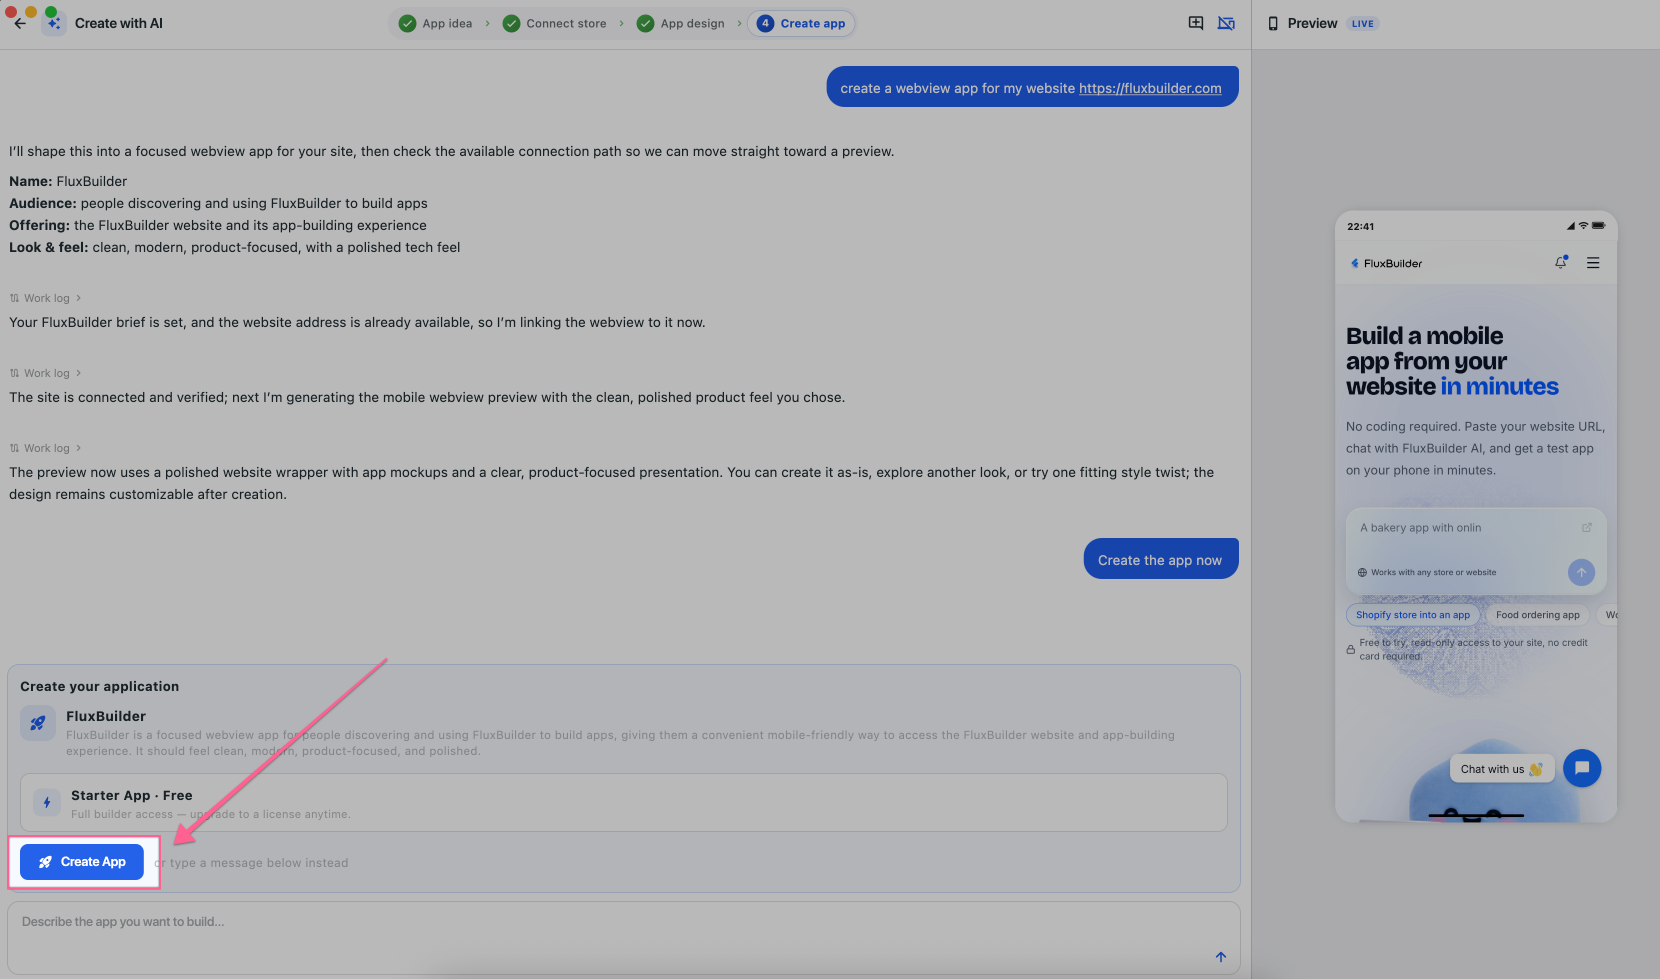
Click Create App: (At this step, you may be asked to log in to save your app project and continue anytime.)
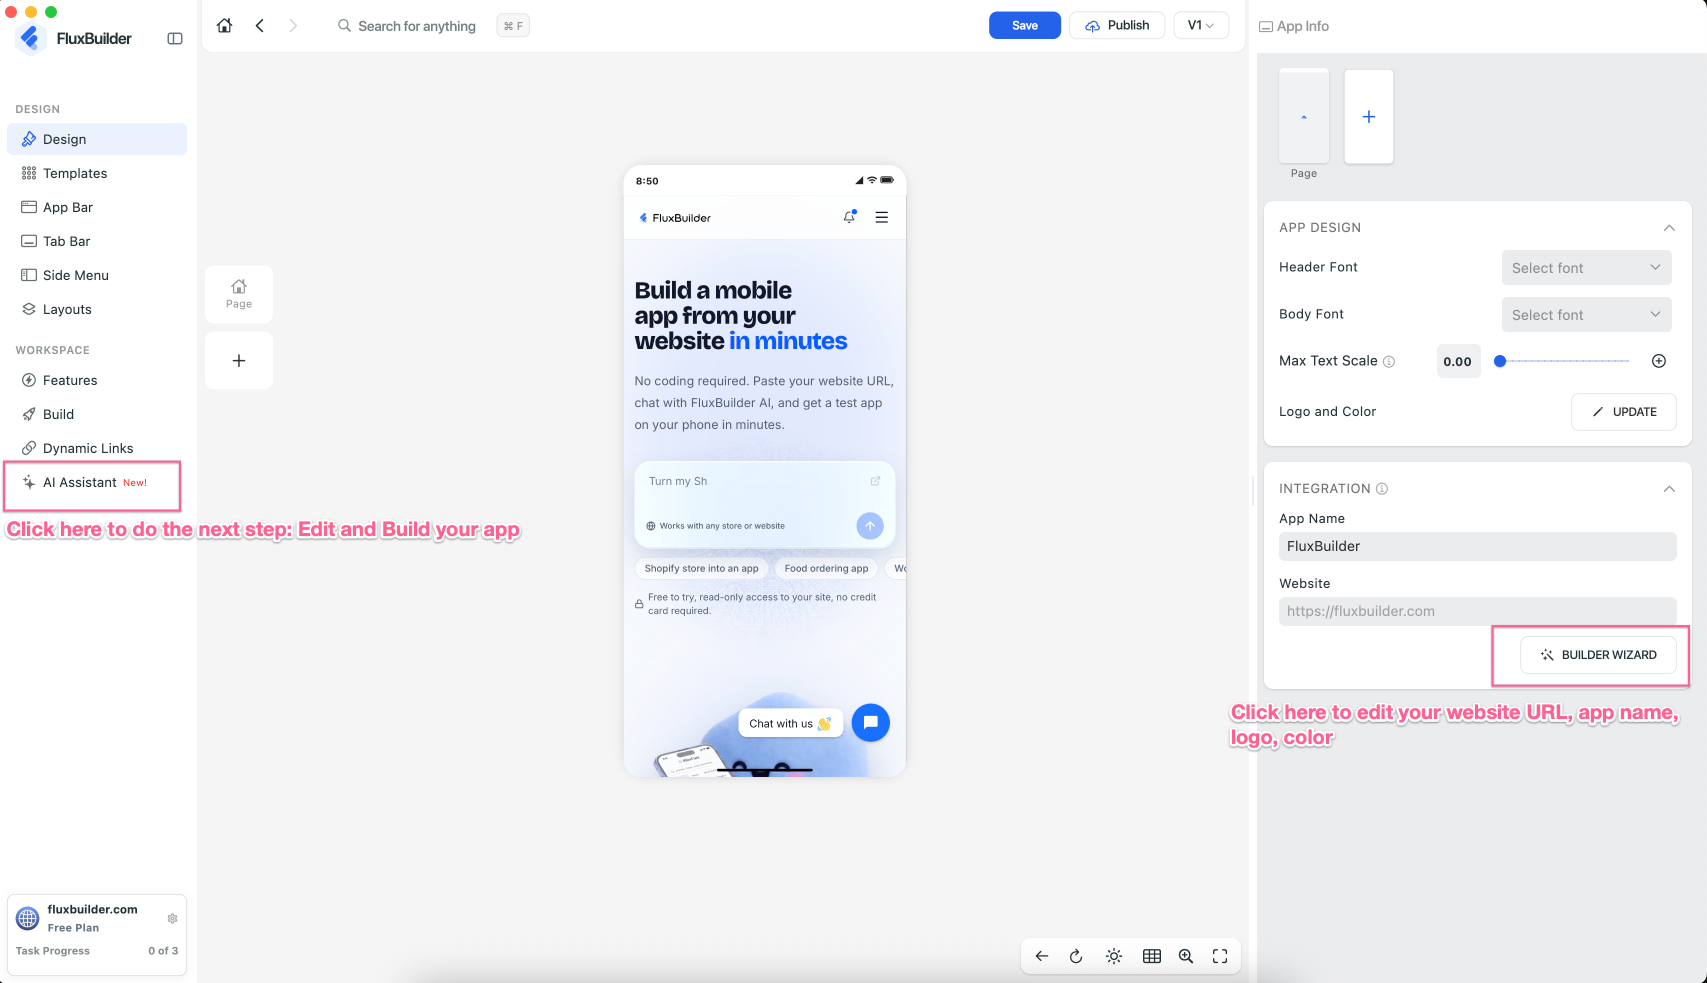
Your app project has been created successfully and this is the FluxBuilder editor:
—-
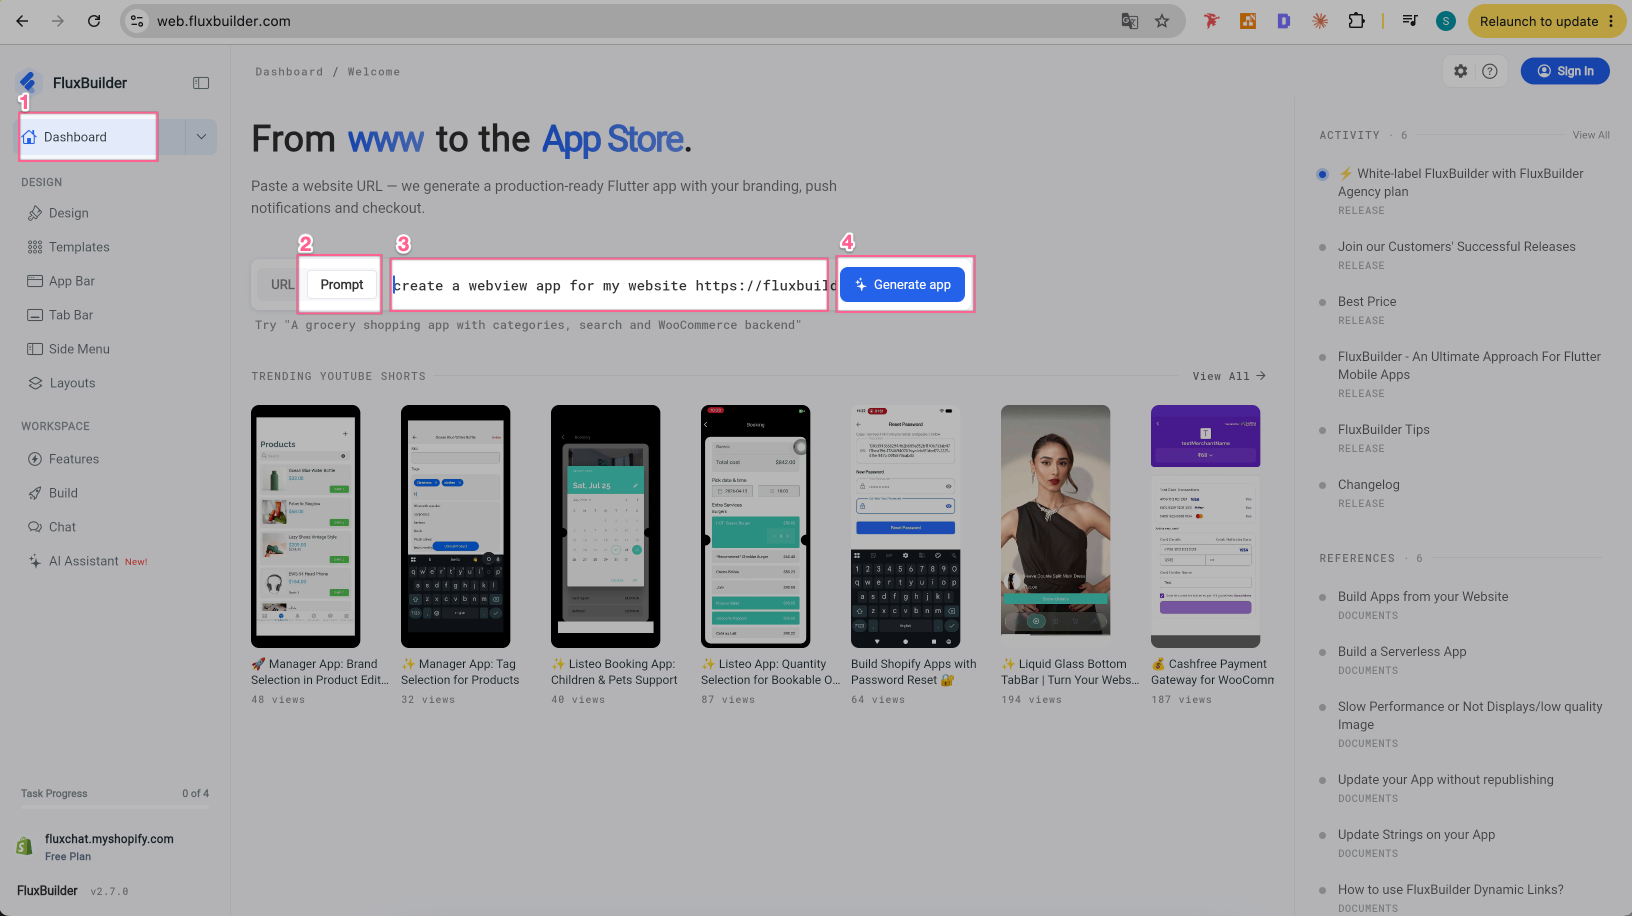
✨ If using the FluxBuilder Web version https://web.fluxbuilder.com : select Dashboard, click Prompt, then enter your request and click Generate App:
Click Create the app now:
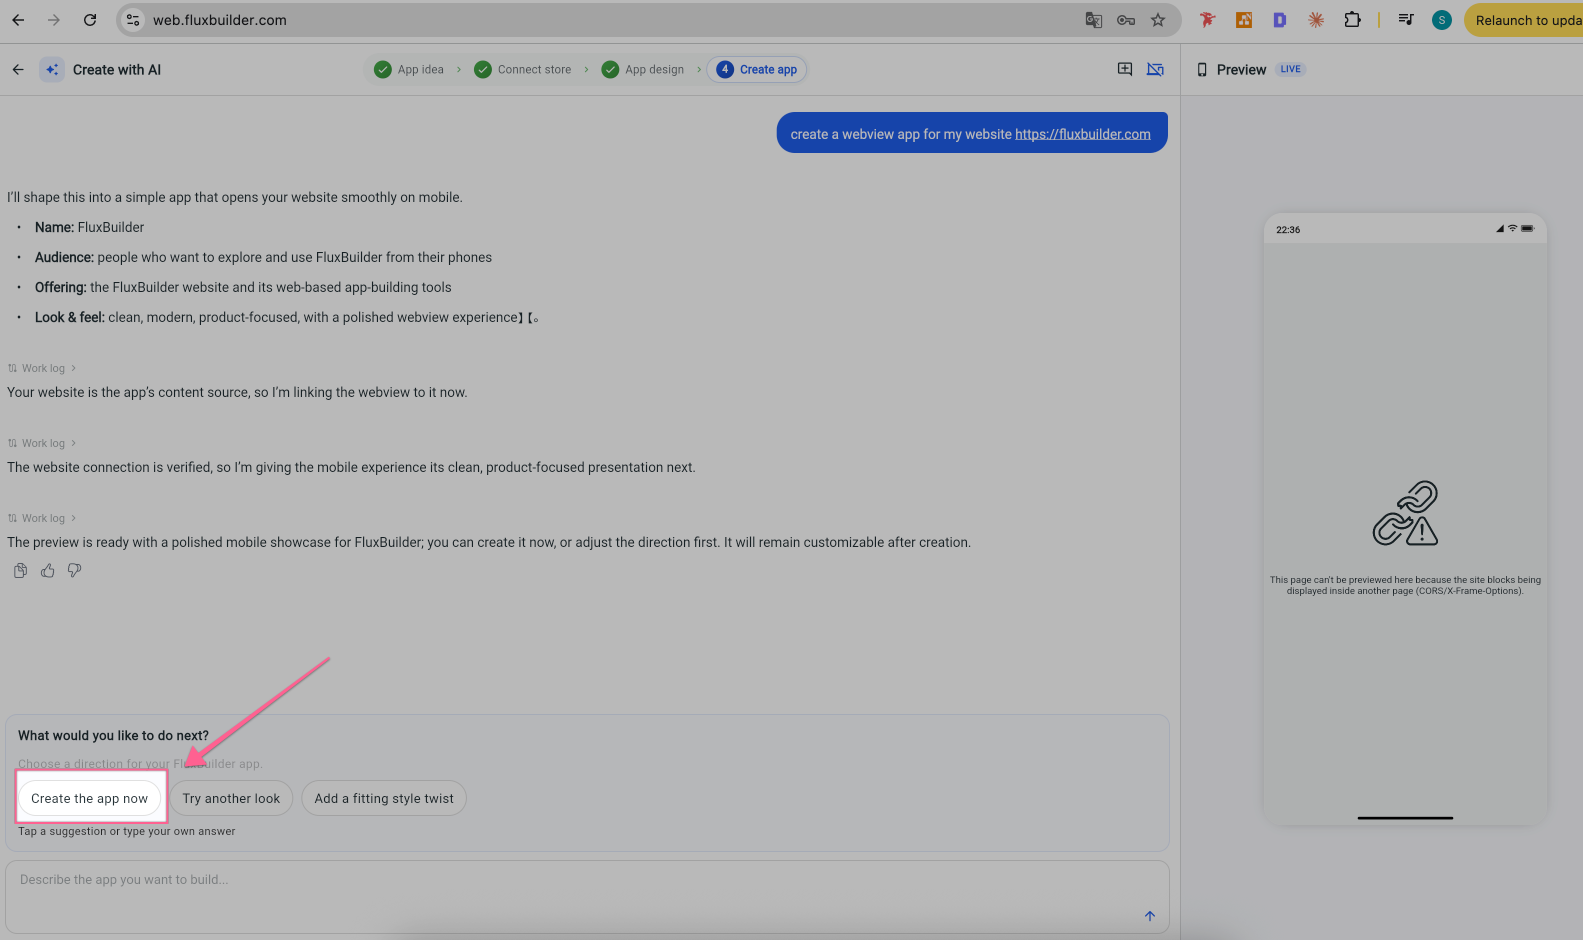
If your website is protected by X-Frame-Options to not display inside another page, the simulator may not display the app UI correctly, as shown below. Don’t worry — the app will display correctly on mobile devices. The FluxBuilder Desktop version is recommended to avoid this issue.
Click Create App: (At this step, you may be asked to log in to save your app project and continue anytime.)
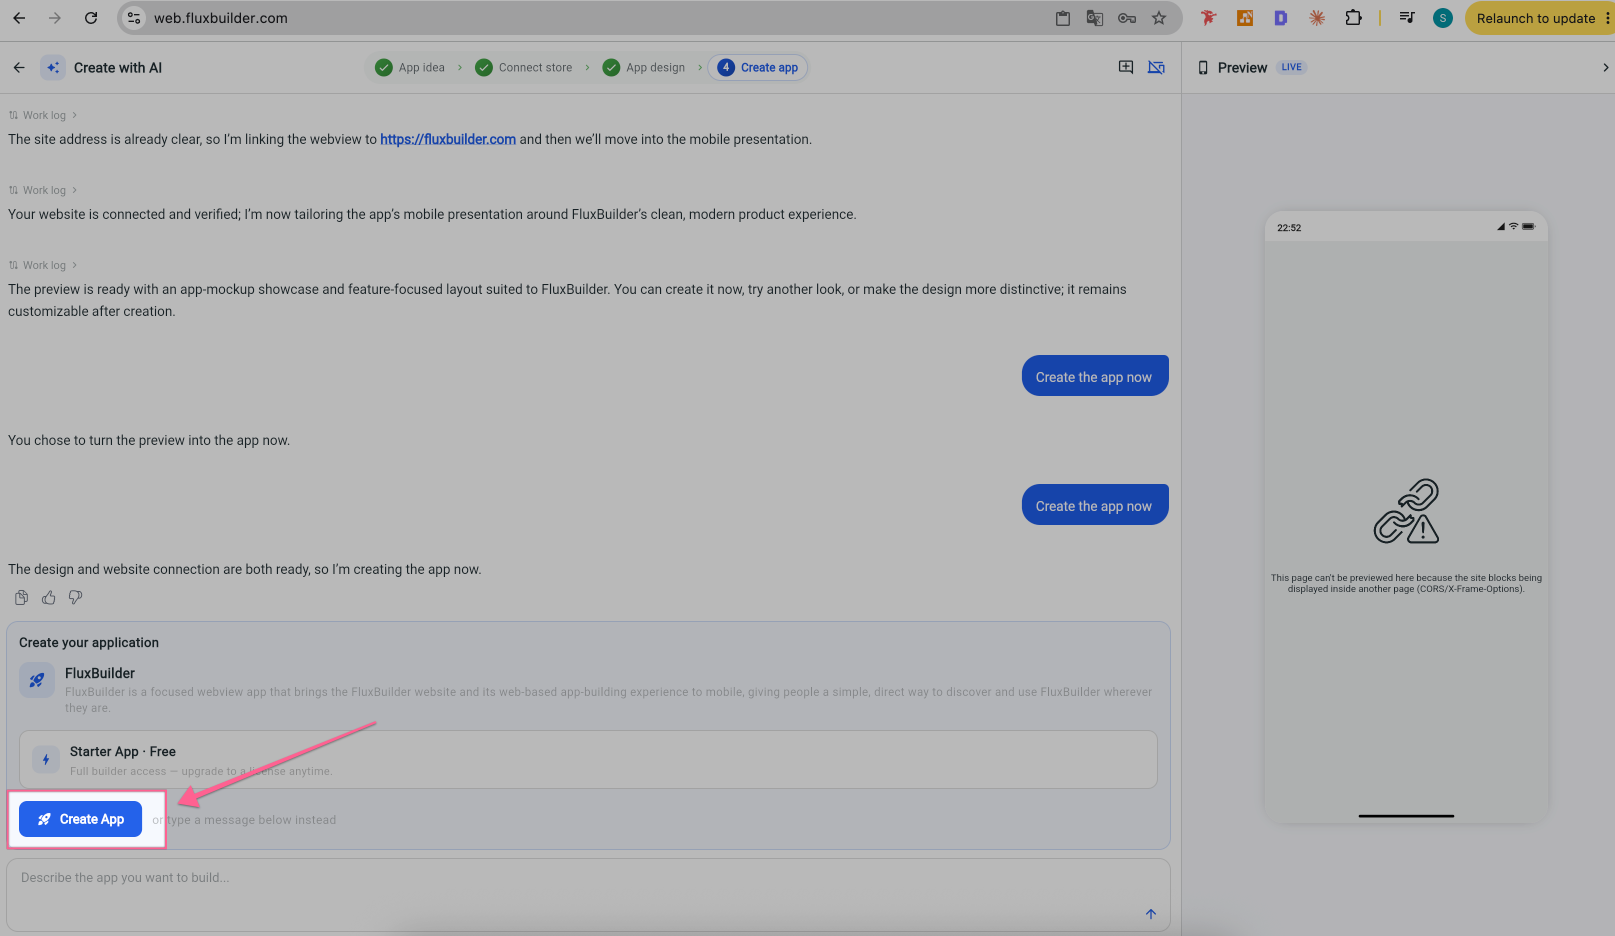
Your app project has been created successfully. Click it to open:
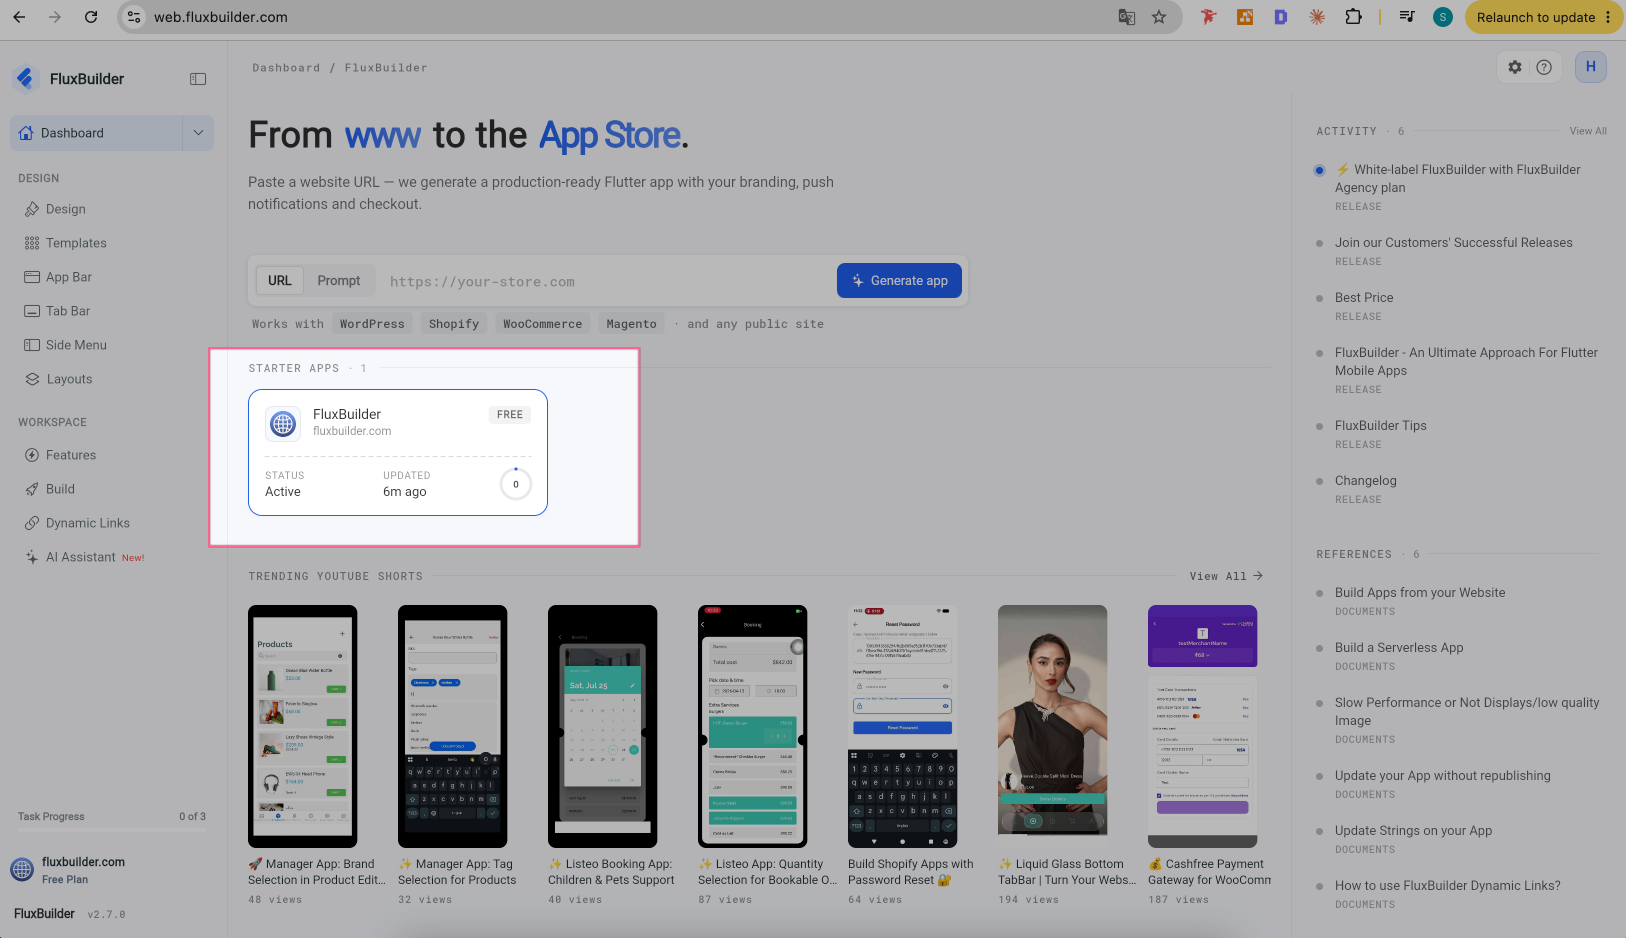
Your app project is now open in the FluxBuilder editor:
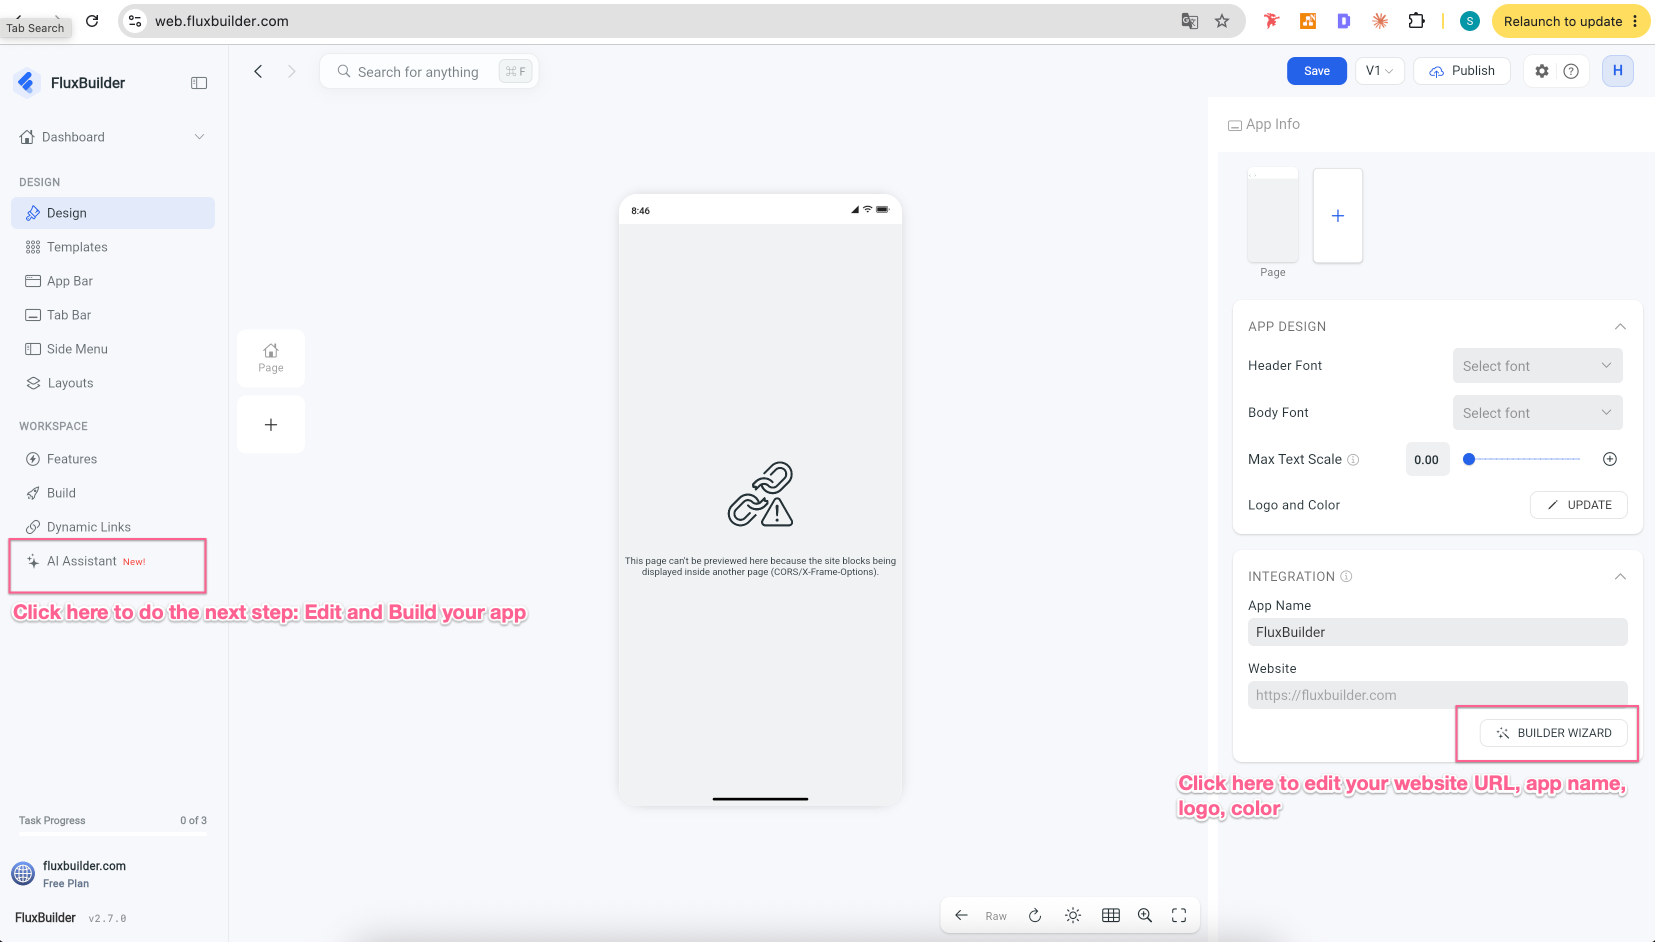
—-
Step 3: Edit and Build your app
Video guide:
🎥 Explore the FluxBuilder AI & MCP Tutorial Playlist → https://www.youtube.com/playlist?list=PLQj-KQmrvvB8
Manual guide:
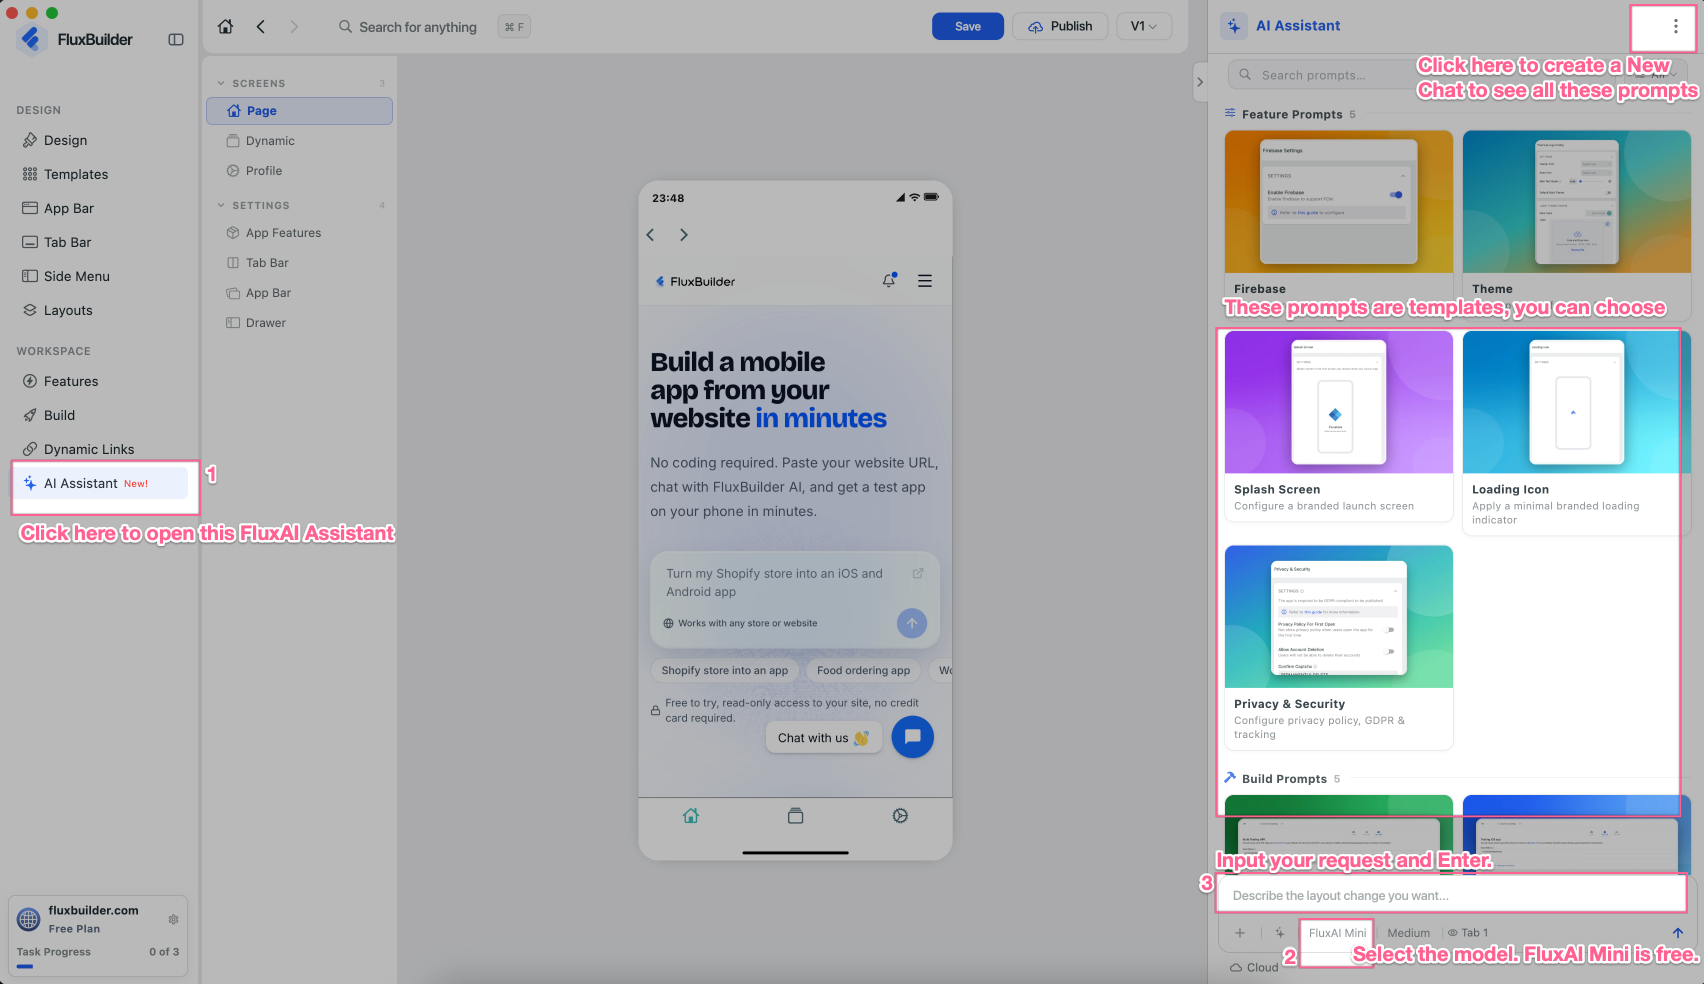
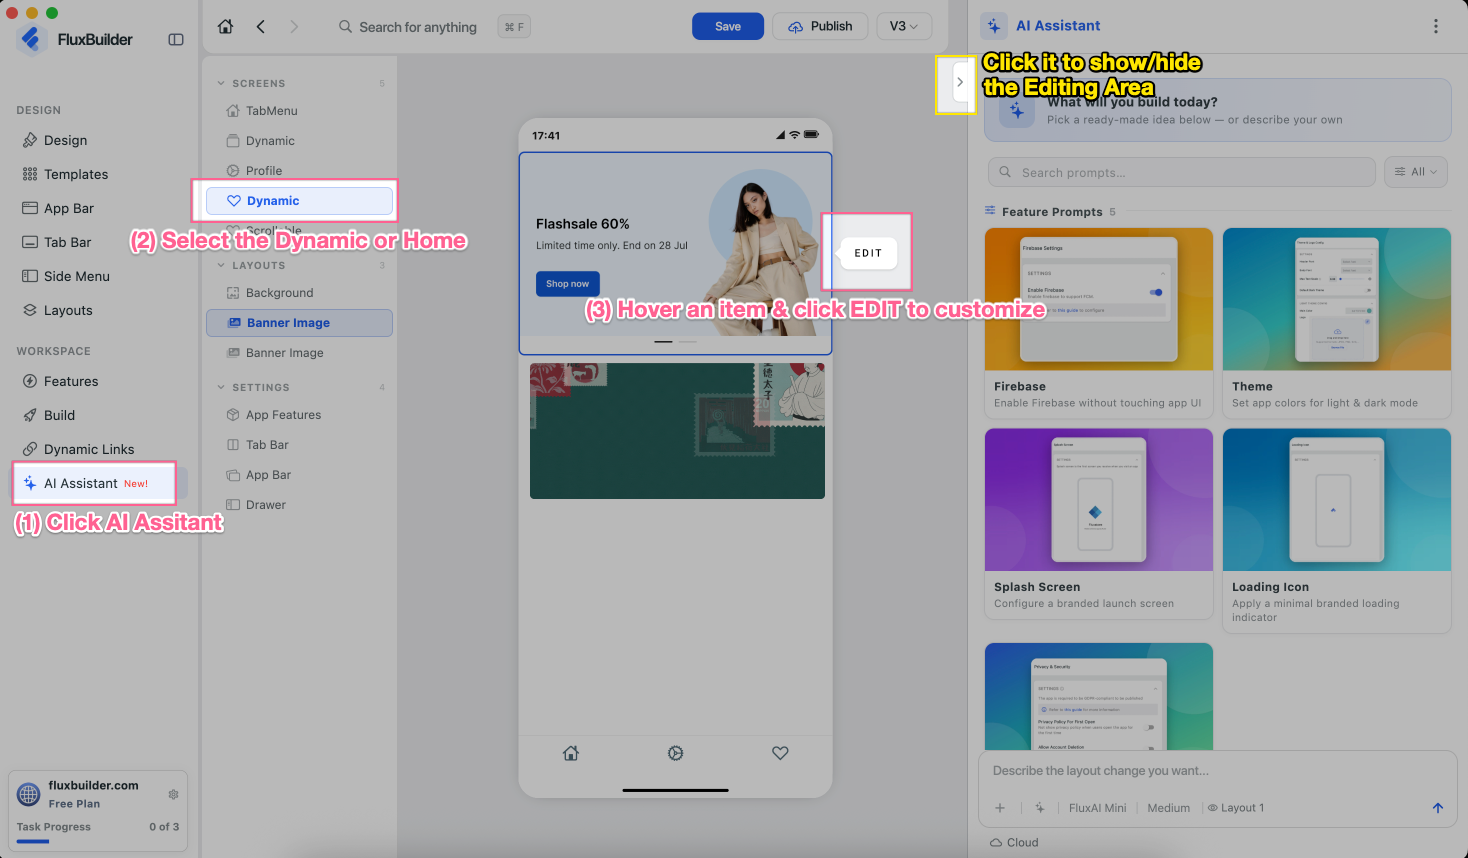
Click AI Assistant, type your request, and press Enter to customize your app UI, configure app features, or build your Android/iOS app.
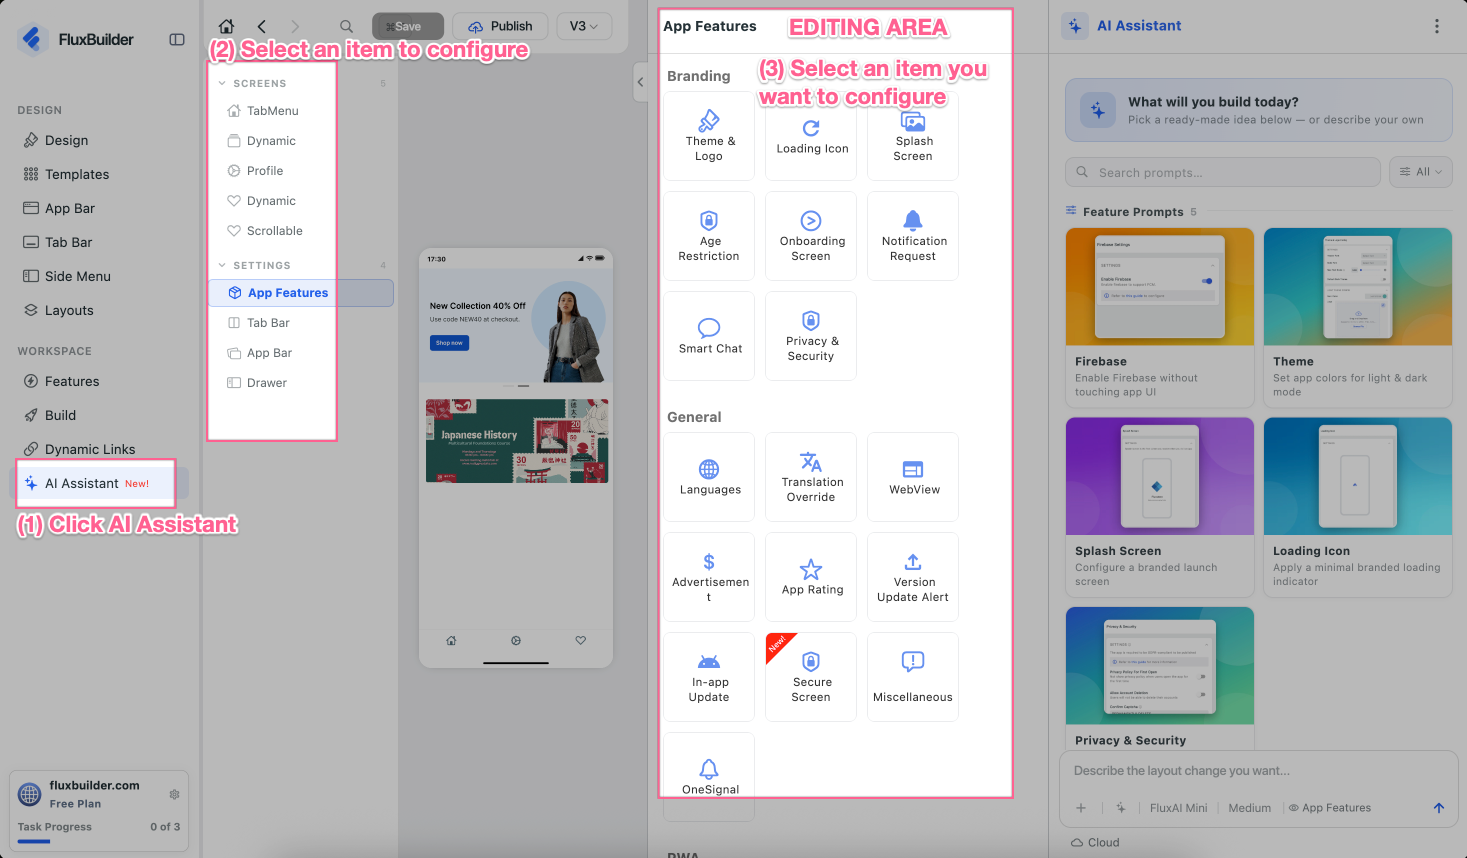
Or select an item to configure it manually:
If your app has a Dynamic or Home tab/screen, hover over an item in the simulator to quickly edit it:
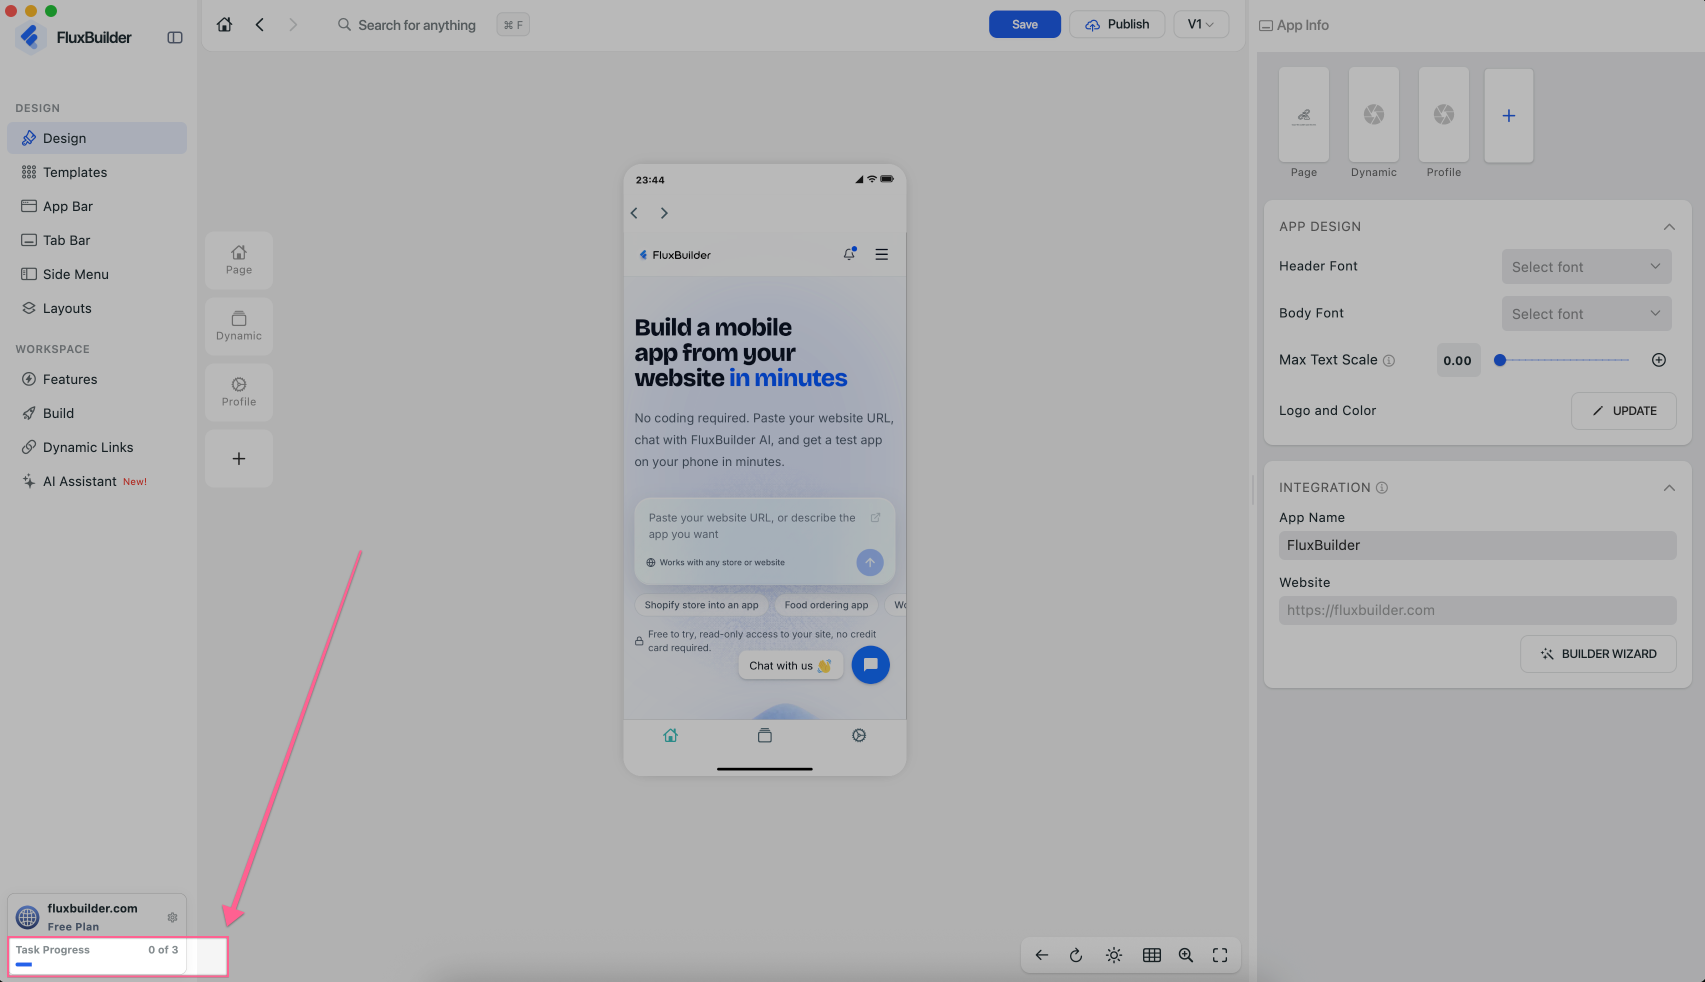
✨ If you're not sure which essential UI and features need to be configured before submitting your app for approval, click Task Progress:
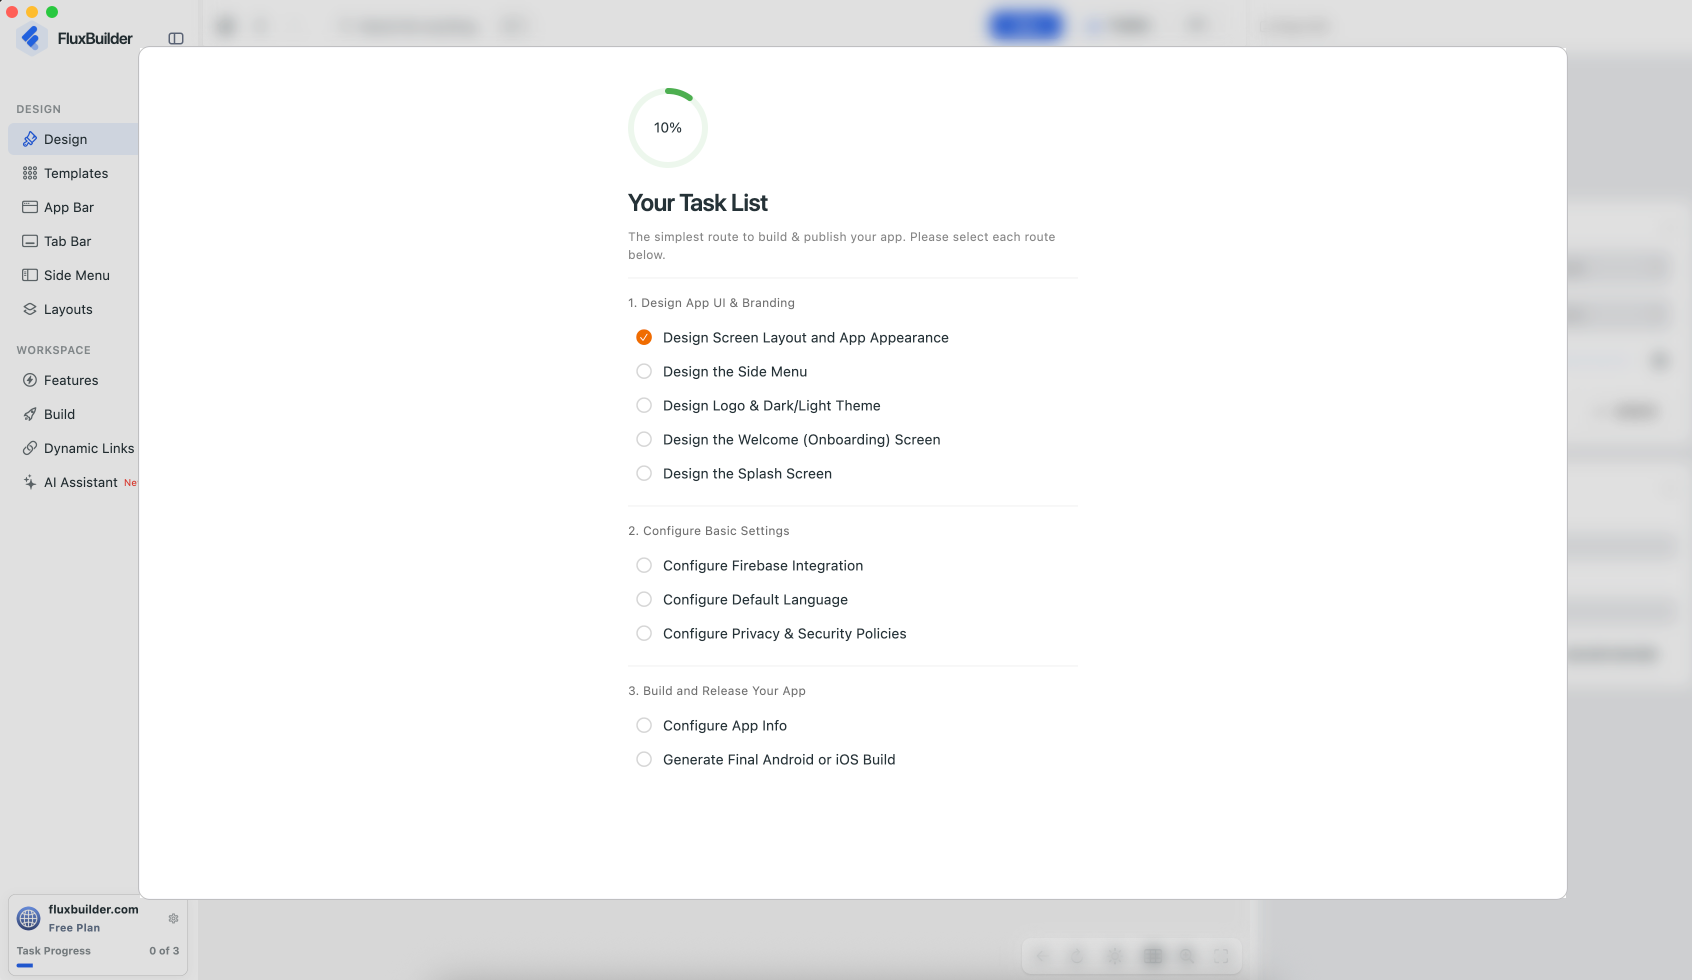
Your Task List is now open and shows the essential tasks to complete:
If you want to update your app without republishing it to the App Store and Google Play, configure this feature before building your app.
Create Manually
- This guide shows you how to create a WebView app using the standard FluxBuilder workflow.
- Choose one of the two methods to create your WebView app: “Create Manually” or “Create with AI” (above).
Follow these steps to take you from connecting your website to build and publish apps on the App Store and Google Play:
Step 1: Prepare your website
- Make sure your website is live and looks good on a phone screen (mobile-friendly).
- Prepare your app name, logo, and basic information.
Step 2: Create an app project
Create a new app project in FluxBuilder. Follow this guide to install and run FluxBuilder in your devices successfully.
Video guide:
Manual guide:
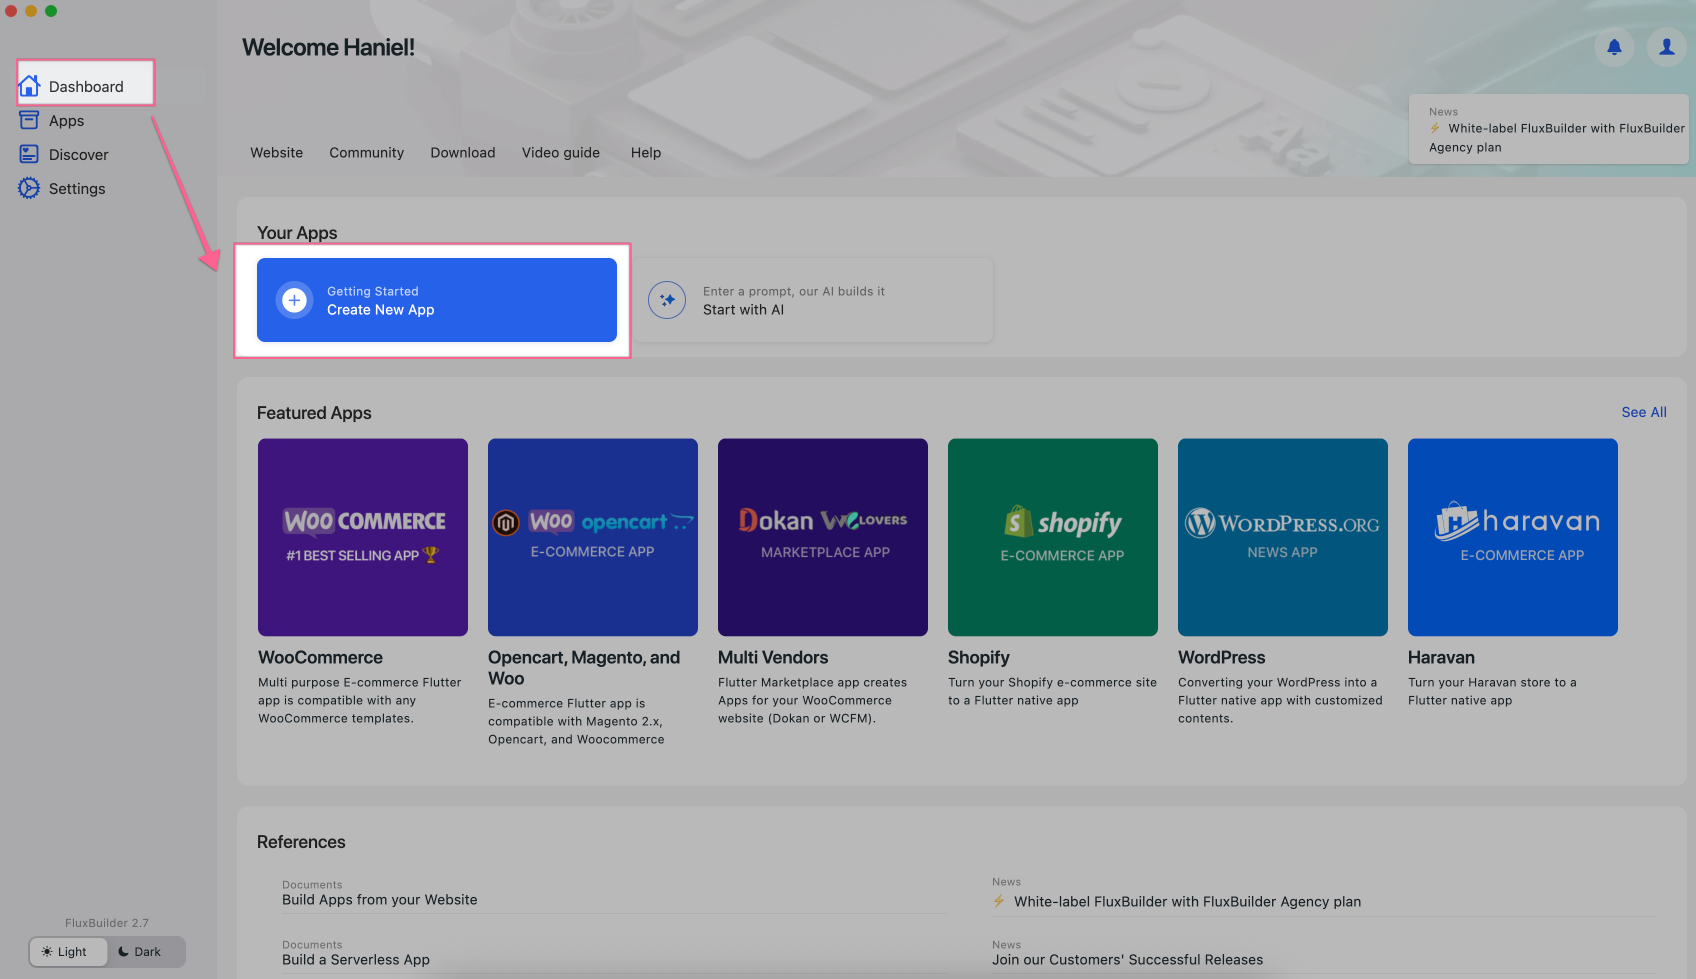
✨ If using the FluxBuilder Desktop version (recommended), open FluxBuilder, then select Dashboard > choose Create New App:
(If you subscribed to a plan but haven't created an app yet, refer to this guide.)
✨ If using the FluxBuilder Web version https://web.fluxbuilder.com : select Dashboard, click URL, then enter your Website URL and click Generate App:
(If you subscribed to a plan but haven't created an app yet, refer to this guide.)
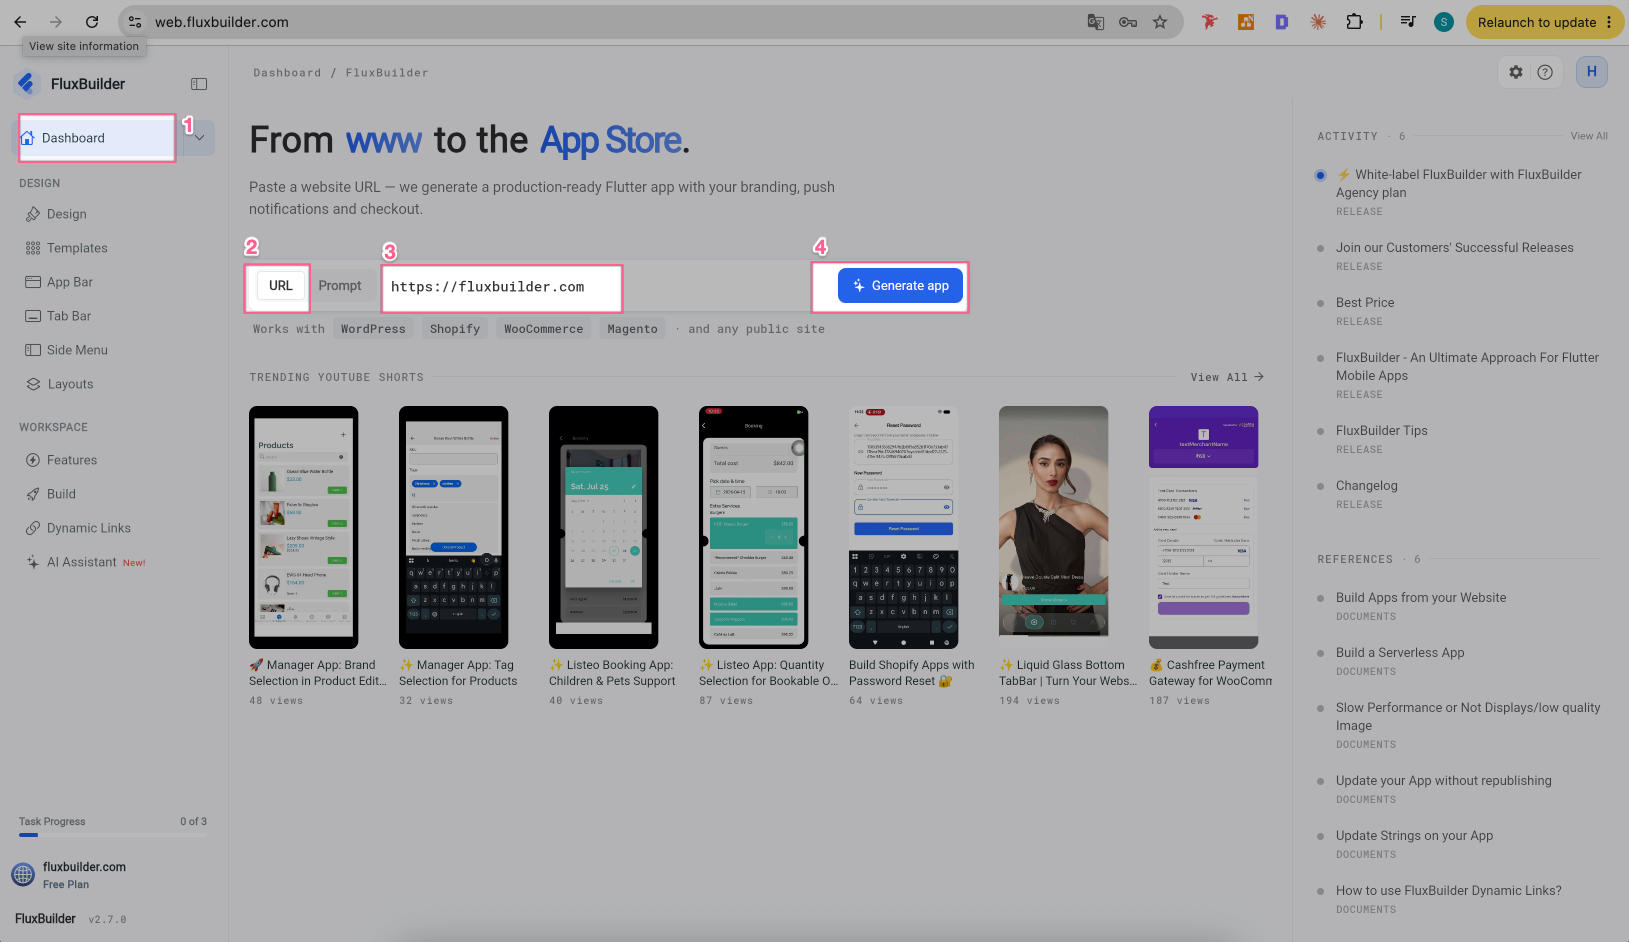
—-
Then enter your Website URL , select Web To App, and click Run Troubleshoot . After that, select NEXT button:
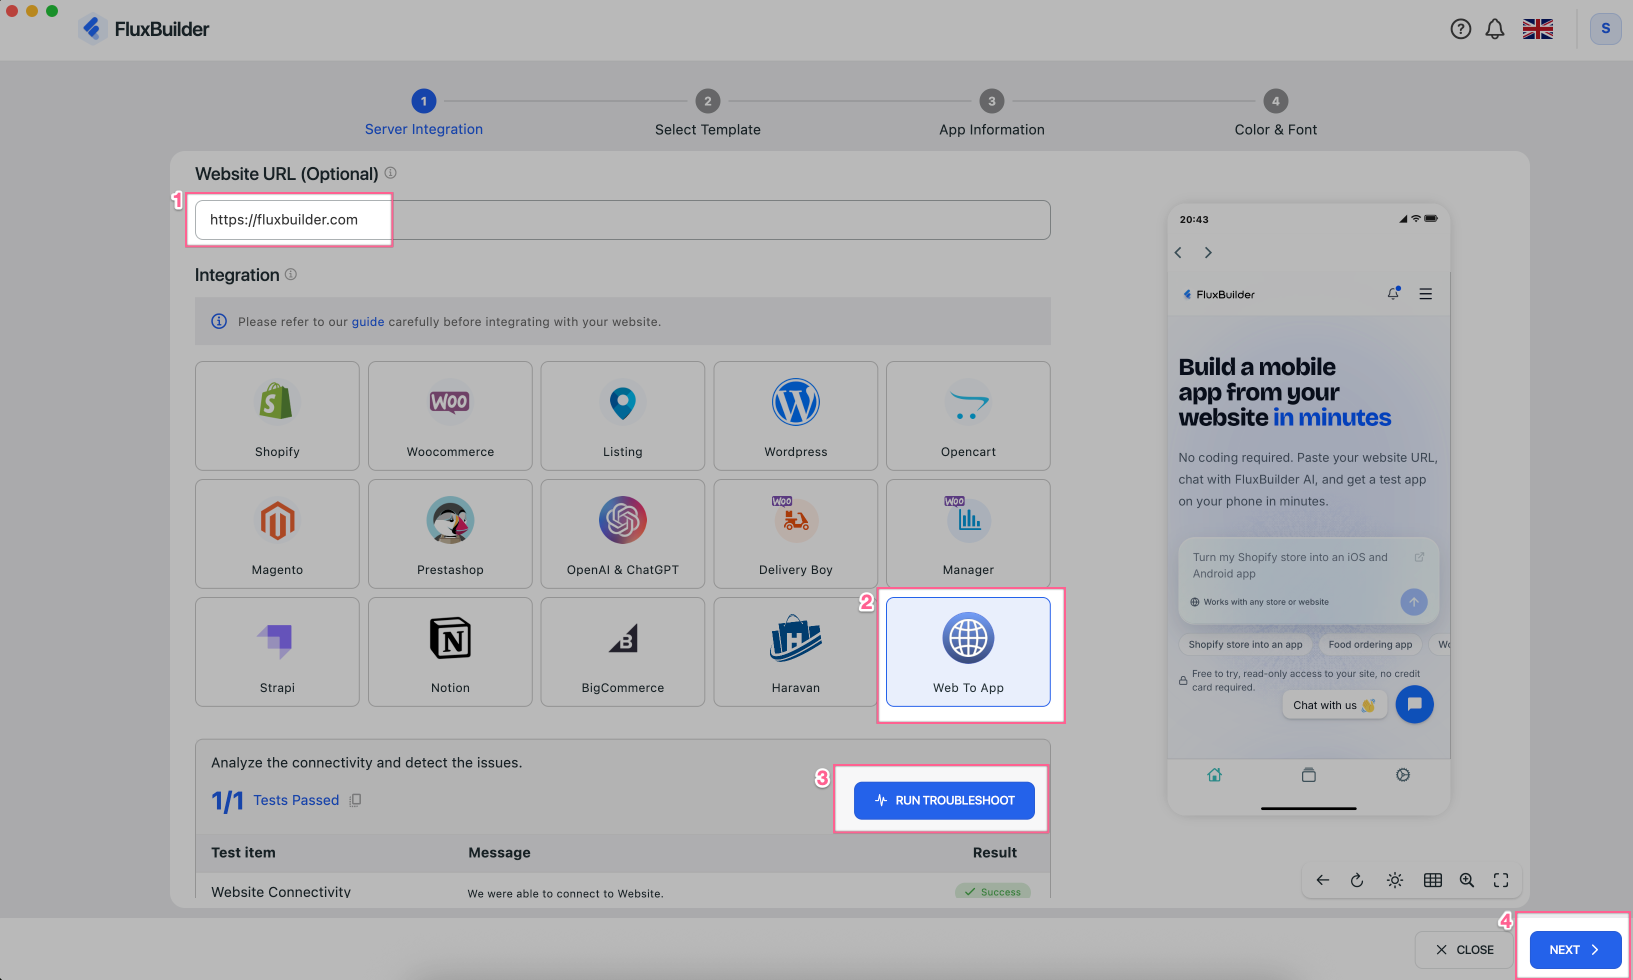
When Run Troubleshoot:
On the FluxBuilder Web version, if your website is protected by X-Frame-Options and cannot be displayed inside another page, X-Frame Security will show a warning, and the simulator may not display the app UI correctly, as shown below.
Just ignore this warning — the app will display correctly on mobile devices after it is built. You can also use the FluxBuilder Desktop version to preview the app UI. The FluxBuilder Desktop version is recommended to avoid this issue.
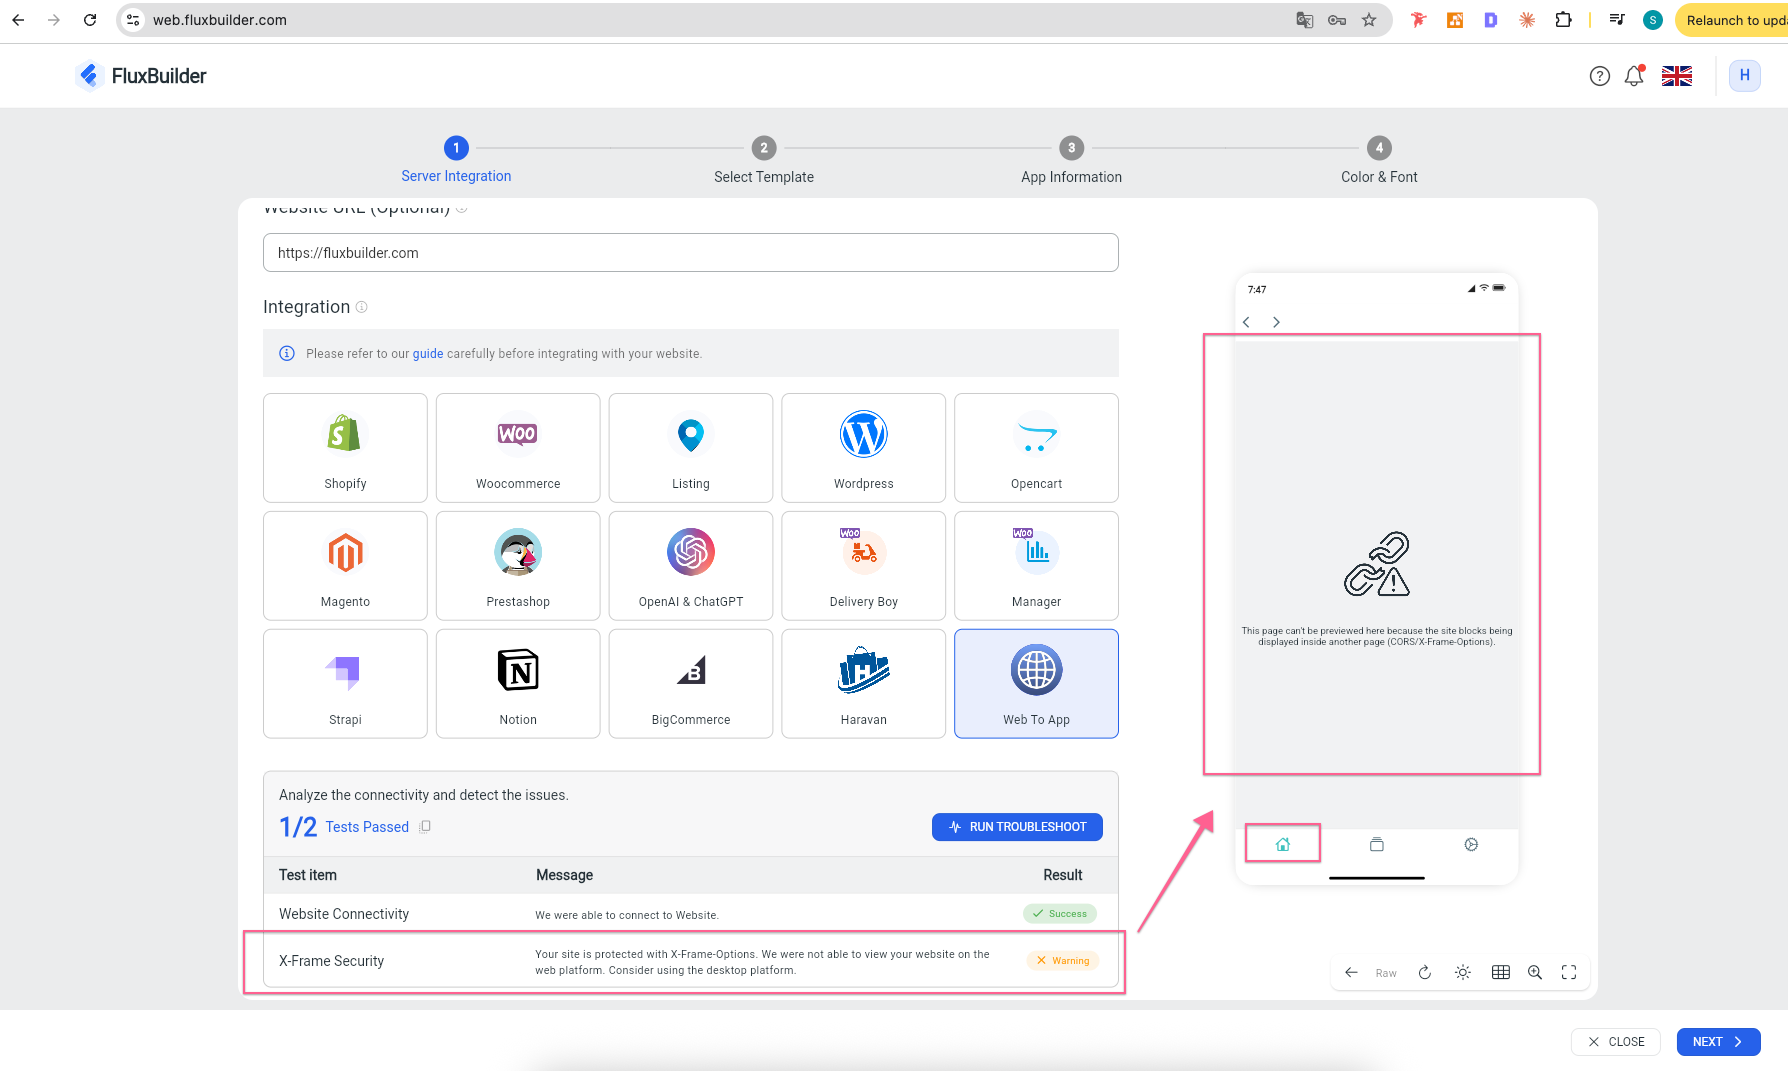
—-
To continue, select a Template and click NEXT:
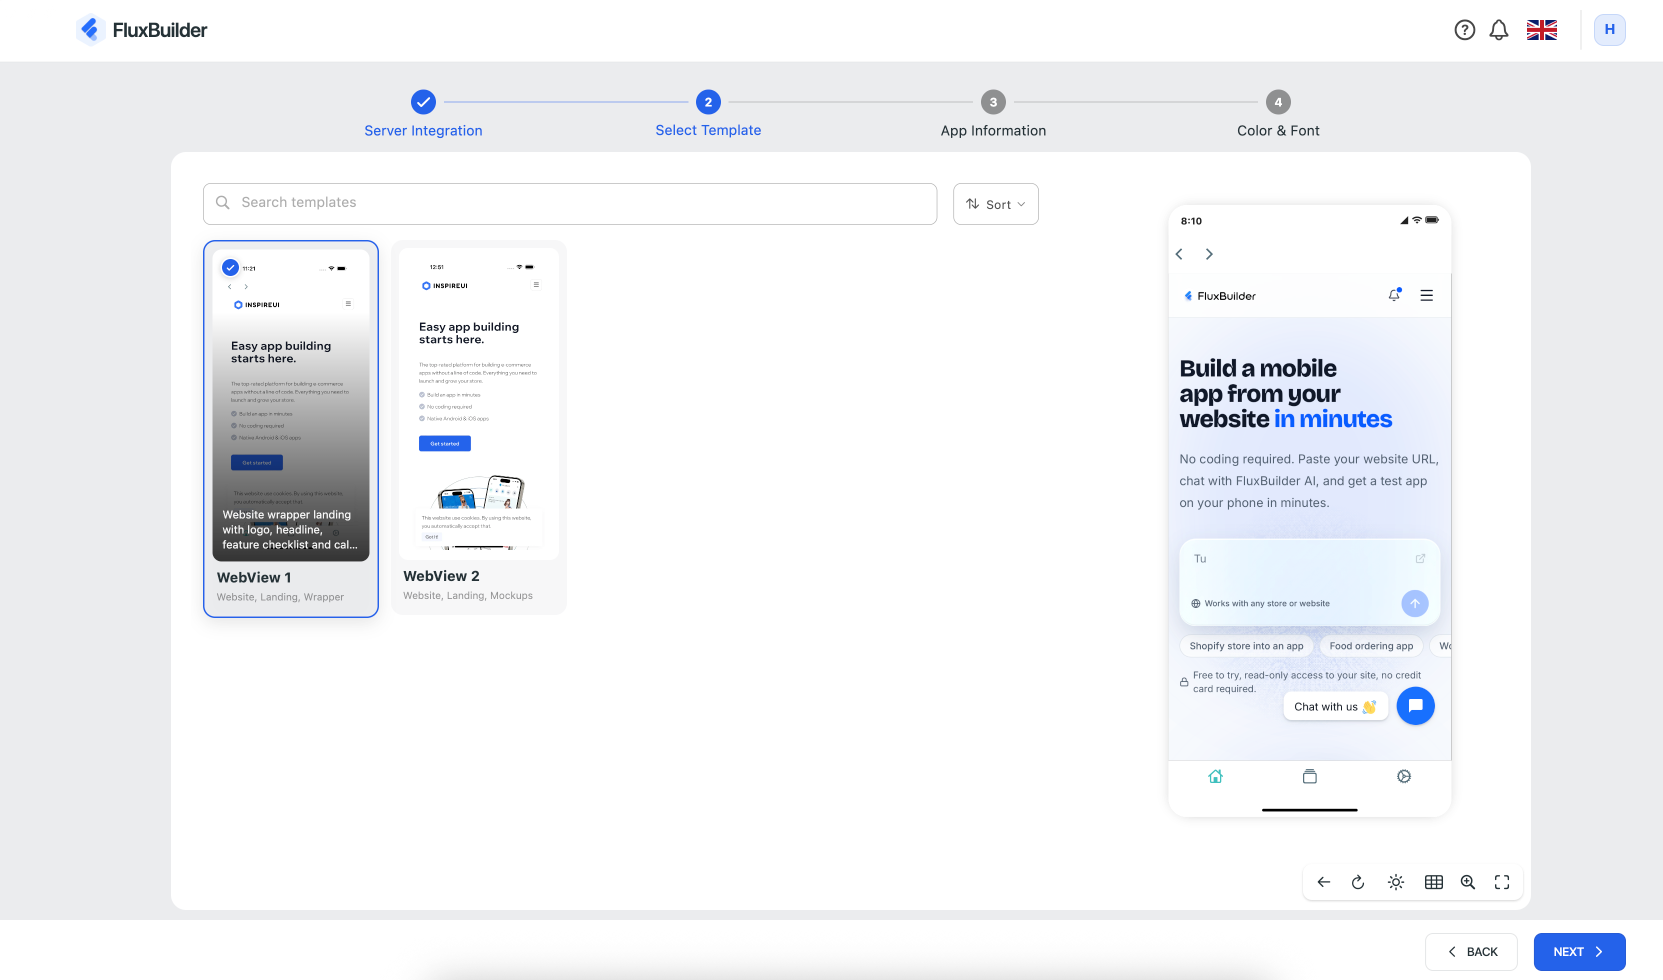
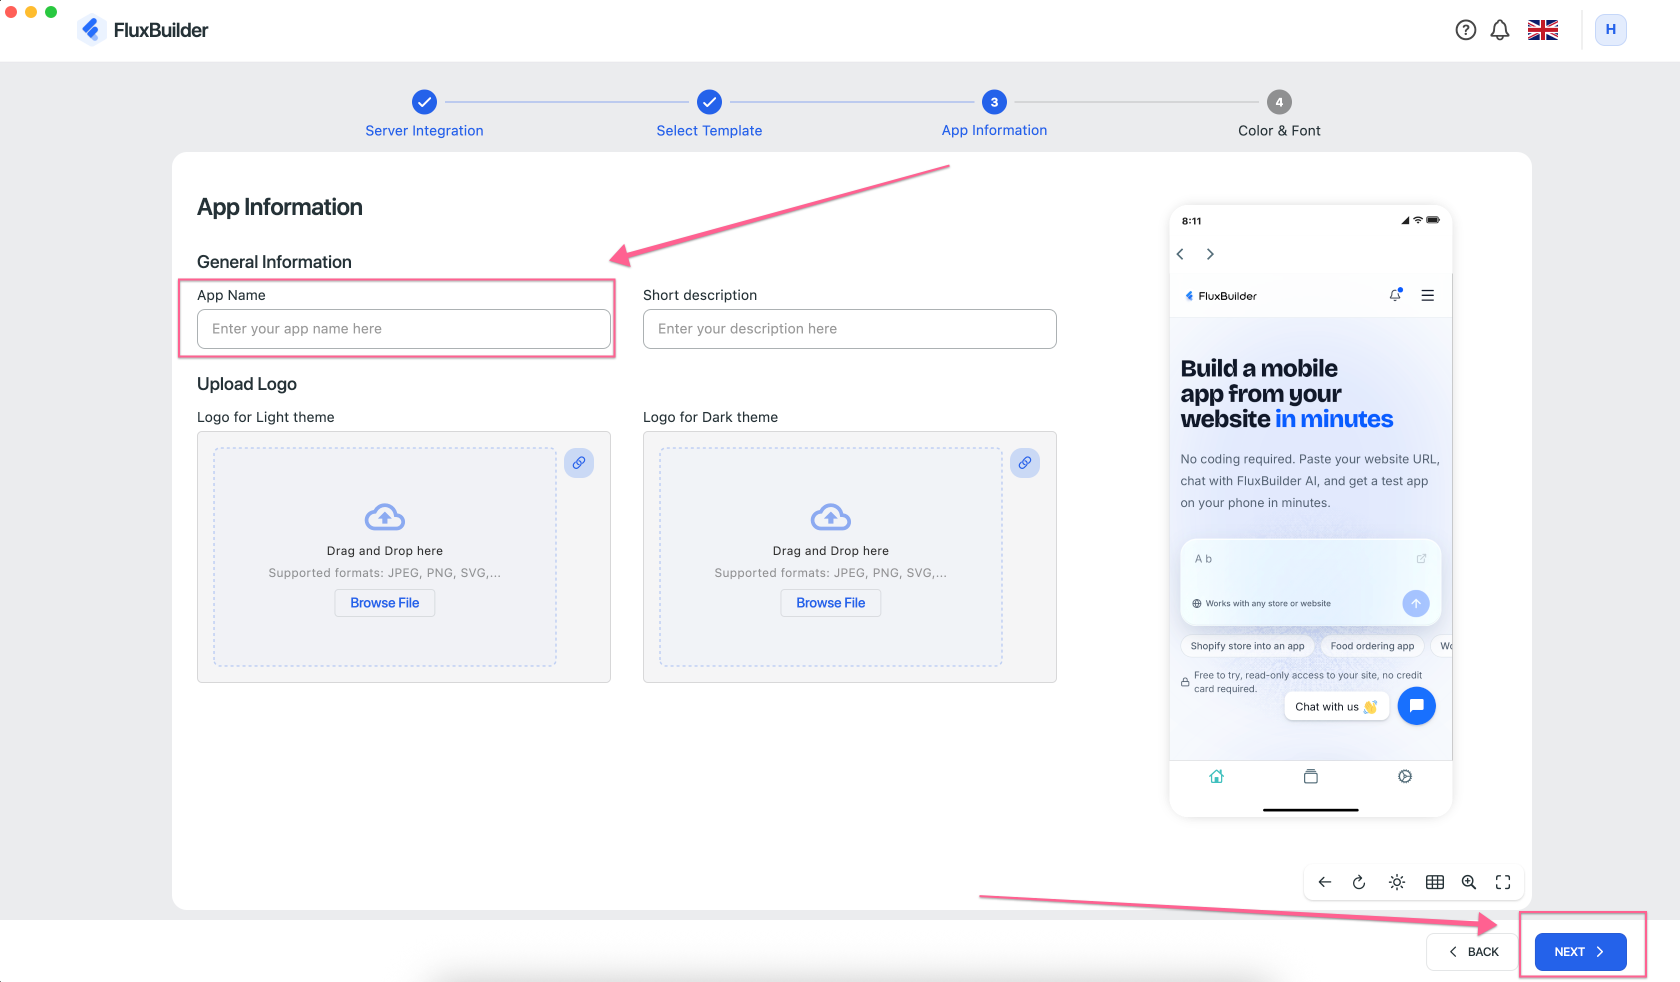
Next, enter your app information:
App Name(required): Enter the name of your App.Short Description(optional): Enter a brief description of your app.Upload Logo(optional): Upload your app logo for both Light and Dark themes. You can change it later.
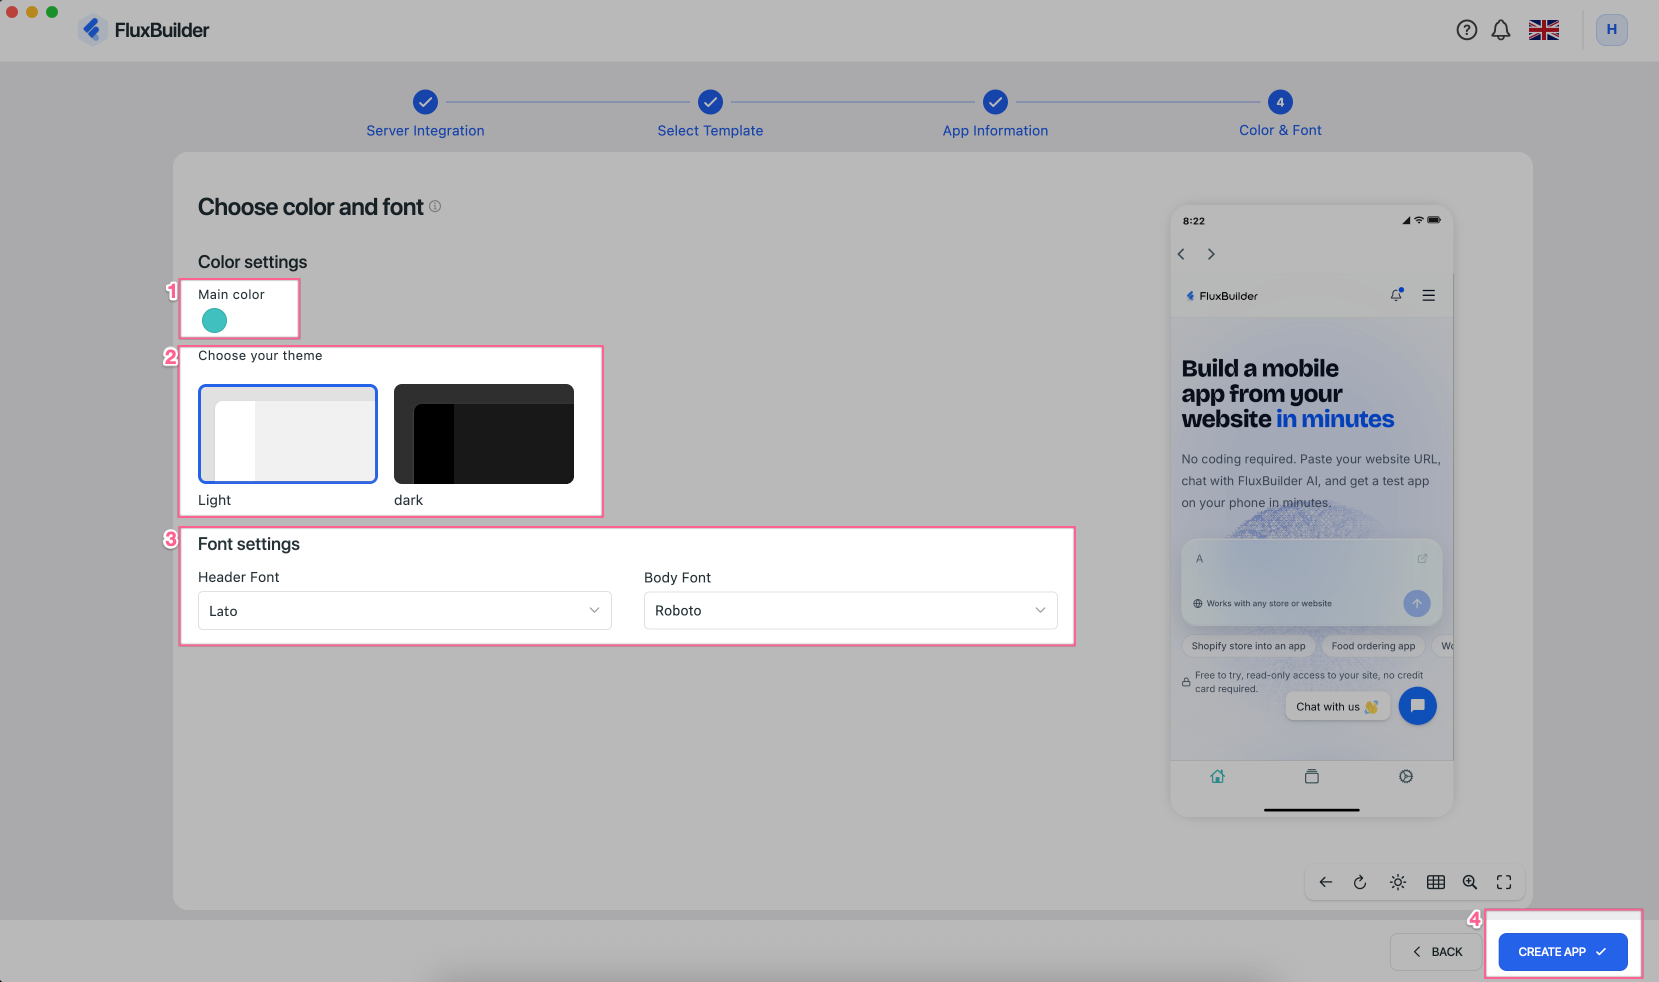
Choose a color, font, and default Light/Dark theme (optional — you can edit these settings later). Then click CREATE APP :
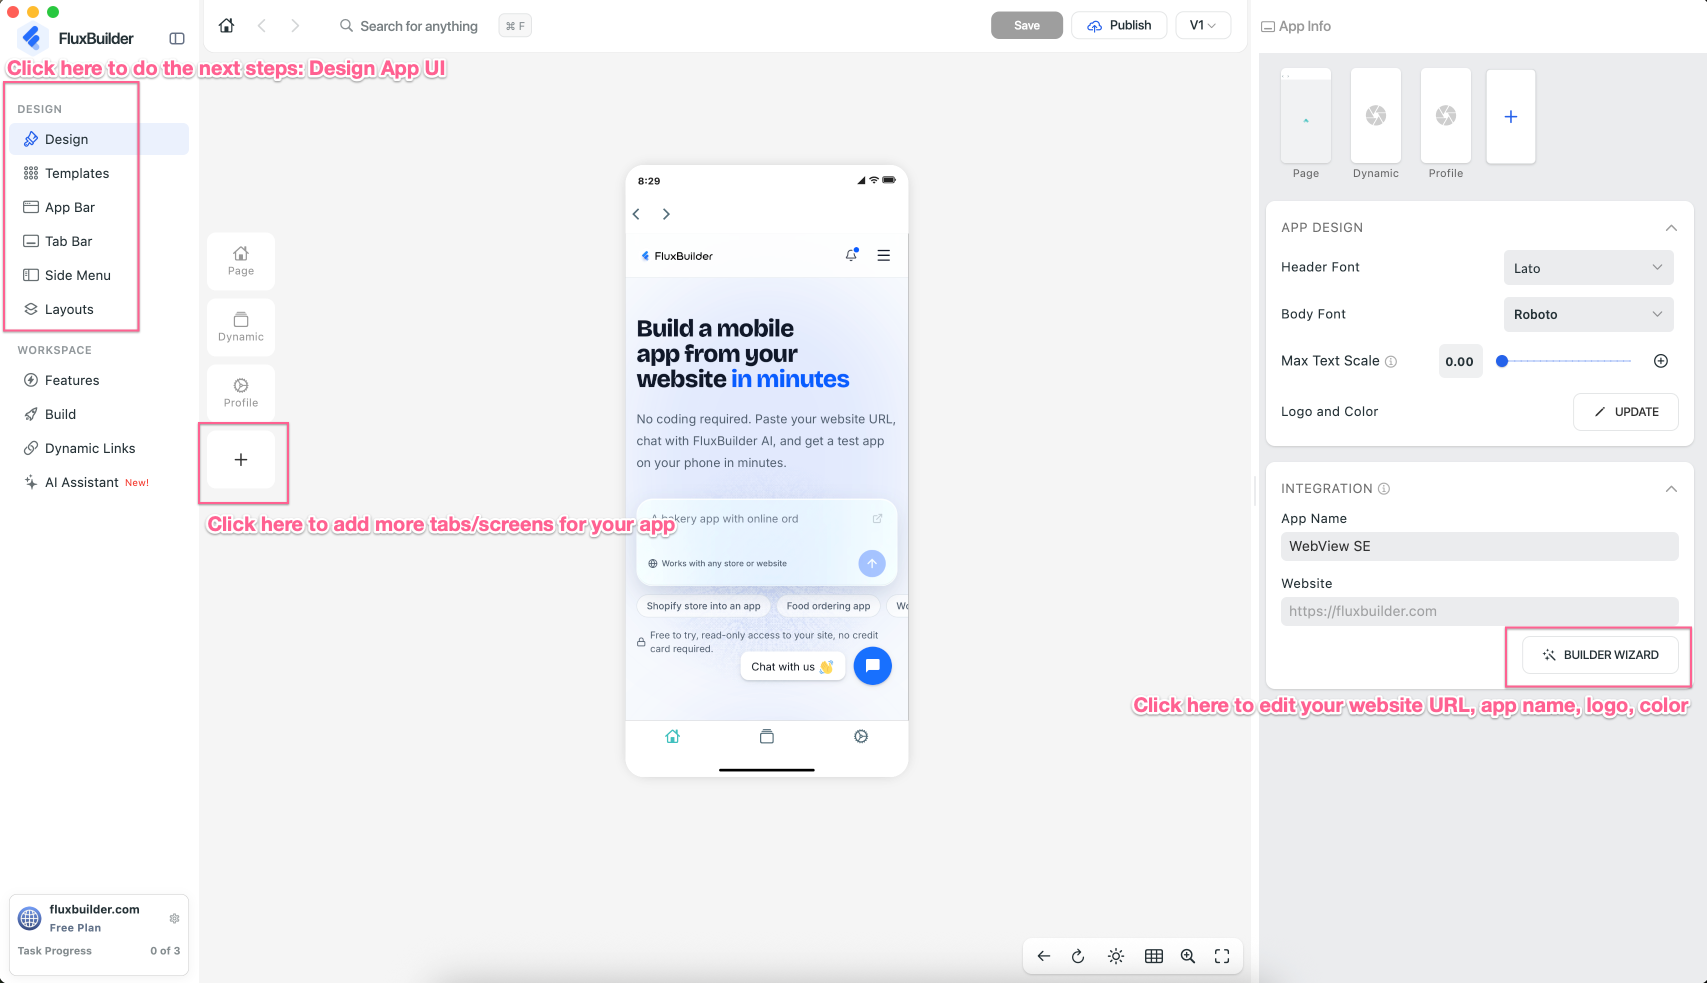
Your app project has been created successfully and this is the FluxBuilder editor:
Step 3: Customize your app
Customize your app’s UI and features by drag-and-drop on FluxBuilder to create an experience that fits your needs.
👉 Learn how to customize your app
Step 4: Build Apps and Release
Once your app UI and features are ready, it’s time to build, test, and release your app.
- Generate Demo App for Free and test on phone.
- Build and Publish Apps on both Google Play and App Store.
🎉 You’re all set! Your app is ready to launch.
App Example
For example, you can check out this WebView app as a reference (have been successfully built with FluxBuilder No Code App Builder):
https://play.google.com/store/apps/details?id=com.gharaagan.onlineshopping