App Screens
Design your App’s UI easily and flexibly by drag&drop. You can also configure to update your App’s UI without republishing app to App Store and Google Play.
Deliver and Manager apps do not support the following App Screens.
Layout UI Kits (recommended)
You can easily and quickly design the Homepage of the app with about 80 Layout Templates, saving you valuable time.
Homepage
Category screen
Many users like to define a new category tree that is different from the backend site. Let’s try the Remap Categories feature:
- Allows user to control the Position, Order, and Level of Category manually.
- Available on Side menu (Category part) and Category screen.
Settings (Profile) screen
4 different styles for the Profile screen (Settings screen), allowing you to select the UI that suits your preferences the most.
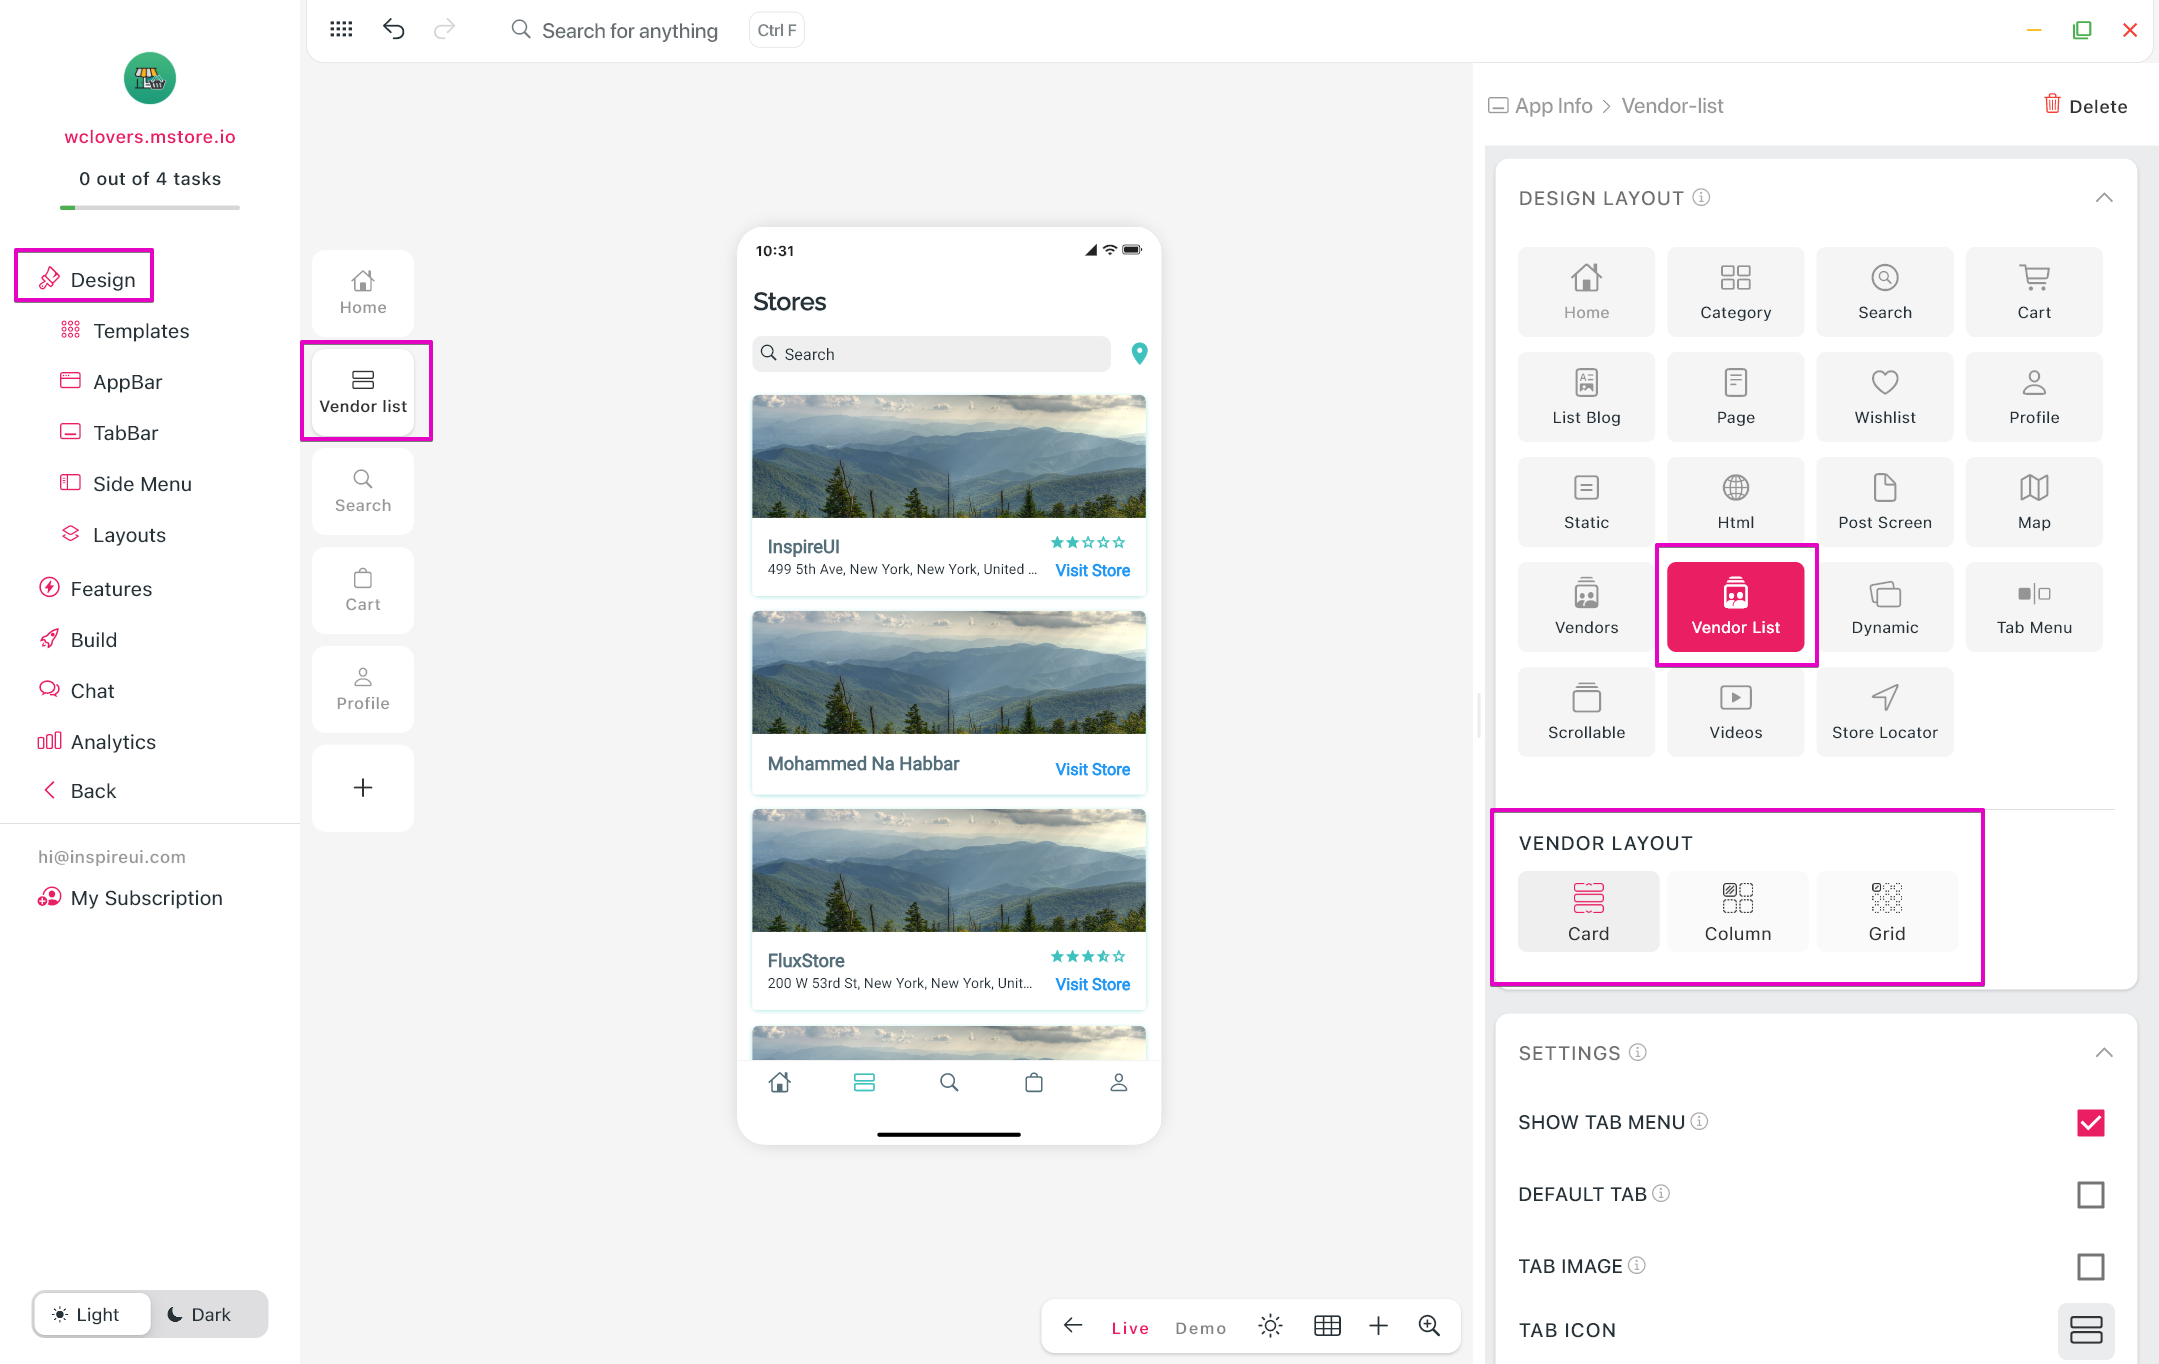
Vendors screen
Experience the 3 UIs of the Vendors screen in the Multi-Vendor apps (Multiple Sellers app with WCFM or Dokan plugin).
- Vendor layout: include Stores and Categories pages.
- Vendor List layout: only Stores page.
Splash screen
To set your logo and caption from the startup screen or to fix the white screen when opening the app, let's customize your Splash screen:
Click here to follow the full guide.
Onboarding screen
Let’s customize the Onboarding content (Welcome screen):
List Blog screen
Blog Detail Screen
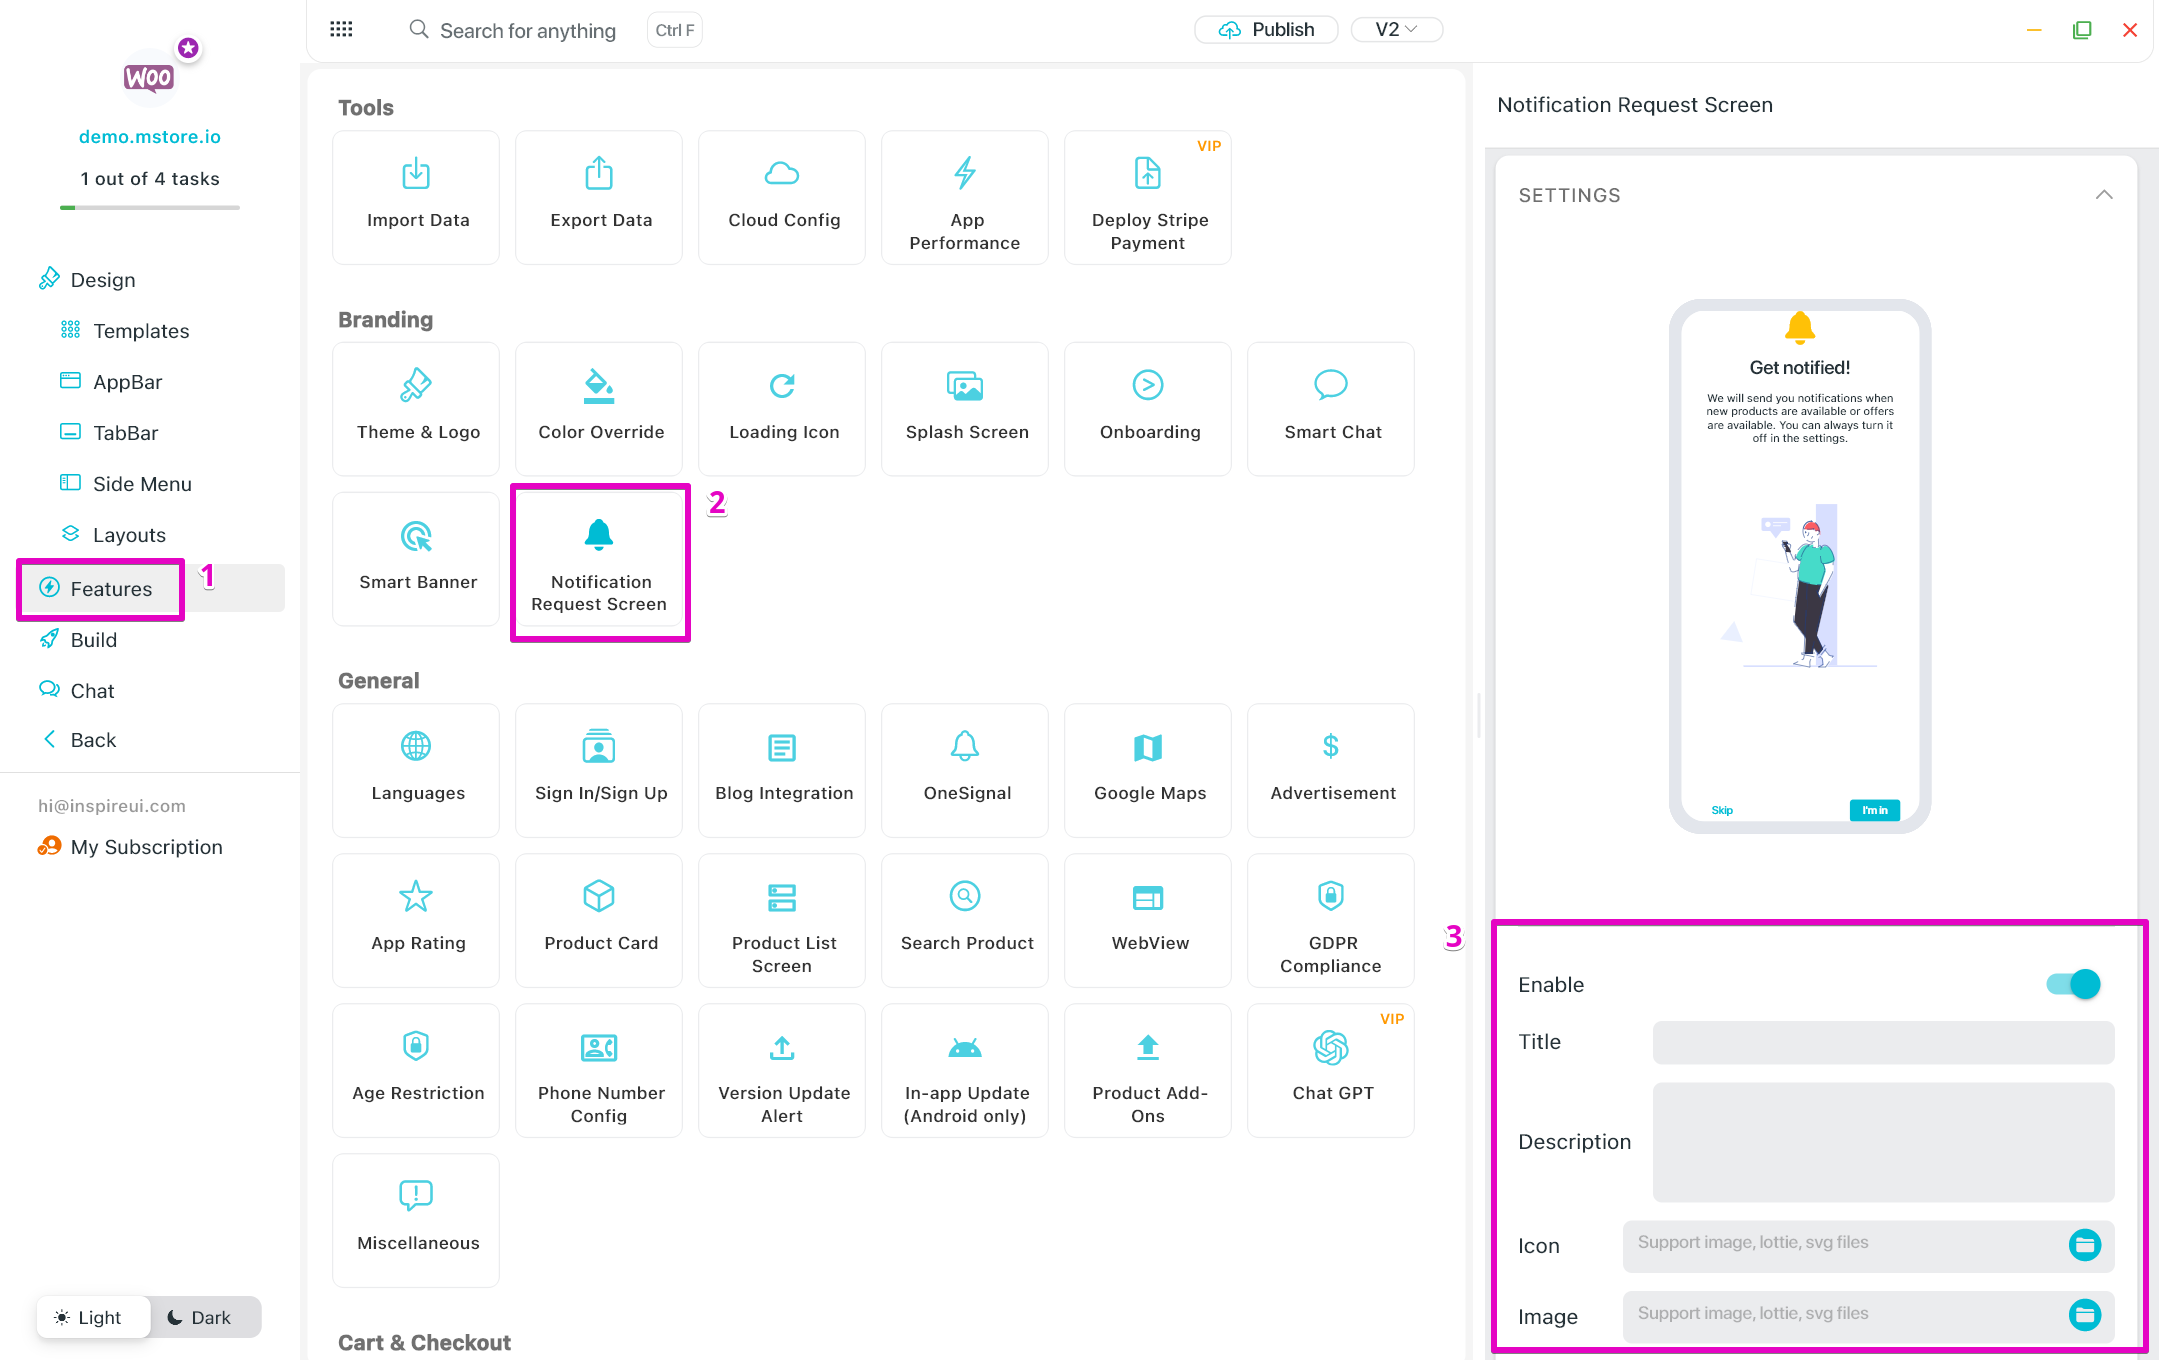
Notification Request screen
When users open your app for the first time, the app must show this screen to ask for their permission to use notifications. Obviously, the users can also re-adjust it in the Settings screen on the app later.
This UI follows GDPR compliance (GDPR affects all companies that do business in the EU).
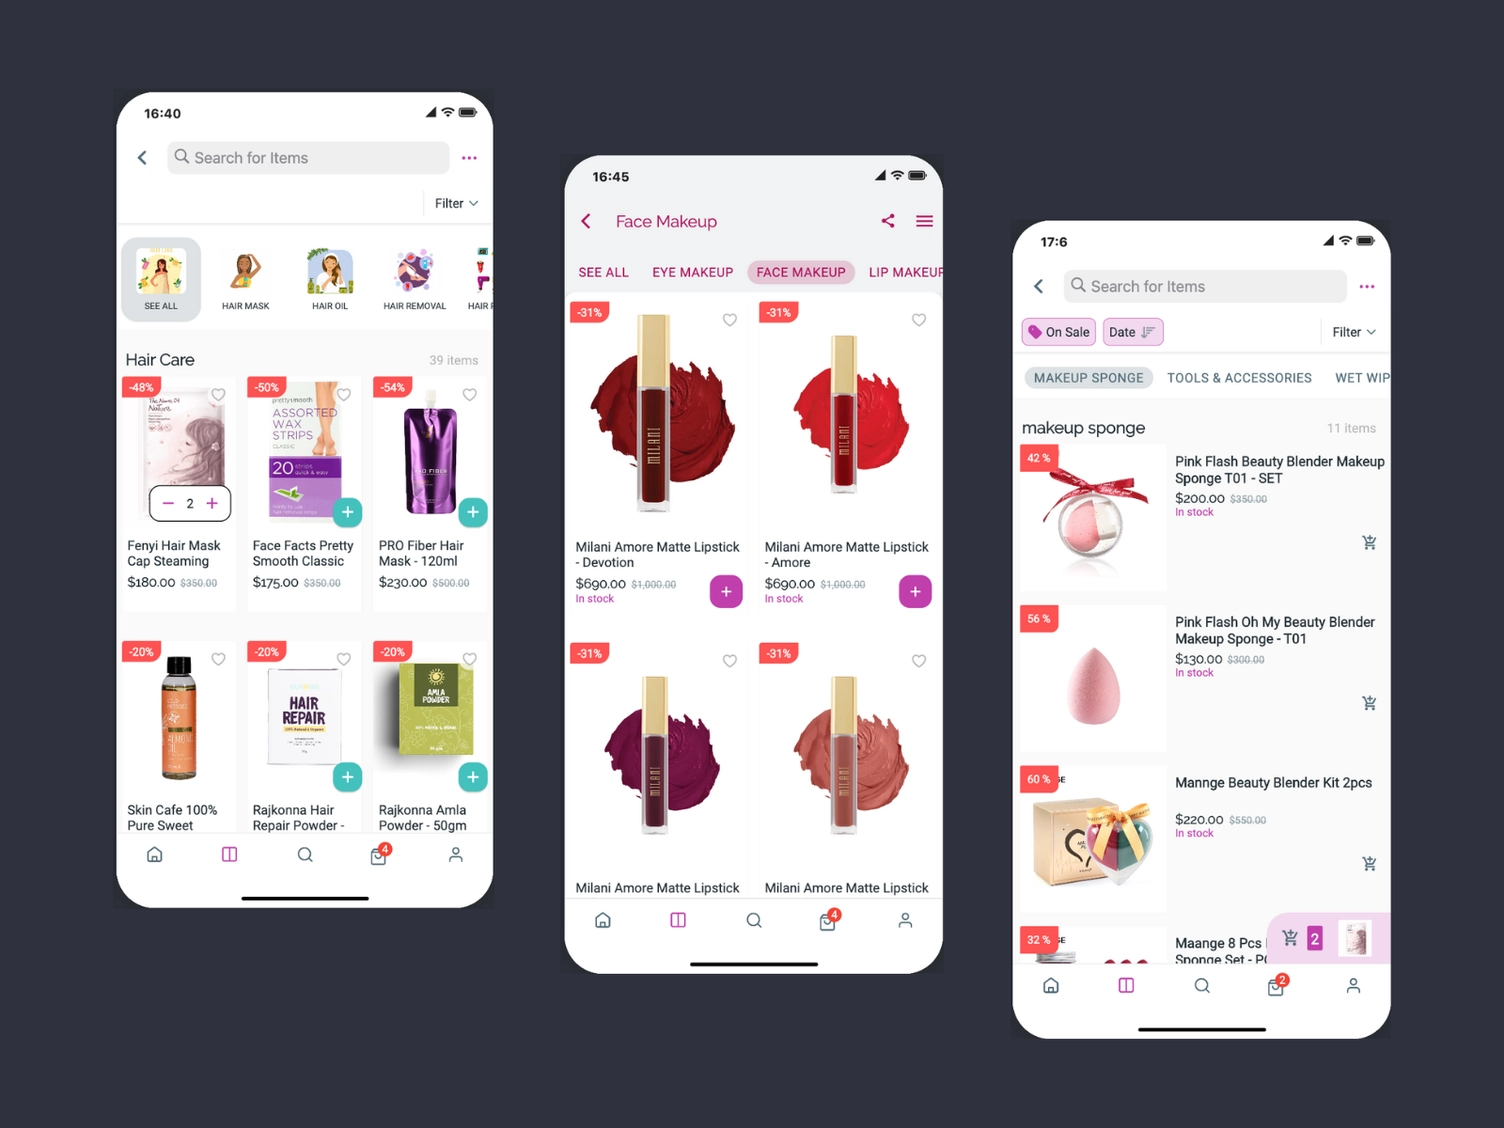
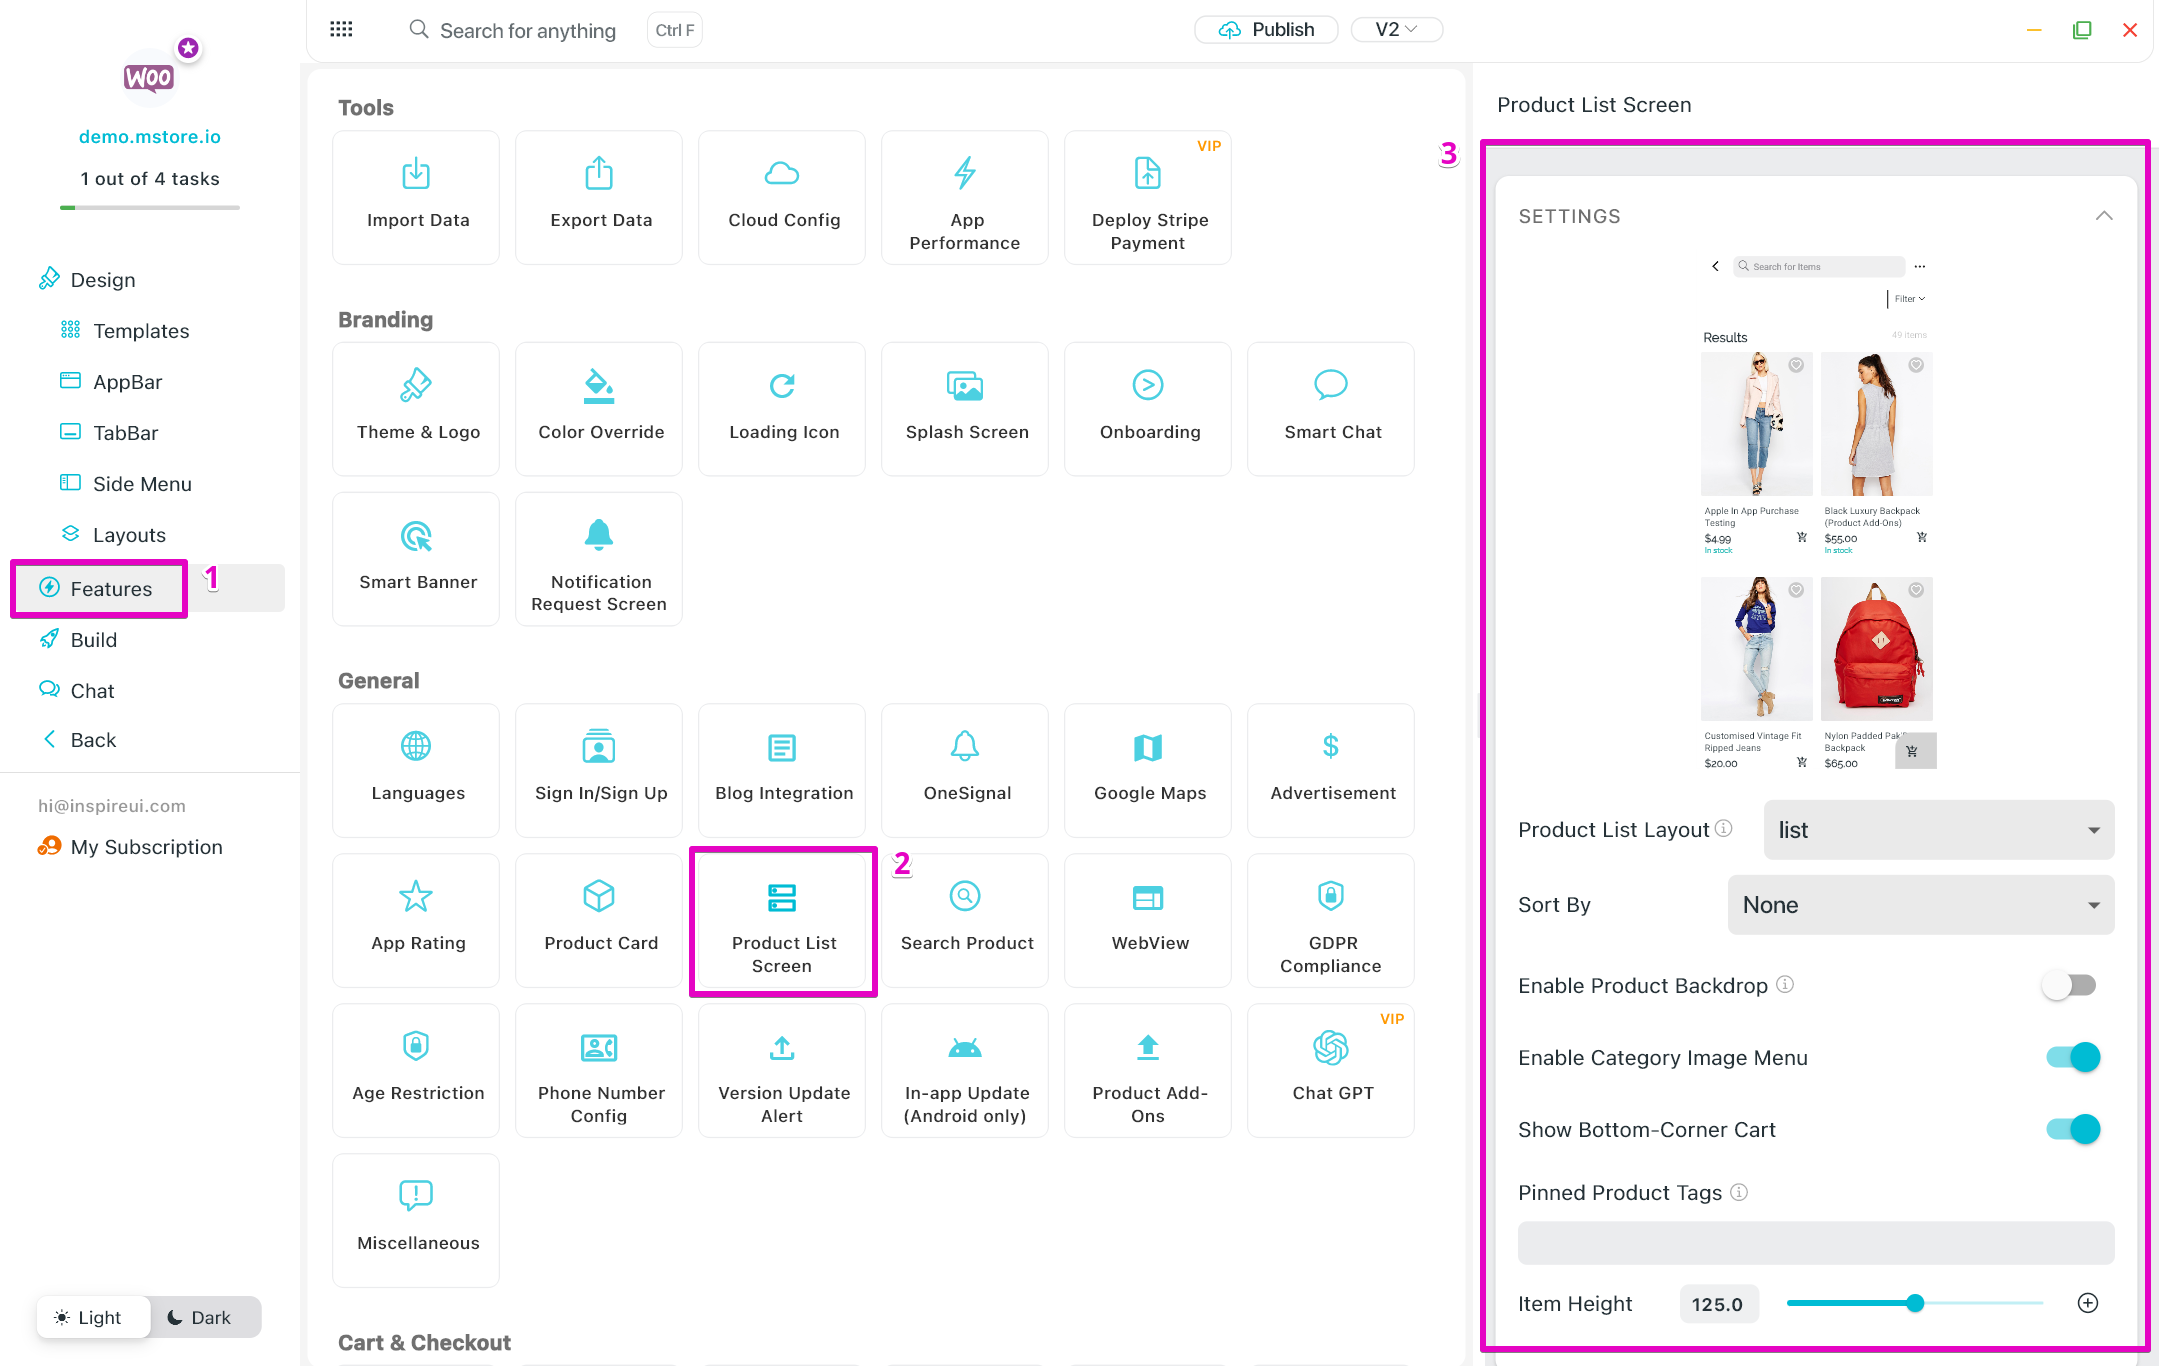
Filter screen
There are 3 templates of Product List screen (or Filter screen) that you are able to edit:
Webview Page with Token
Ability to add a Webview page into your native app (good release on App Store and Google Play).
Supports adding a Webview page on some parts of app:
- Settings screen
- Side menu
- TabBar
If you want users to access the Webview Page without re-login, enabling REQUIRED LOGIN to add Token when the user logs into the app.
If you want to use Javascript to hide some webview UI on the app, add SCRIPT to hide some webview UI as video below:
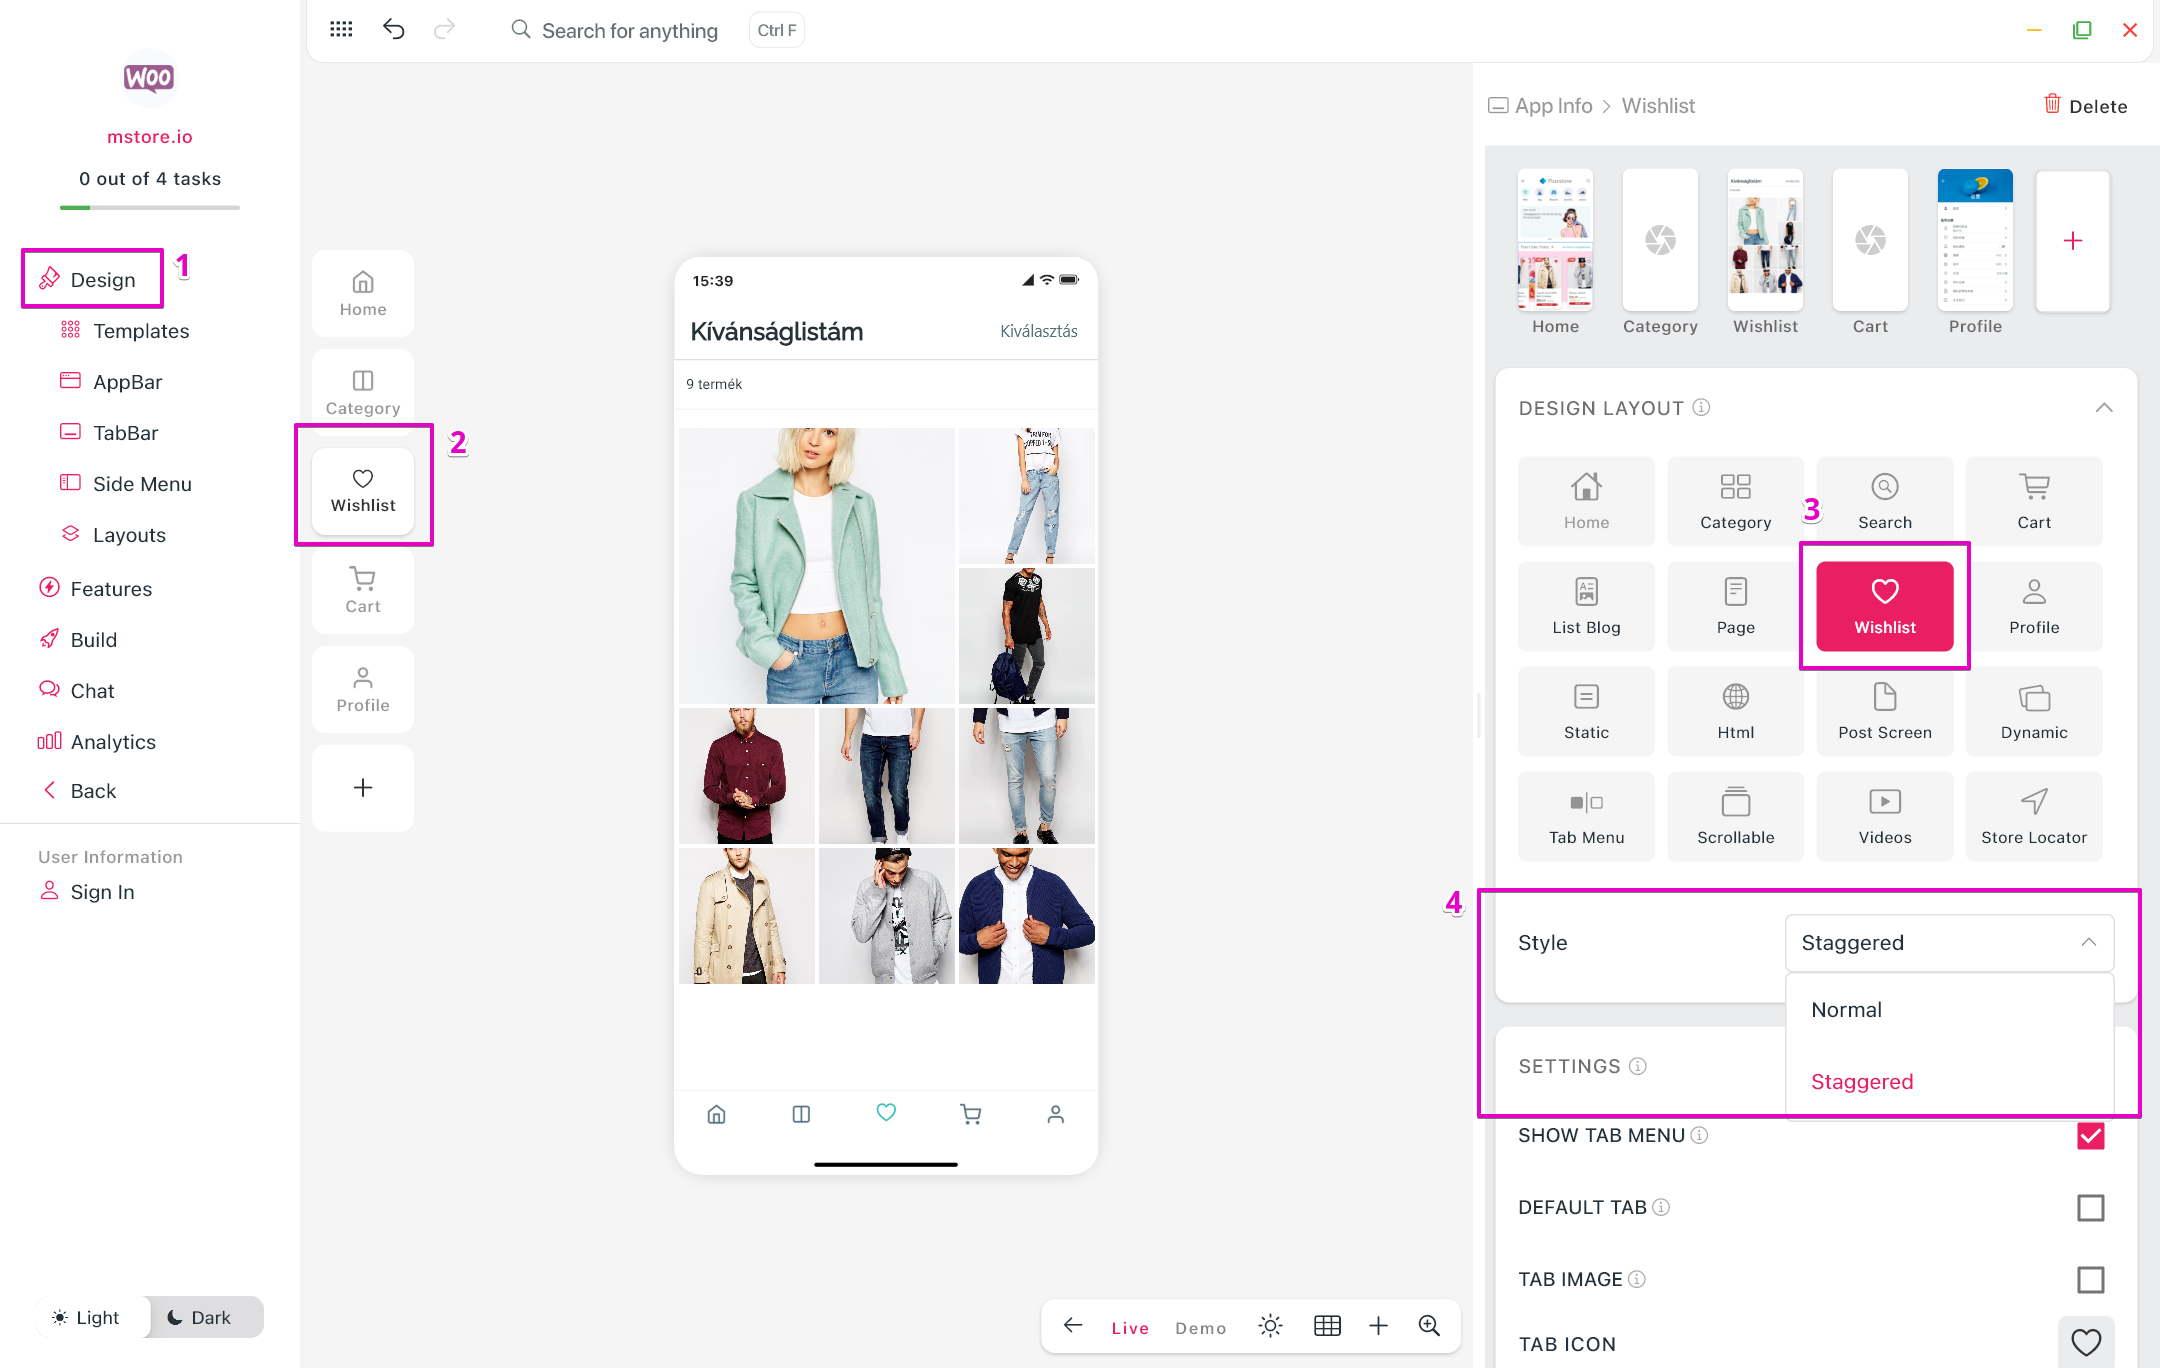
Wishlist Screen
- Add and change the Wishlist screen style directly on FluxBuilder.
- Open app on FluxBuilder.
- Go to Design on the side menu.
- Select Wishlist tab (or click on any tab and select Wishlist option in DESIGN LAYOUT).
- Select Style (Normal or Staggered).
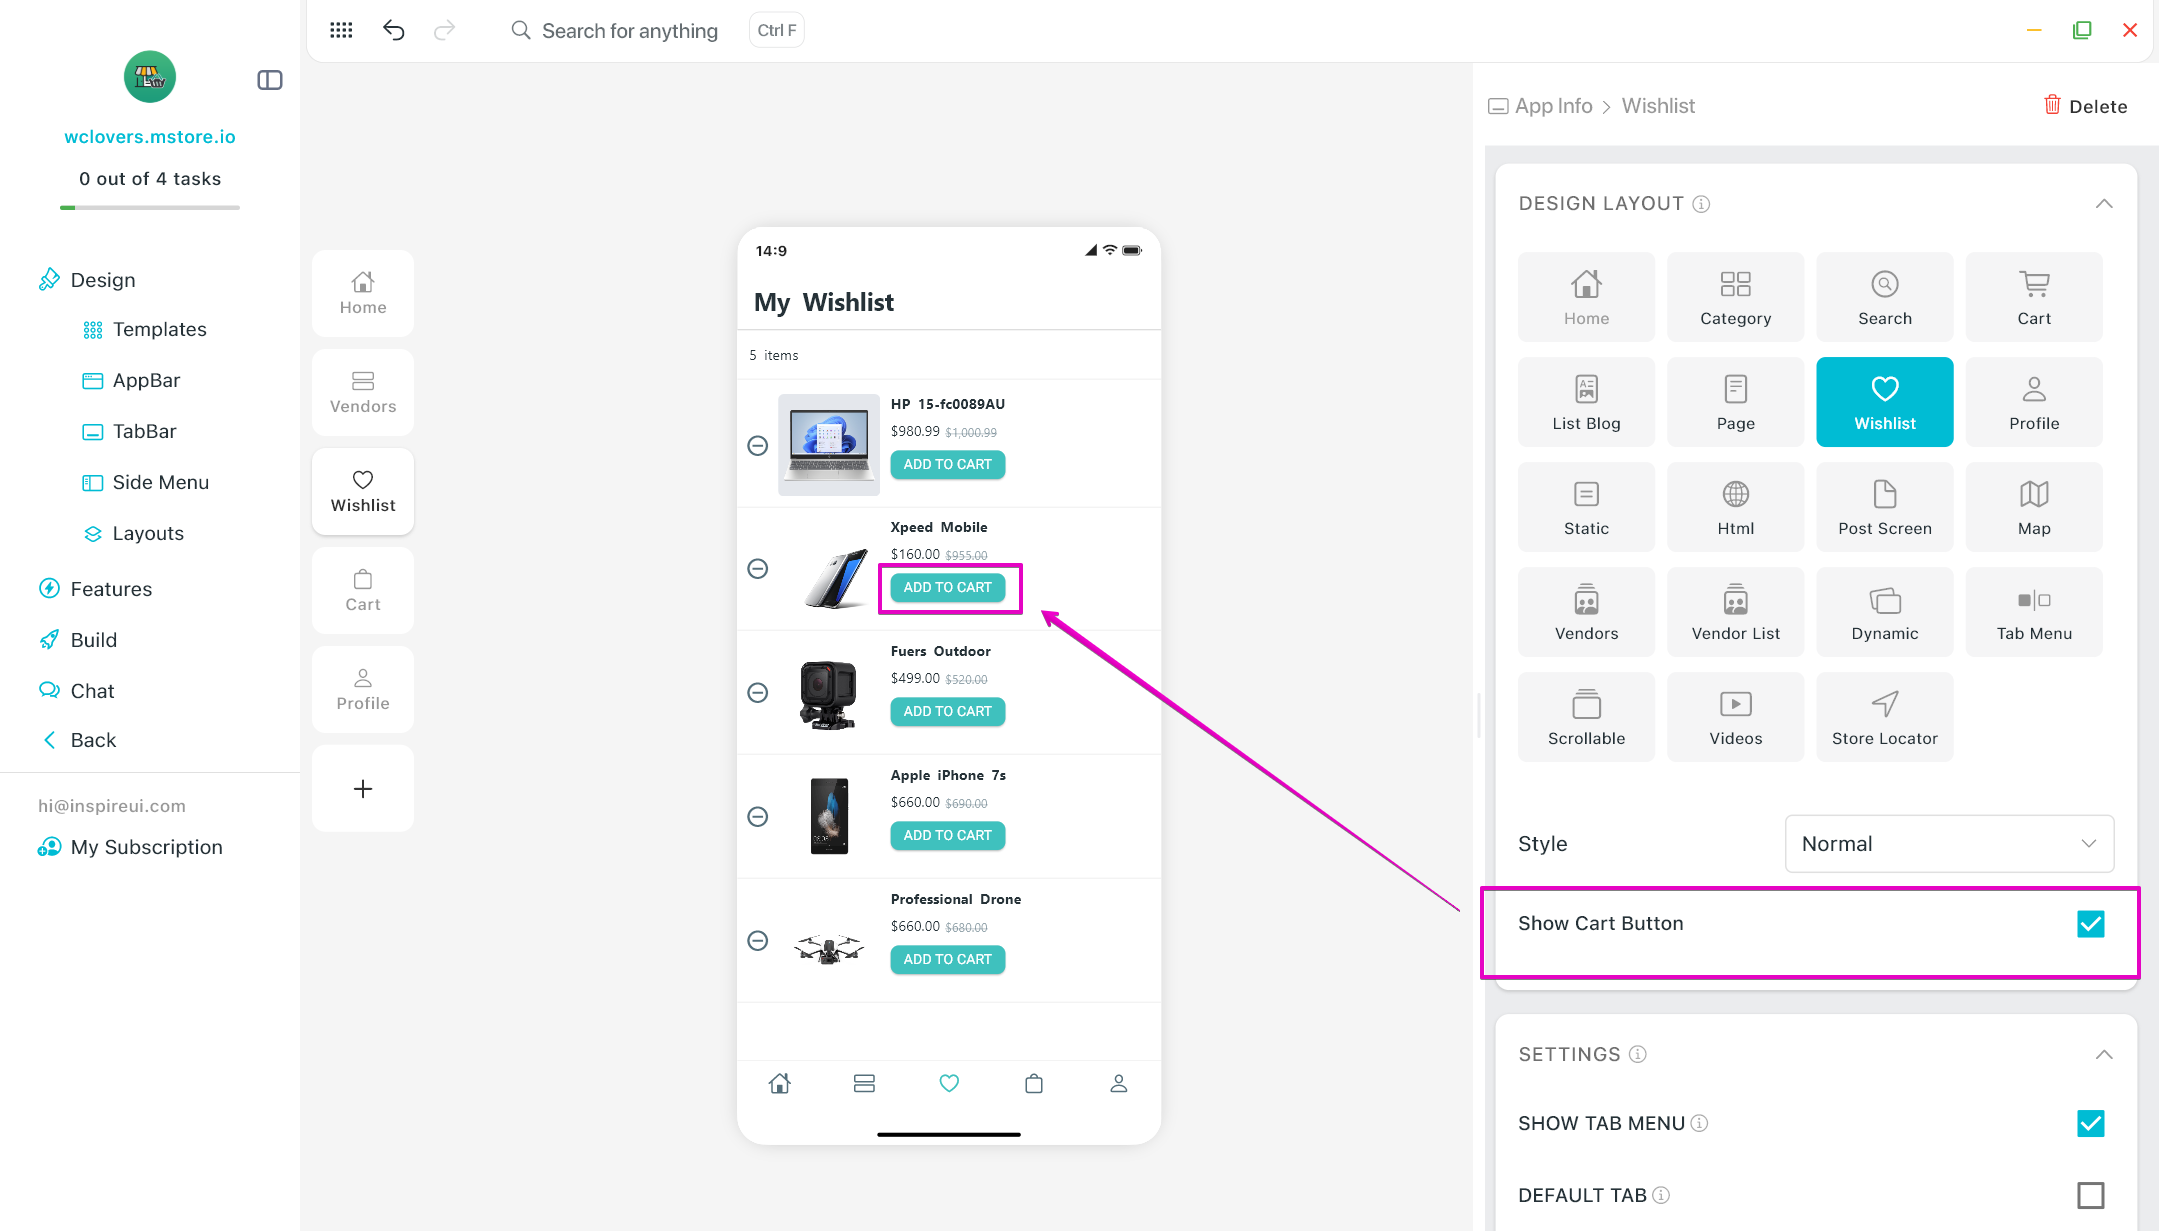
- Show/Hide Cart button on Wishist screen.
- Open app on FluxBuilder.
- Go to Design on the side menu.
- Select Wishlist tab (or click on any tab and select Wishlist option in DESIGN LAYOUT).
- Enable/Disable Show Cart Button to show or hide the ADD TO CART button.
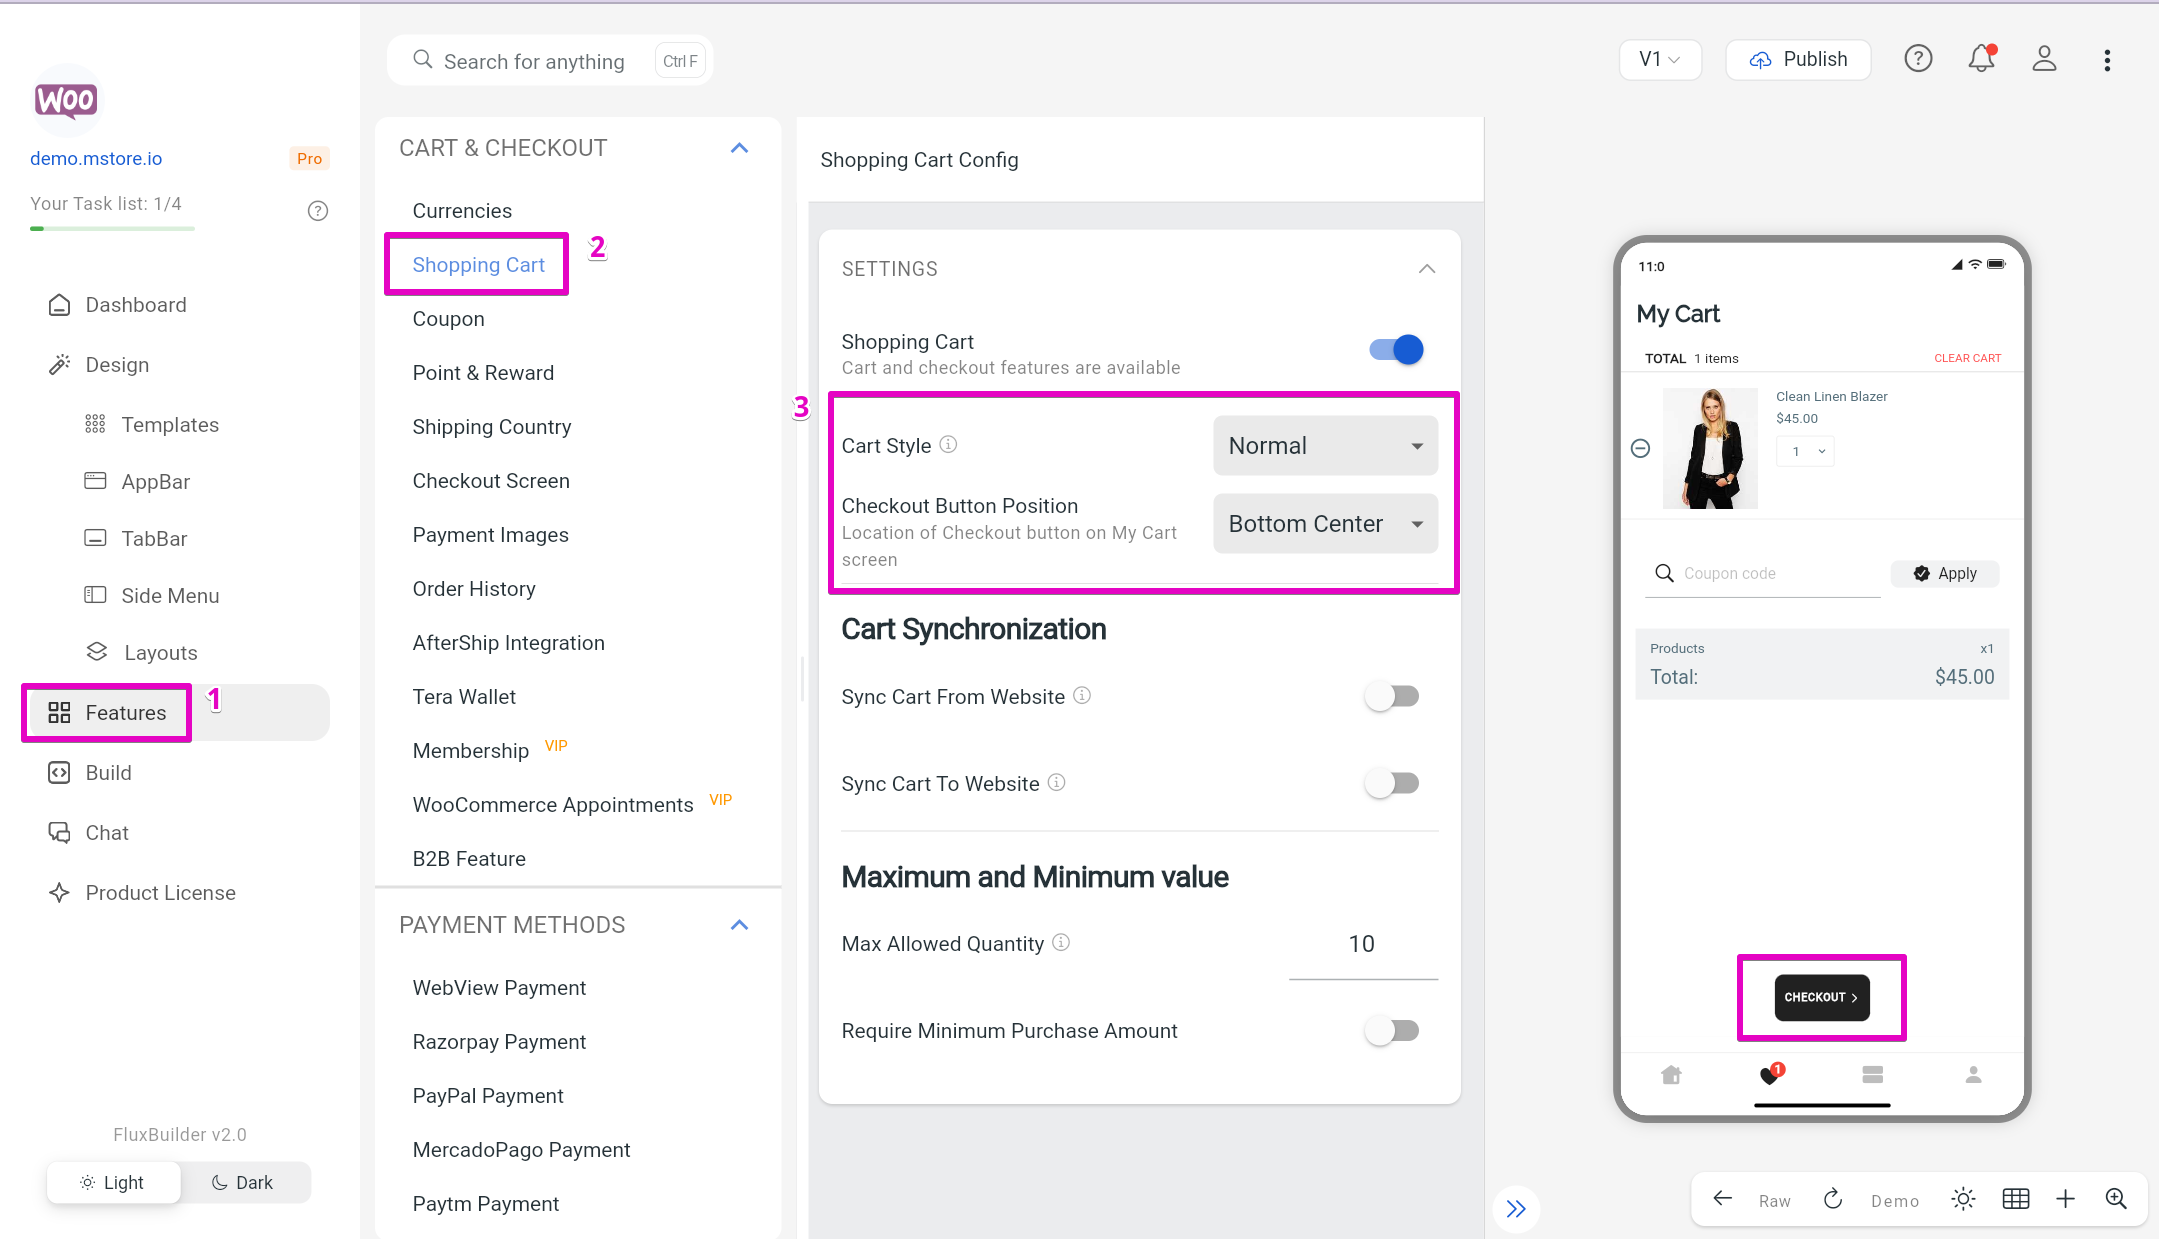
My Cart screen
The Checkout buttons can be located flexibly on the My Cart screen. Available for E-commerce apps:
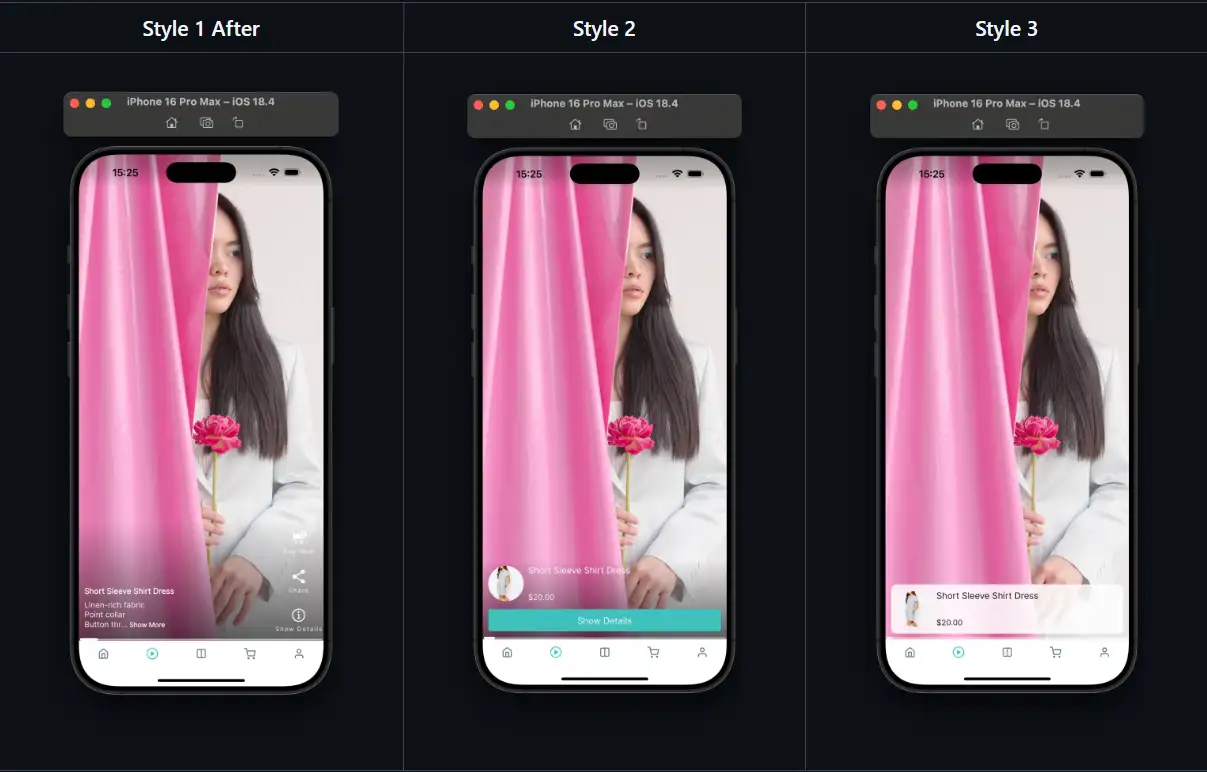
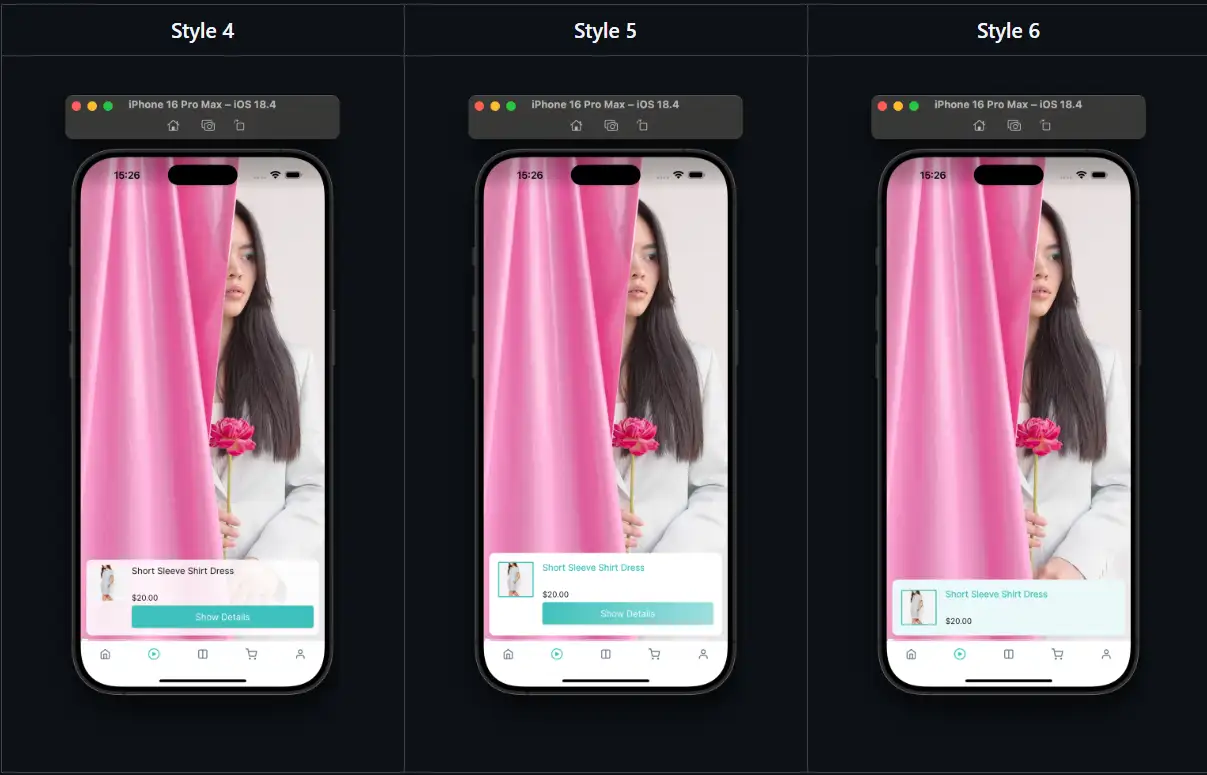
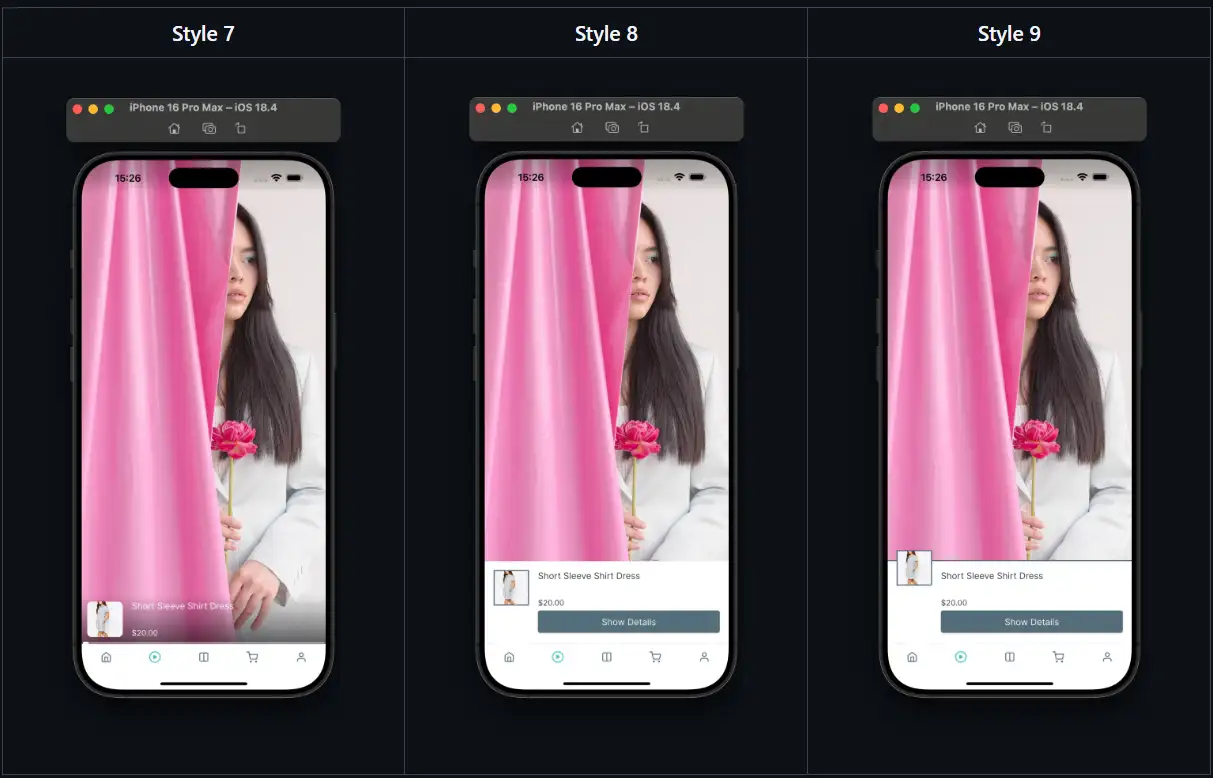
Shopping Video screen
Support adding a Shopping Video widget/page: (available for WooCommerce and Shopify apps)
- Show video list view with .mp4 files, which is similar to Tiktok and Youtube Short.
- Load the video list (get it from the Product setup as in the video below).
Available on these apps: Woocommerce, Woocommerce with Dokan or WCFM plugin, Shopify. The feature is also supported in Listing, but it requires the Woocommerce plugin installed on your Listing website.
Follow these Steps to configure this screen:
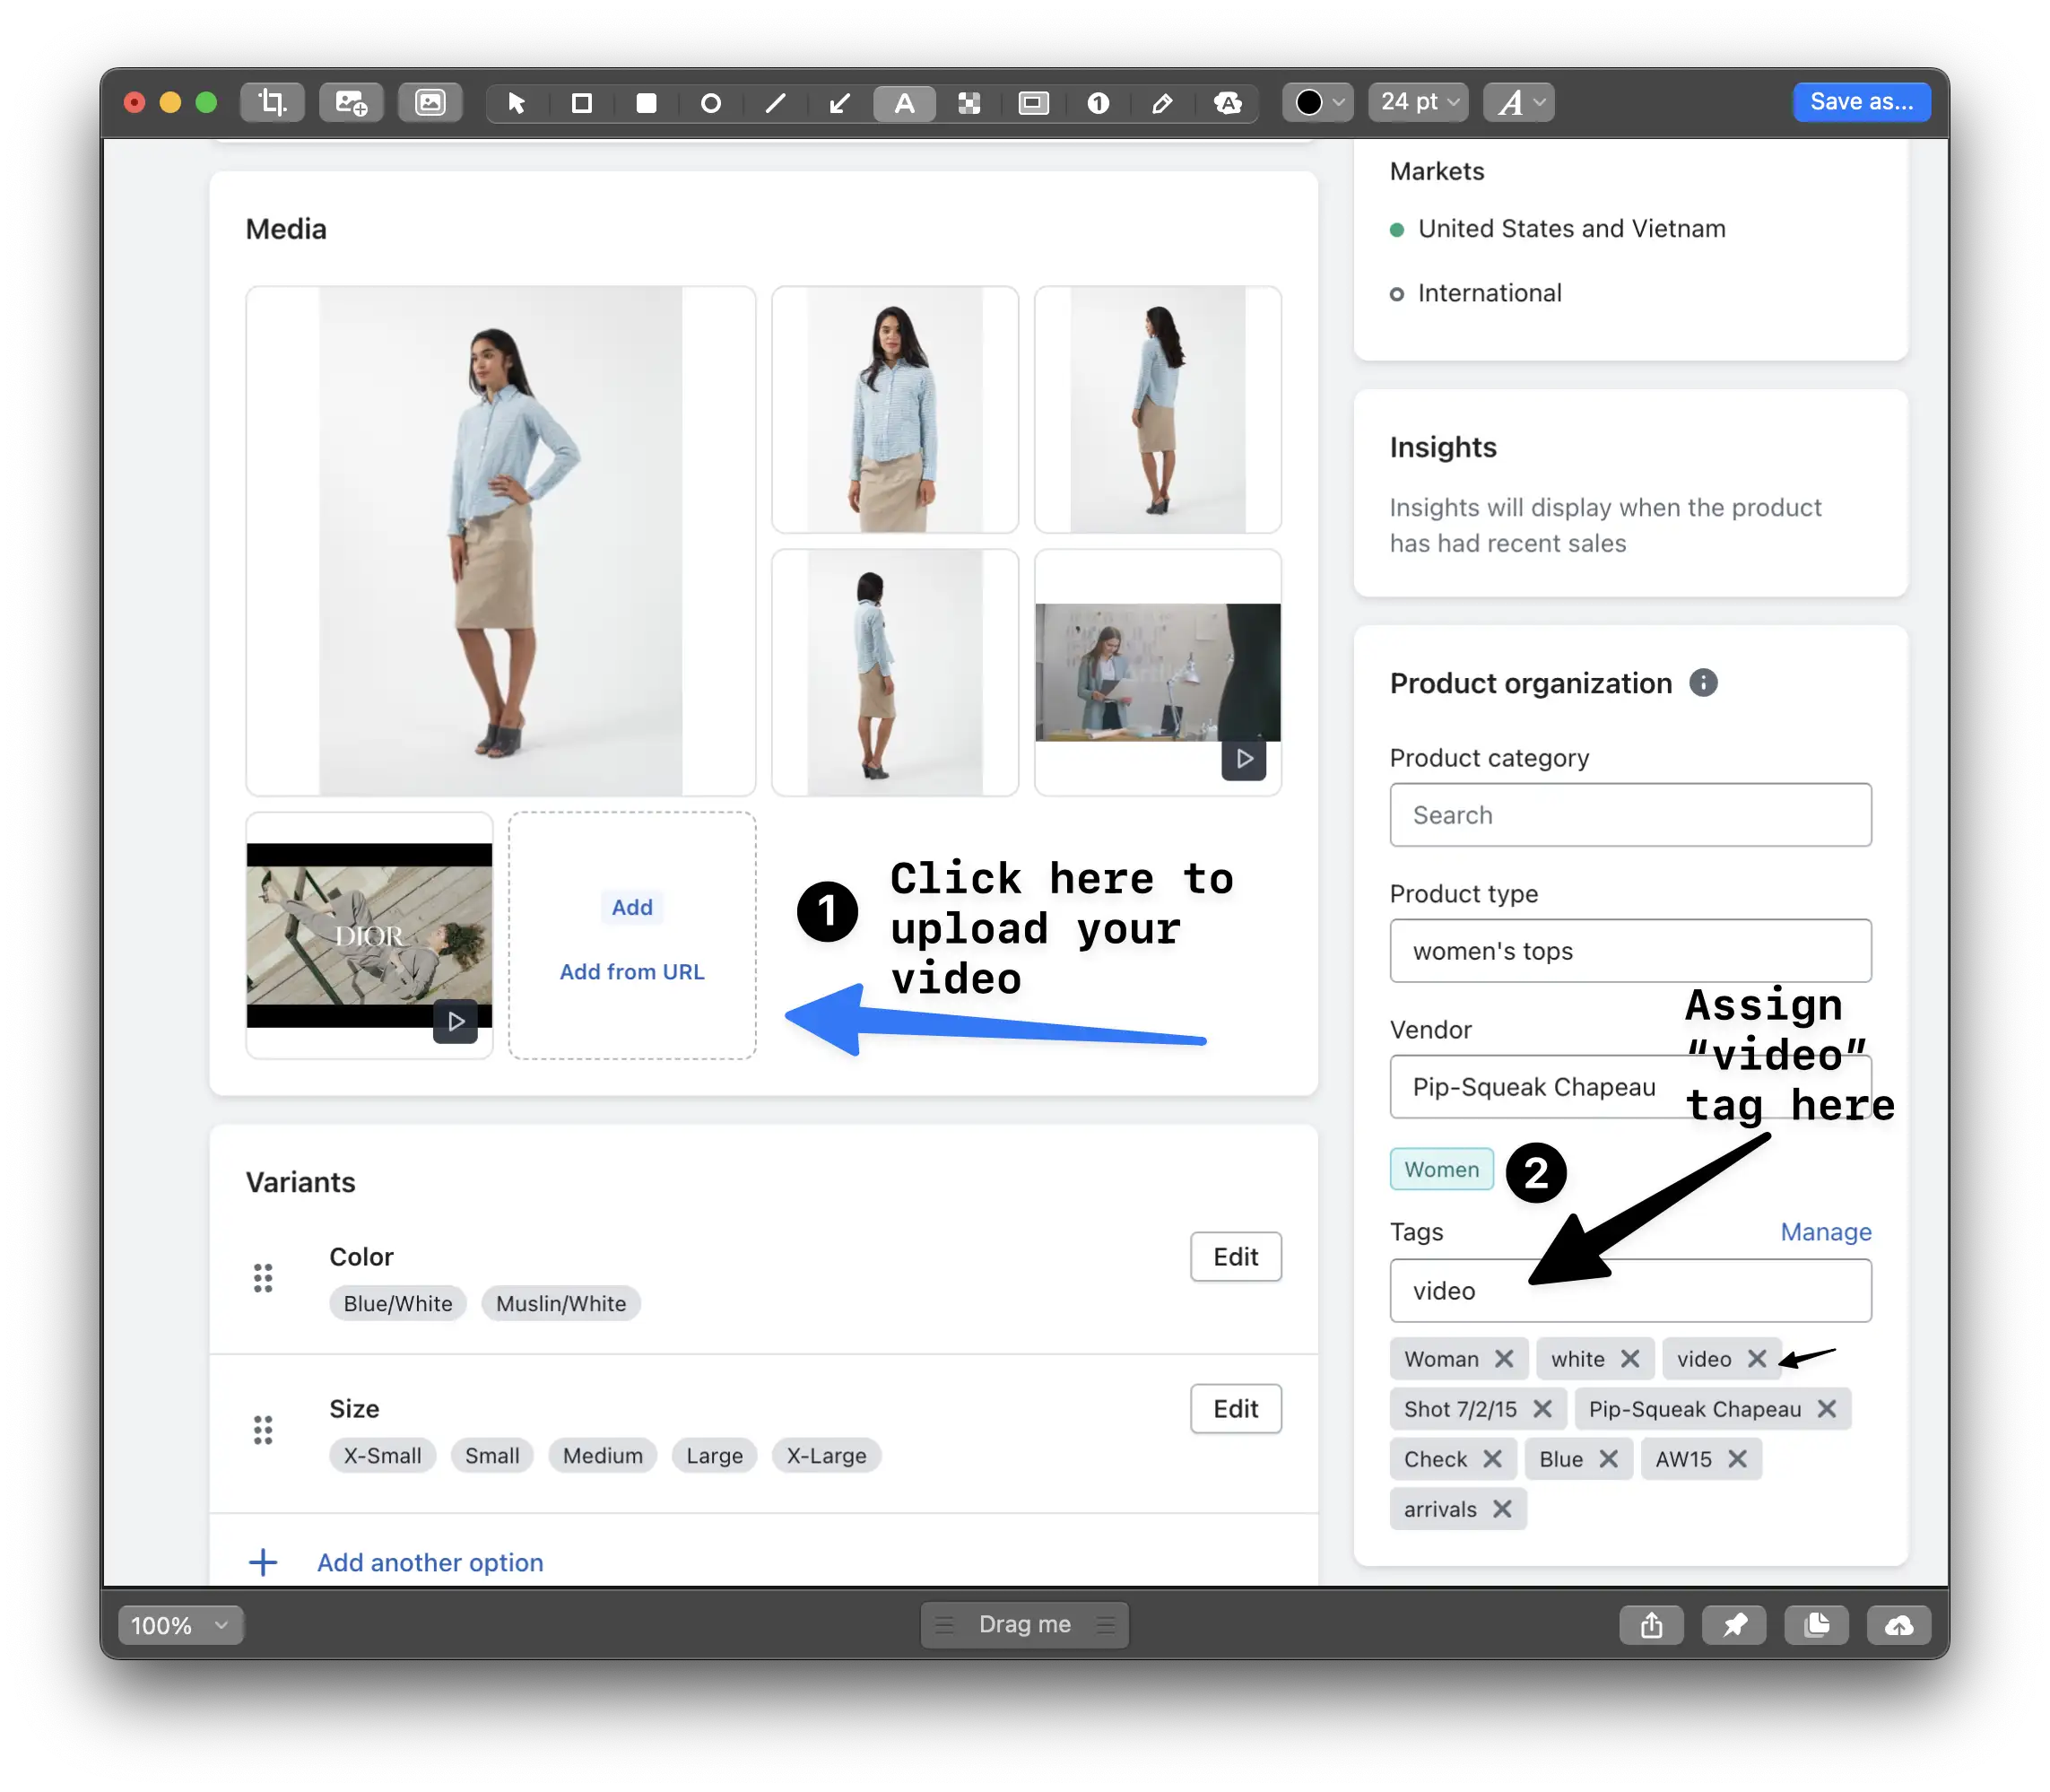
Step 1: Add videos into Products
For WooCommerce: go to your Admin site, edit a product. In Video Setting, refer to a .mp4 file (as image below). After that, UPDATE the product.

For Shopify: after uploading a new video file in the Product settings on Admin site, remember to add the tag "video" as below:
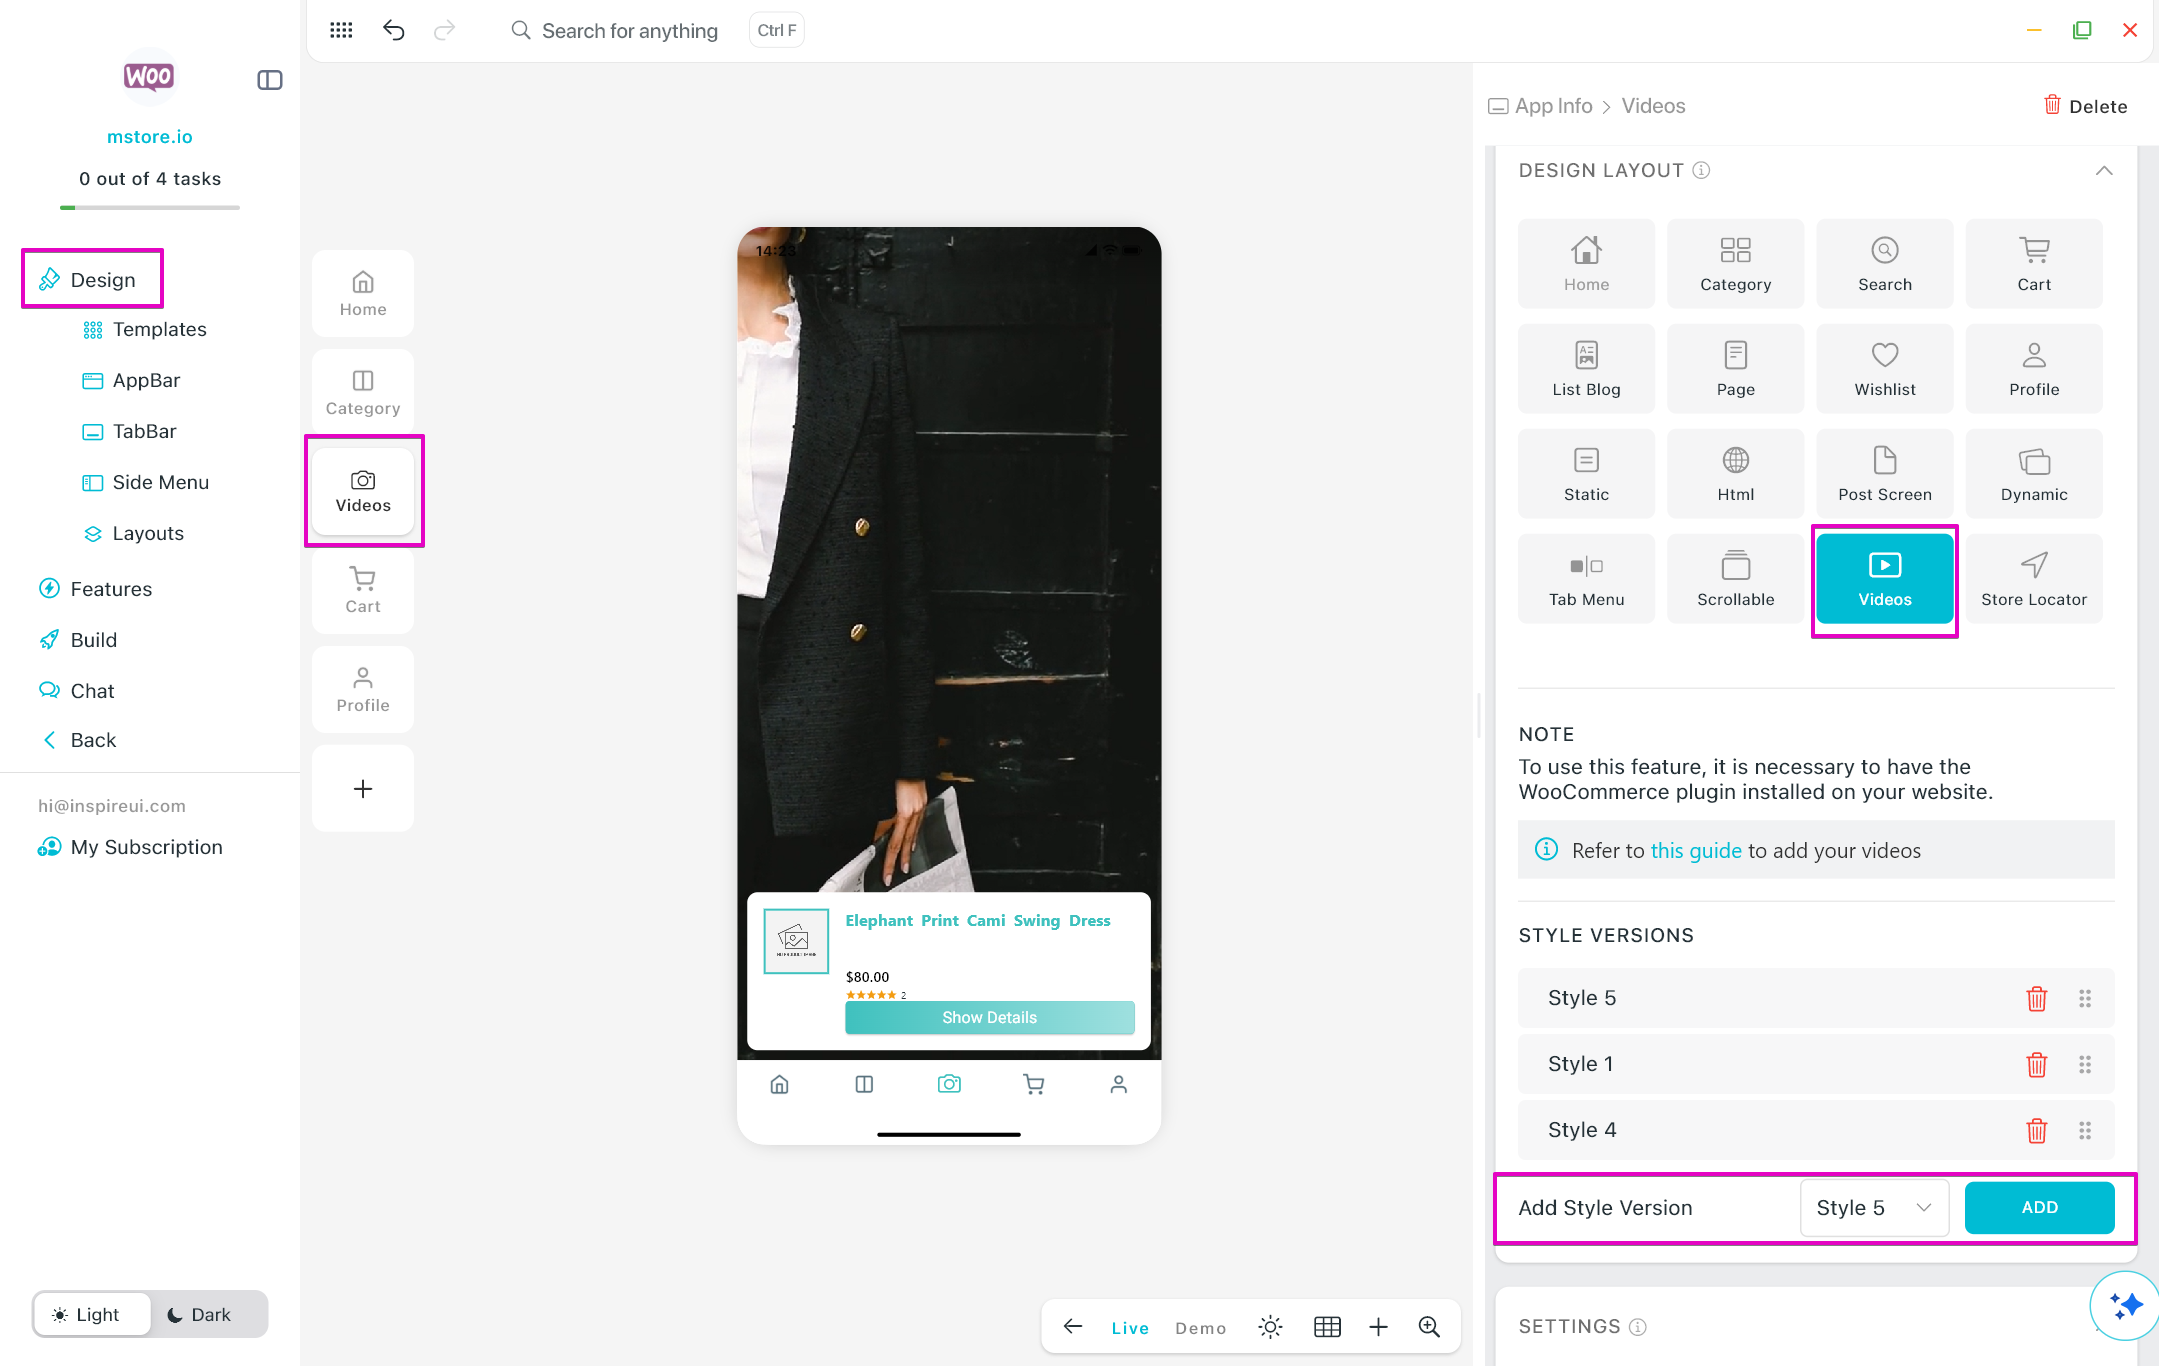
Step 2: Configure the feature
- Open app on FluxBuilder.
- Go to Design on the side menu.
- Select the Videos tab (or click on any tab and select the Videos option in DESIGN LAYOUT).
- Select the style version and click the ADD button (you can add many versions).
- Reorder the added versions in the STYLE VERSIONS.b
YITH Store Locator
This guide tells you how to implement a Store Locator in Your App for Seamless Customer Navigation
Discover how to enable a store locator feature in your app, enabling customers to effortlessly find your points of sale. Provide real-time directions based on their current location, ensuring a convenient and hassle-free experience for your valued customers.
1. Prerequisite
Before setting up the feature, you need to install the plugin YITH Store Locator for WordPress & WooCommerce on your website.
2. Add Store Locator Layout into the App
- Open your app on FluxBuilder
- In Design, select any tab
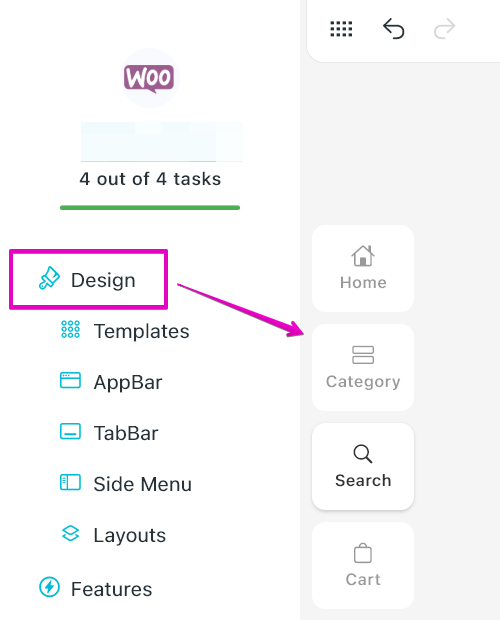
- On the right side, in DESIGN LAYOUT, select Store Locator

3. Set Up the Website
After completing the settings above, now let open your admin site, and follow the steps to make sure the feature works on app:
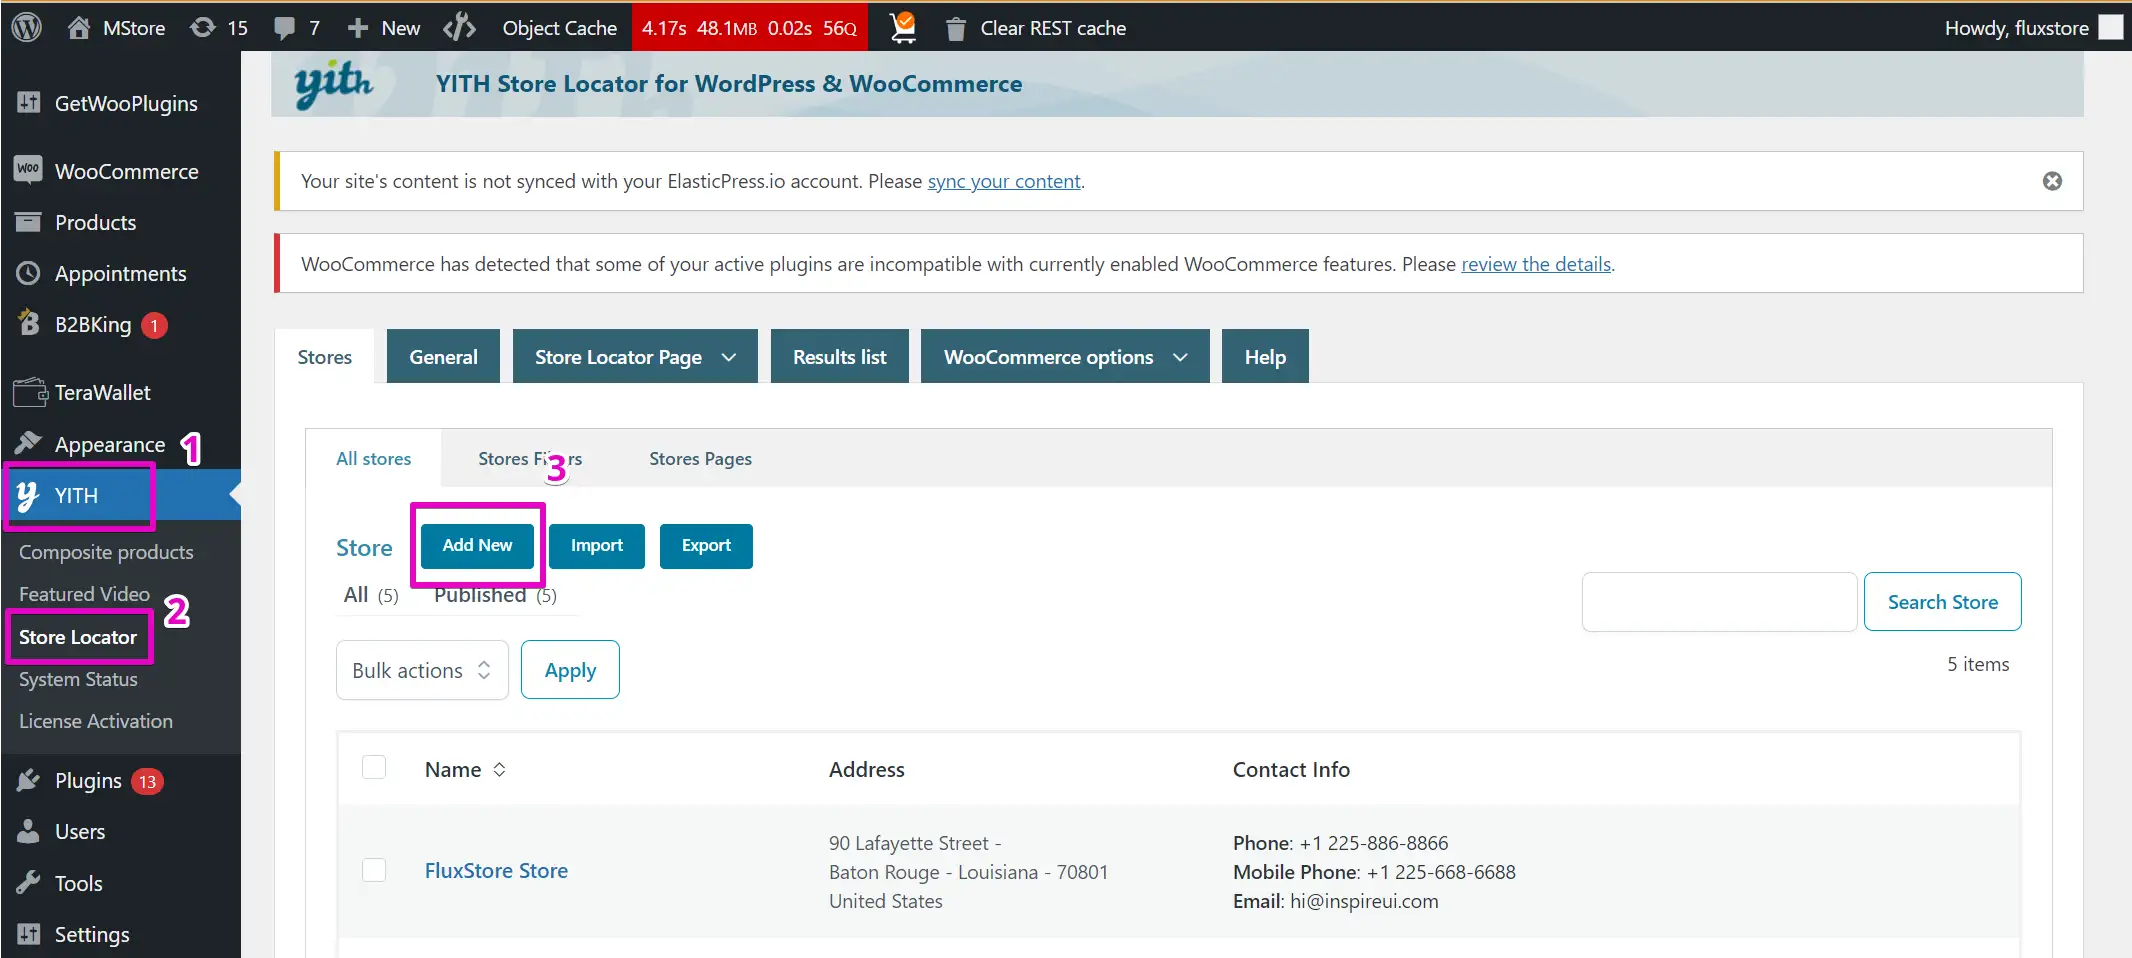
Step 1: Add new stores in Yith > Store Locator > Add New.
Step 2: Go to Products, open the products you need to add to the store. Go to Store locator to select the corresponding store.

That’s all!
✅ What’s Next
You’ve now:
- Learned how to customize key app screens (Home, Category, Settings, Vendor, Blog, etc.) in Design → App Screens
- Discovered additional UI options (Layout UI Kits, Webview pages, Wishlist, Filter, and more)
Next steps (continue with these 3 Design guides):
- Upgrade user experience with the Home screen design in App UIs.
- Configure your startup experience with Splash Screen.
- Learn how to update your app UI later without resubmitting to App Stores by following Update App Without Republishing.