Strapi API Settings
In Strapi, there’s no fixed template to follow. When you create a Content Type, Strapi automatically generates REST API endpoints for it.
So let’s strictly follow our tutorial below including collection/content types names, JSON serializer names, etc.
If you wish to customize your Strapi settings, refer to Strapi Docs for Strapi configurations and JSON-serializable plugin.
1. Define content types
1.1 Product content type
A Content Type, also called a model, is a type of data. The Strapi API includes by default, the user Content Type. Right now we need products, so our new Content Type is going to product (Content Types are always singular).
Here are the required steps:
- Navigate to the Content Type Builder in the sidebar (
http://your-site.com/admin/plugins/content-type-builderorhttp://localhost:xxxx/admin/plugins/content-type-builder). - Click on
+ Create new collection type. - Set
Productas name. - Click on
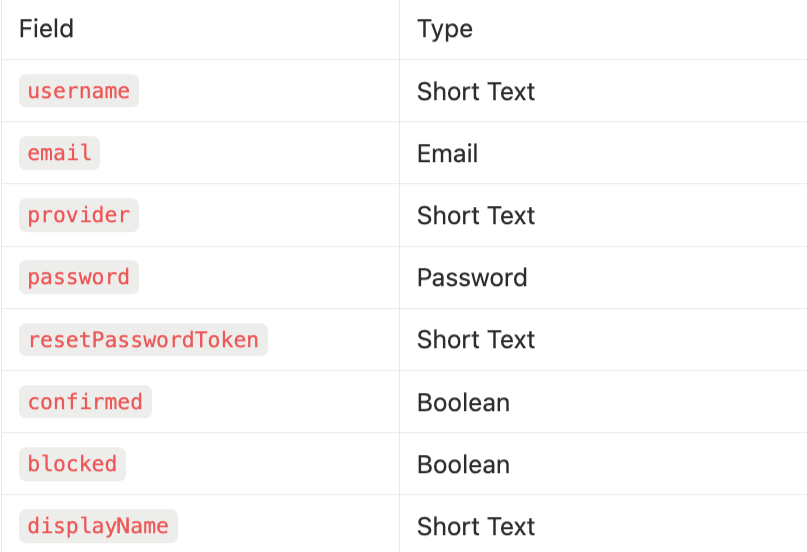
Continueand create the followings fields:
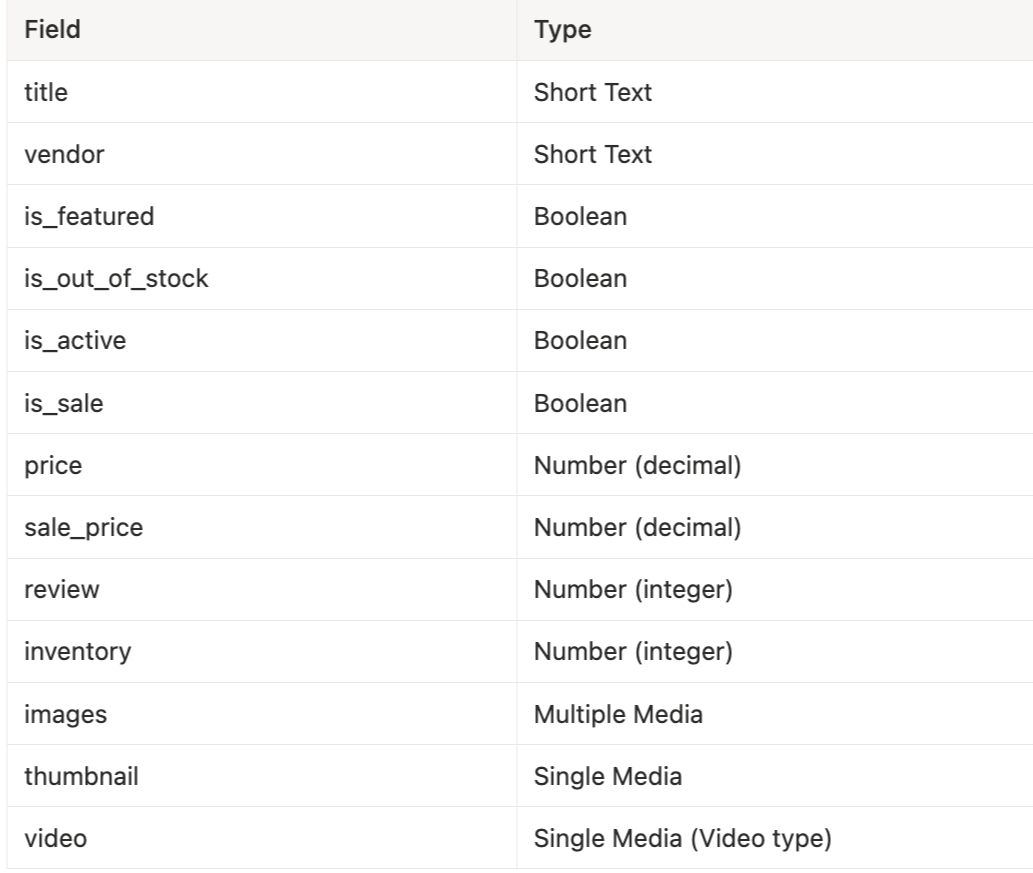
- Click on Finish
- Click on Save, the server should restart automatically.
Some fields might not be used yet but are required for future updates.
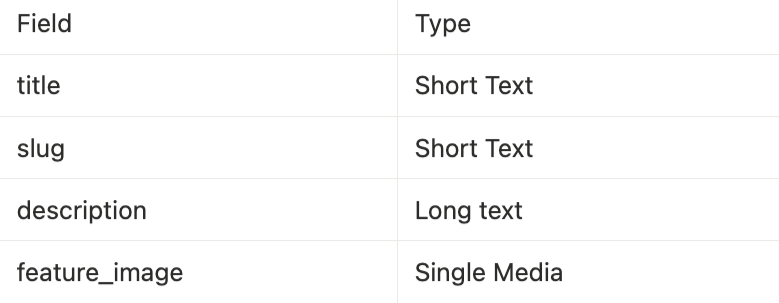
1.2 Product-category content type
Similar to creating a Product content type, repeat those steps, and create a Product-category content type with those fields:
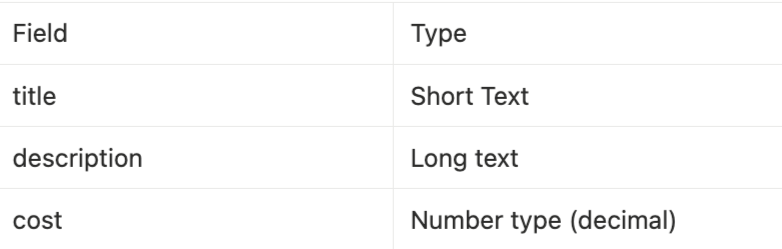
1.3 Shipping content type
Create a Shipping content type with those fields:
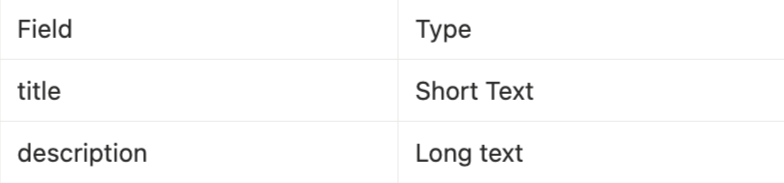
1.4 Payment content type
Create a Payment content type with those fields:
1.5 User content type
Create a User content type with those fields:
1.6 Order content type
Create an Order content type with just 1 field: total with decimal Number format
2. Define relations
2.1 Product relation
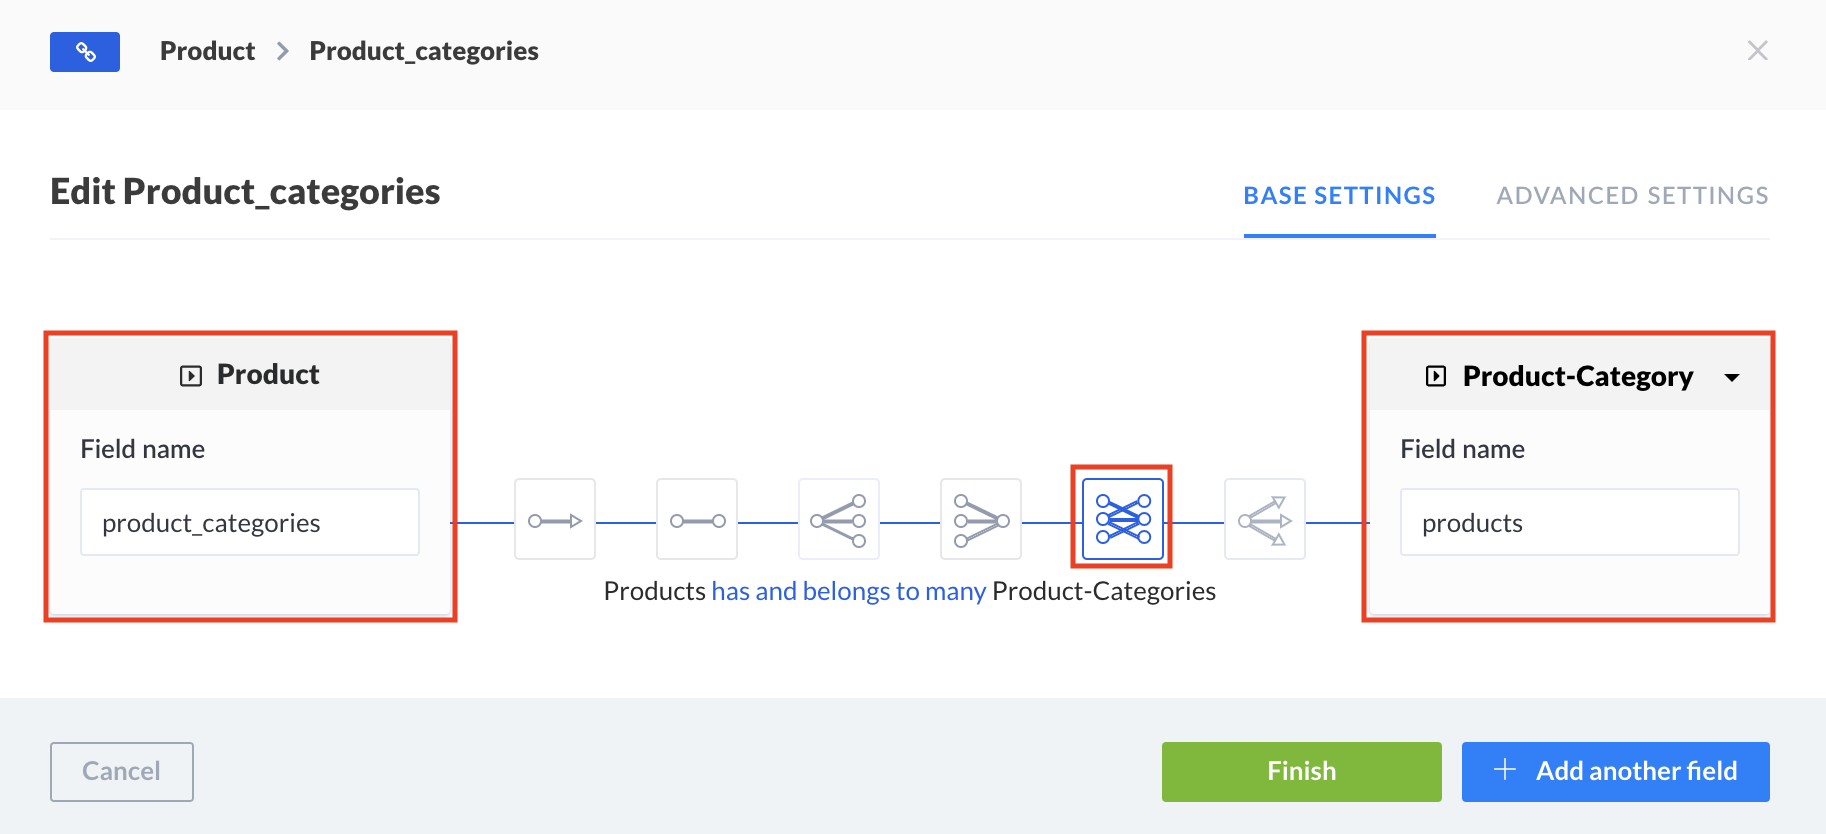
- Go to Content-Types Builder at the left-hand side menu bar. Choose
Productcollection type then click+ Add another field - Create a many-to-many Relation with Product-Category content type as below:
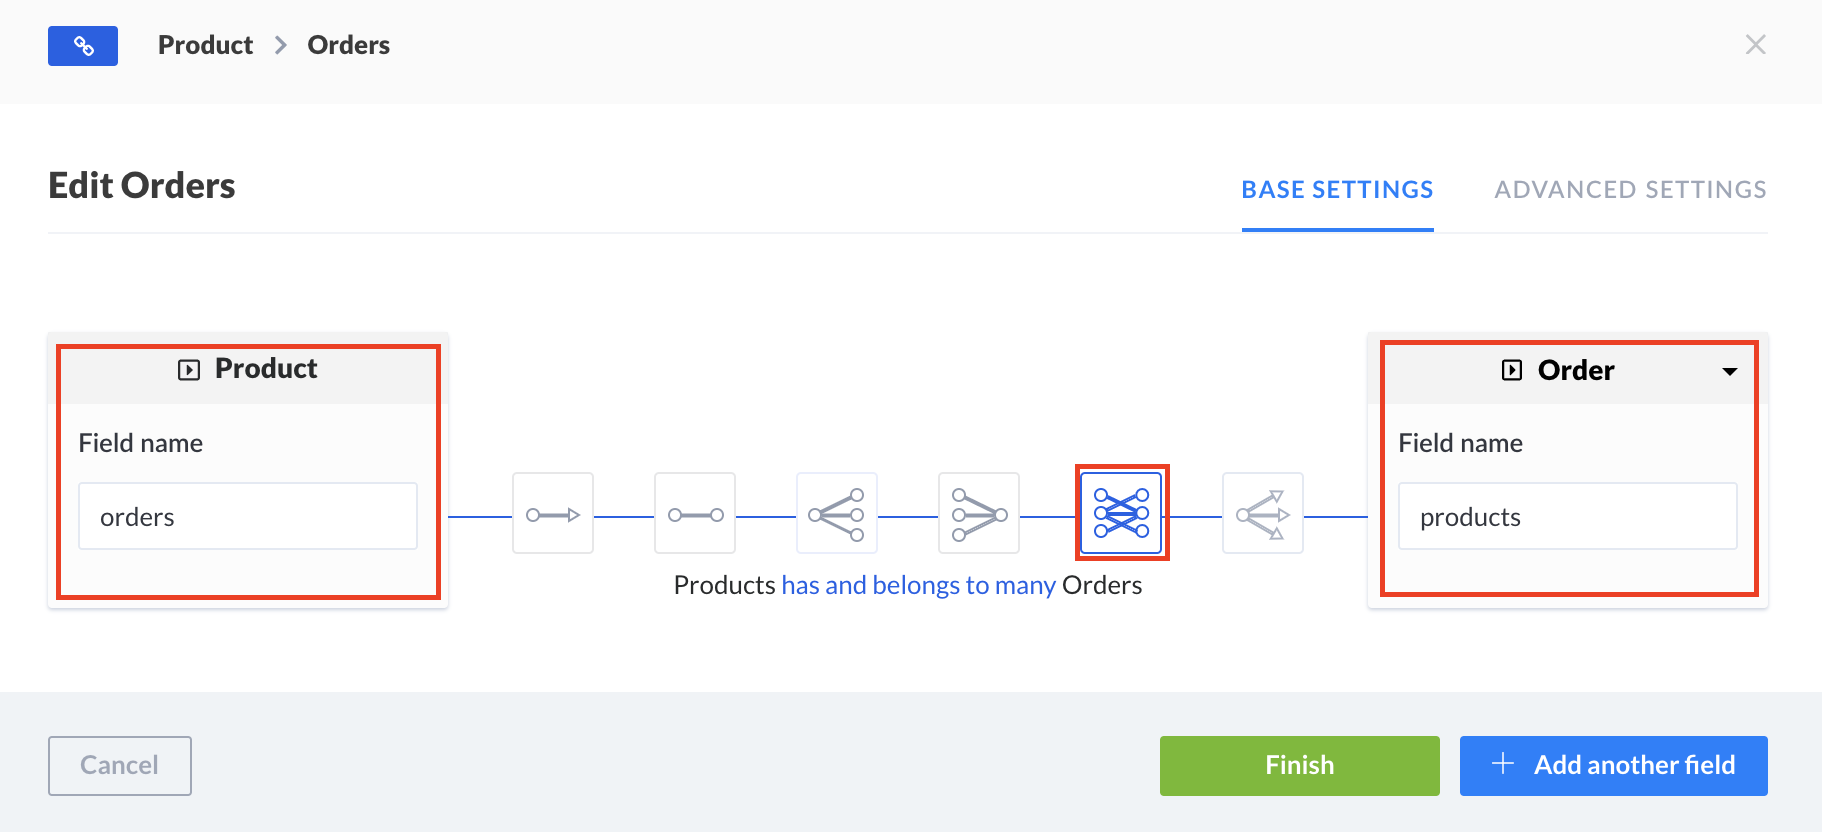
- Also, create a many-to-many relation with
Orderas below:
2.2 Order relations
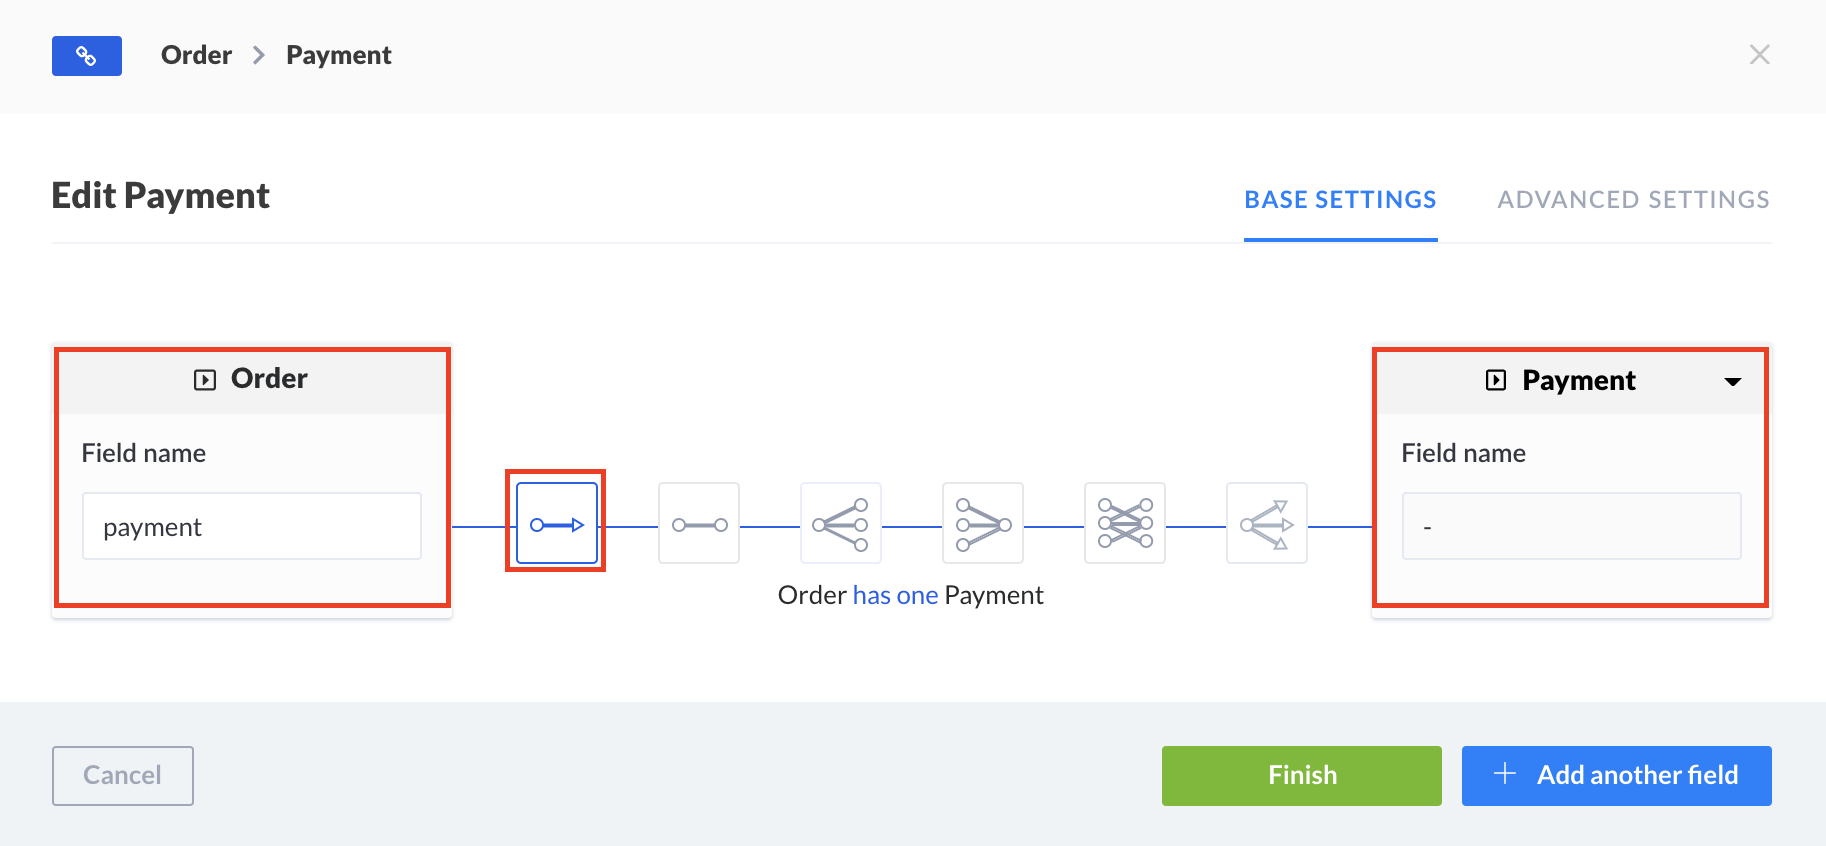
- In
Ordercontent type, create a relation withPaymentas below
- Create a relation with
Shippingas below
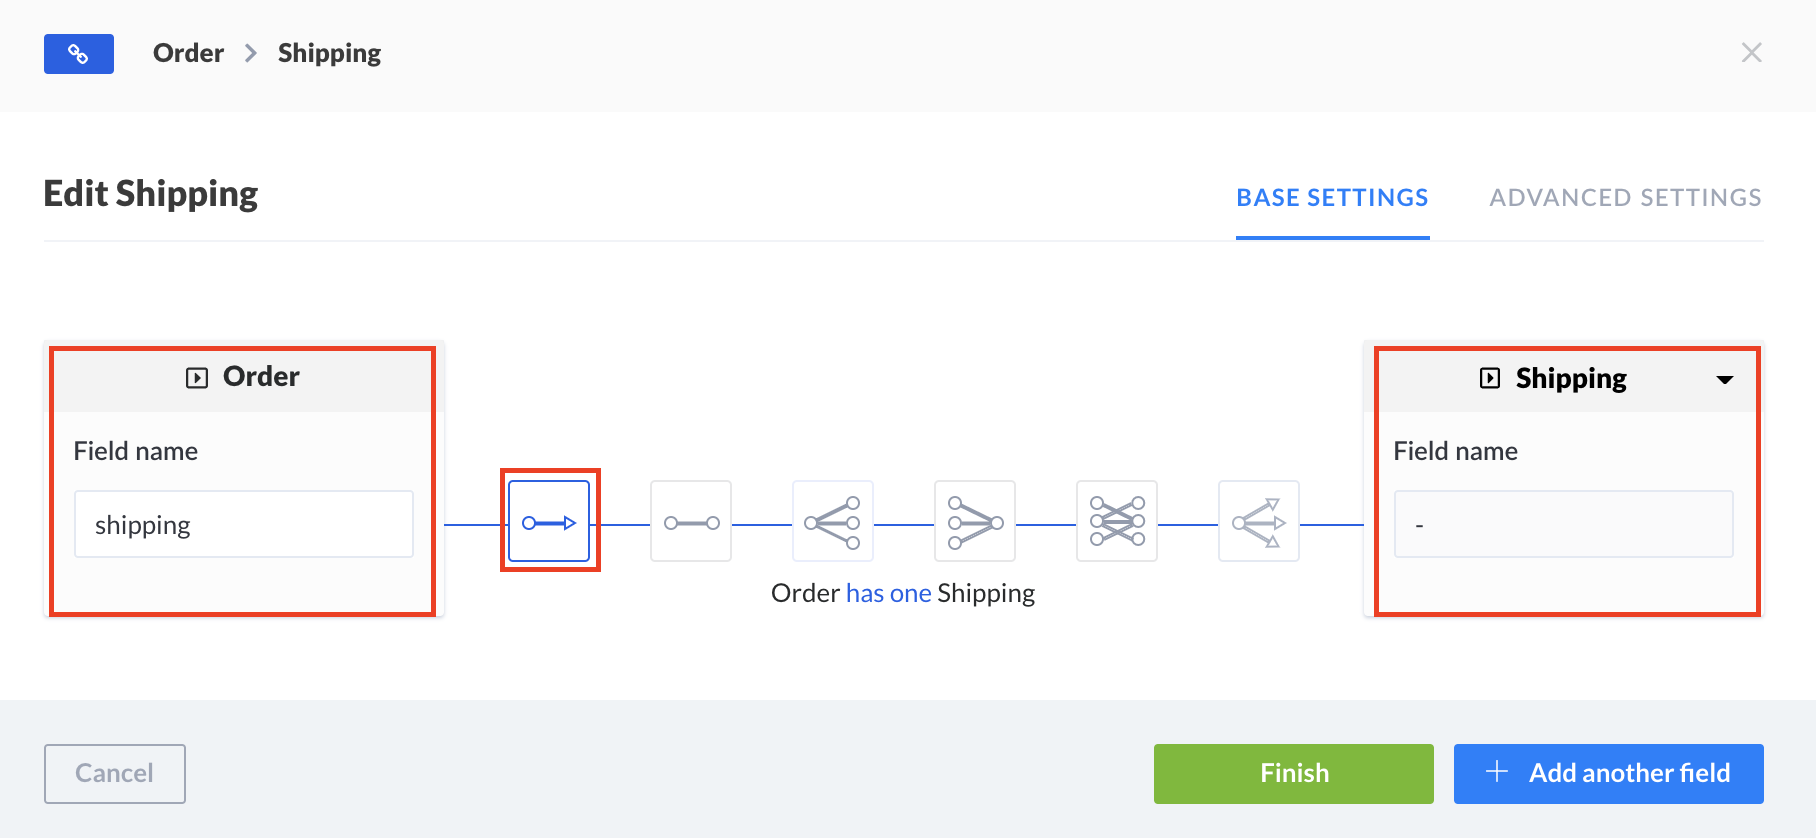
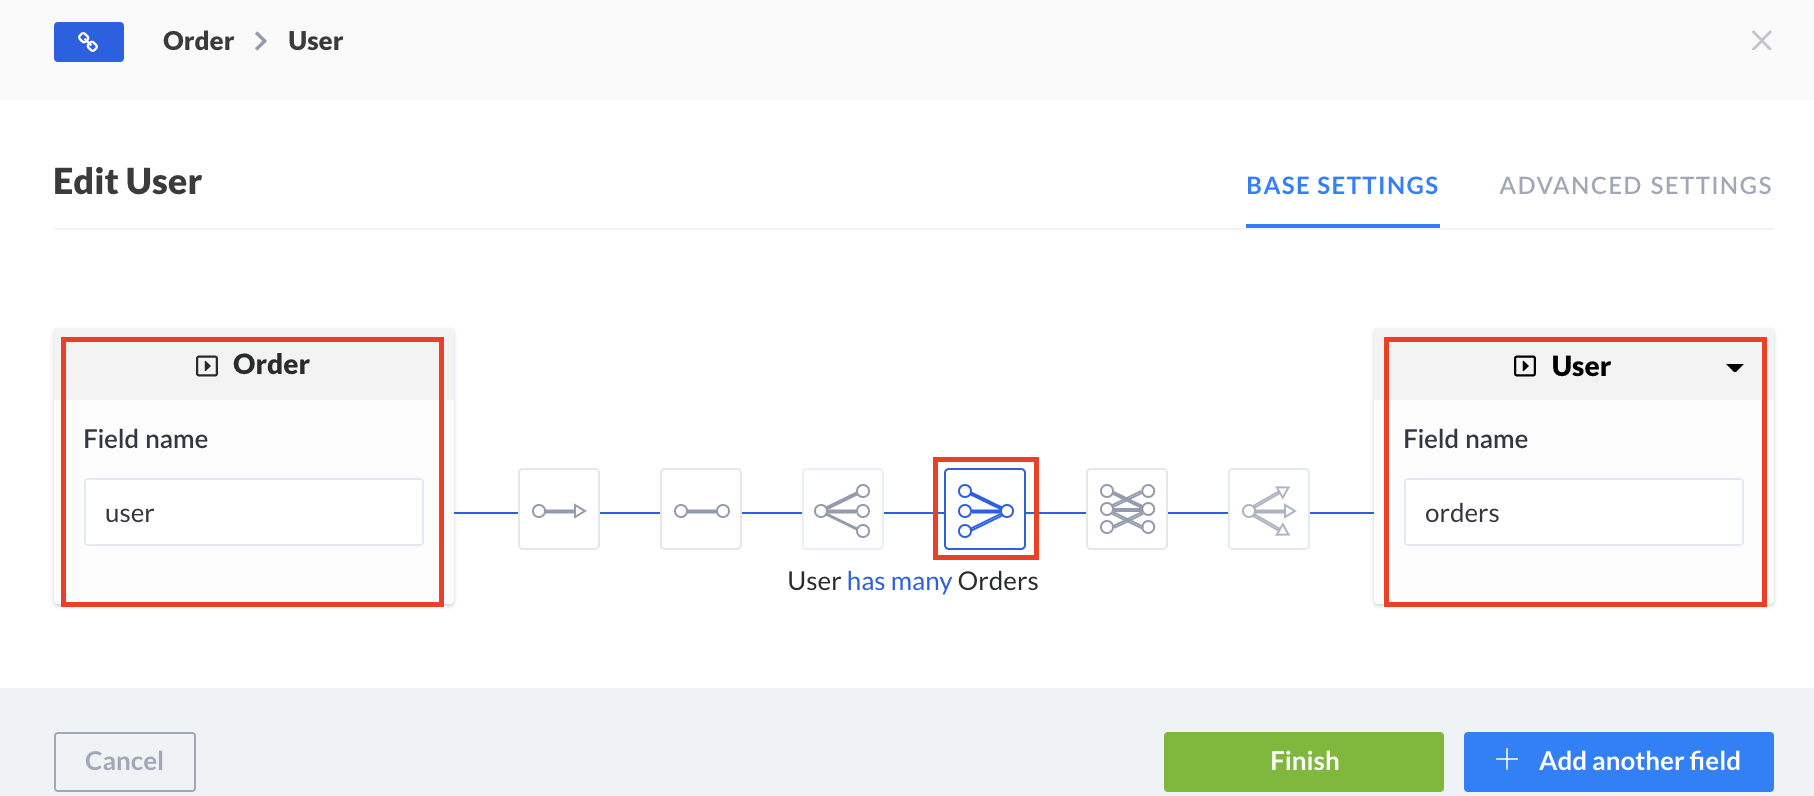
- Also, create a relation with
Useras below:
3. Create some entries
When completing all of your content types, the next thing that you need to do is to create some data for it (so that we can test later). To do so, click on Products under Collection Types list on the left-hand side menu bar. You are now in the Content Manager plugin: an auto-generated user interface that lets you see and edit entries. Let's create a sample product
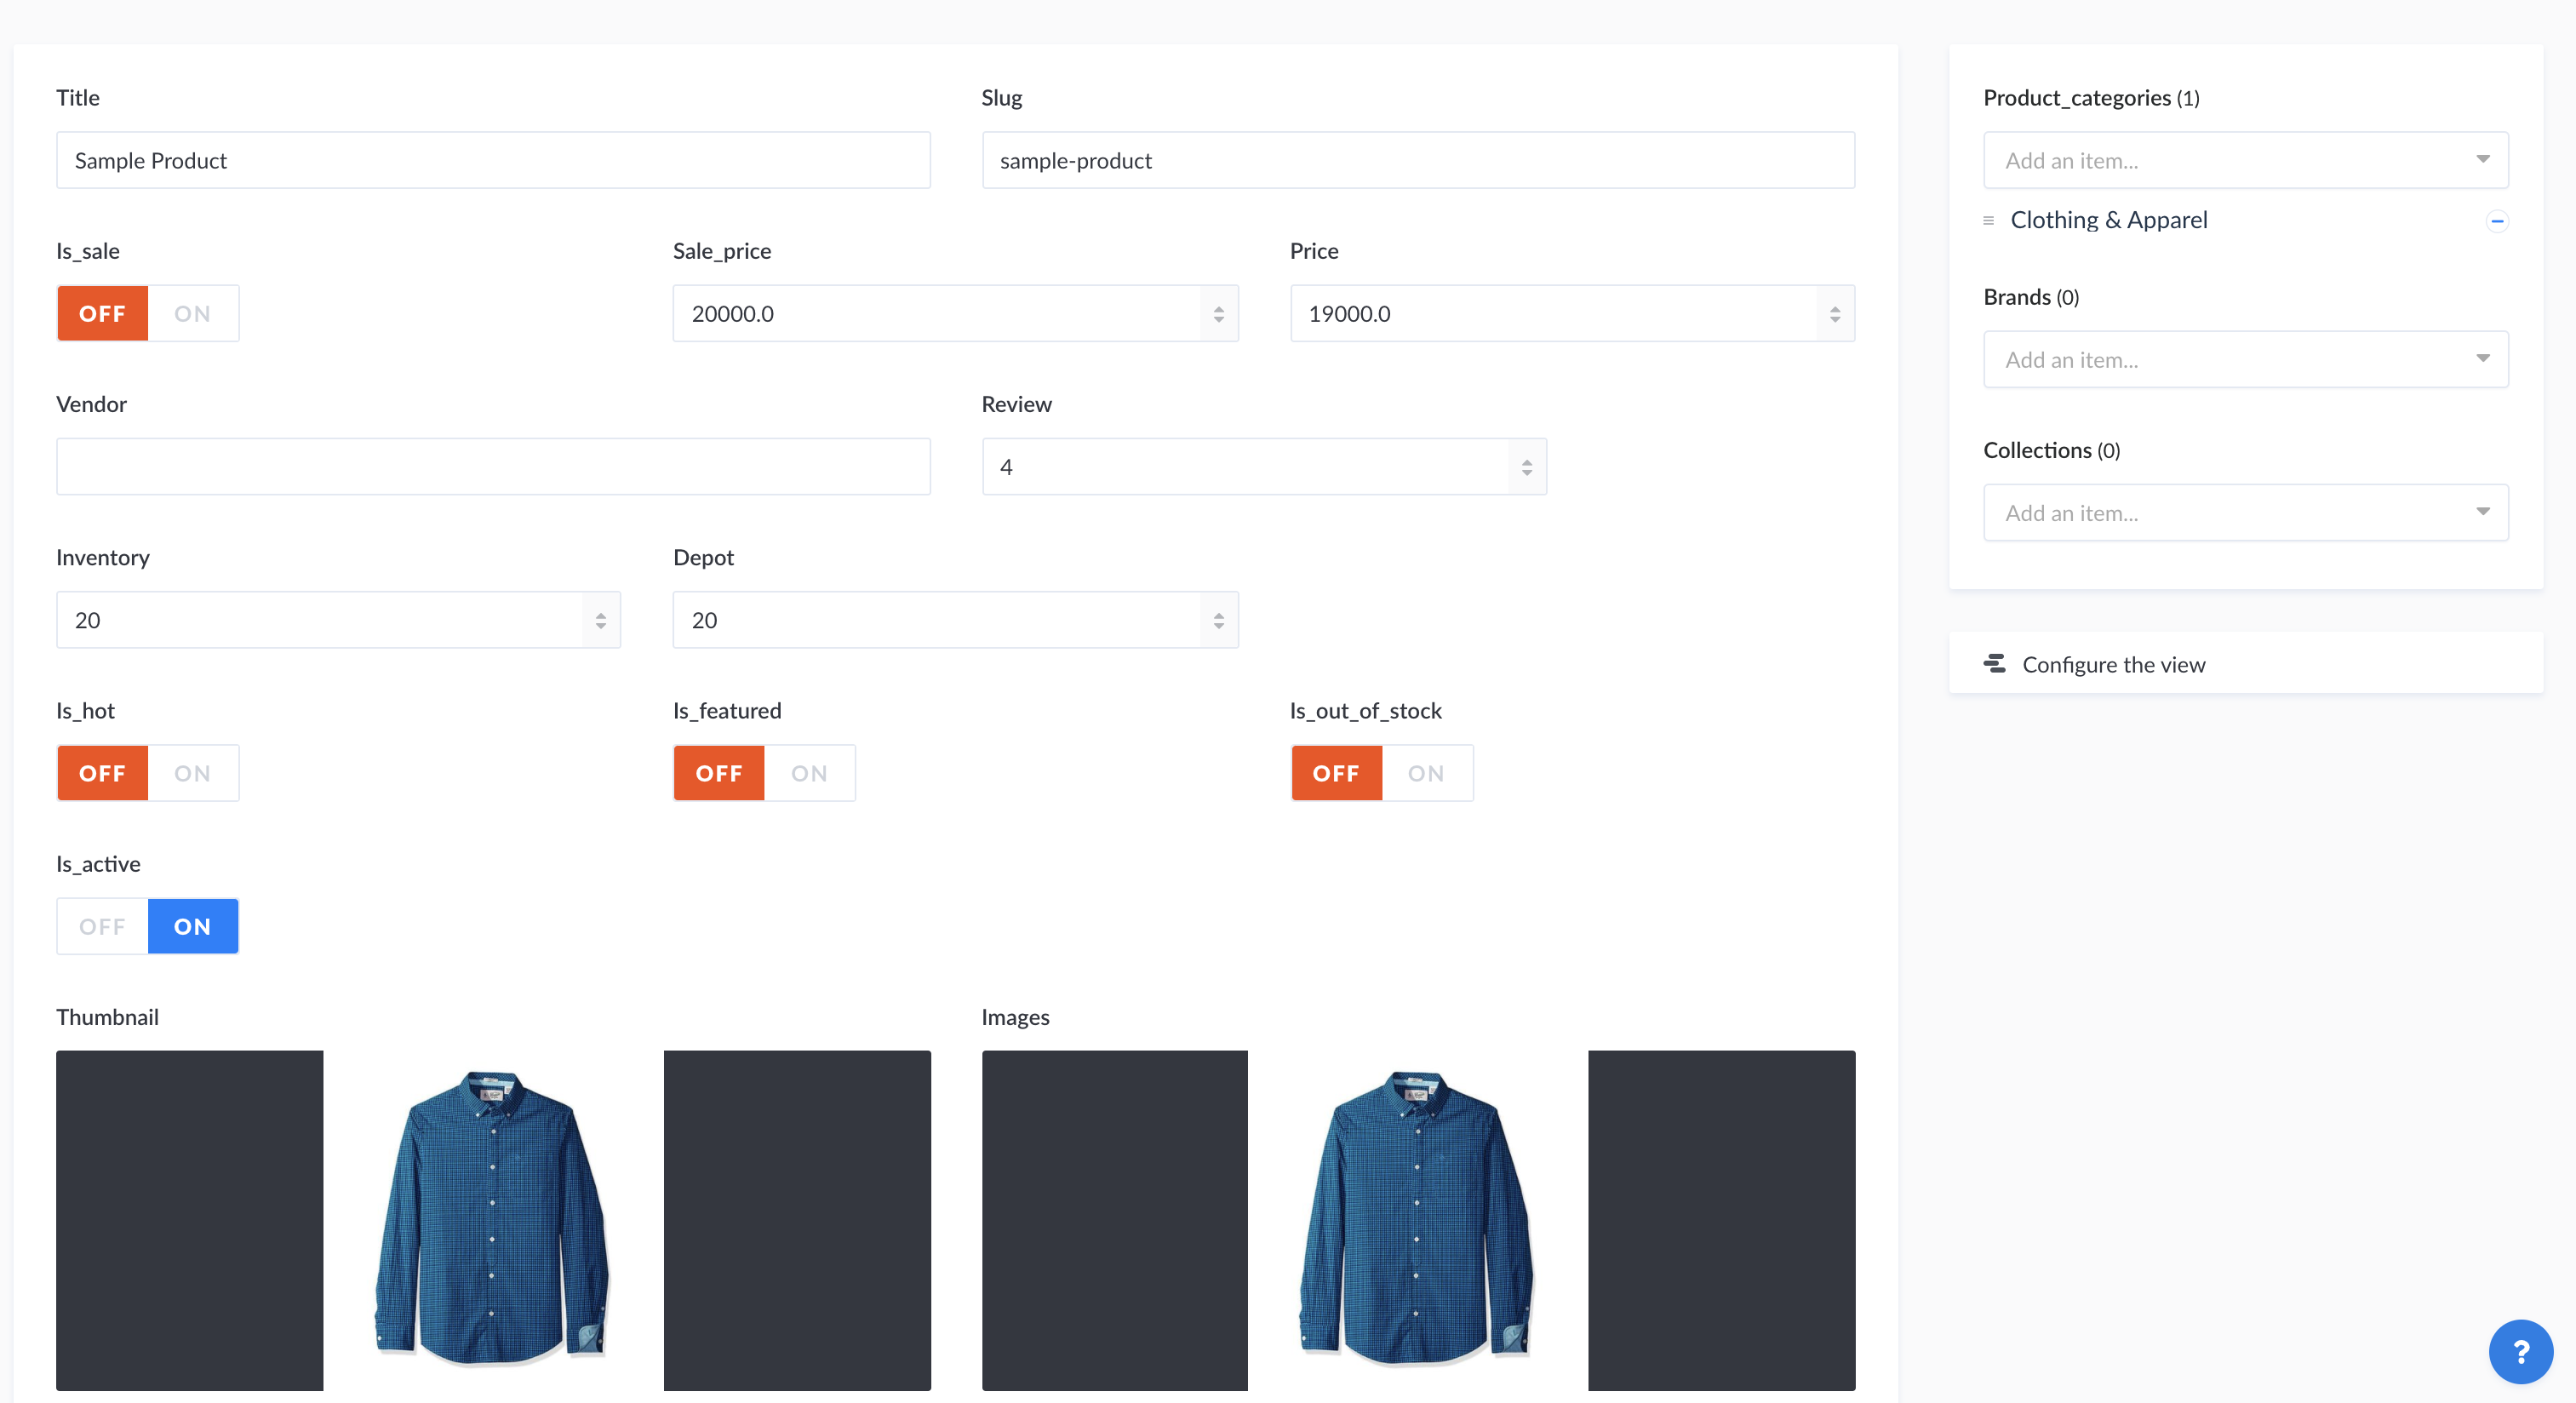
And the final result would look like this:

Continue creating as many entries as you want that you would like to see on your app.
4. Allow access
When you are creating a content type, Strapi created a few set of files located in api/your-content-type-name. The find route is available at http://localhost:xxxx/your-content-type-name or http://your-site-url.com/your-content-type-name. However, due to Strapi APIS security, any access to those URLs would be blocked by 403 forbidden error. In order to let the app access your data, follow those steps:
- Navigate to the Settings then Roles & Permissions
- Click on the Public role
- Tick the
find,findoneandcountcheckboxes of the available routes - Save.
Important: do the same thing for the authenticated role.
Now go back to, for example, http://localhost:xxxx/products or http://your-site-url.com/products . At this point, you should be able to see your list of products.
5. Database setup
There are several choices for setting up a database for your Strapi application, please refer Strapi Database Docs and pick whatever fits you the most.
That’s all 😊