Firebase Realtime Chat
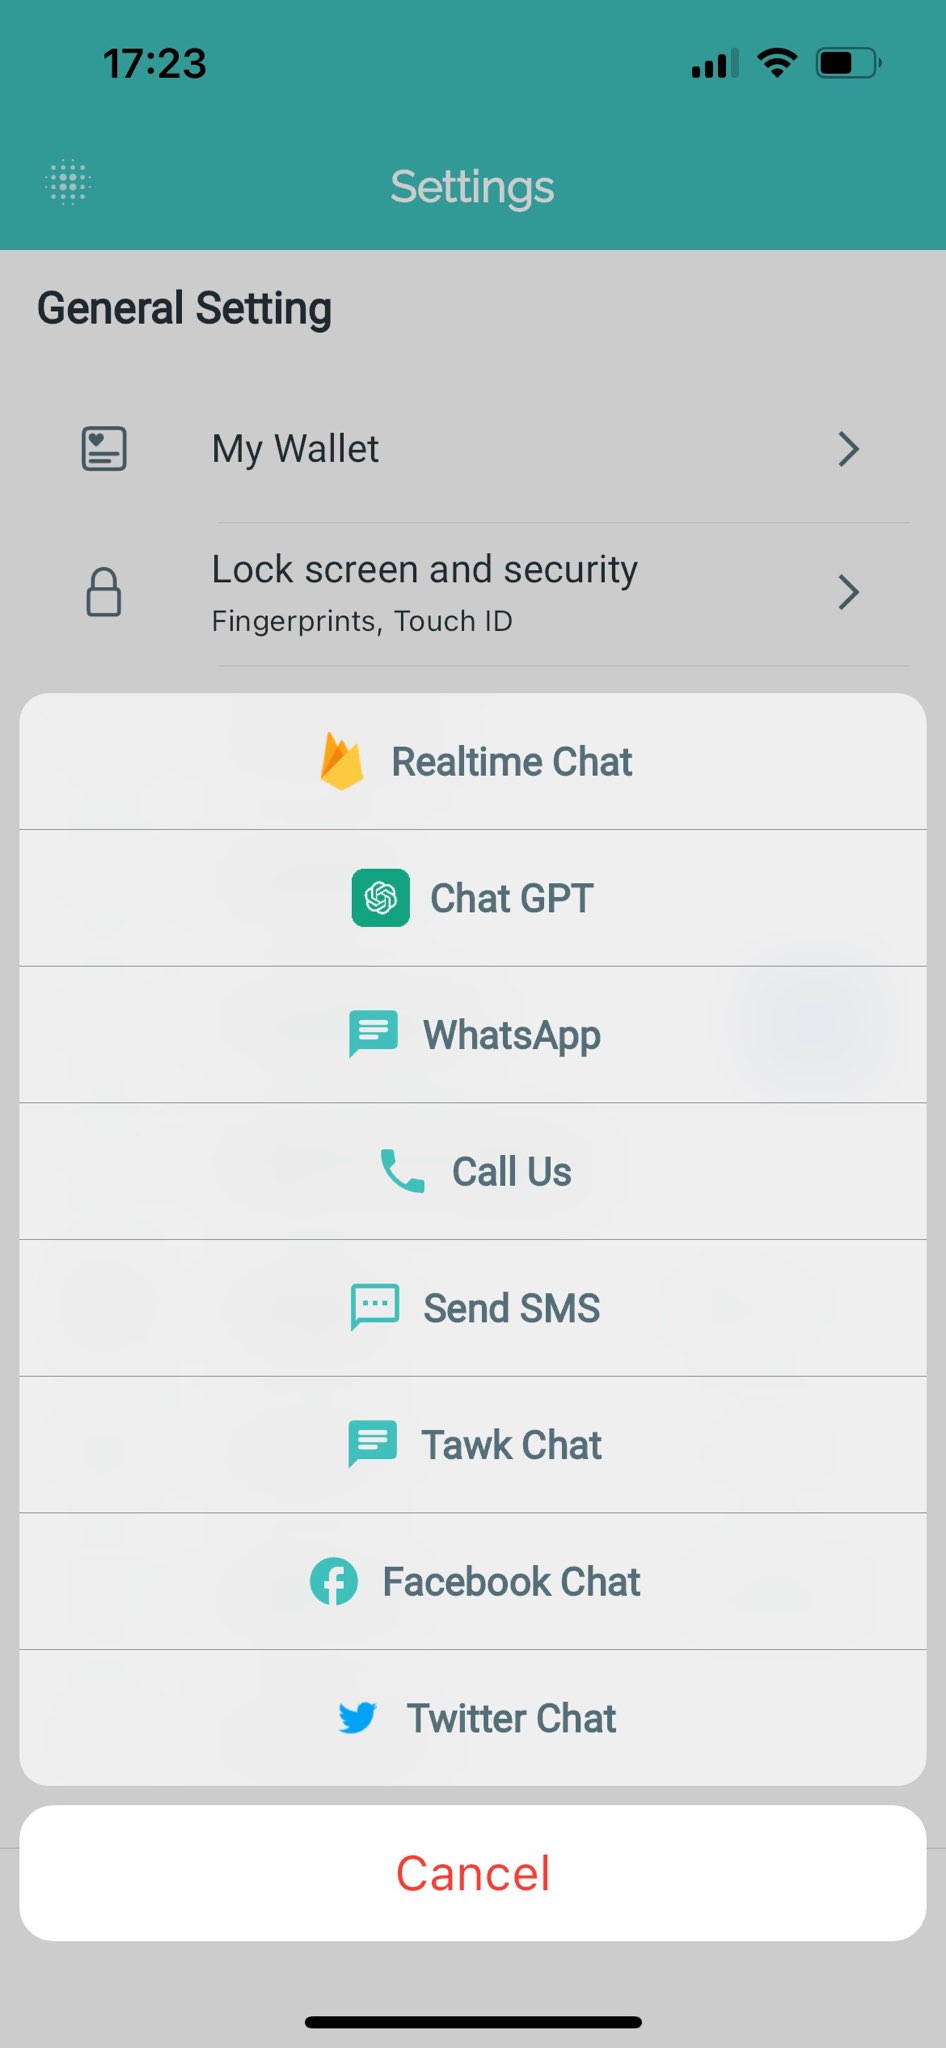
This Realtime Chat feature helps to chat between the Vendor and the Client. When you click on the "Realtime Chat" item in the Smart Chat tab, the conversation screen of Firebase Realtime Chat will pop up.
Realtime Chat setup
1. Precondition
Follow this guide Firebase Settings to create your application on Firebase. (Skip this step if you already did)
Then, open your app on Firebase Console, and make sure you complete these steps below:
- Add your
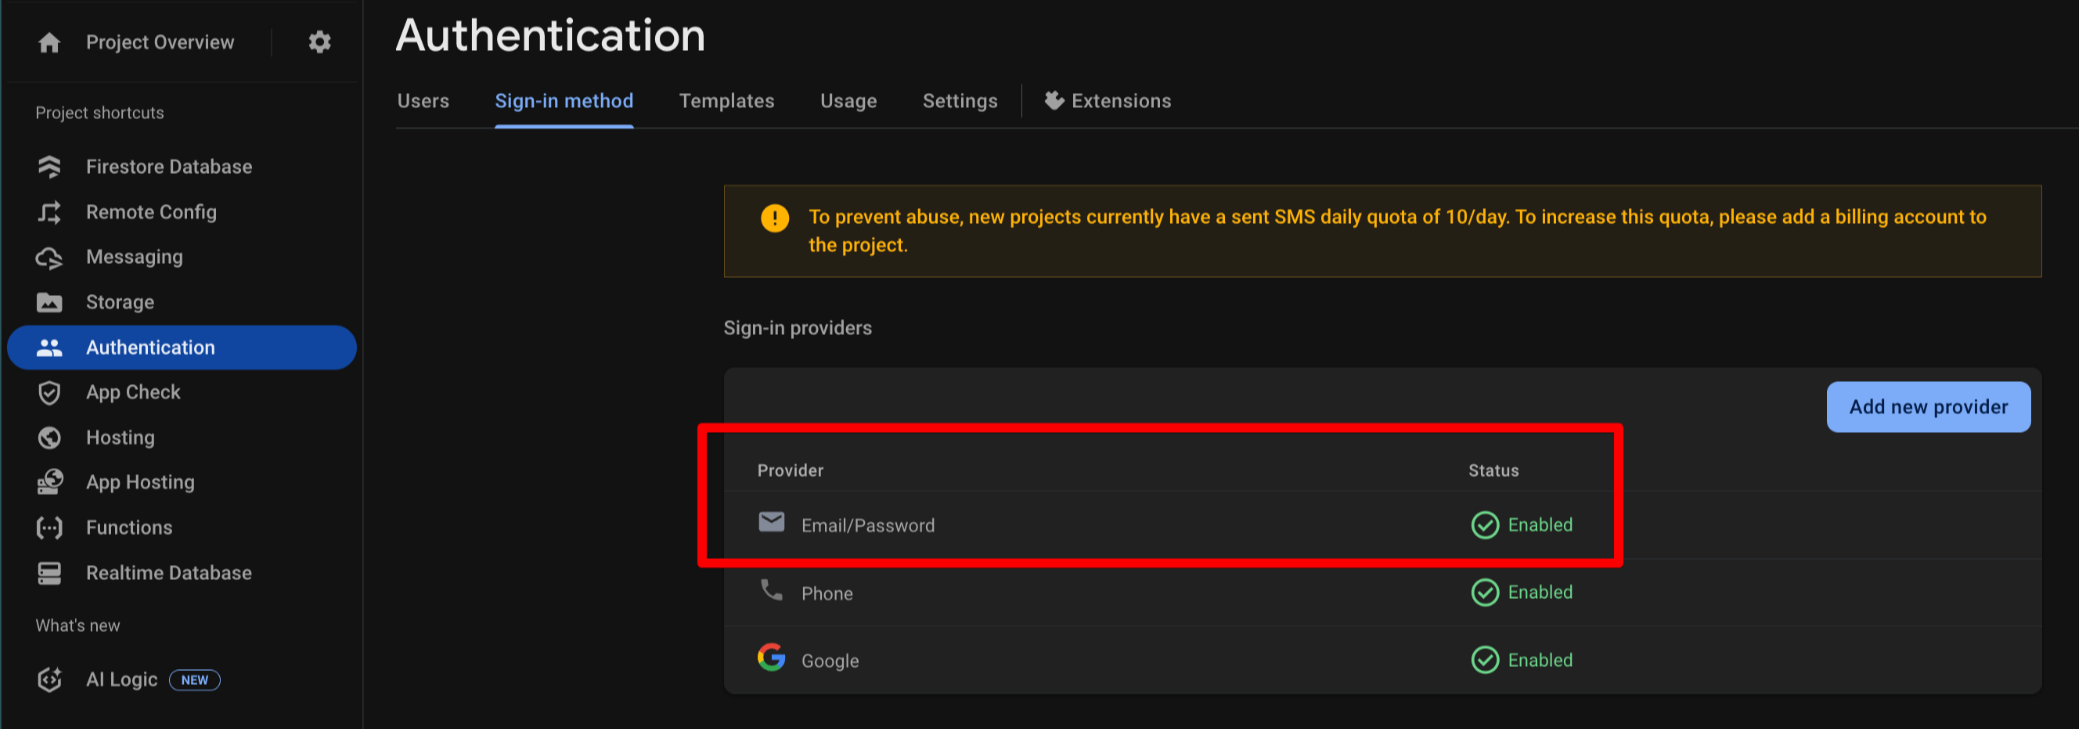
SHA Keysto the Android app in Project Settings - Enable at least
Email/Passwordoption in Authentication → Sign-In method
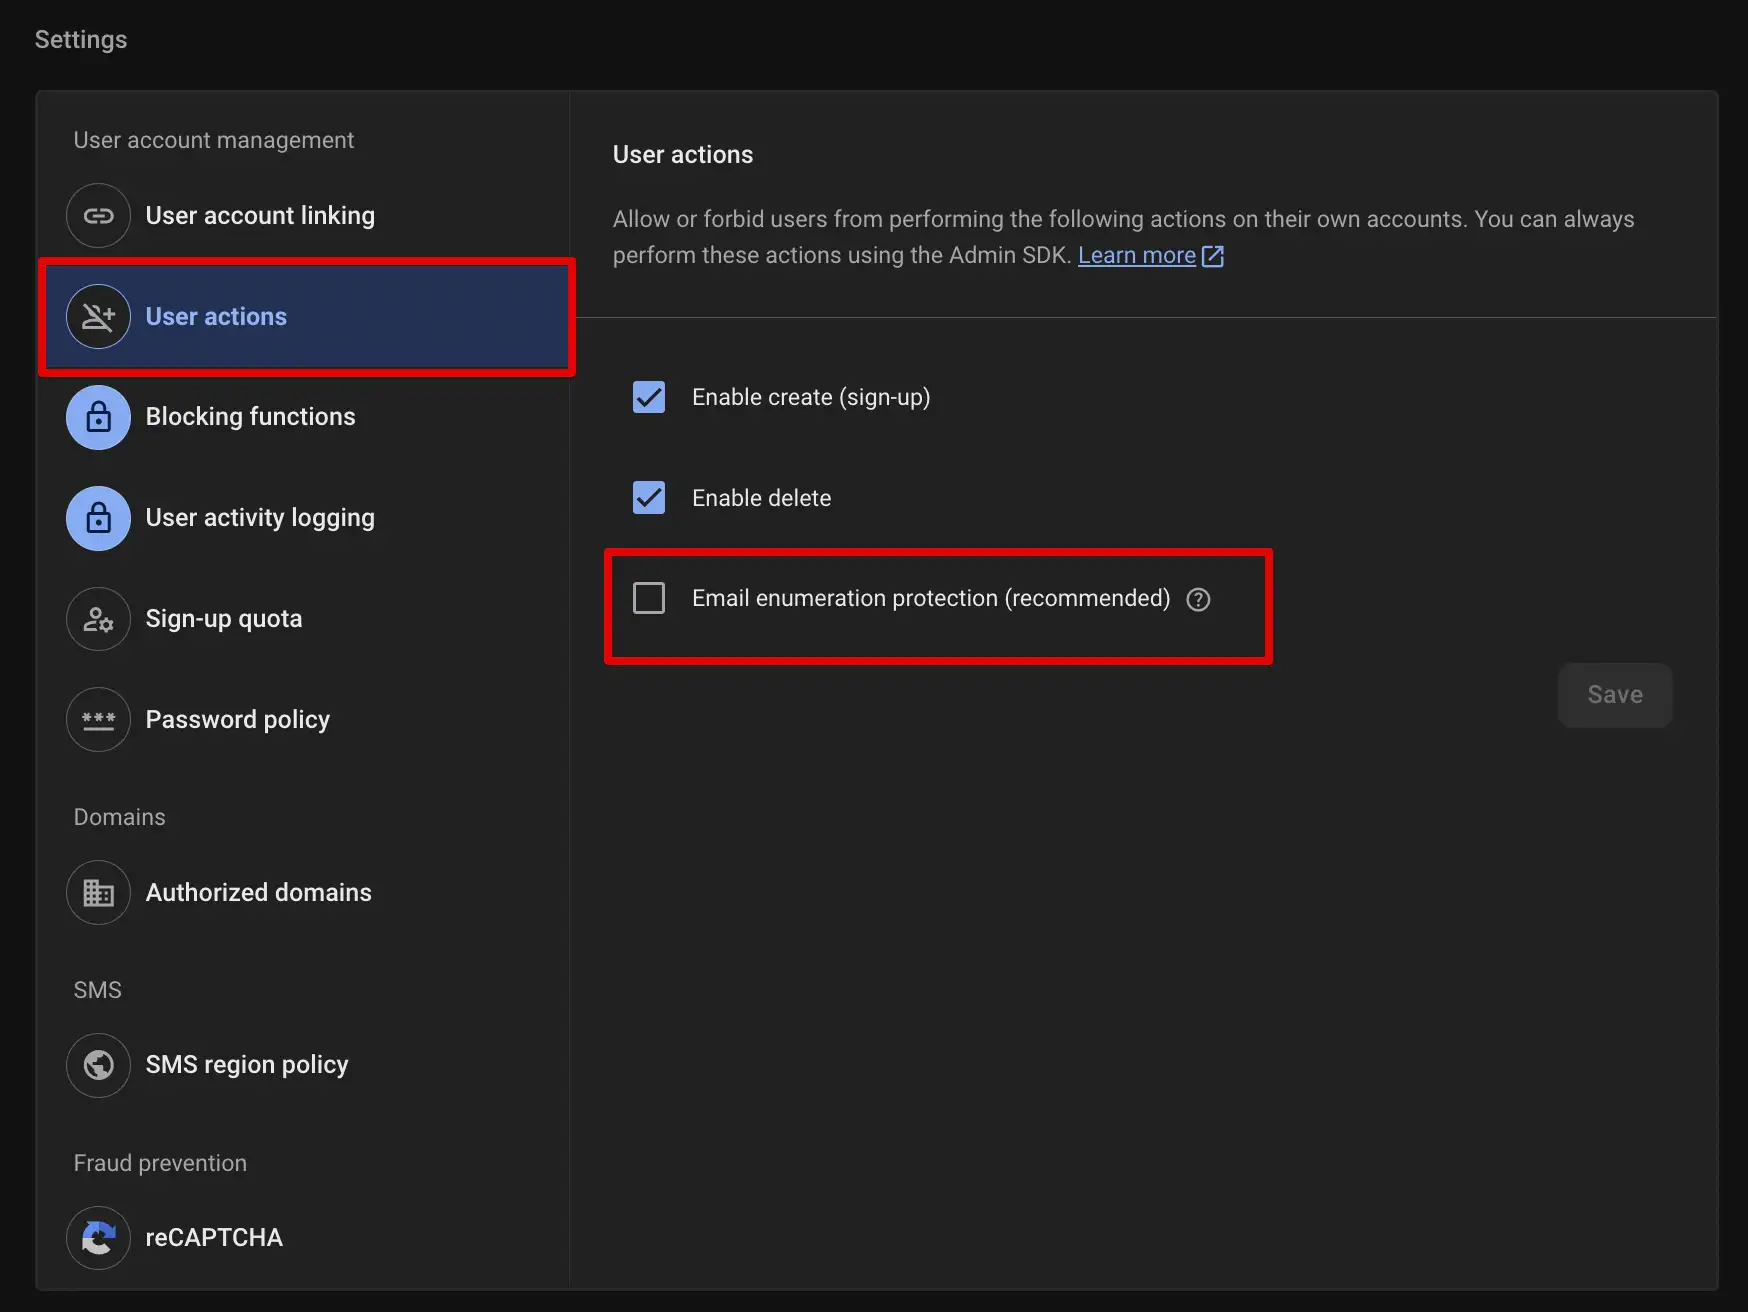
- Disable
Email enumeration protectionoption in Authentication → Settings → User actions
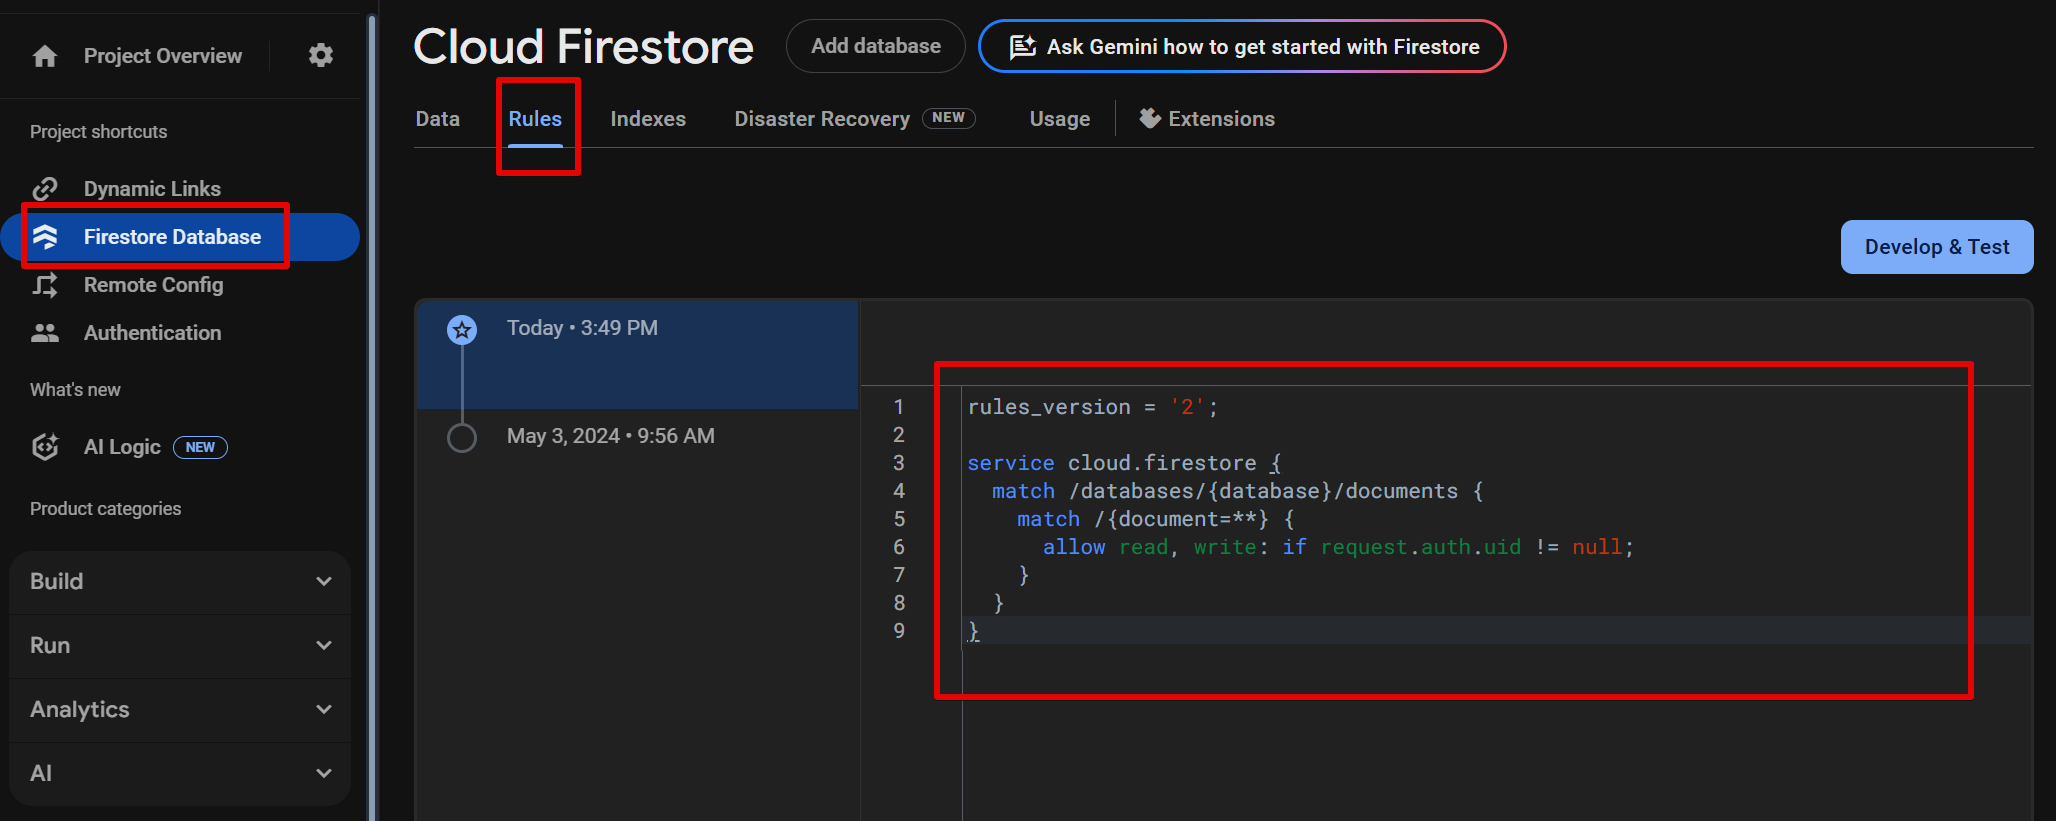
- Go to Firestore Database → Rules and set the rule as follows:
rules_version = '2';

service cloud.firestore {
  match /databases/{database}/documents {
    match /{document=**} {
        allow read, write: if request.auth.uid != null;
    }
  }
}
2. Configuration
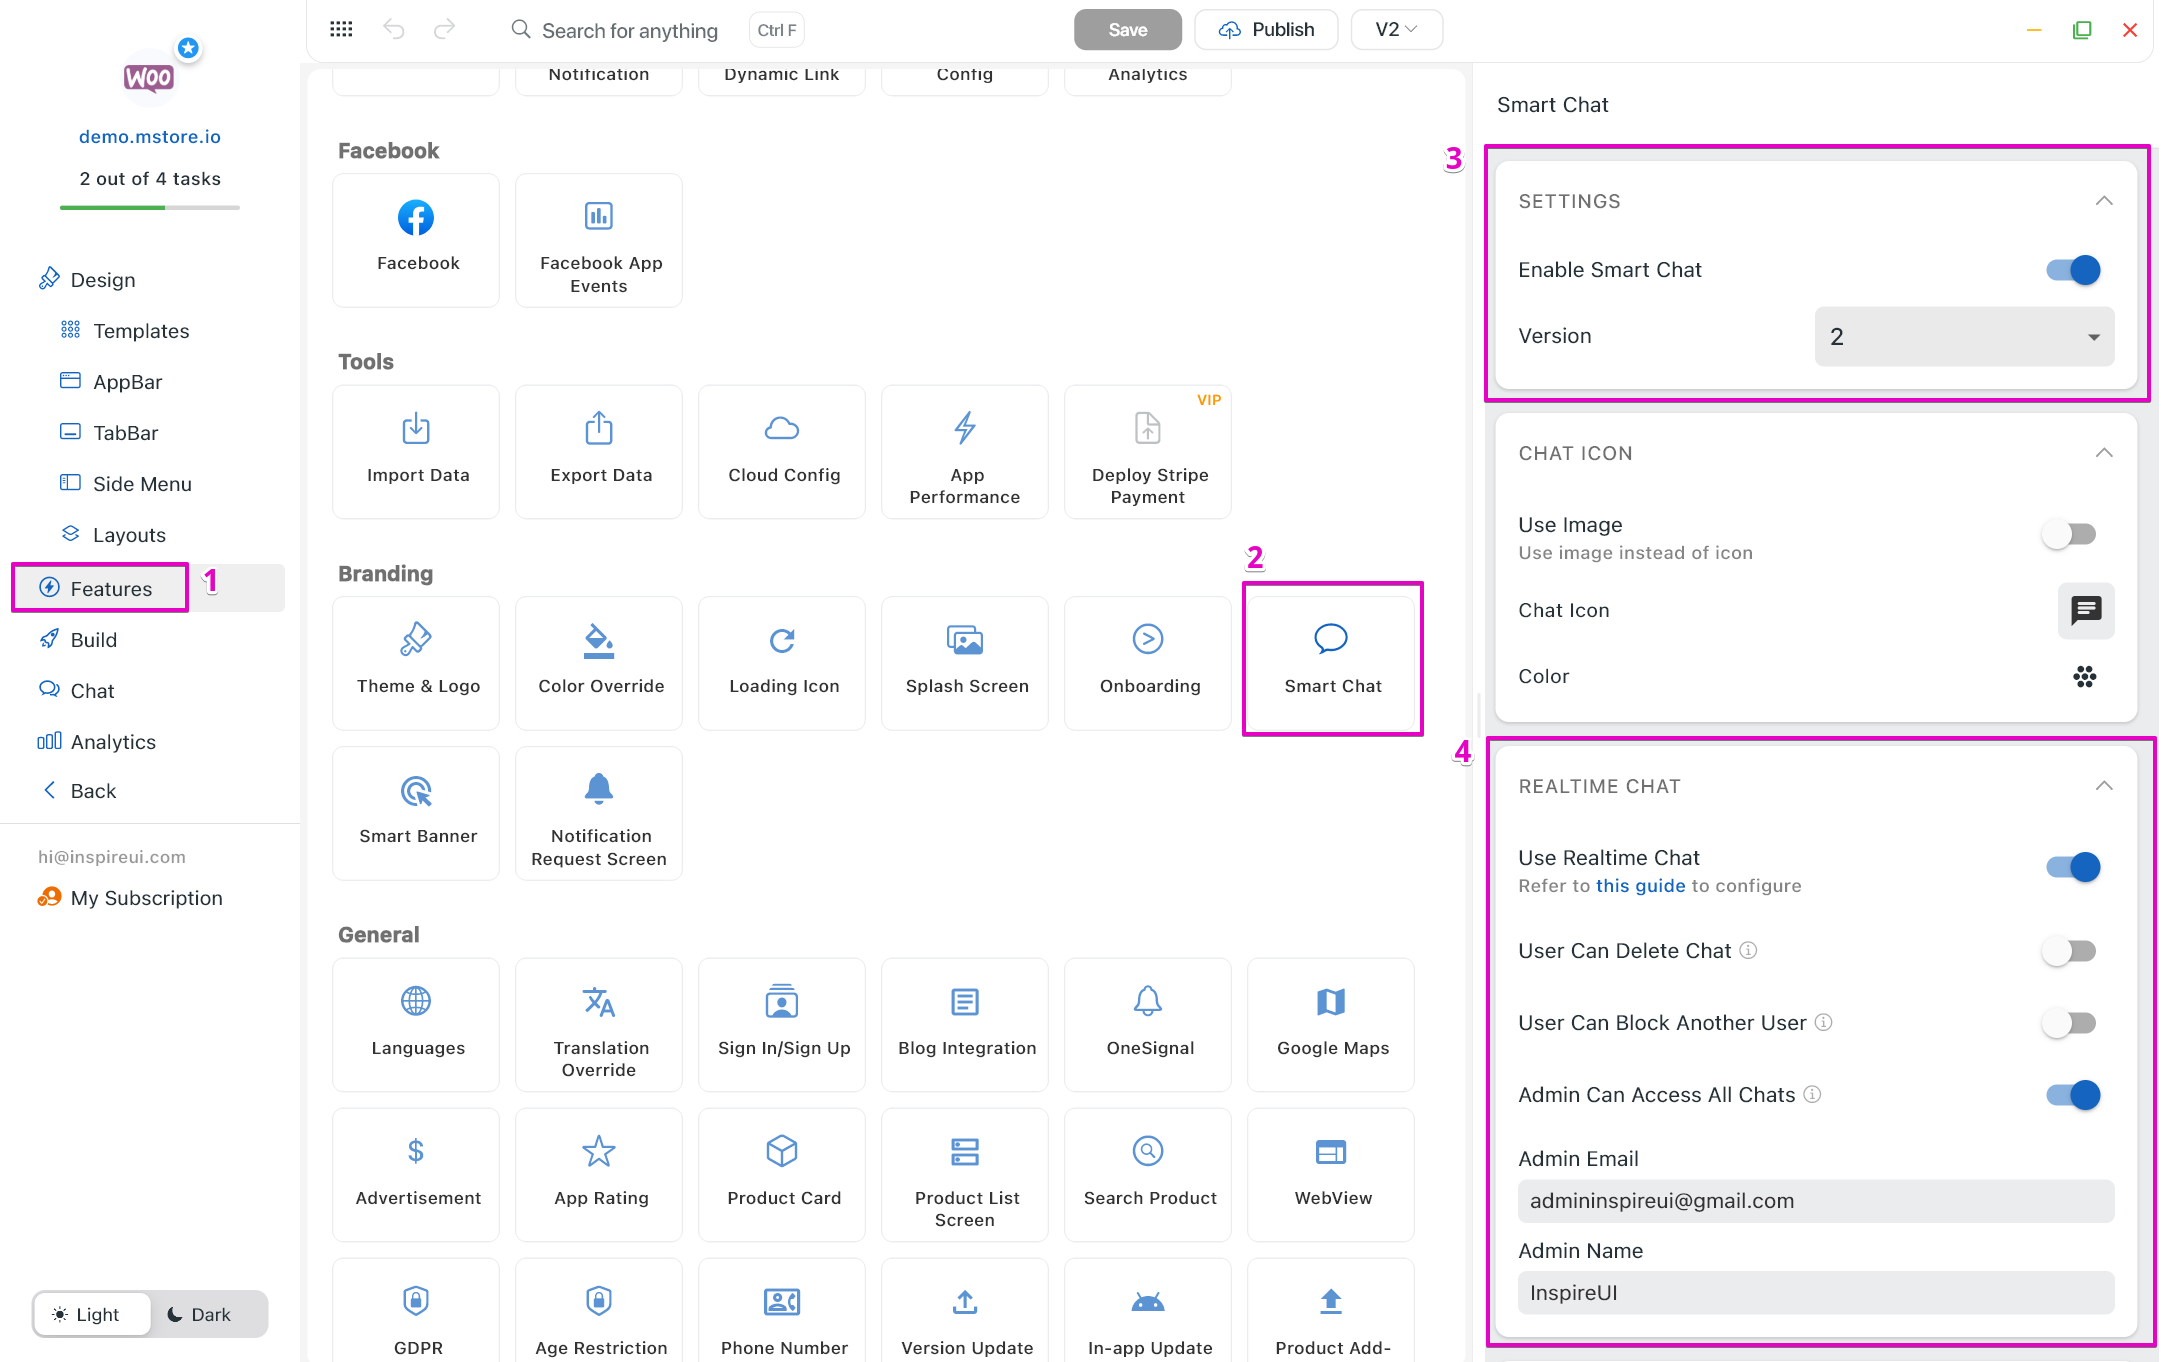
- Go to
Features>Smart Chat> turn onEnable Smart Chat. - Enable
Use Realtime Chat. - Enable/disable
User Can Delete Chat,User Can Block Another User, orAdmin Can Access AllChats. - Input
Admin EmailandAdmin Name.
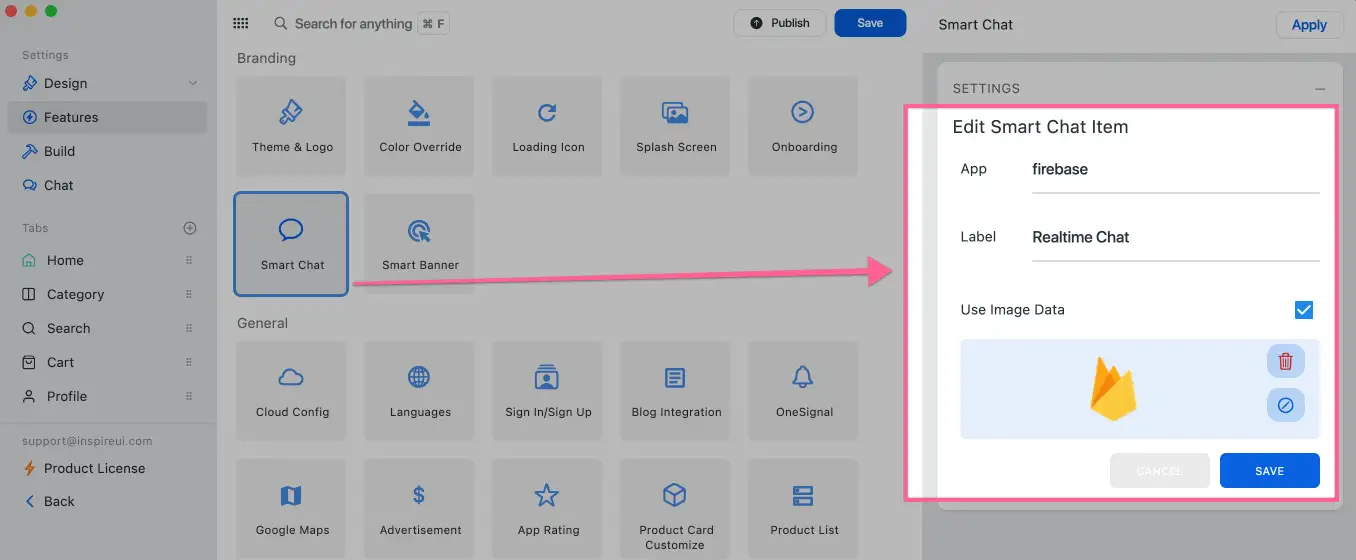
While creating a new Firebase chat option, you can input "firebase" in App to activate it:
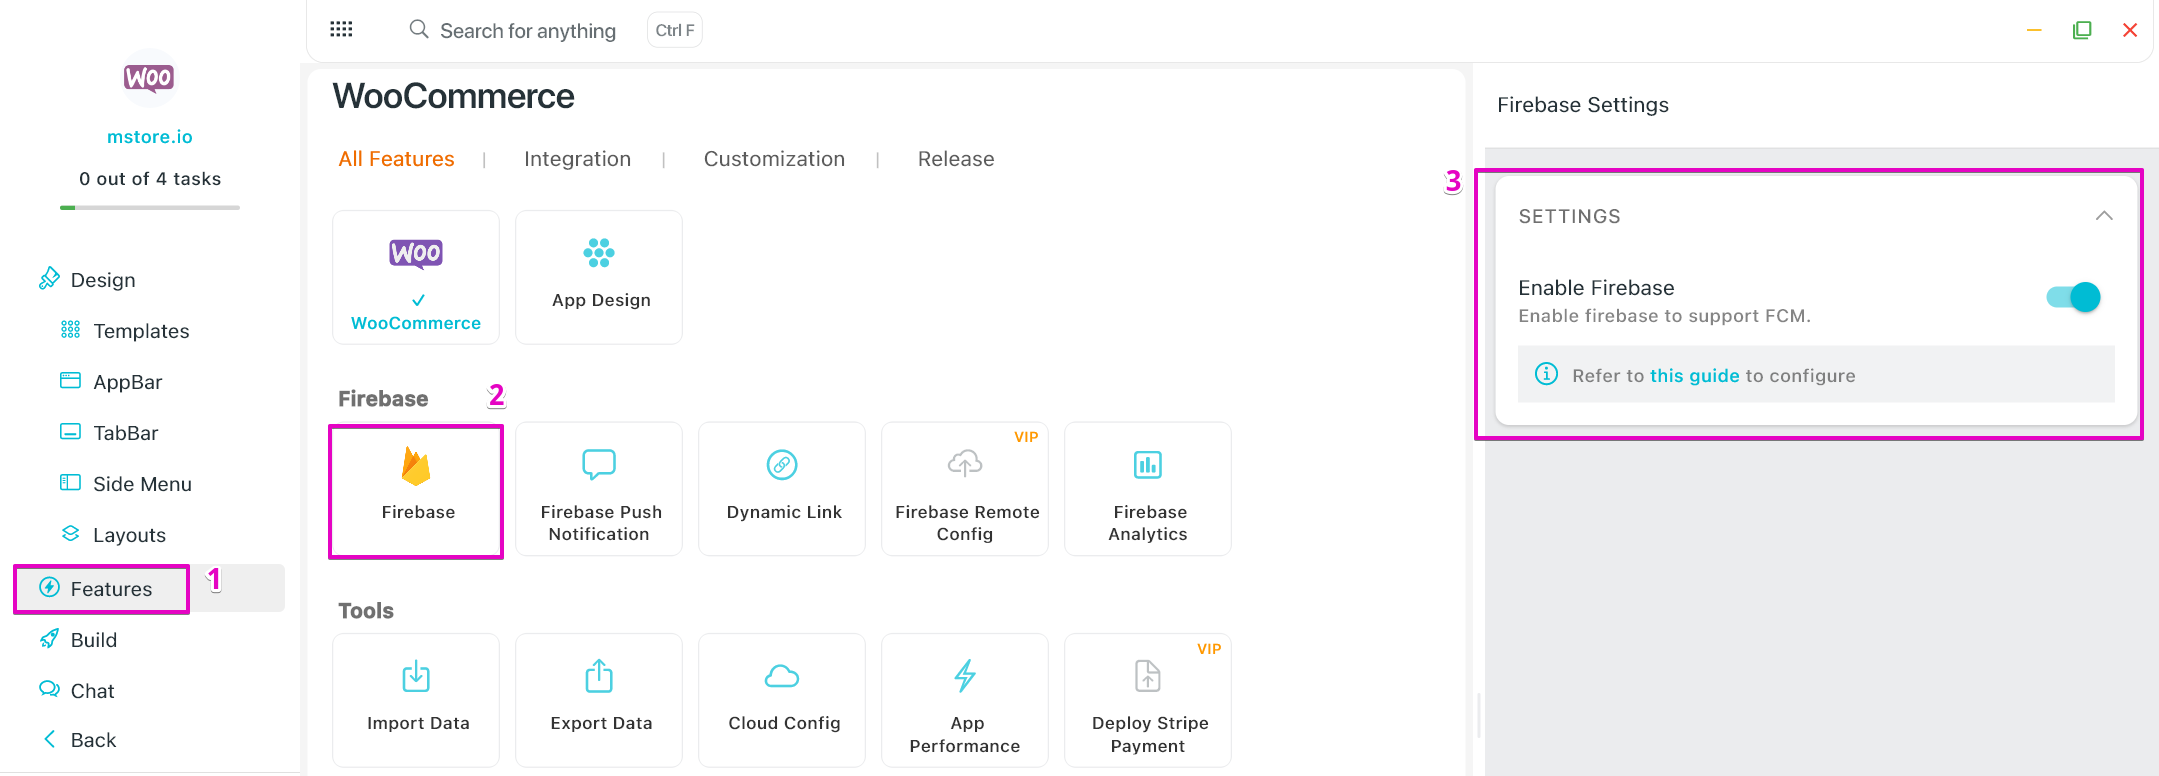
Remember to enable Firebase in Features:
If it is still not able to turn on this feature , please double-check the following instructions: Enable Cloud Firestore at your Firebase project by following Cloud Firestore Get Started Docs until Step 5.
Your Admin Email will be the default email that all of your users would communicate with. By signing in using Admin Email , you would see the chat list containing all of the messages from your customers when choosing Realtime Chat at Smart Chat
3. Result
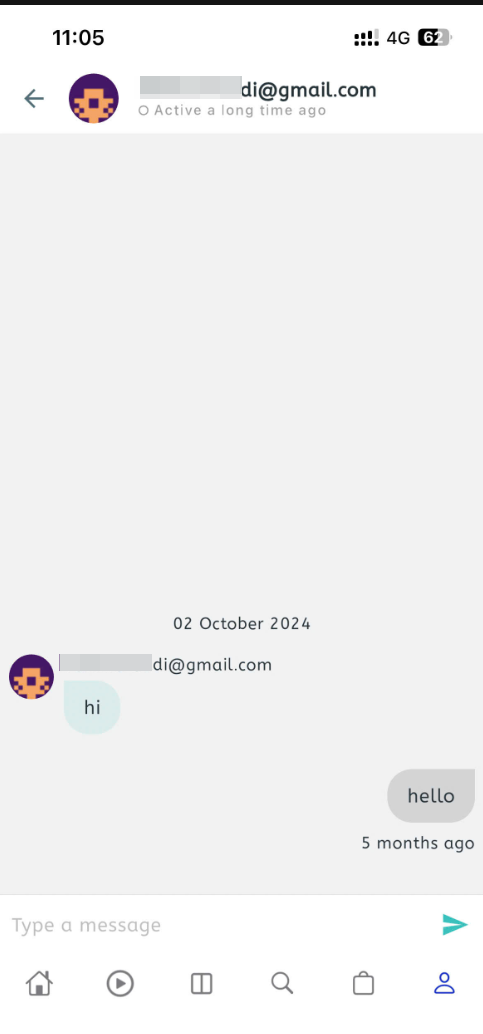
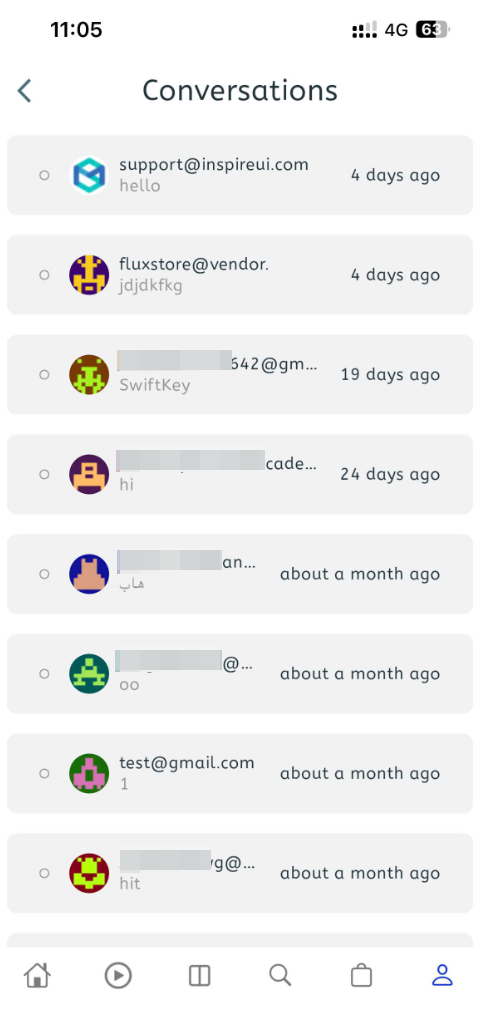
The result will be like this:
- Using Firebase Smartchat as a normal account:
- Using Firebase Smartchat as the Admin account:
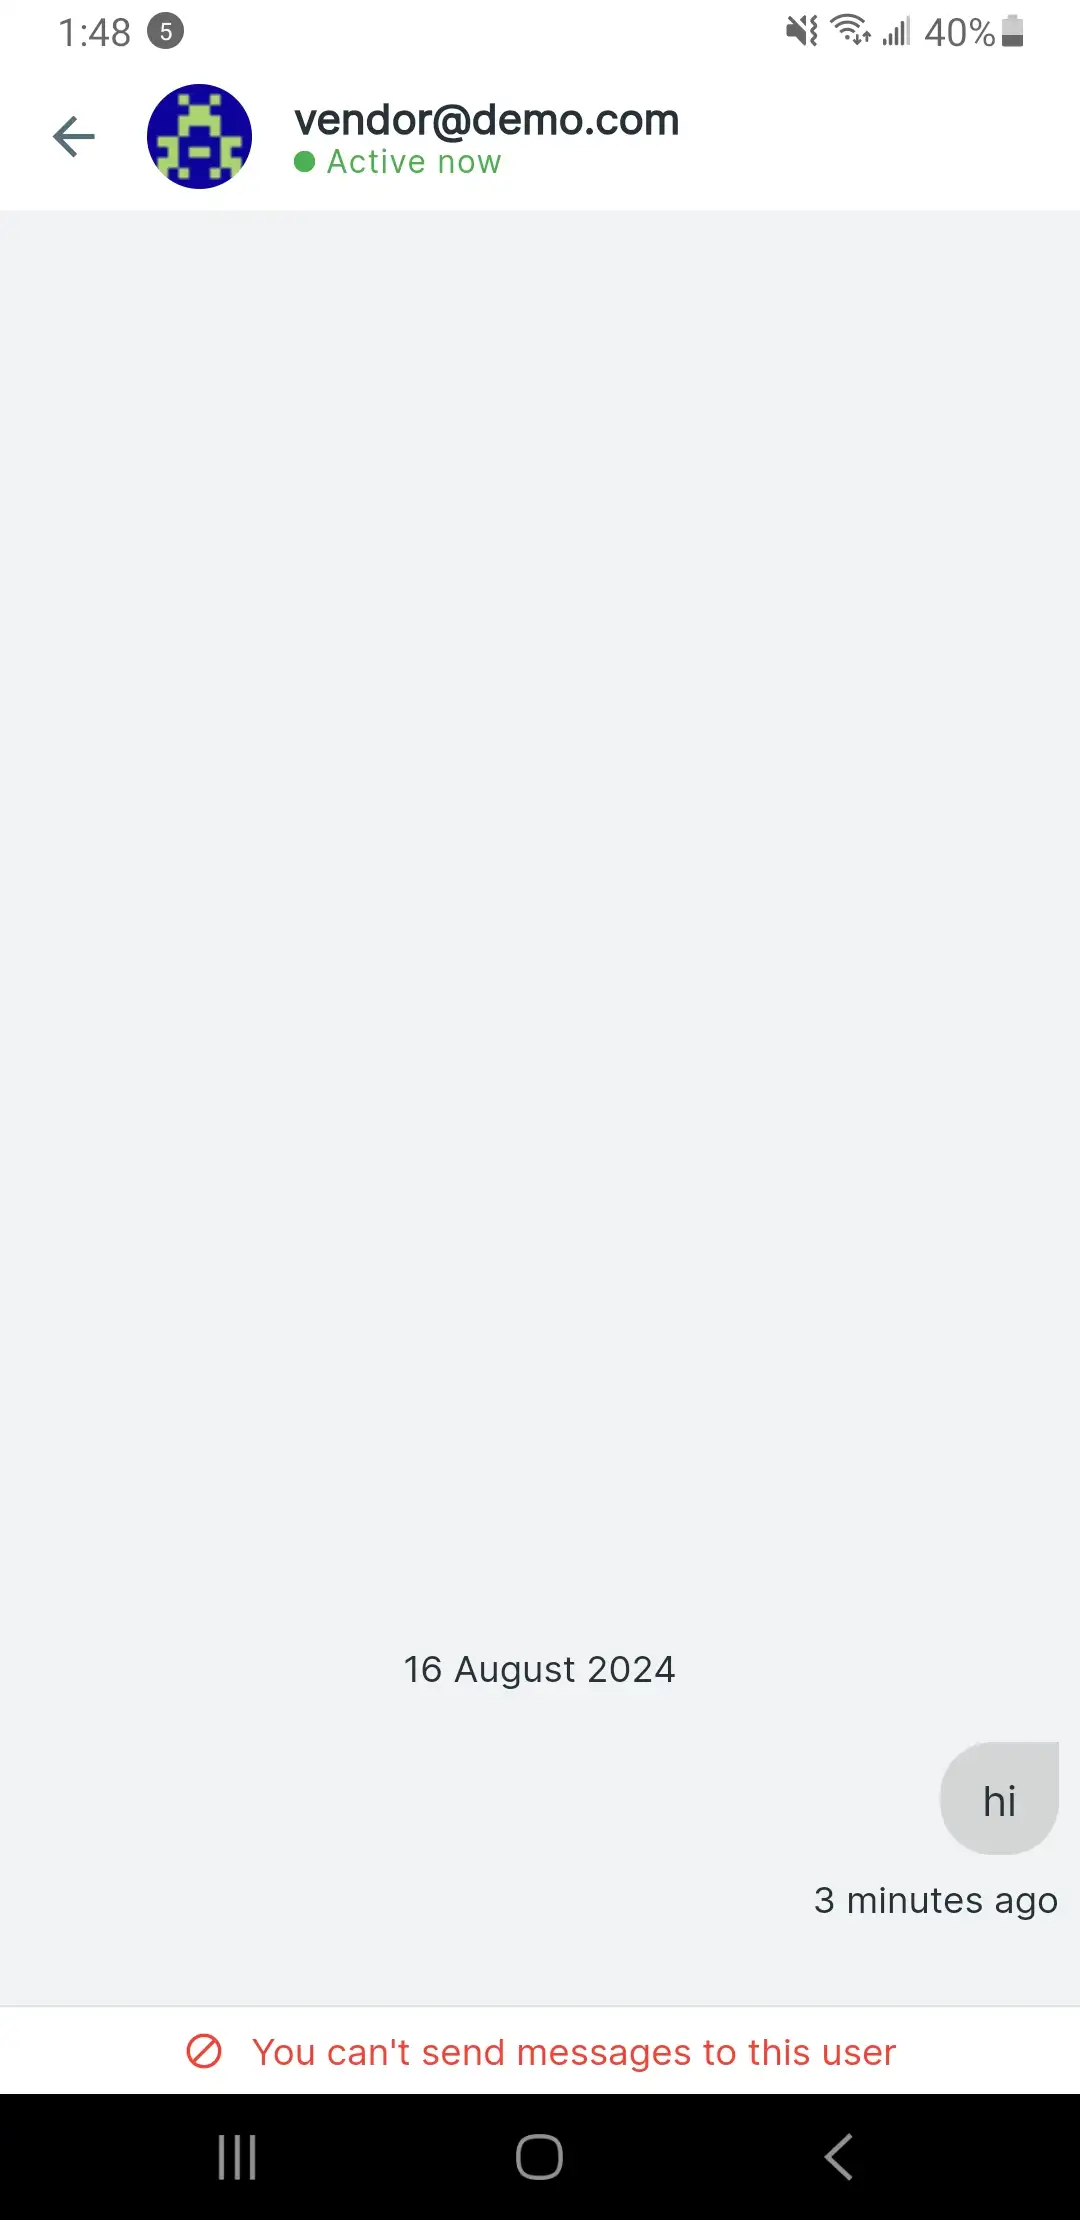
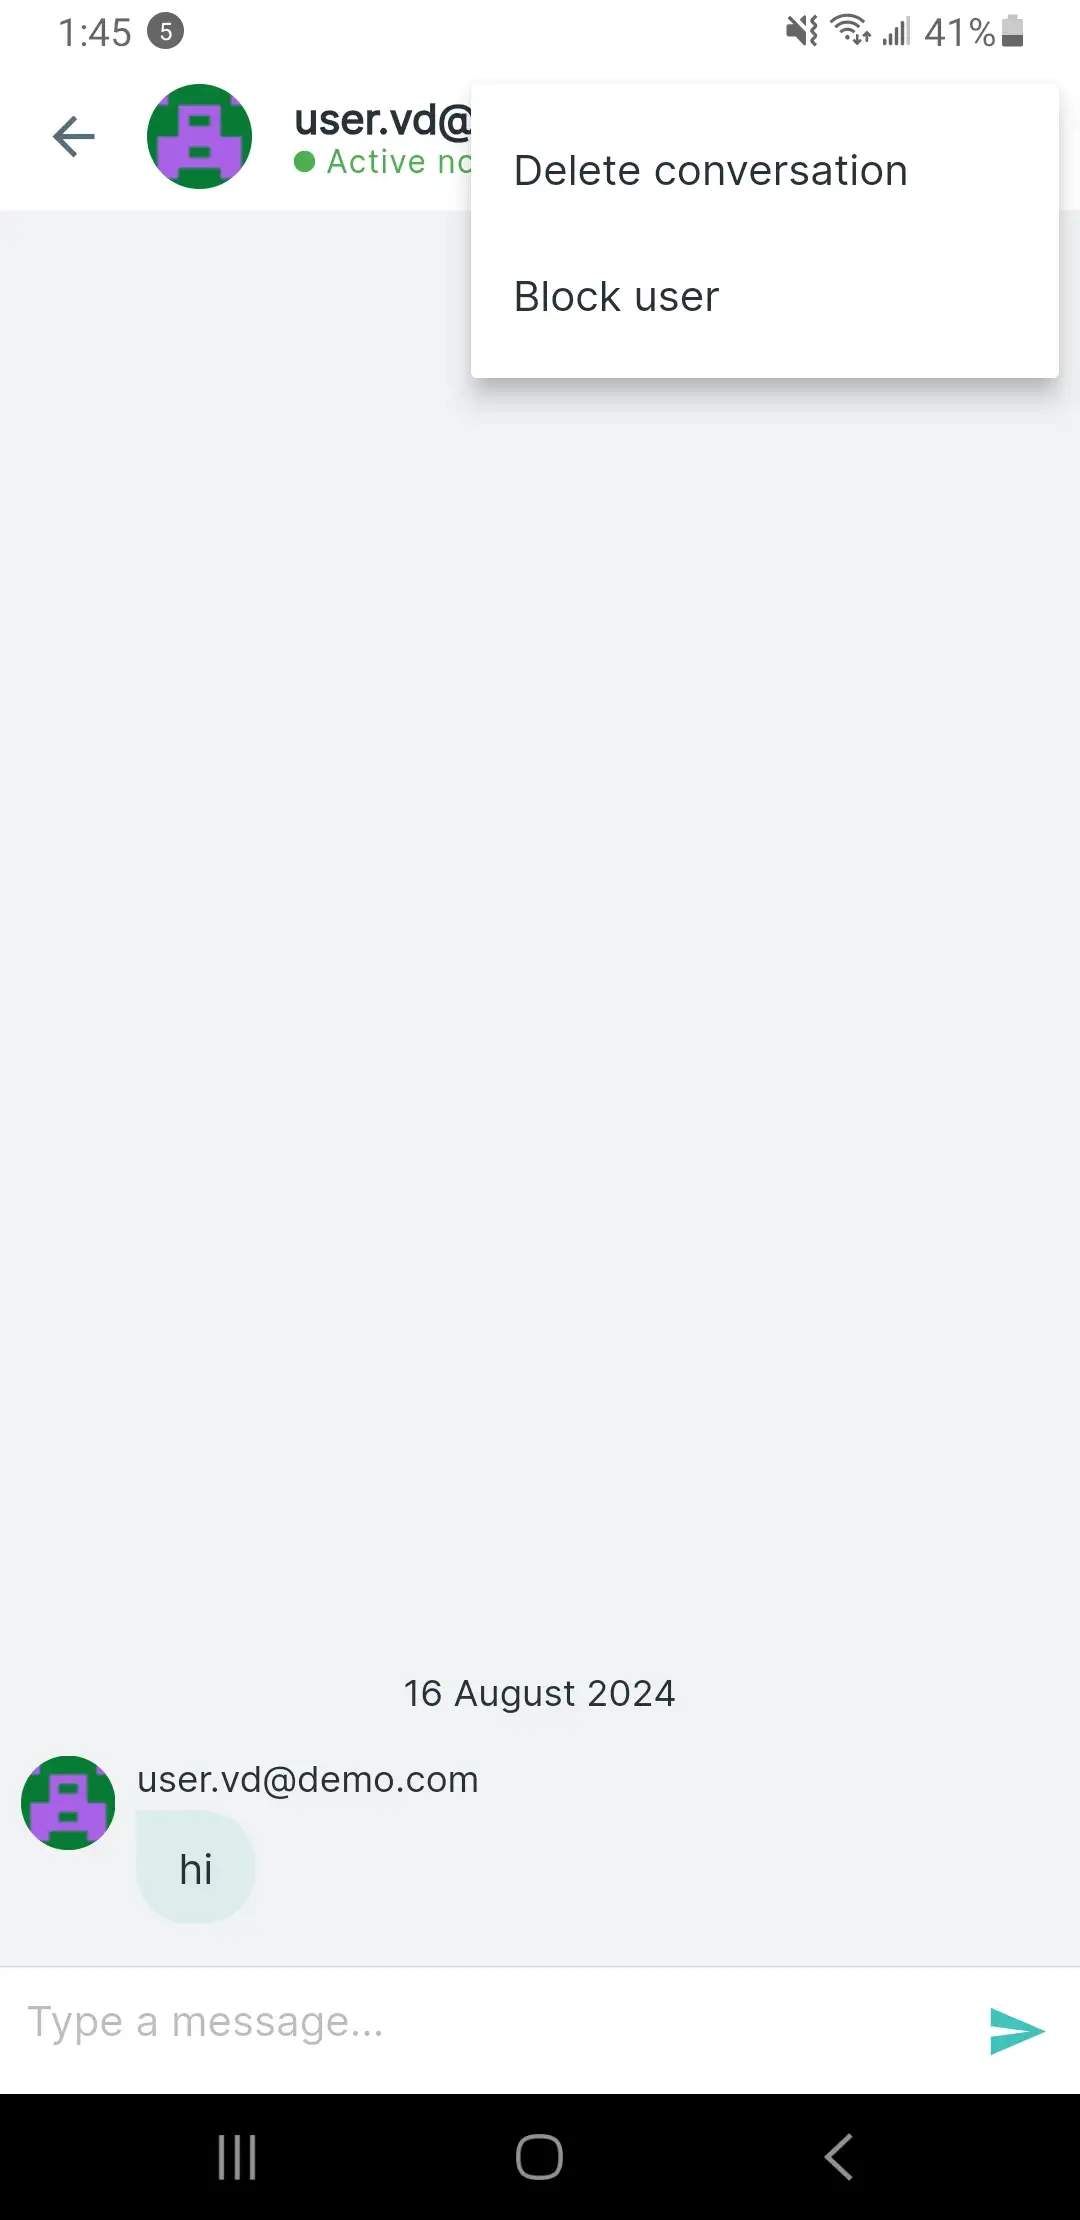
- Users can block other users:
- Users can delete the entire chat thread:
Message Notifications
When users chat with a vendor using Firebase Realtime Chat, this feature allows notifications to be displayed on the device when messages arrive whether the app is running in the background or completely shut down, facilitating quick responses from users, vendors, and administrators, ensuring Don't miss any messages.
Method 1 (recommendation)
Please follow the detailed guide for Firebase Notification Realtime Chat at this LINK.
Method 2
Precondition:
- Follow this guide Firebase Realtime Chat
- This feature requires Billing enabled. See detail - https://cloud.google.com/billing/docs/how-to/modify-project
Please follow these steps to set up:
- Go to the Cloud Functions overview page in the Google Cloud console - https://console.cloud.google.com/functions/list
Make sure that the Google Cloud project to which you want to deploy Cloud Functions is selected.
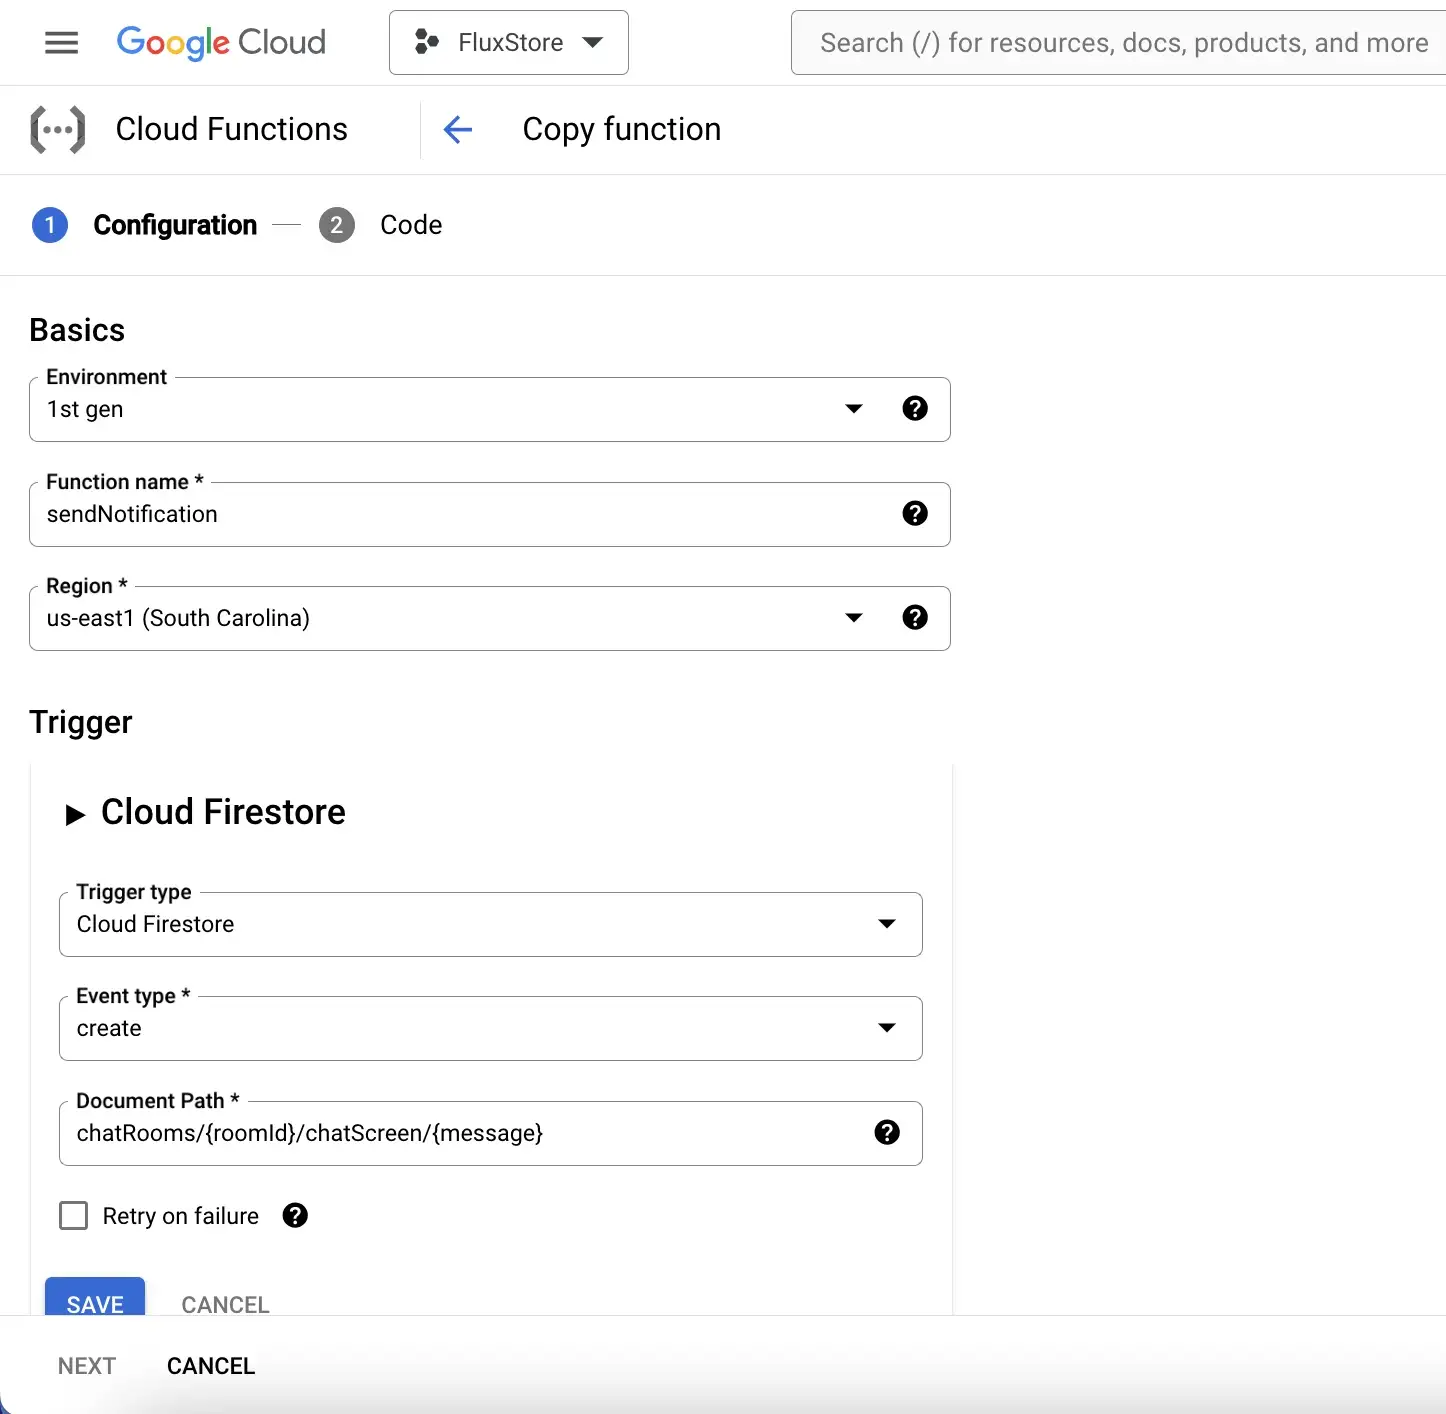
- Click Create function.

- Fill in the information in the fields as shown below:
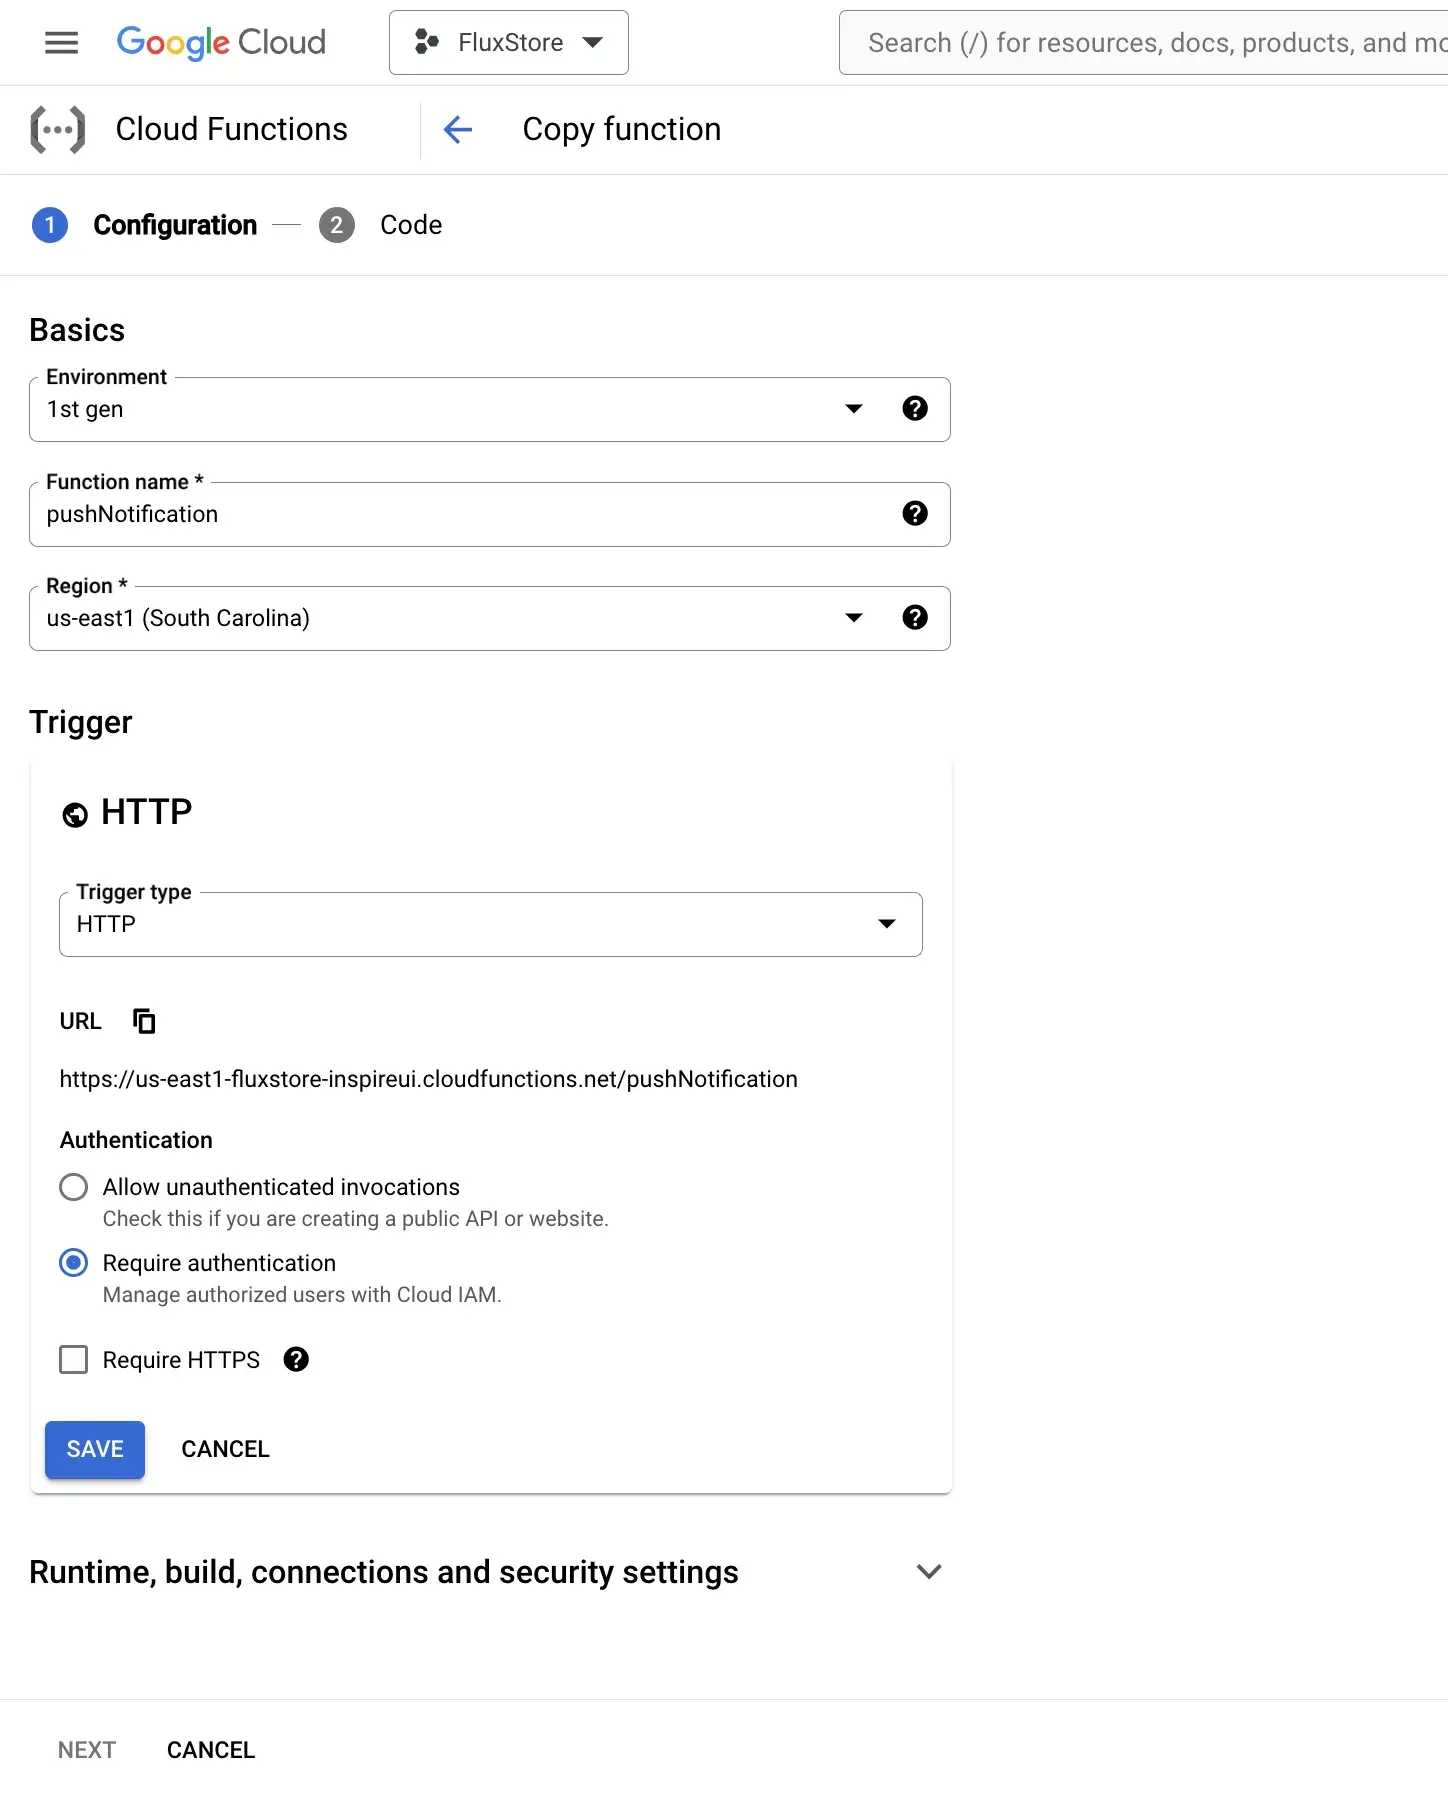
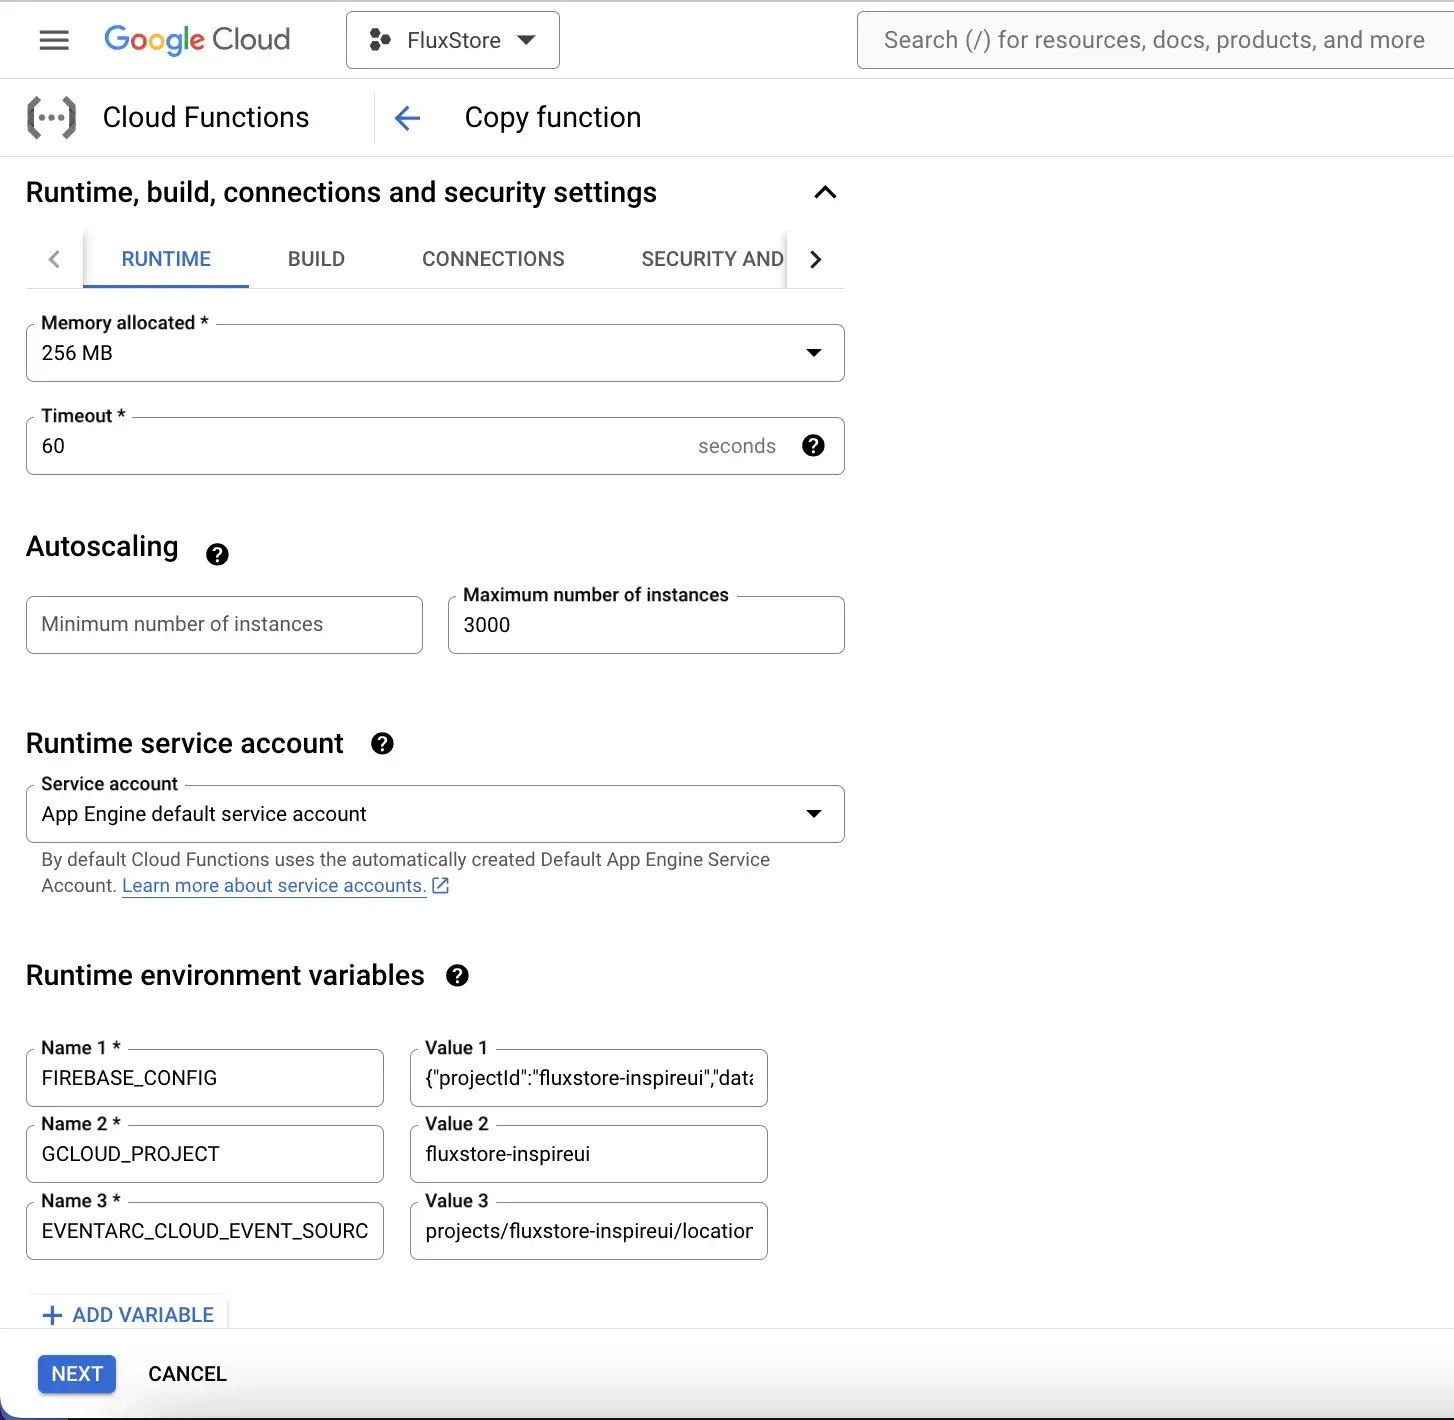
- Click Save then expand the Runtime, build... section at the end of the page for additional configuration and security options.
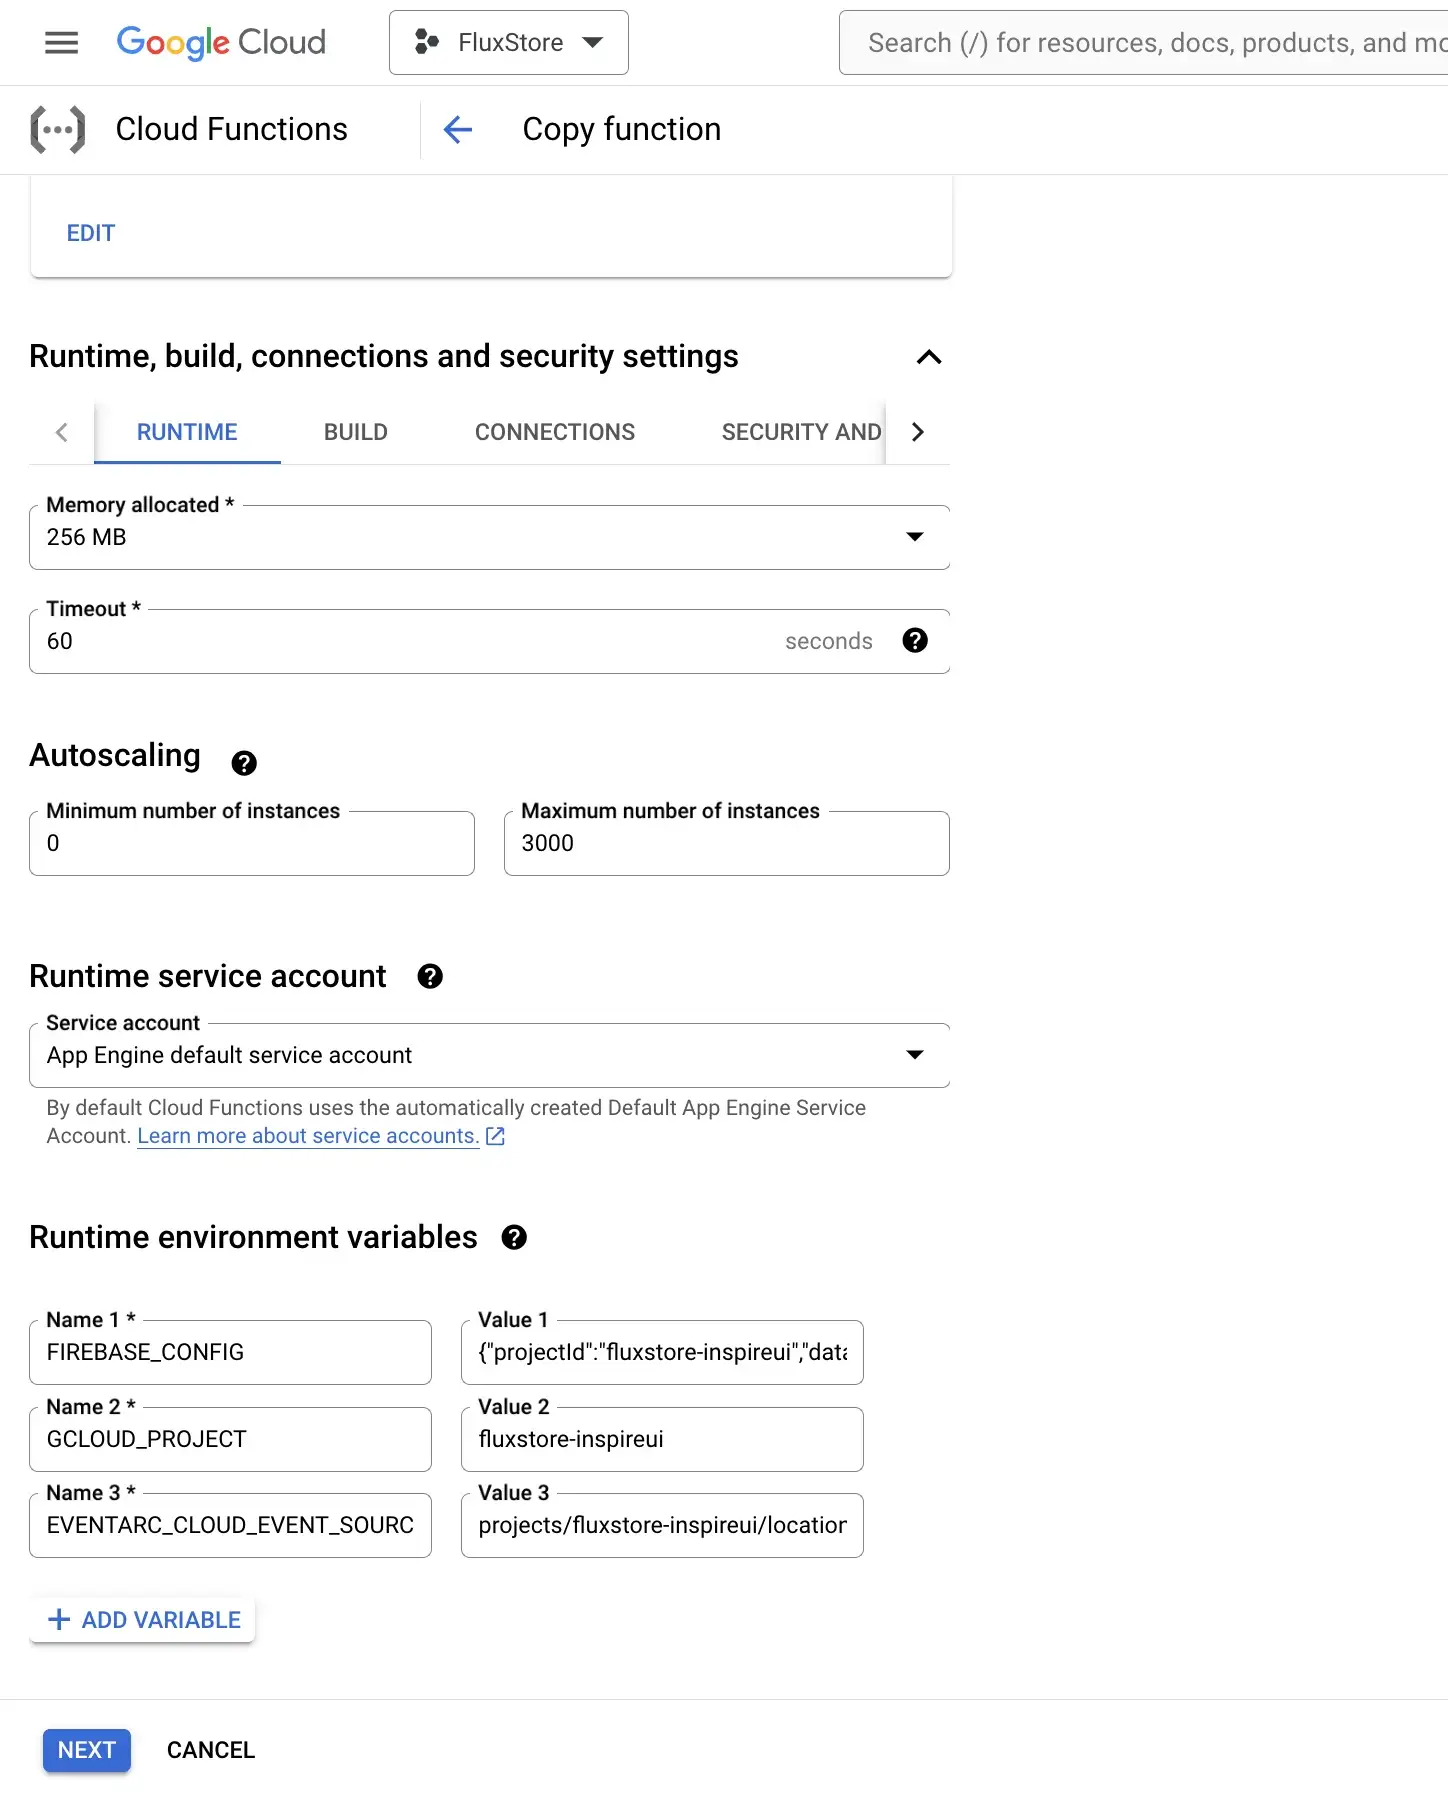
Detail:
Name 1: FIREBASE_CONFIG
Value 1:
{
"projectId": "`https://snipboard.io/H6JDbz.jpg
"databaseURL": "`https://snipboard.io/w6dviT.jpg
"storageBucket": "`https://snipboard.io/gPelmt.jpg
"locationId": "`https://snipboard.io/XlS9mI.jpg
}
Name 2: GCLOUD_PROJECT
Value 2: [Project ID]
Name 3: EVENTARC_CLOUD_EVENT_SOURCE
Value 3: projects/[Project ID]/locations/[region]/functions/sendNotification
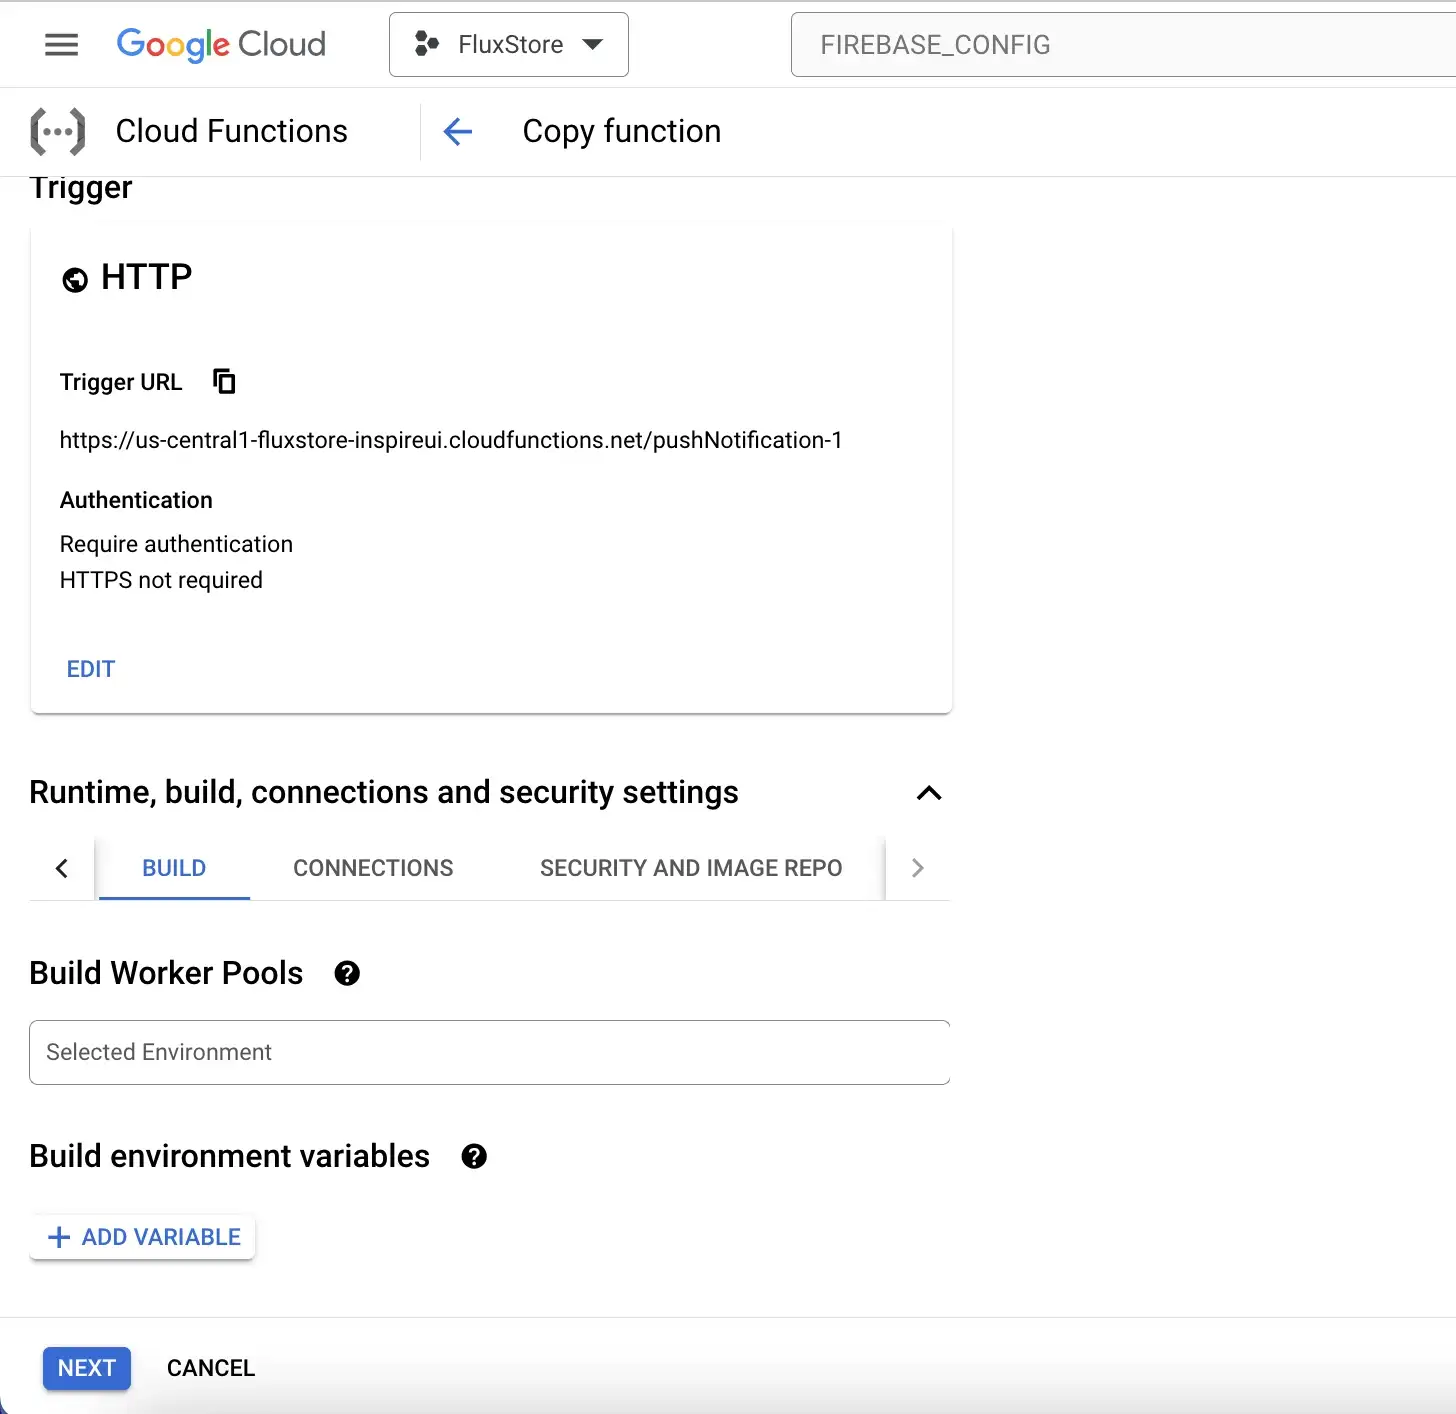
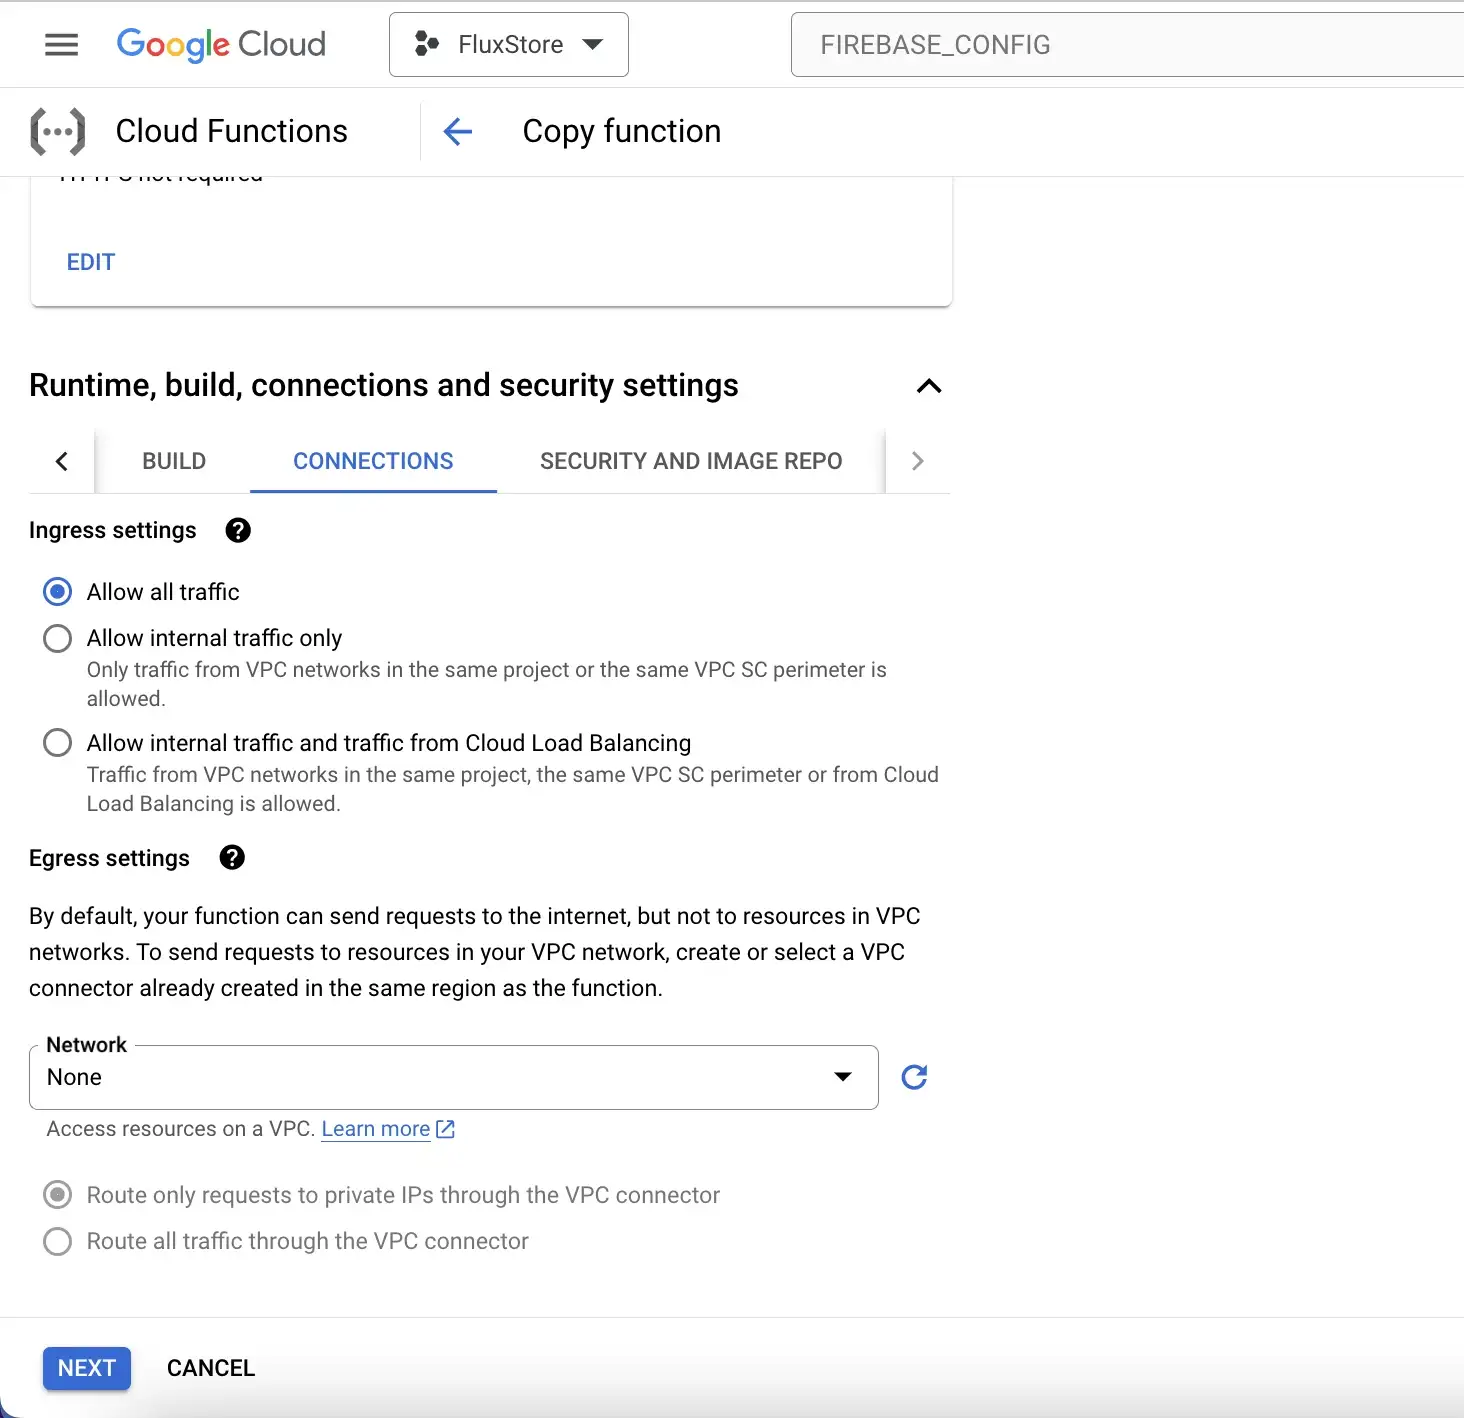
5. Build, Connections and Security and image repo section remain unchanged.

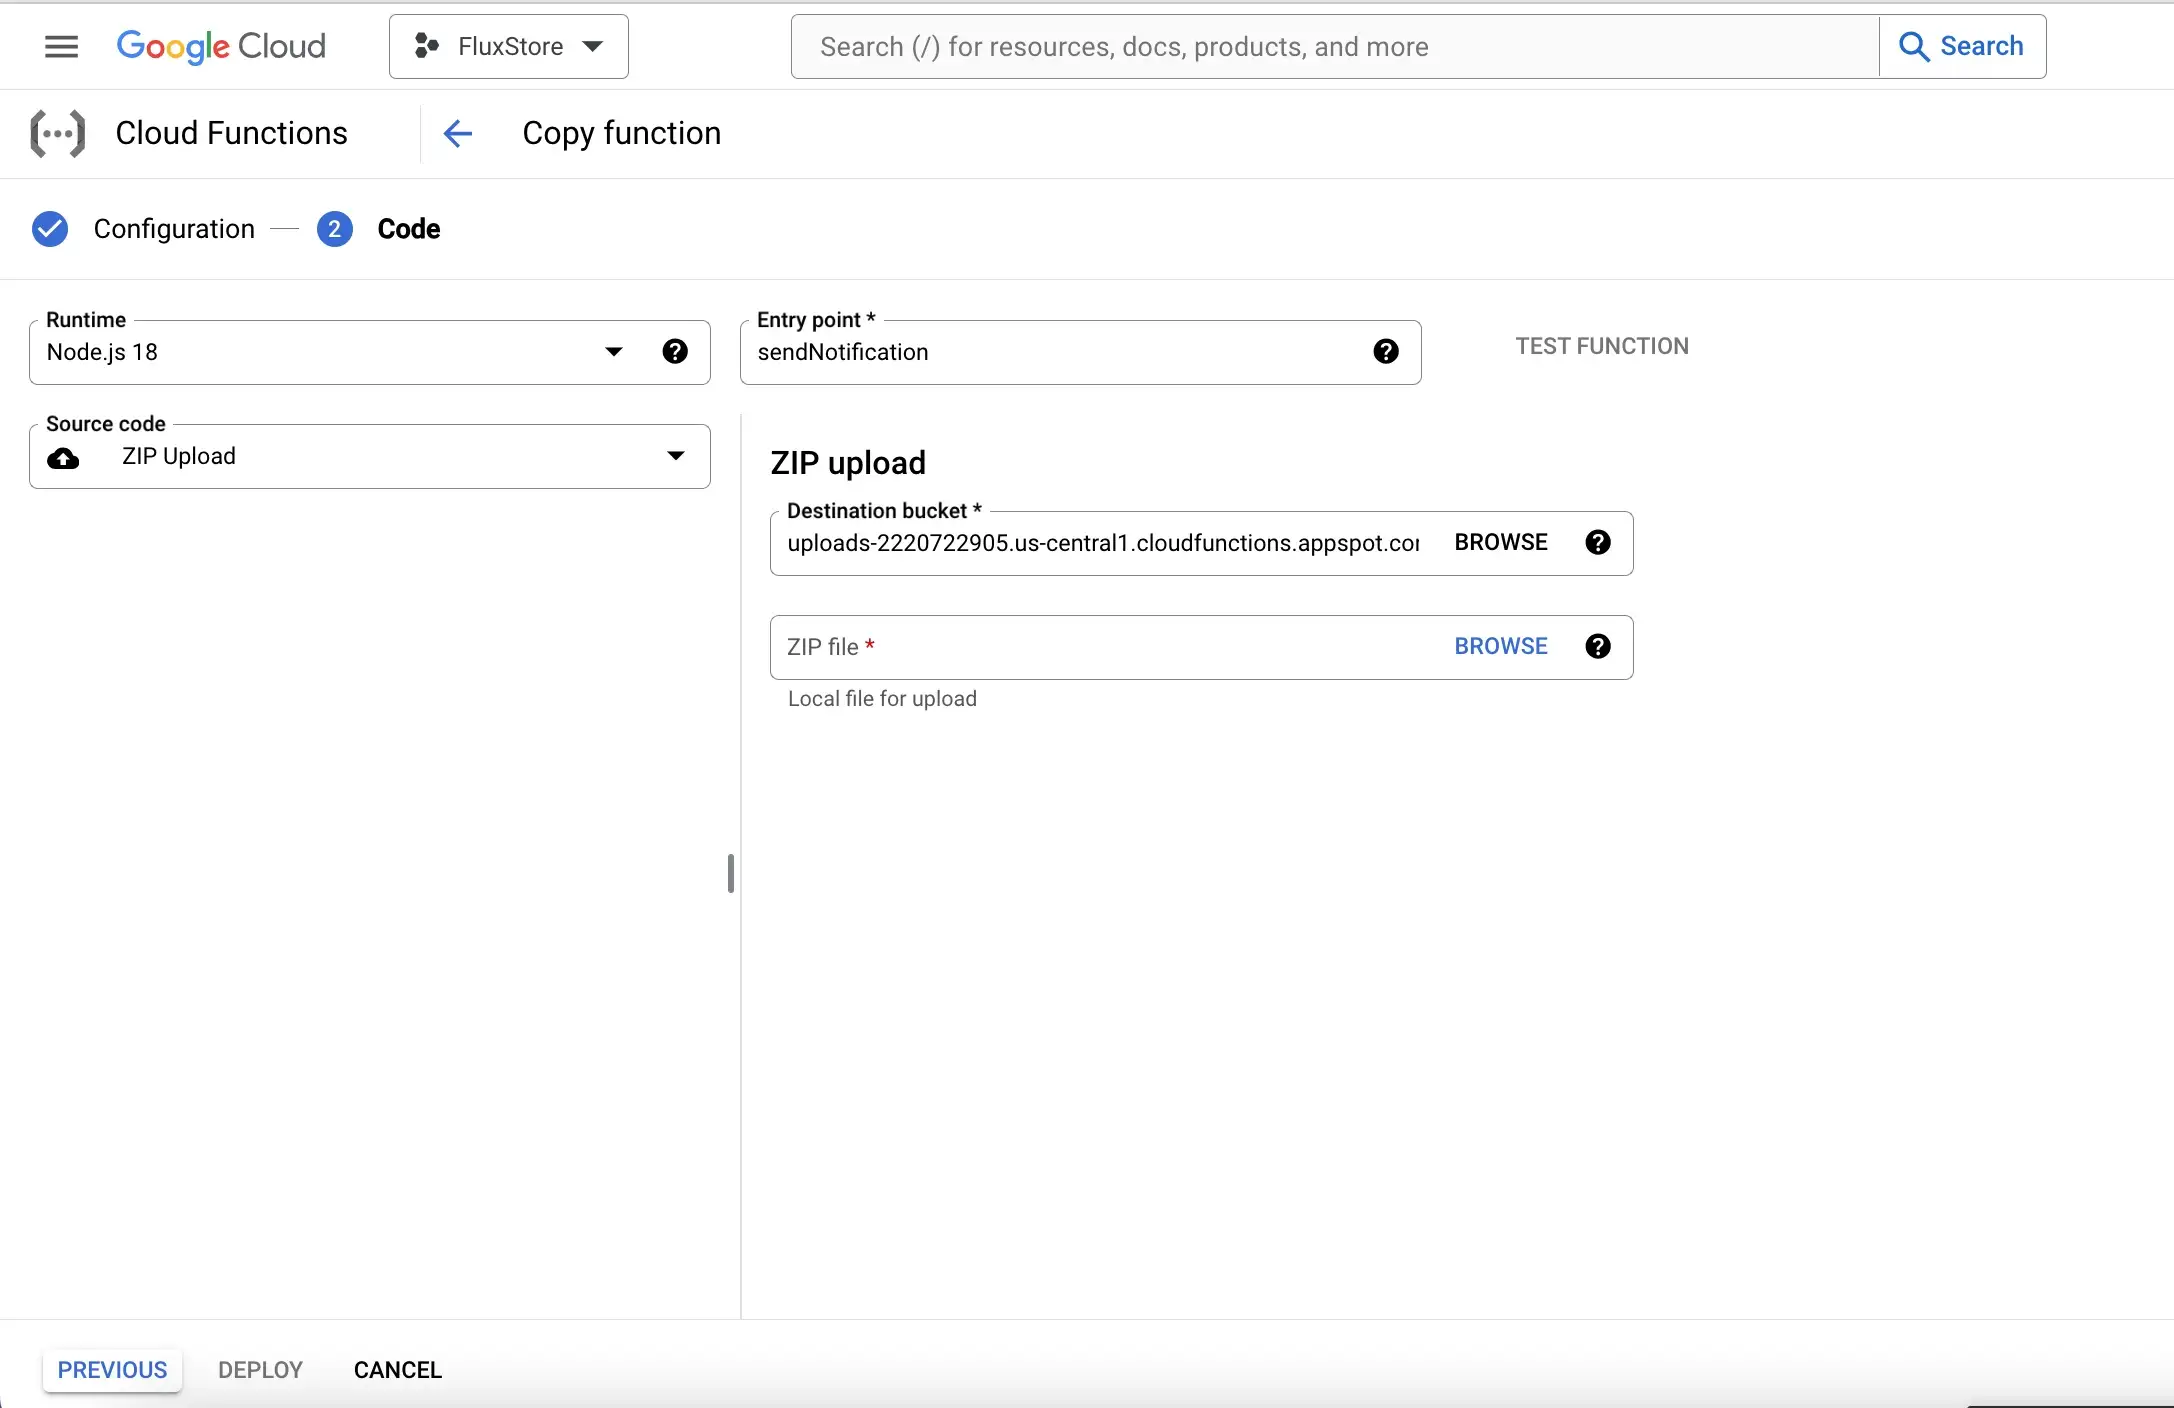
- Click Next to move to the Code step.
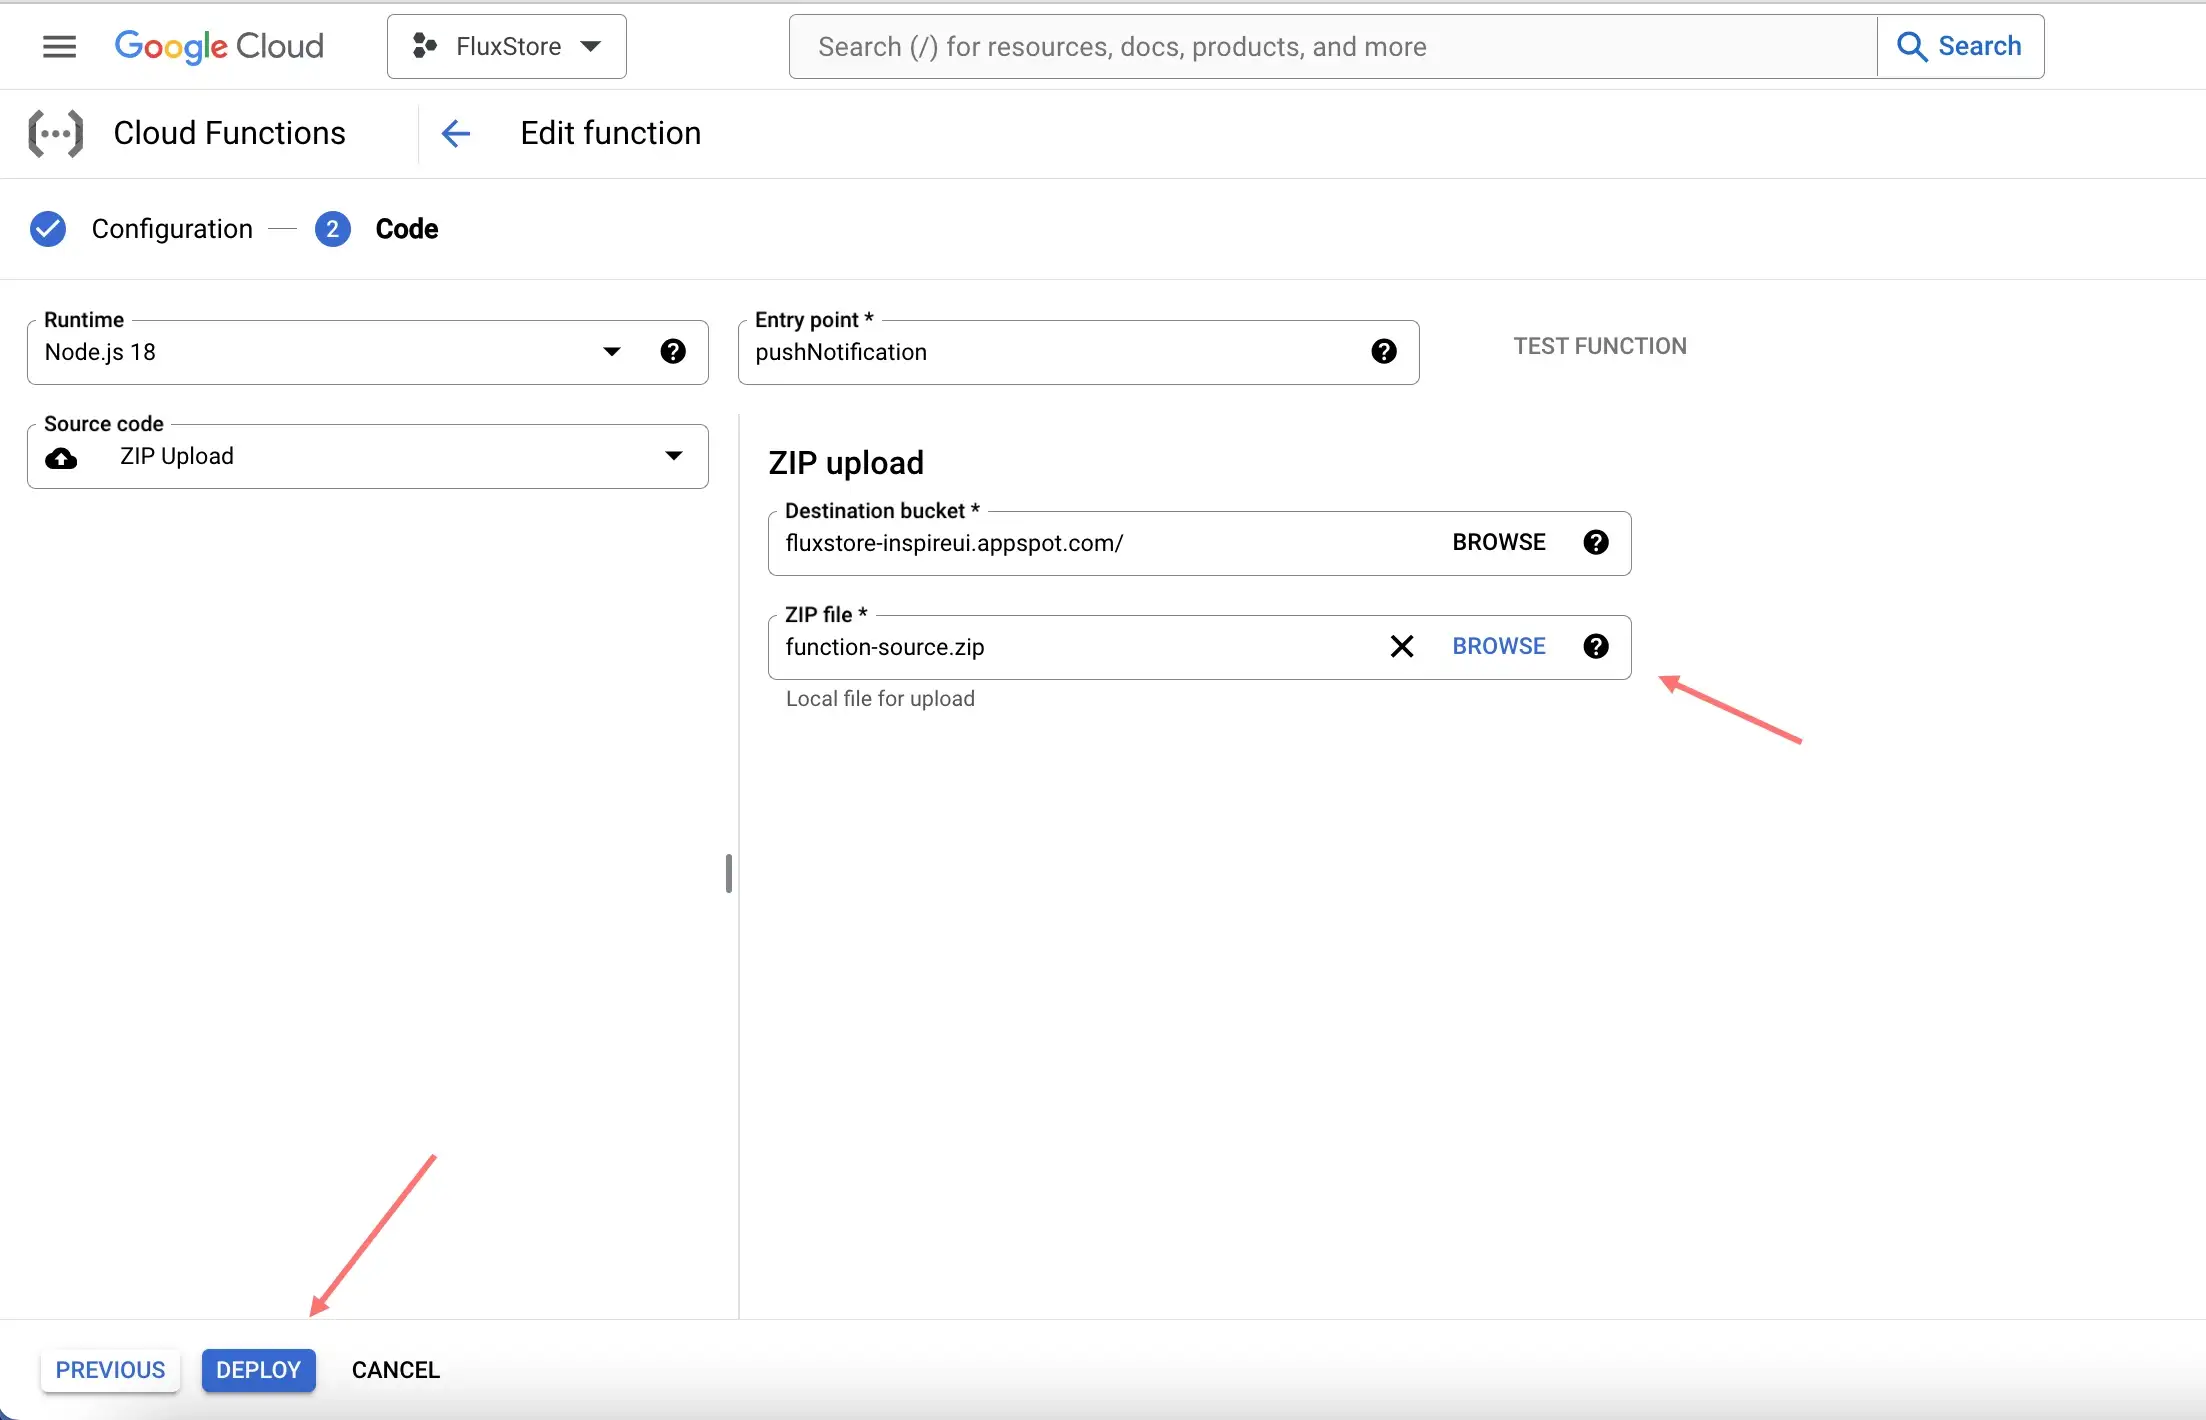
- In the Source Code field, select the ZIP Upload option and fill in the remaining information as shown below.
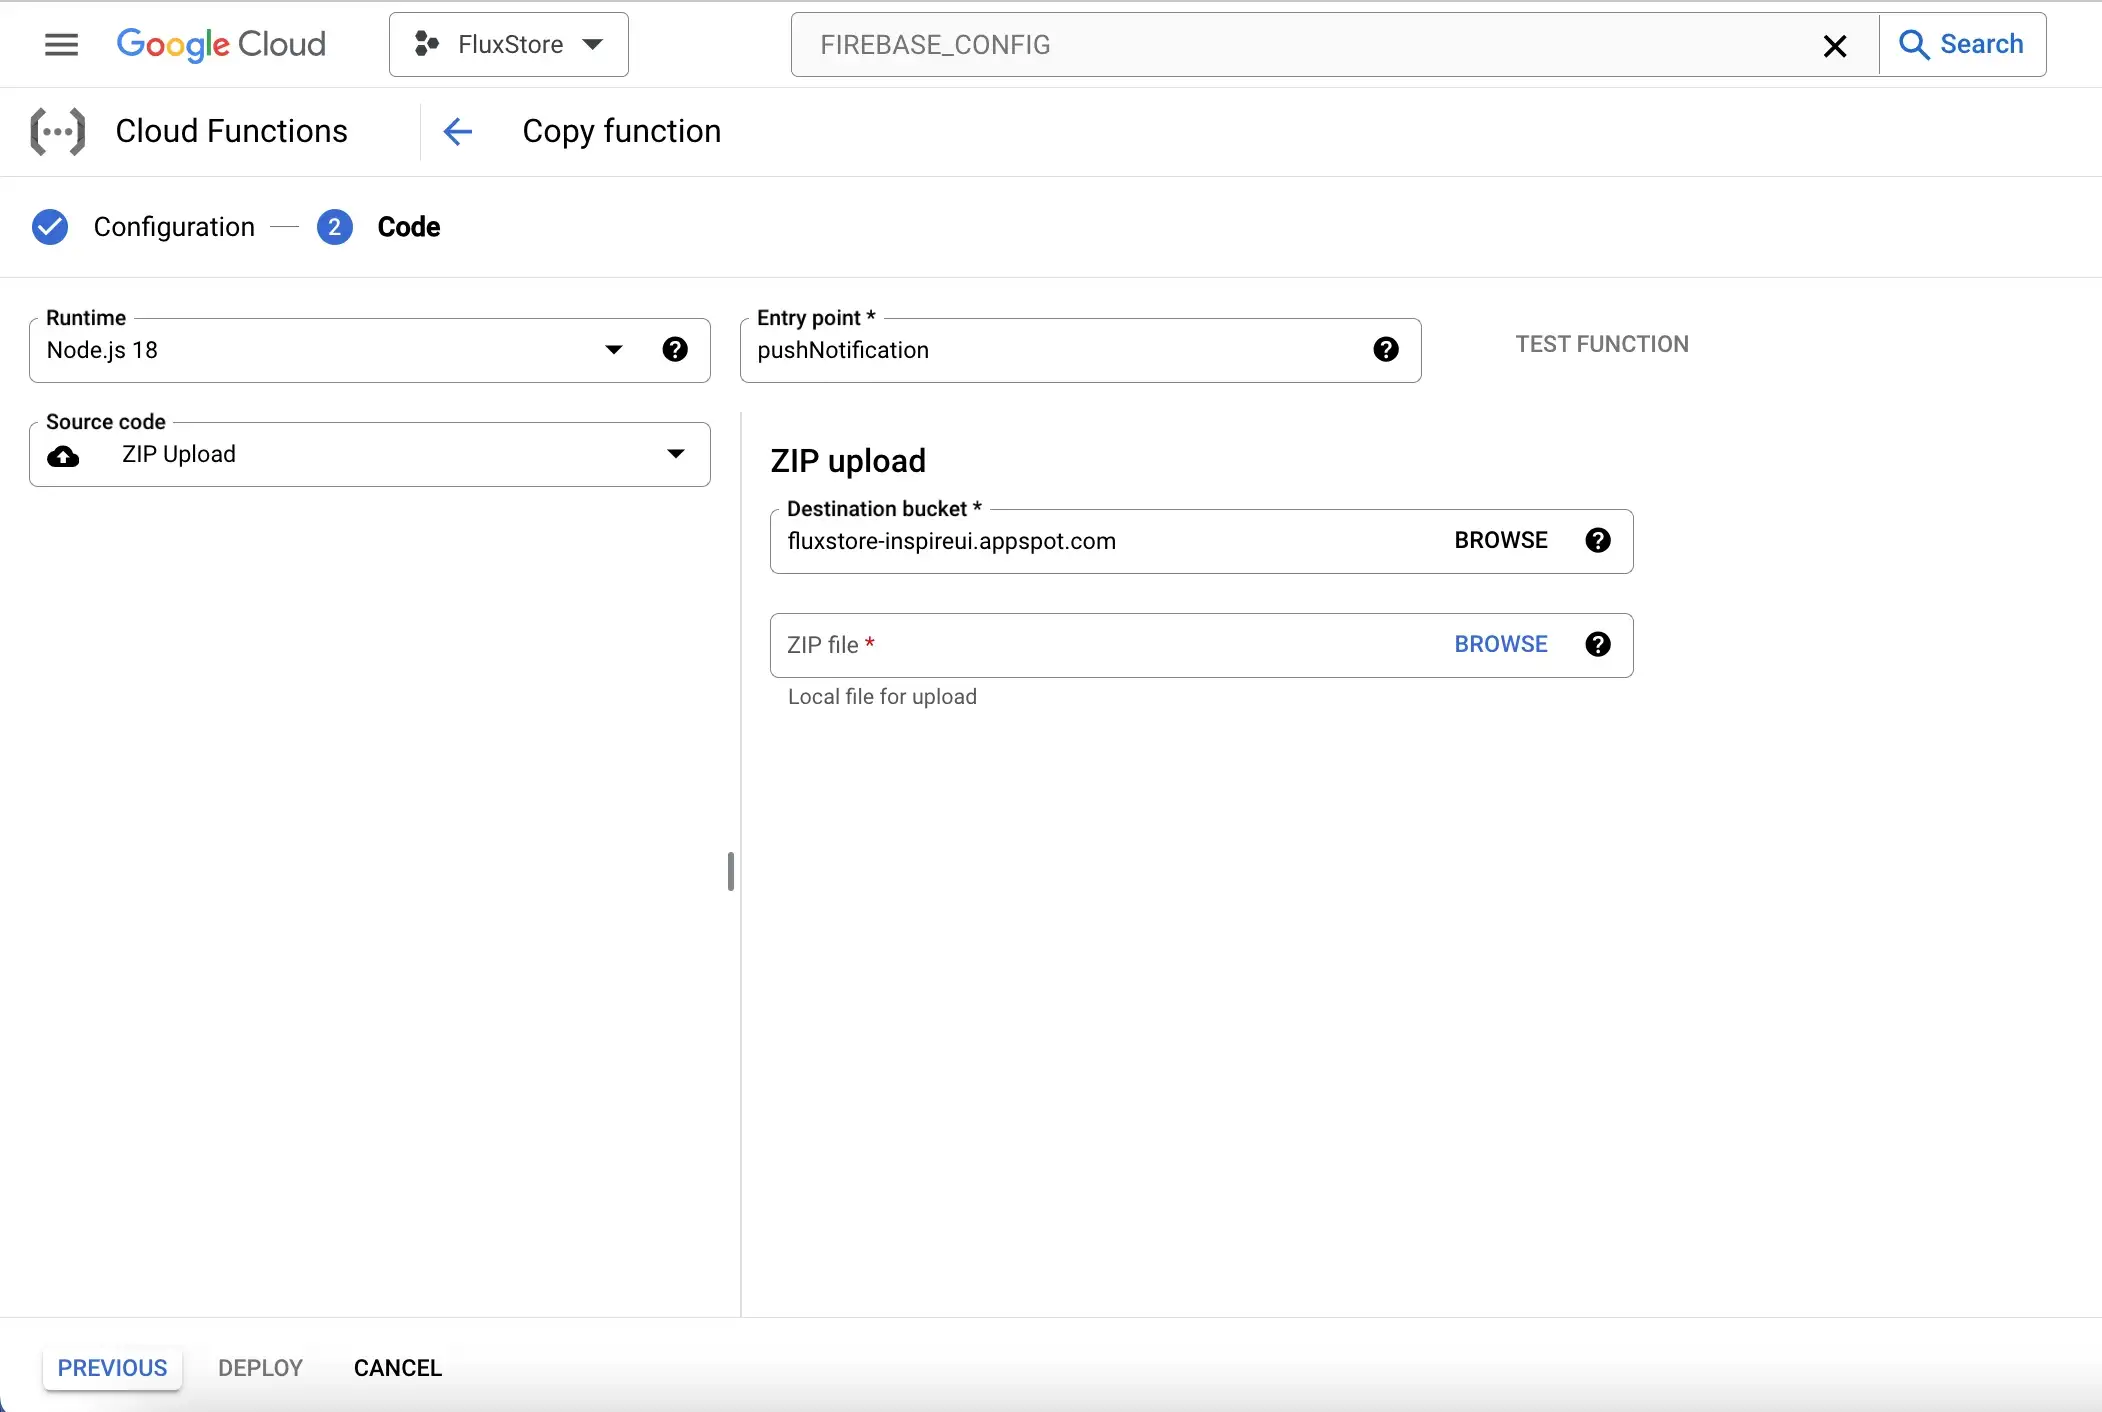
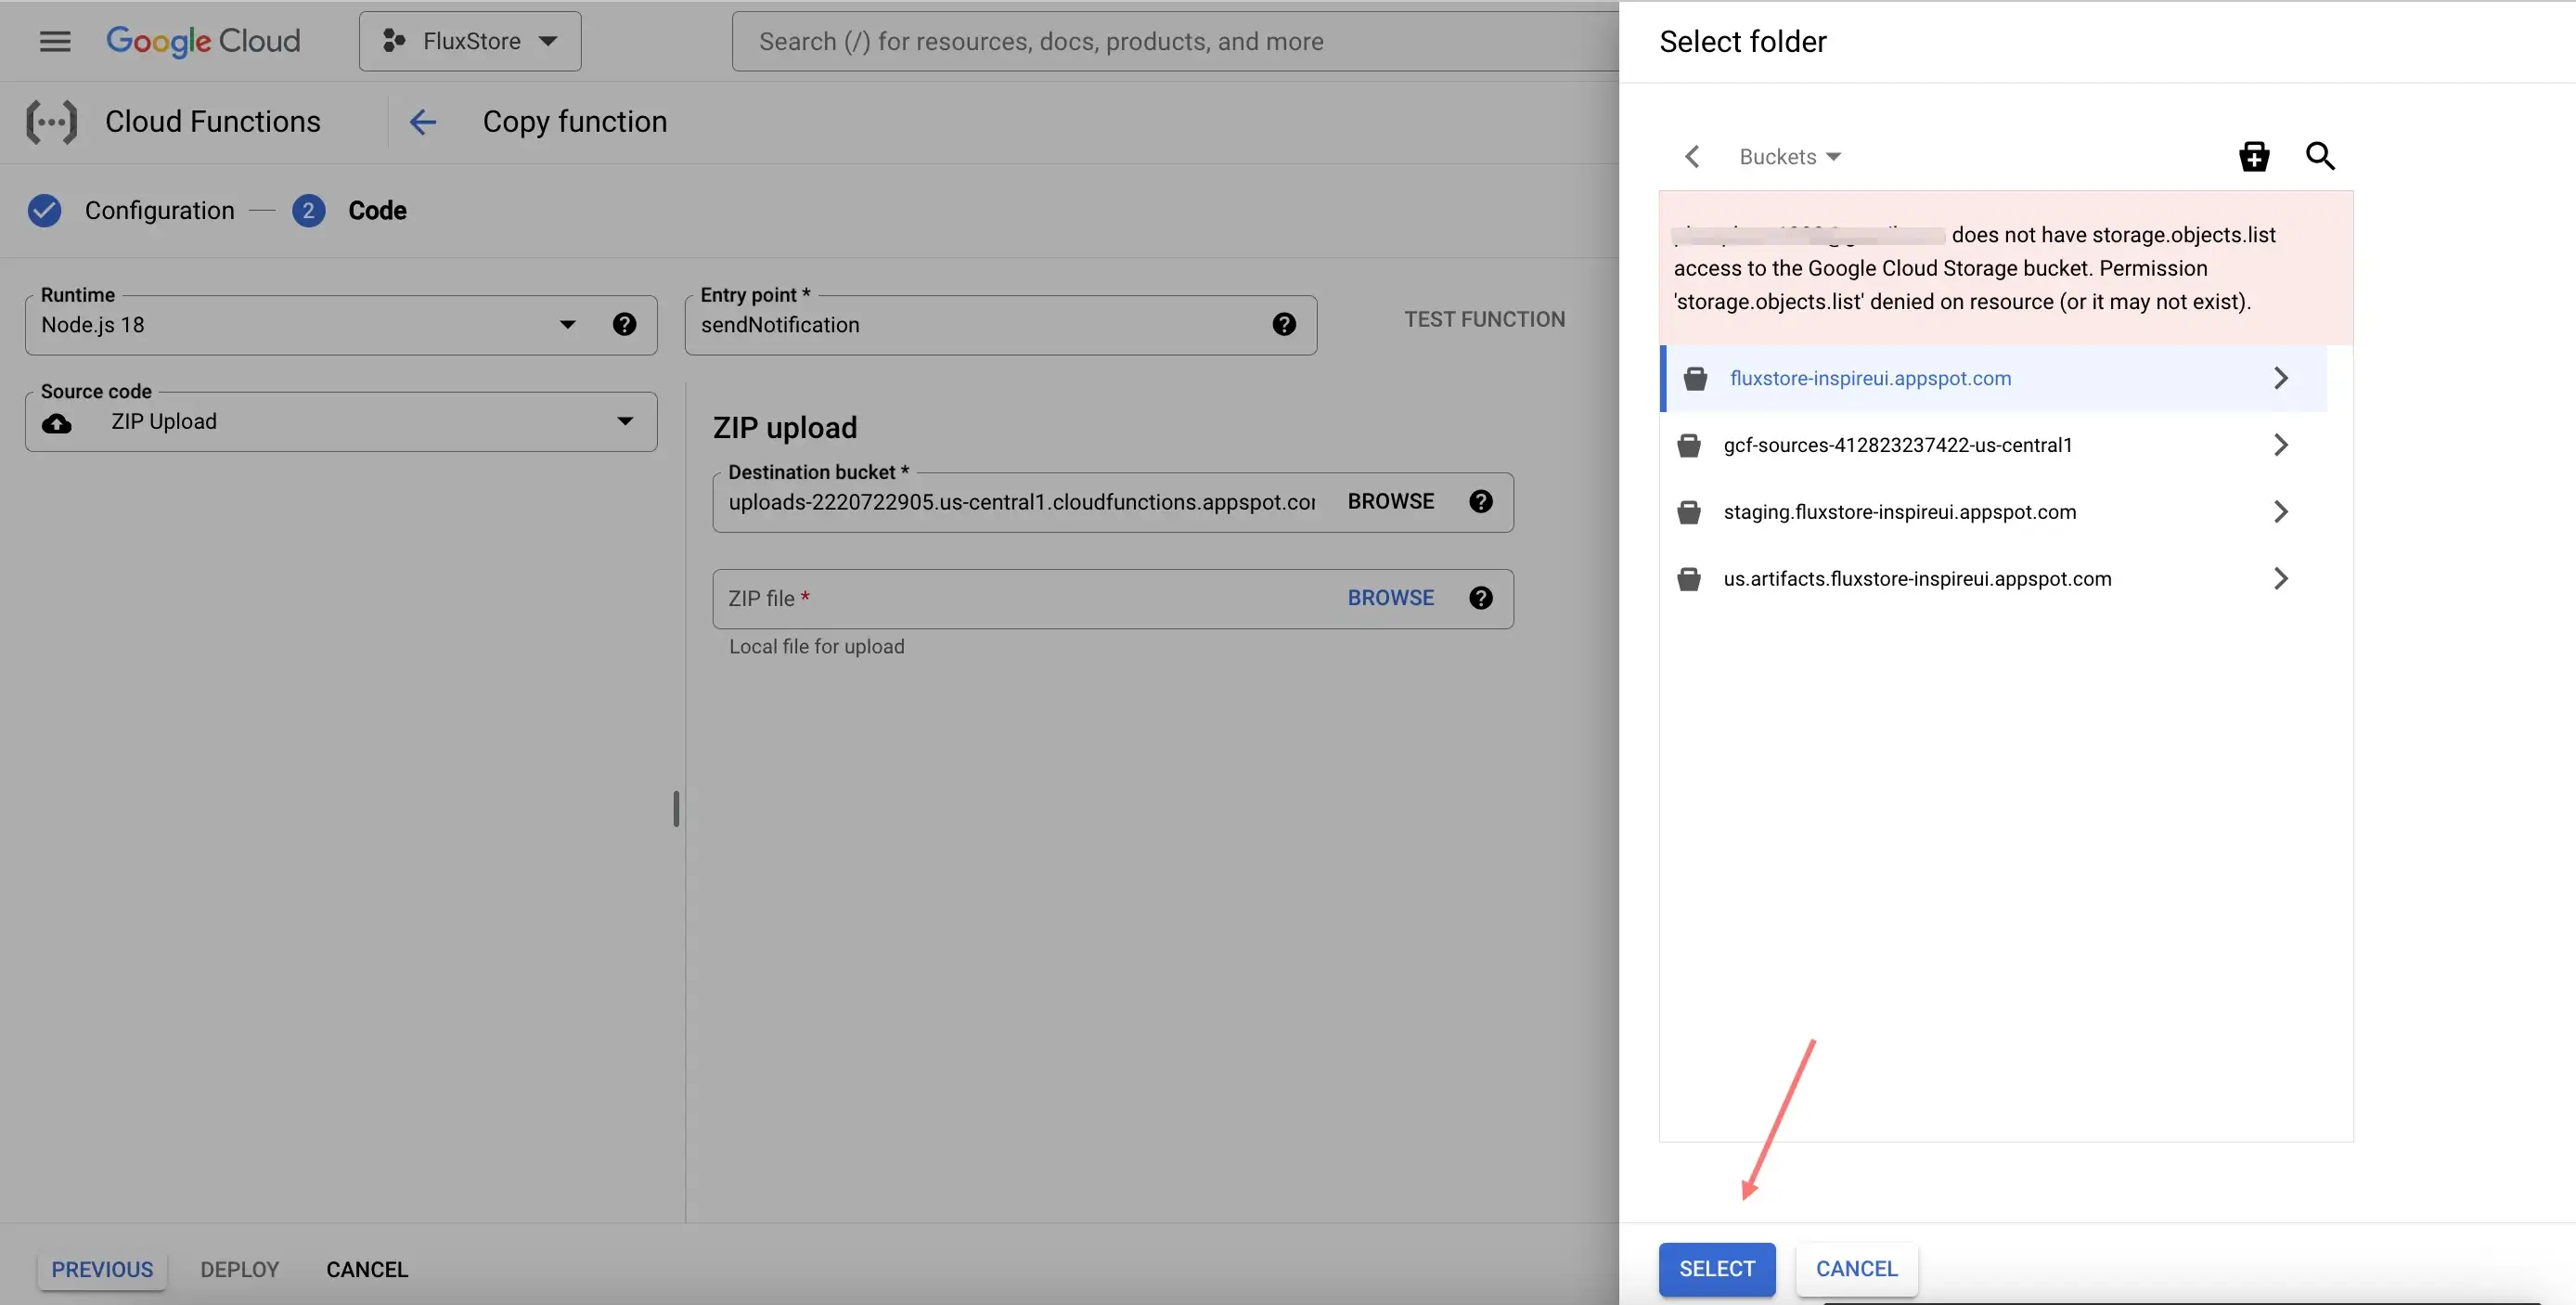
- In the Destination bucket field, Click Browse and Select storageBucket
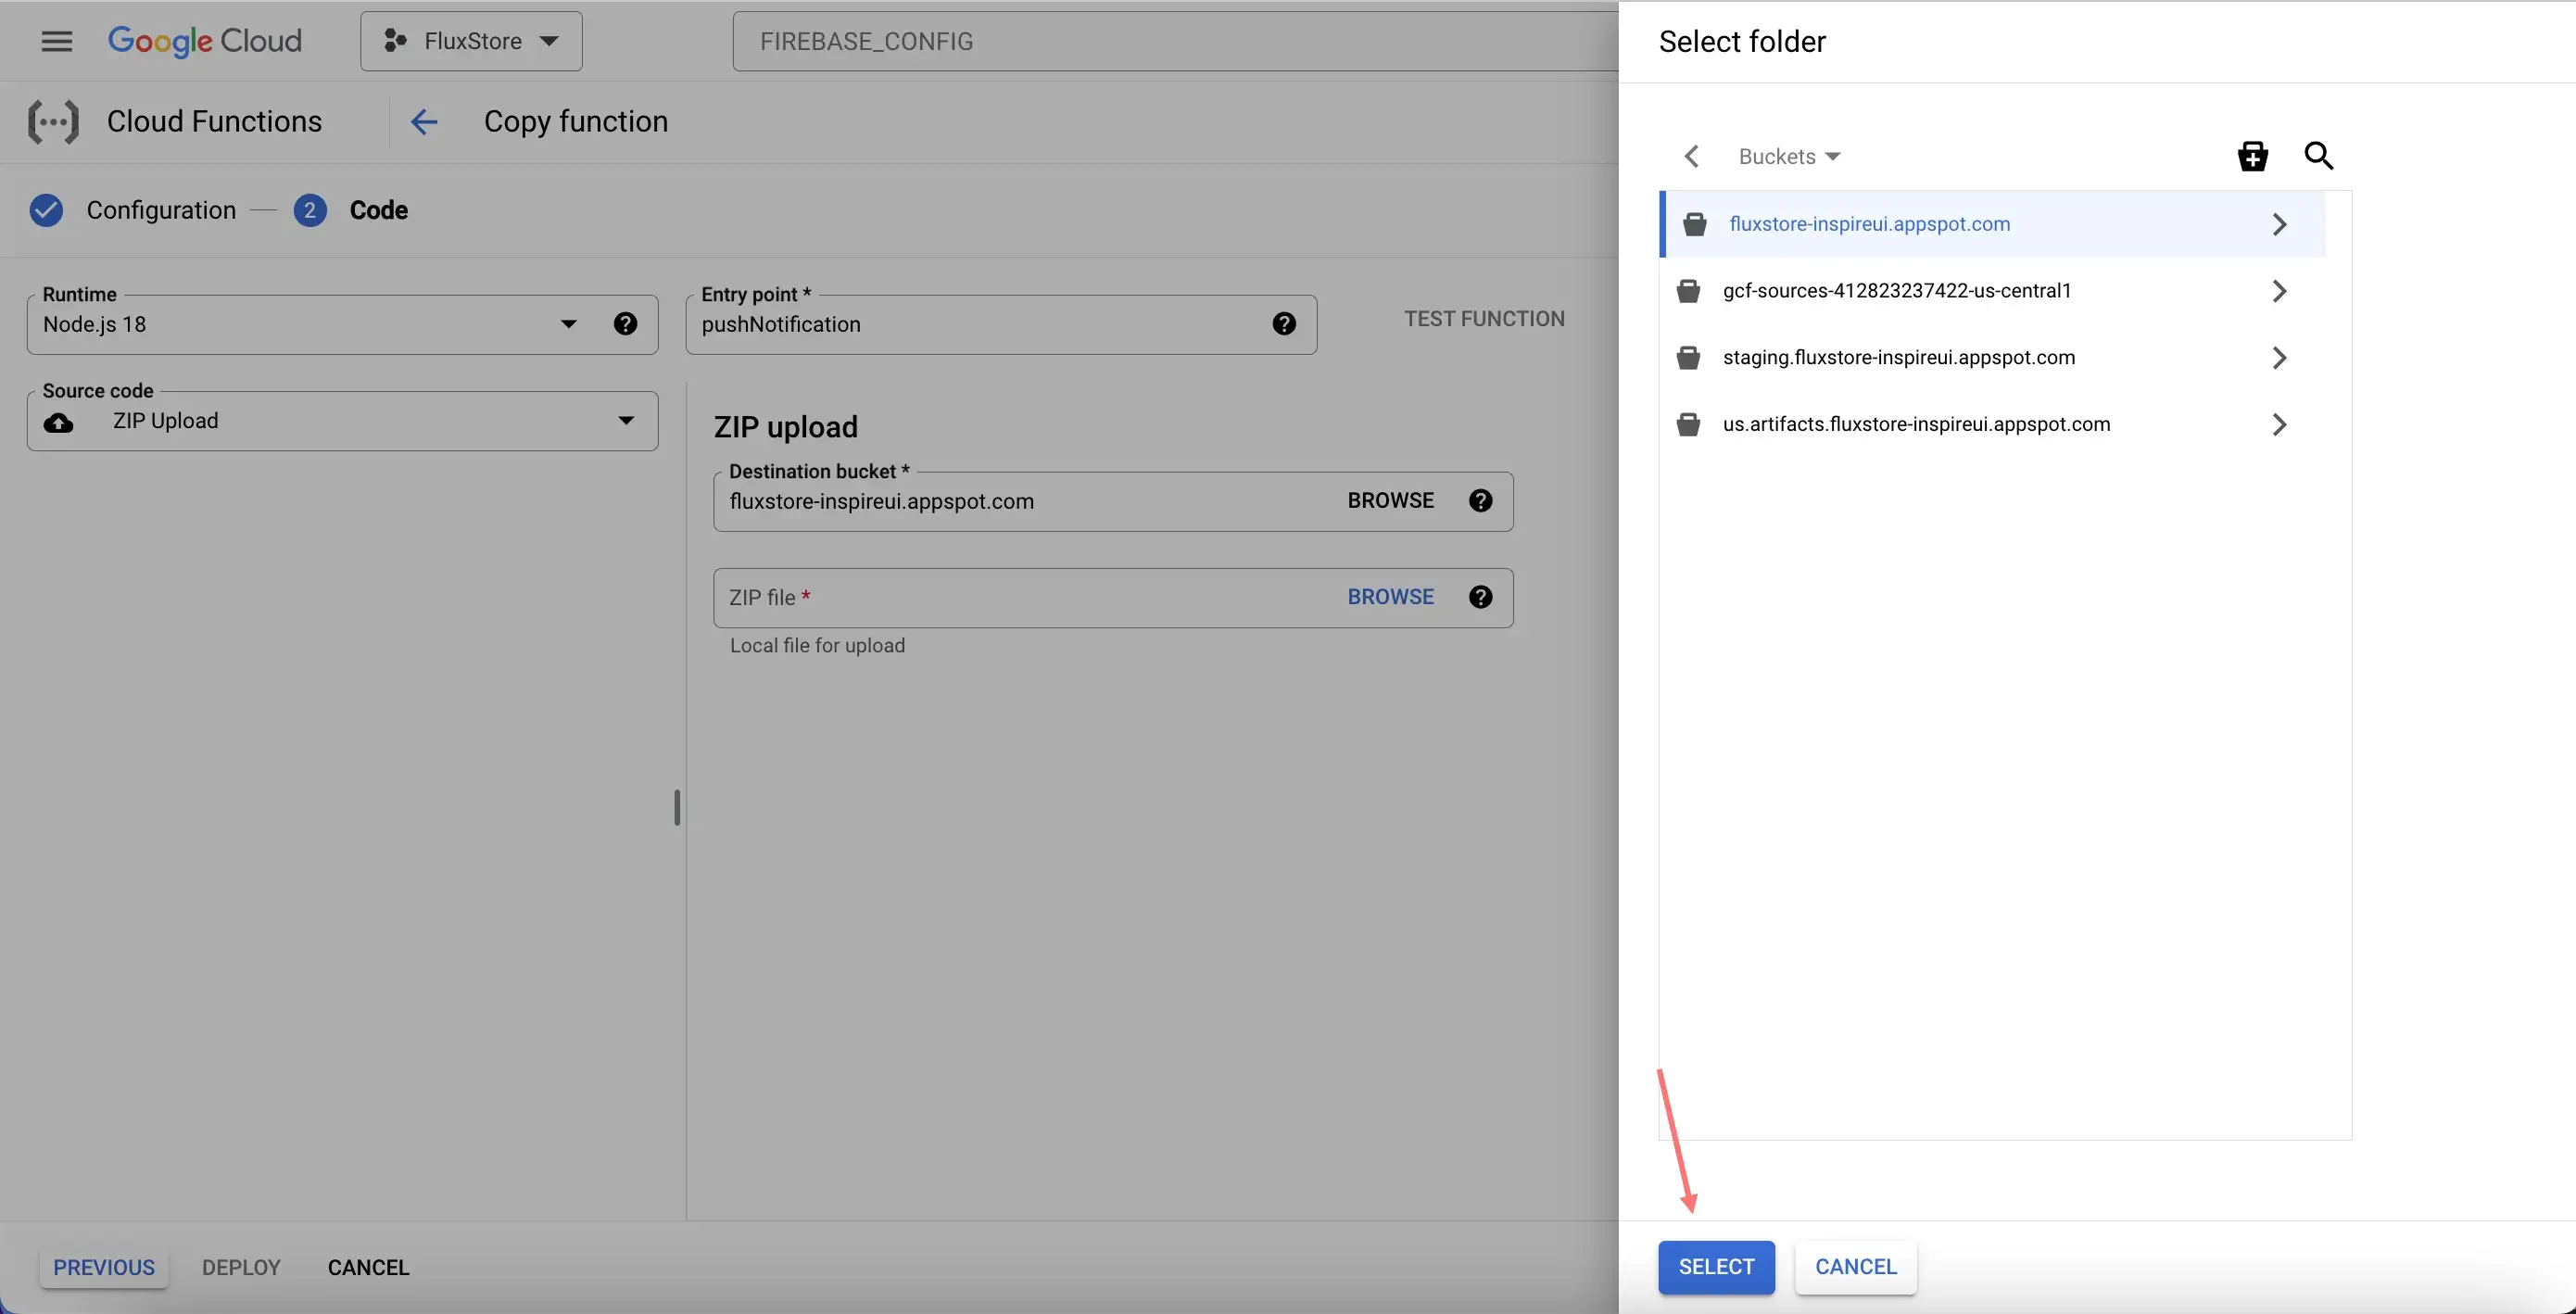
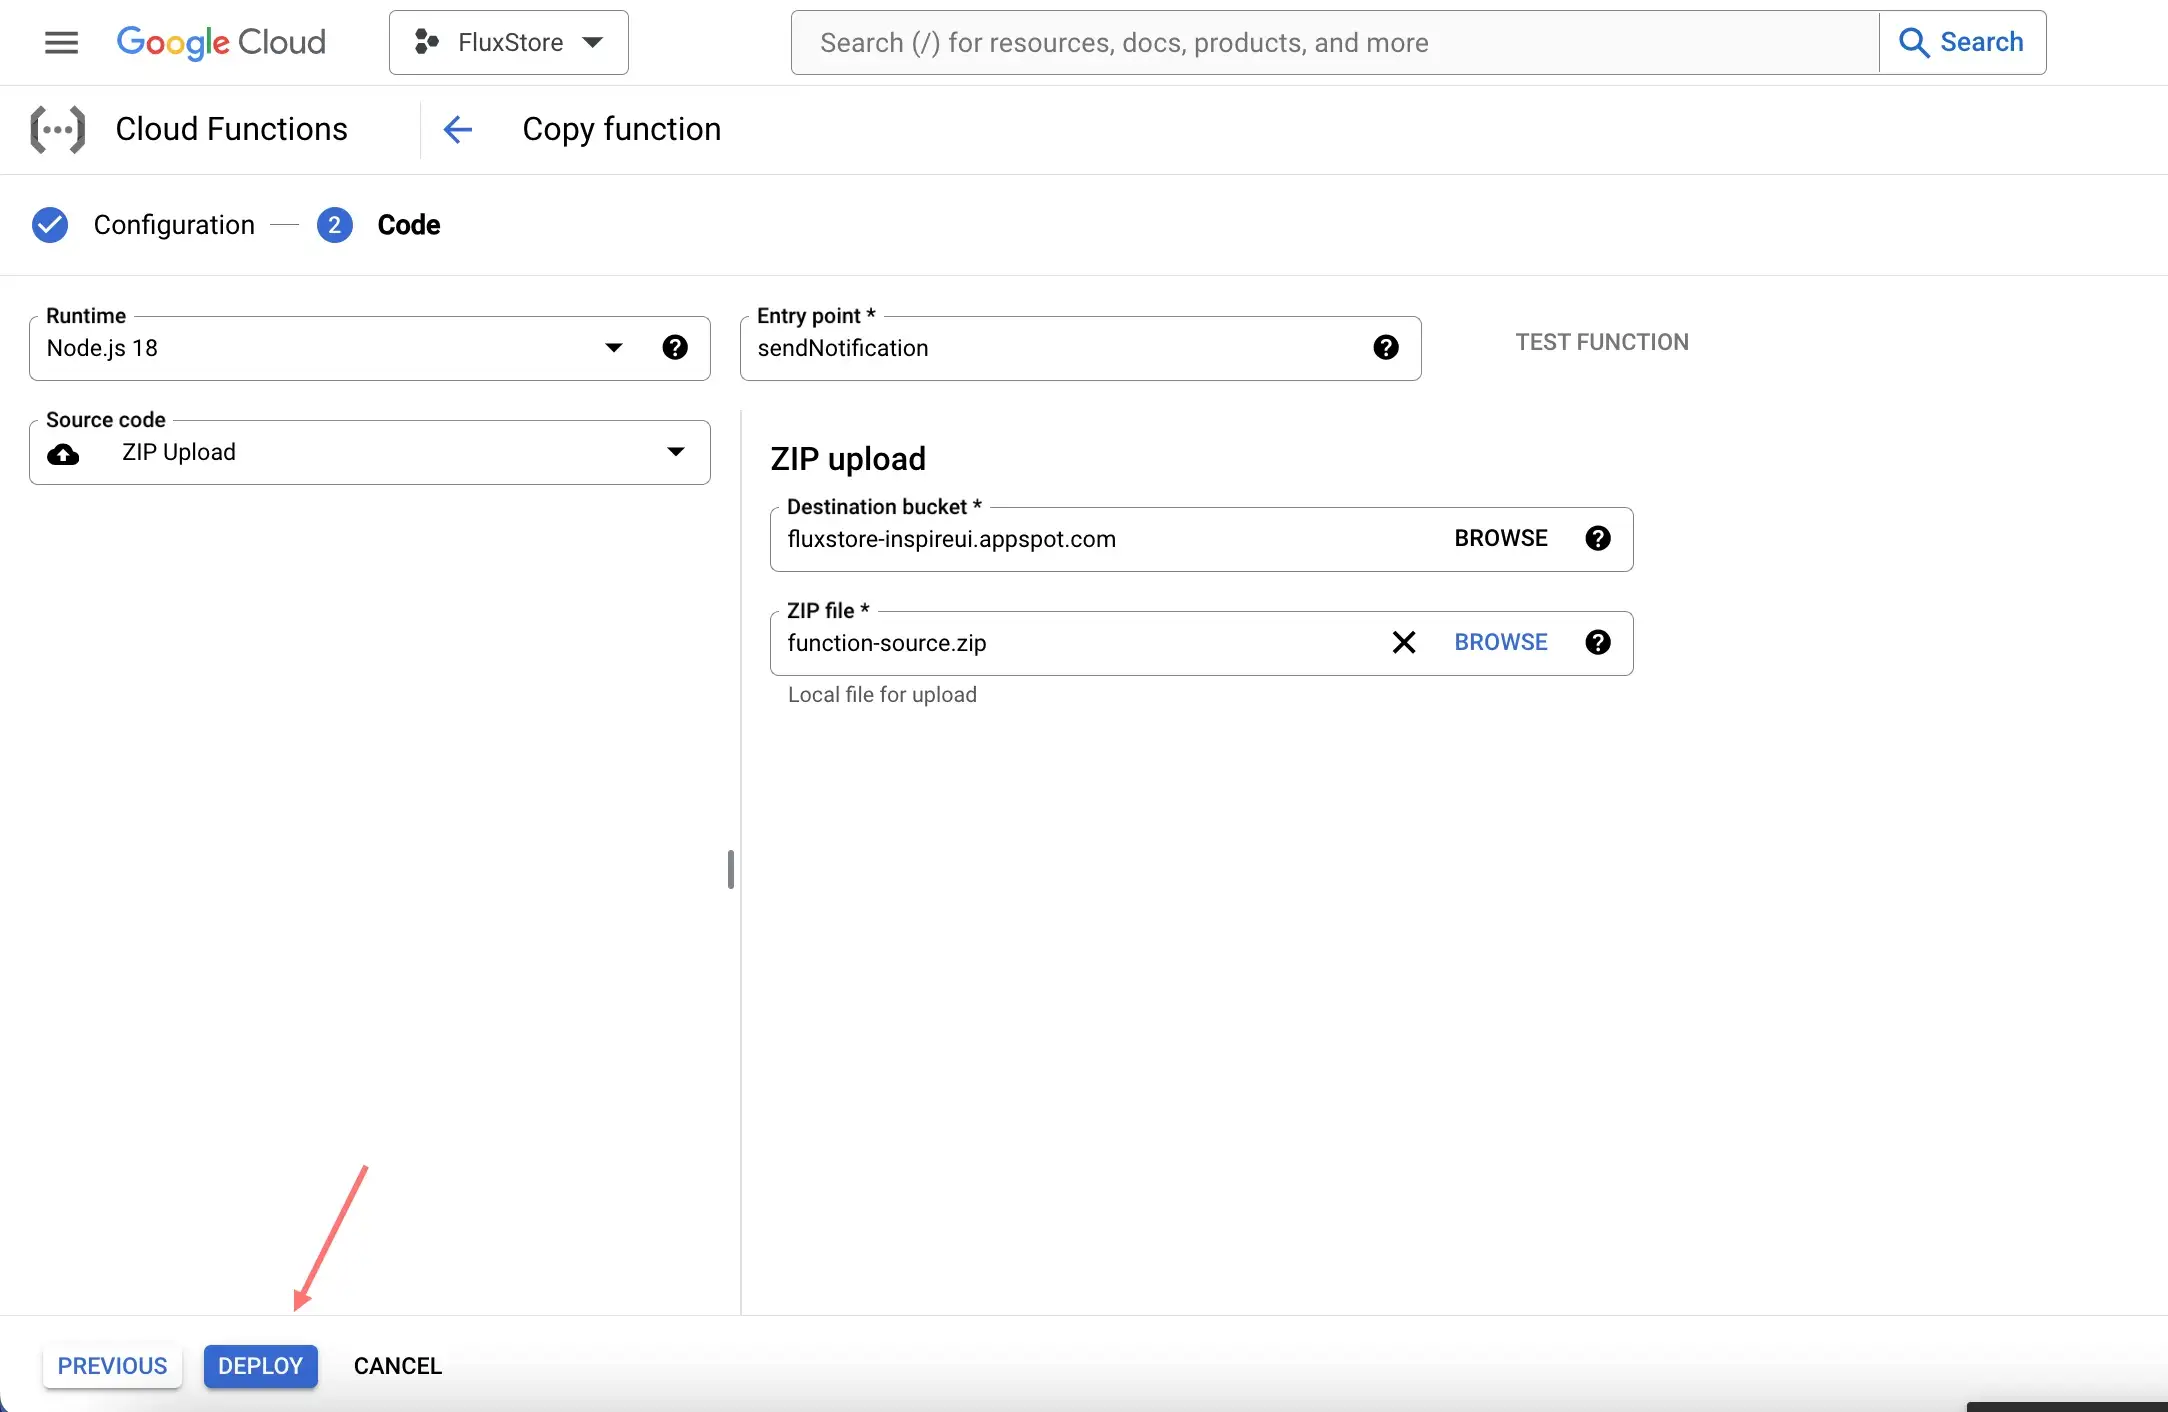
- In the ZIP file field, please DOWNLOAD the ZIP file I have attached using the link then upload your project and Click Deploy.
Download link here
- Continue Click Create Function.
- Fill in the information and fields as shown below:
- Click Save then expand the Runtime, build... section at the end of the page for additional configuration and security options (Similar to step 4)
13. Build, Connections and Security and image repo section remain unchanged (Similar to step 5).
- Click Next to move to the Code step.
- In the Source Code field, select the ZIP Upload option and fill in the remaining information as shown below.
- In the Destination bucket field, Click Browse and Select storageBucket
- In the ZIP file field, please DOWNLOAD the ZIP file I have attached using the link then upload your project and Click Deploy.
Download link here
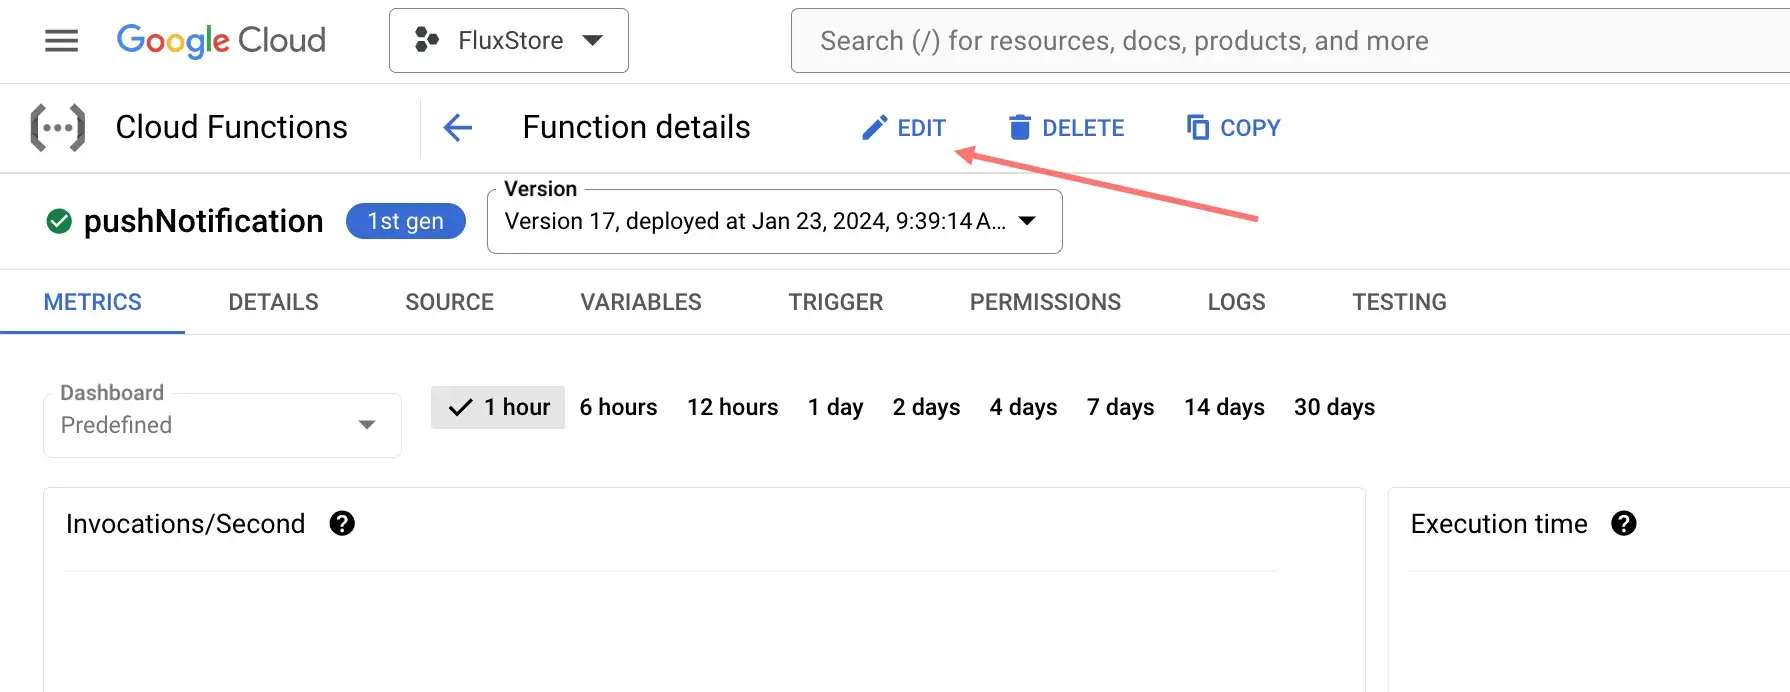
- When deployment finishes successfully, functions appear with a green check mark in the Cloud Functions overview page in the Google Cloud console:
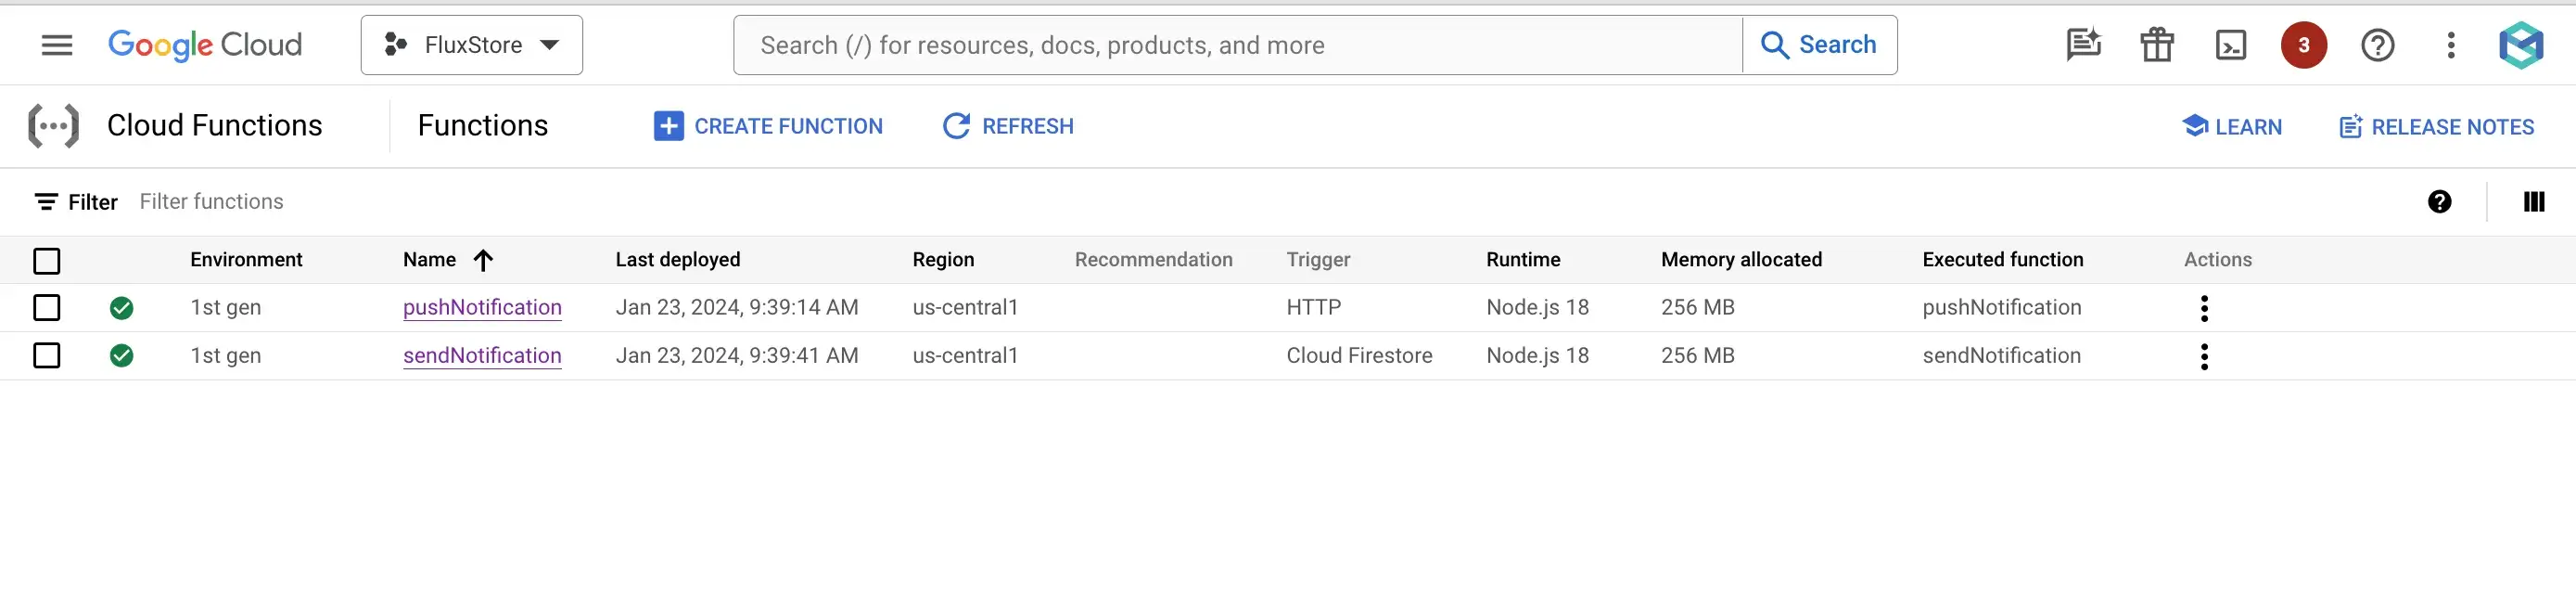
- Select pushNotification function to Edit.
- Click Next to move to the Code step.
- Select the .runtimeconfig.json file and Edit your project's information, referring to the suggestions in step 4.
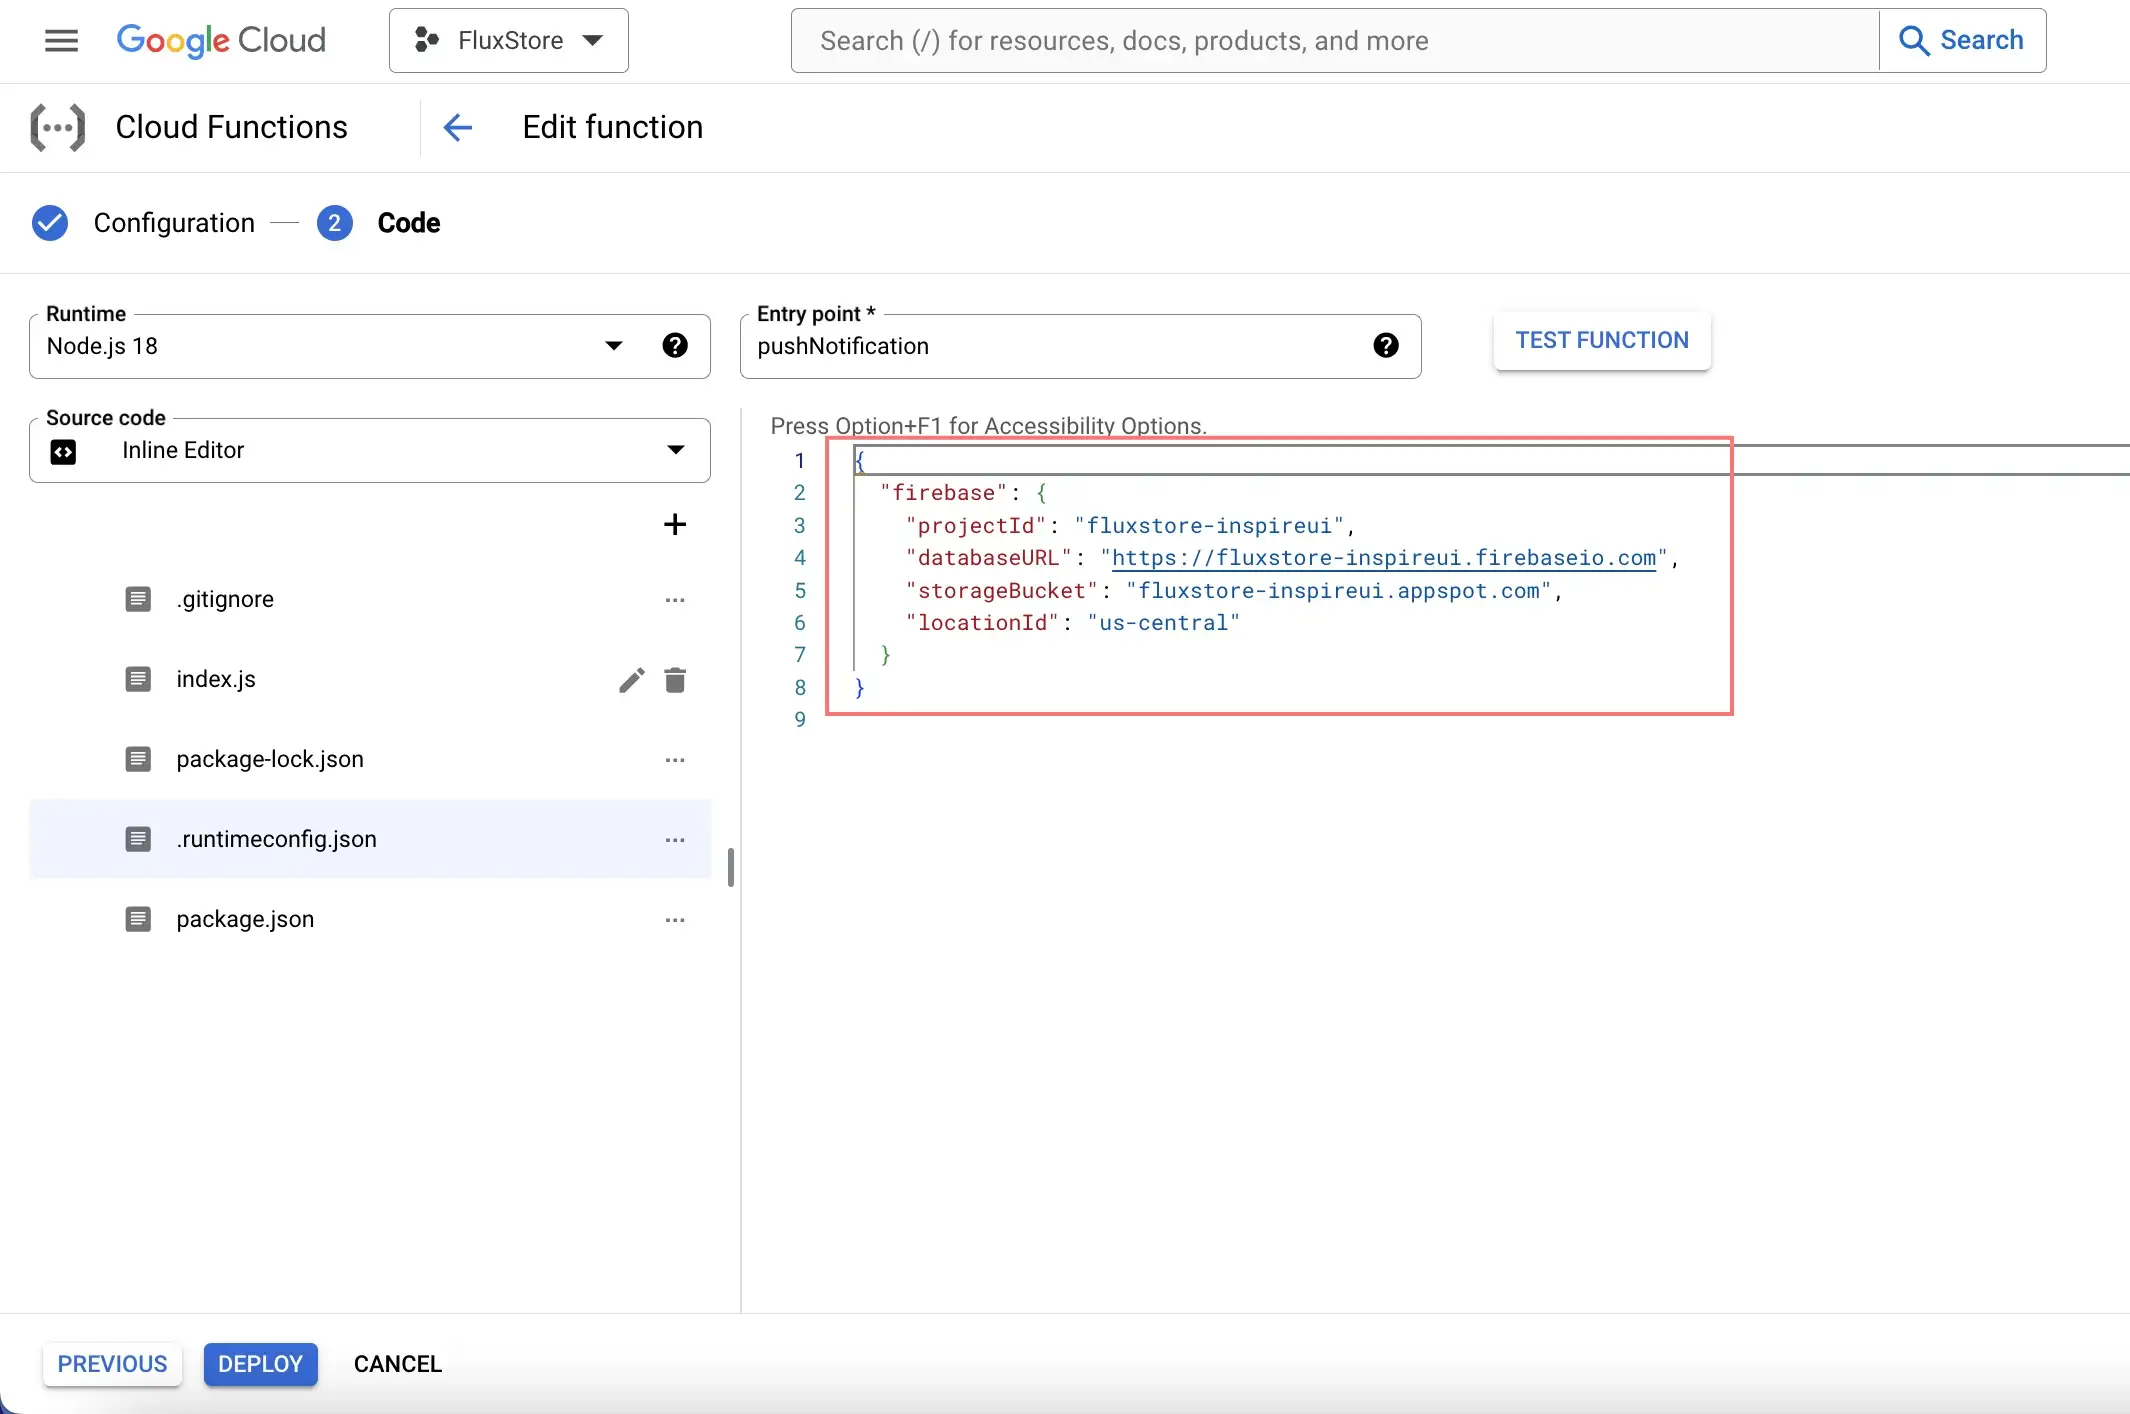
- After completing editing, Click Deploy again.
- Similarly, Edit the .runtimeconfig.json file in the sendNotification function and click Deploy again.
- Done.