PayPal Payment
1. Create App on PayPal
Step 1: Open PayPal Developer Dashboard.
Step 2: Once you are on the Developer Dashboard, navigate to the My Apps & Credentials page.

Step 3: Open your app to proceed. If you haven't created an app yet, please create one by clicking on the "Create App" button.
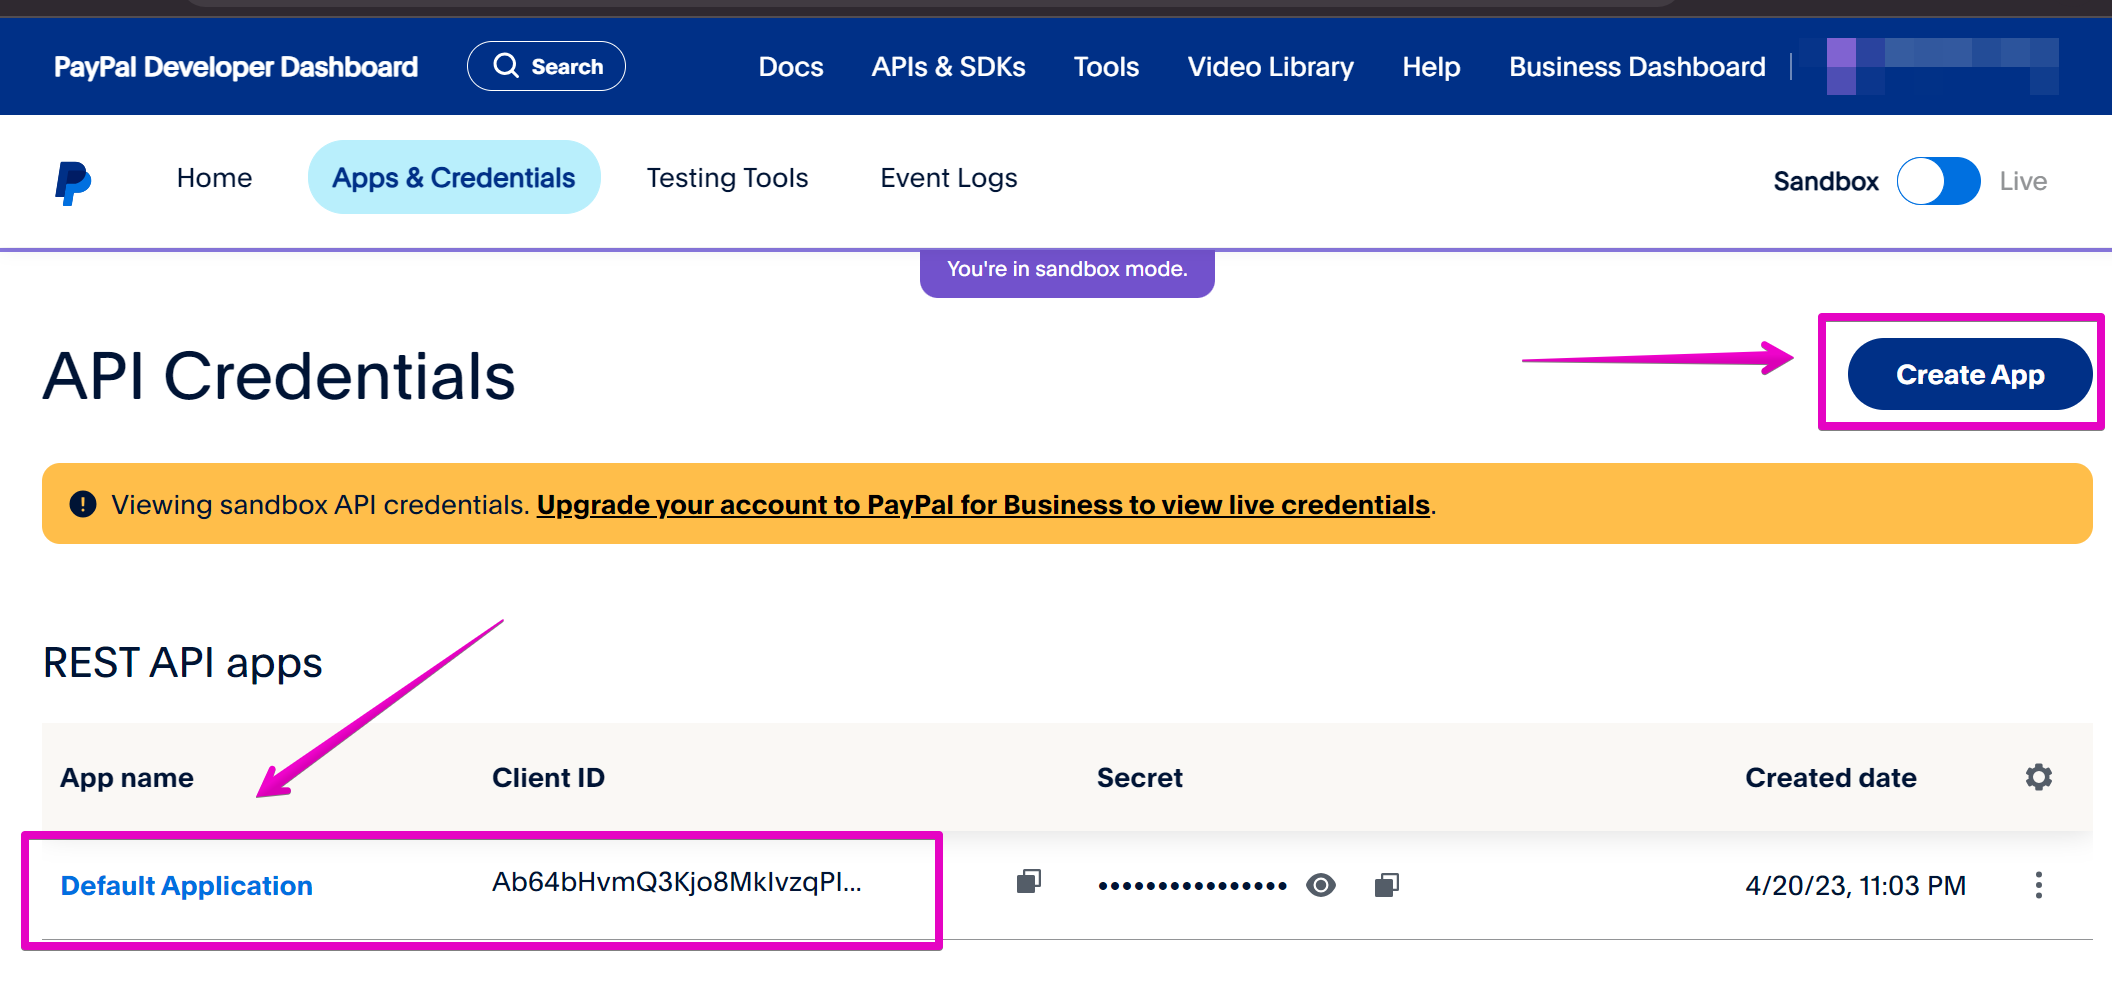
Step 4: Within the app, locate and copy the Client ID and Secret Key. These will be needed for the below steps.

2. Enable PayPal on FluxBuilder
You can easily enable PayPal payment through FluxBuilder by follow these steps:
Step 1: Open your app on FluxBuilder.
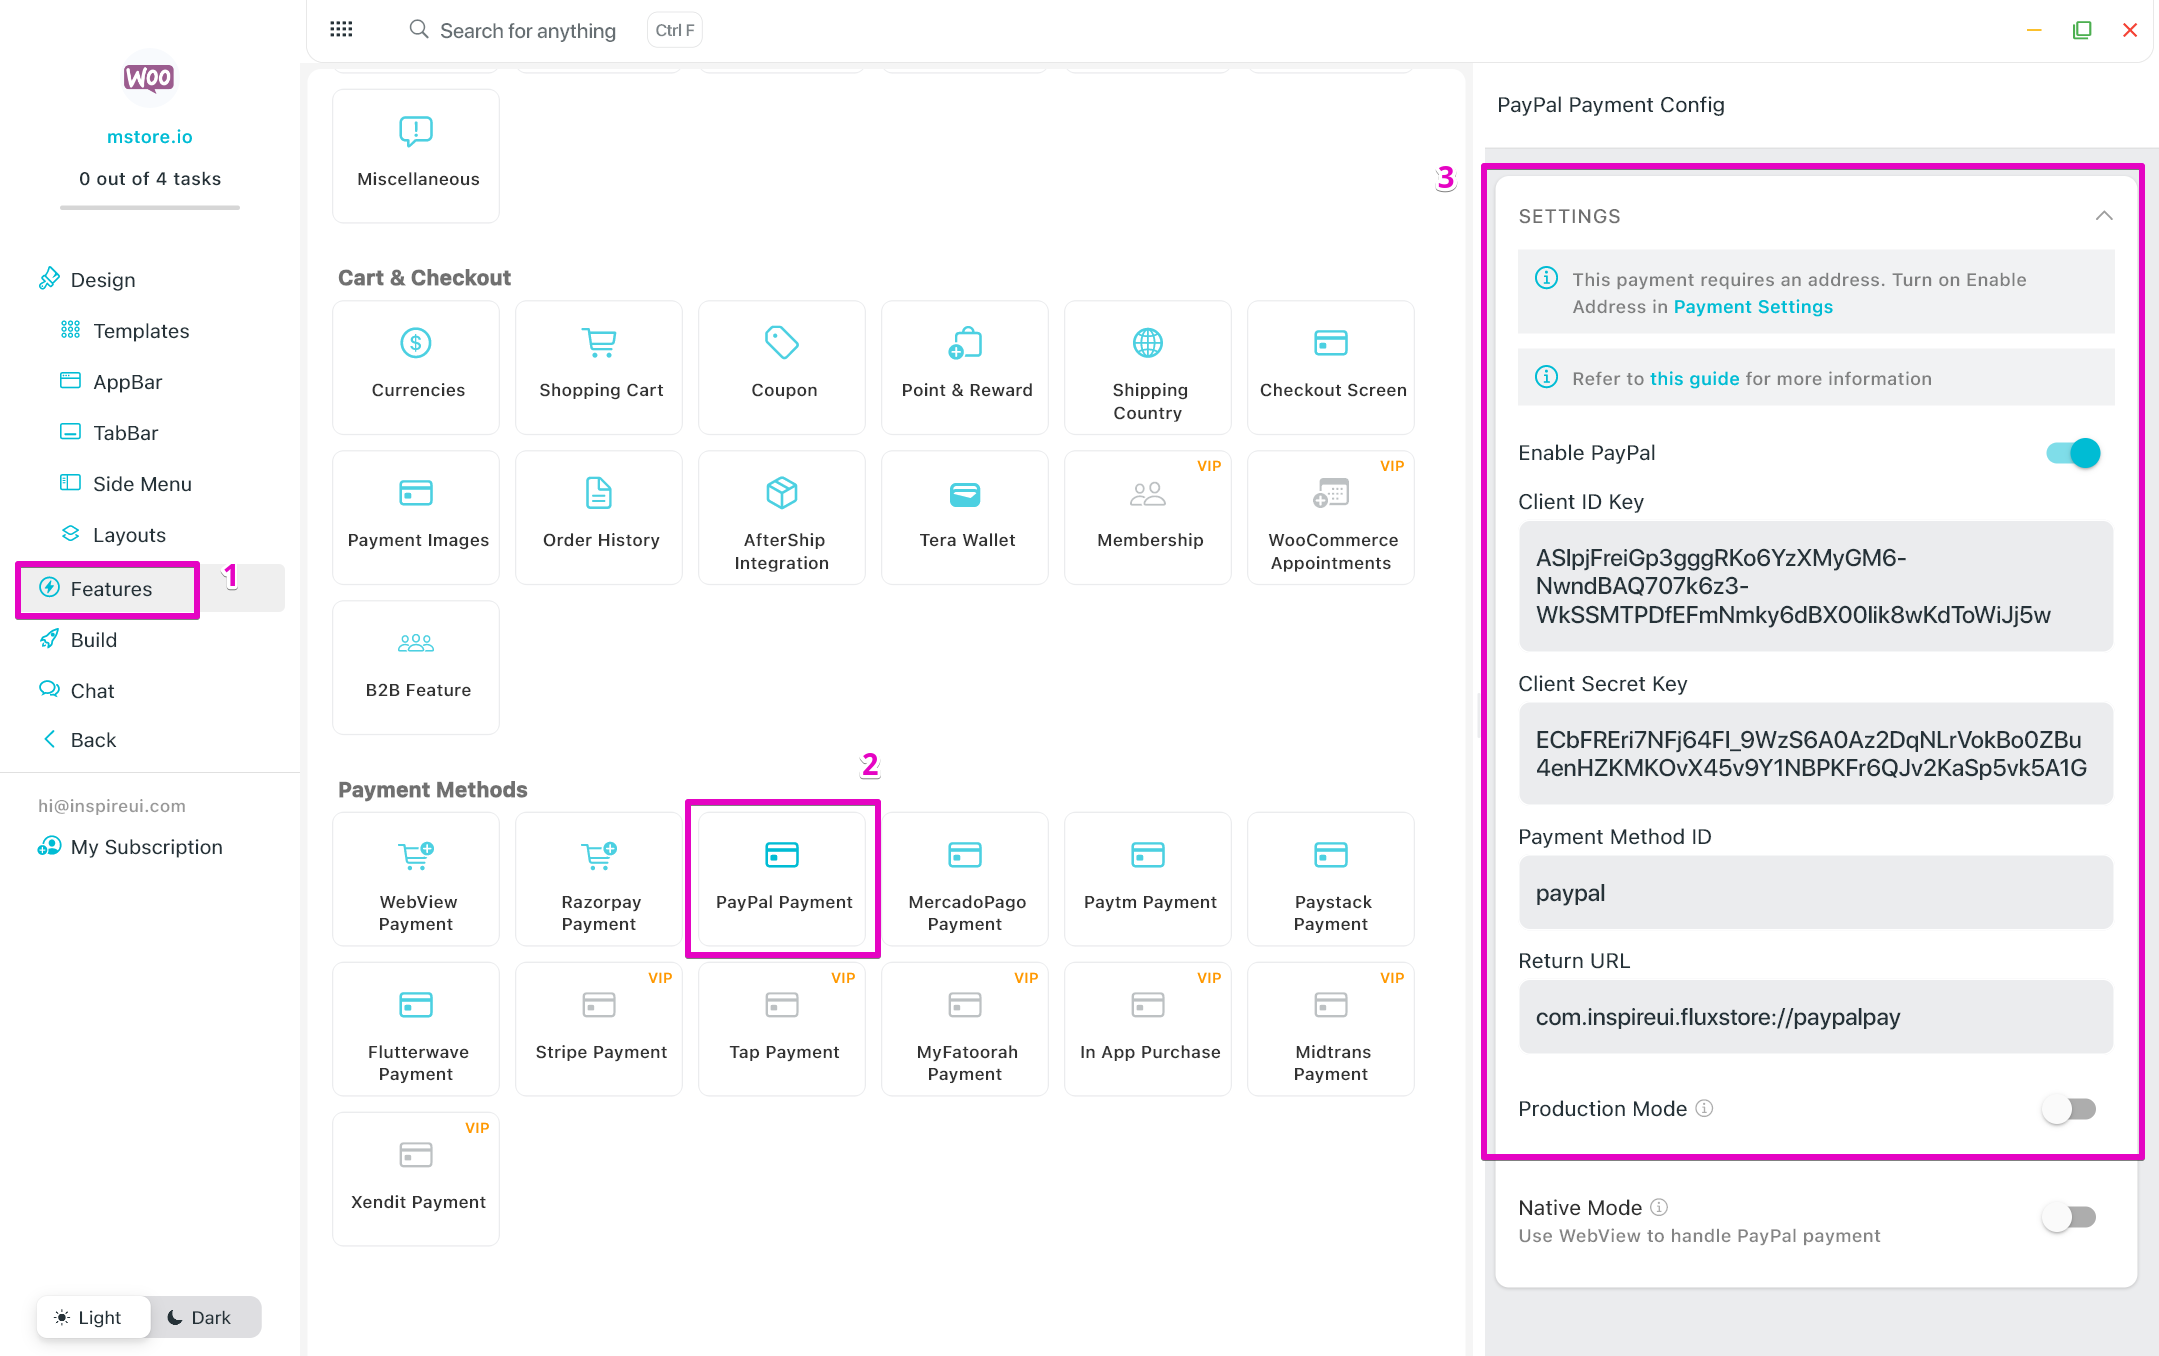
Step 2: On the side menu, navigate to the Features section. Under Payment Methods, select PayPal.
Step 3: Enable PayPal by toggling the Enable PayPal option.
Step 4: Enter your Client ID Key, Client Secret Key, and Payment Method ID.
Step 5: If your Client ID Key and Client Secret Key are live keys, enable Production Mode. If you are using keys in Sandbox mode, please disable it.
Step 6: Provide the Return URL, which should match your app's Android package name as this format your.android.package.name://paypalpay . For example: "com.inspireui.fluxstore://paypalpay".
You can refer to step 4 in the guide “2. Add an Android App into your Firebase project” to create or get the Android Package Name of your app.
Note: If your website uses the default PayPal payment gateway, the payment method ID will be "paypal".
However, if you have set up the PayPal payment gateway using the WooCommerce PayPal Payments plugin, the ID will be "ppcp-gateway".You can verify your payment method ID by going to your website as admin -> WooCommerce -> Settings -> Payments Tab -> Select the payment method you want to check, like this - https://tppr.me/Lapeq
3. Paypal SDK
Easy PayPal SDK Checkout UI for a seamless and convenient payment experience for PayPal payment method. (you can skip it)
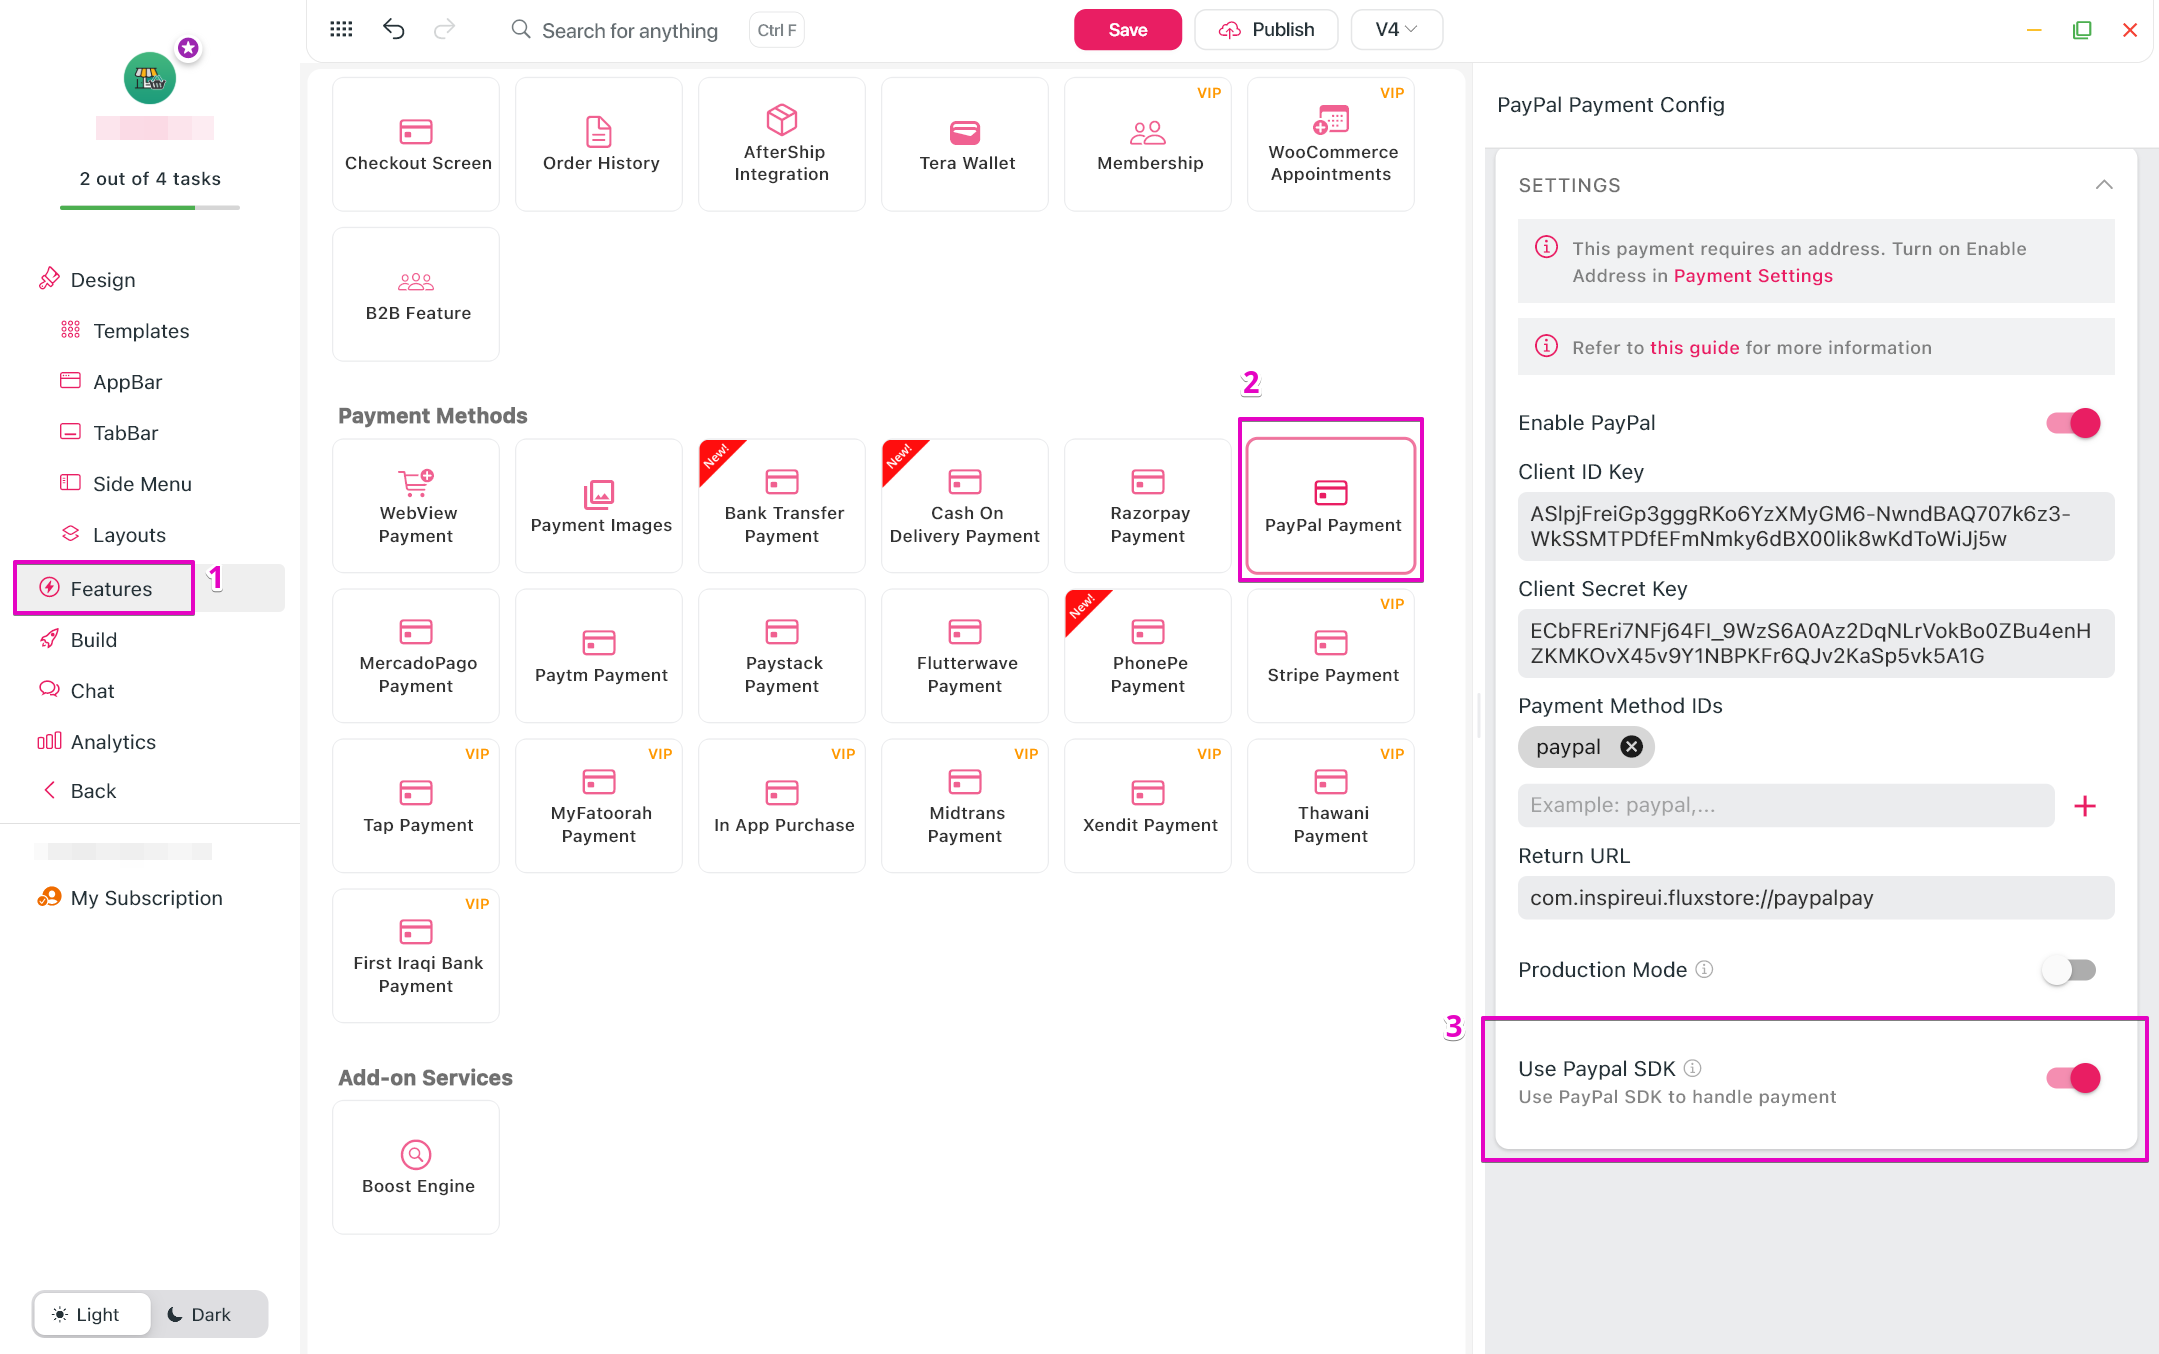
3.1. Enable Paypal SDK on FluxBuilder
Turn on the Use Paypal SDK option.
3.2. Configure the PayPal Developer
To use the Native Checkout UI, follow these steps:
Step 1: Open PayPal Developer Dashboard.
Step 2: Select My Apps & Credentials page on the Developer Dashboard.

Step 3: In the REST API apps, select your app.
Step 4: Scroll to Features, then select the Log in with PayPal and Native Checkout SDK checkboxes.
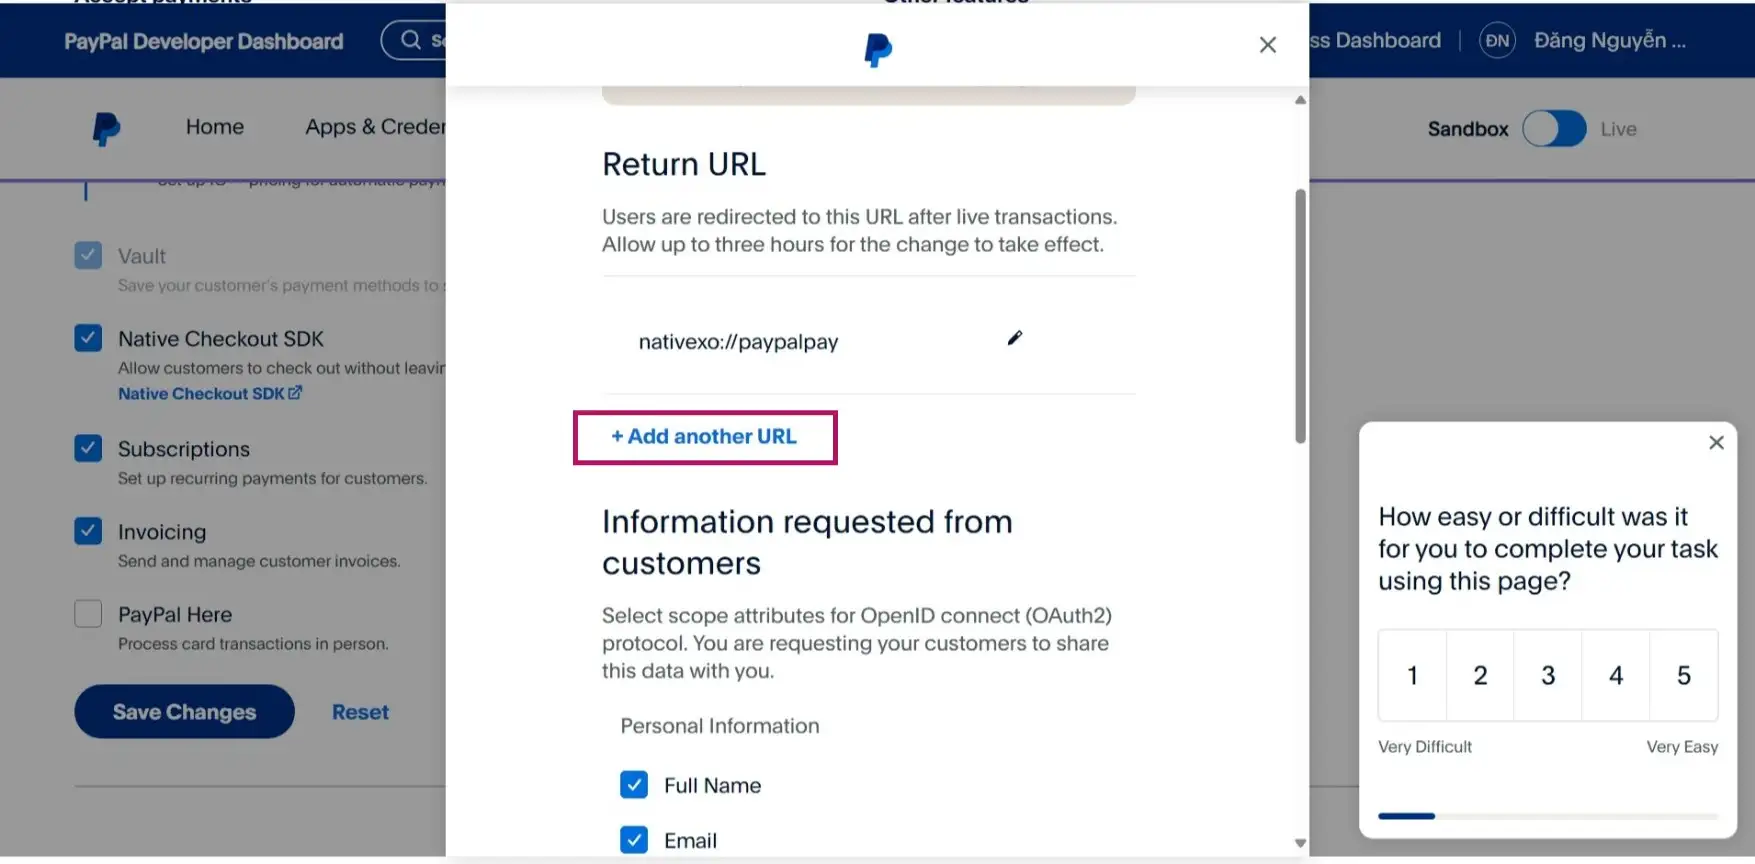
Step 5: Under the Log in with PayPal option, click on Advanced Settings. A pop-up window will open, and you'll see the Return URL field in the new window (Users are redirected to this URL after live transactions. Allow up to three hours for the change to take effect).
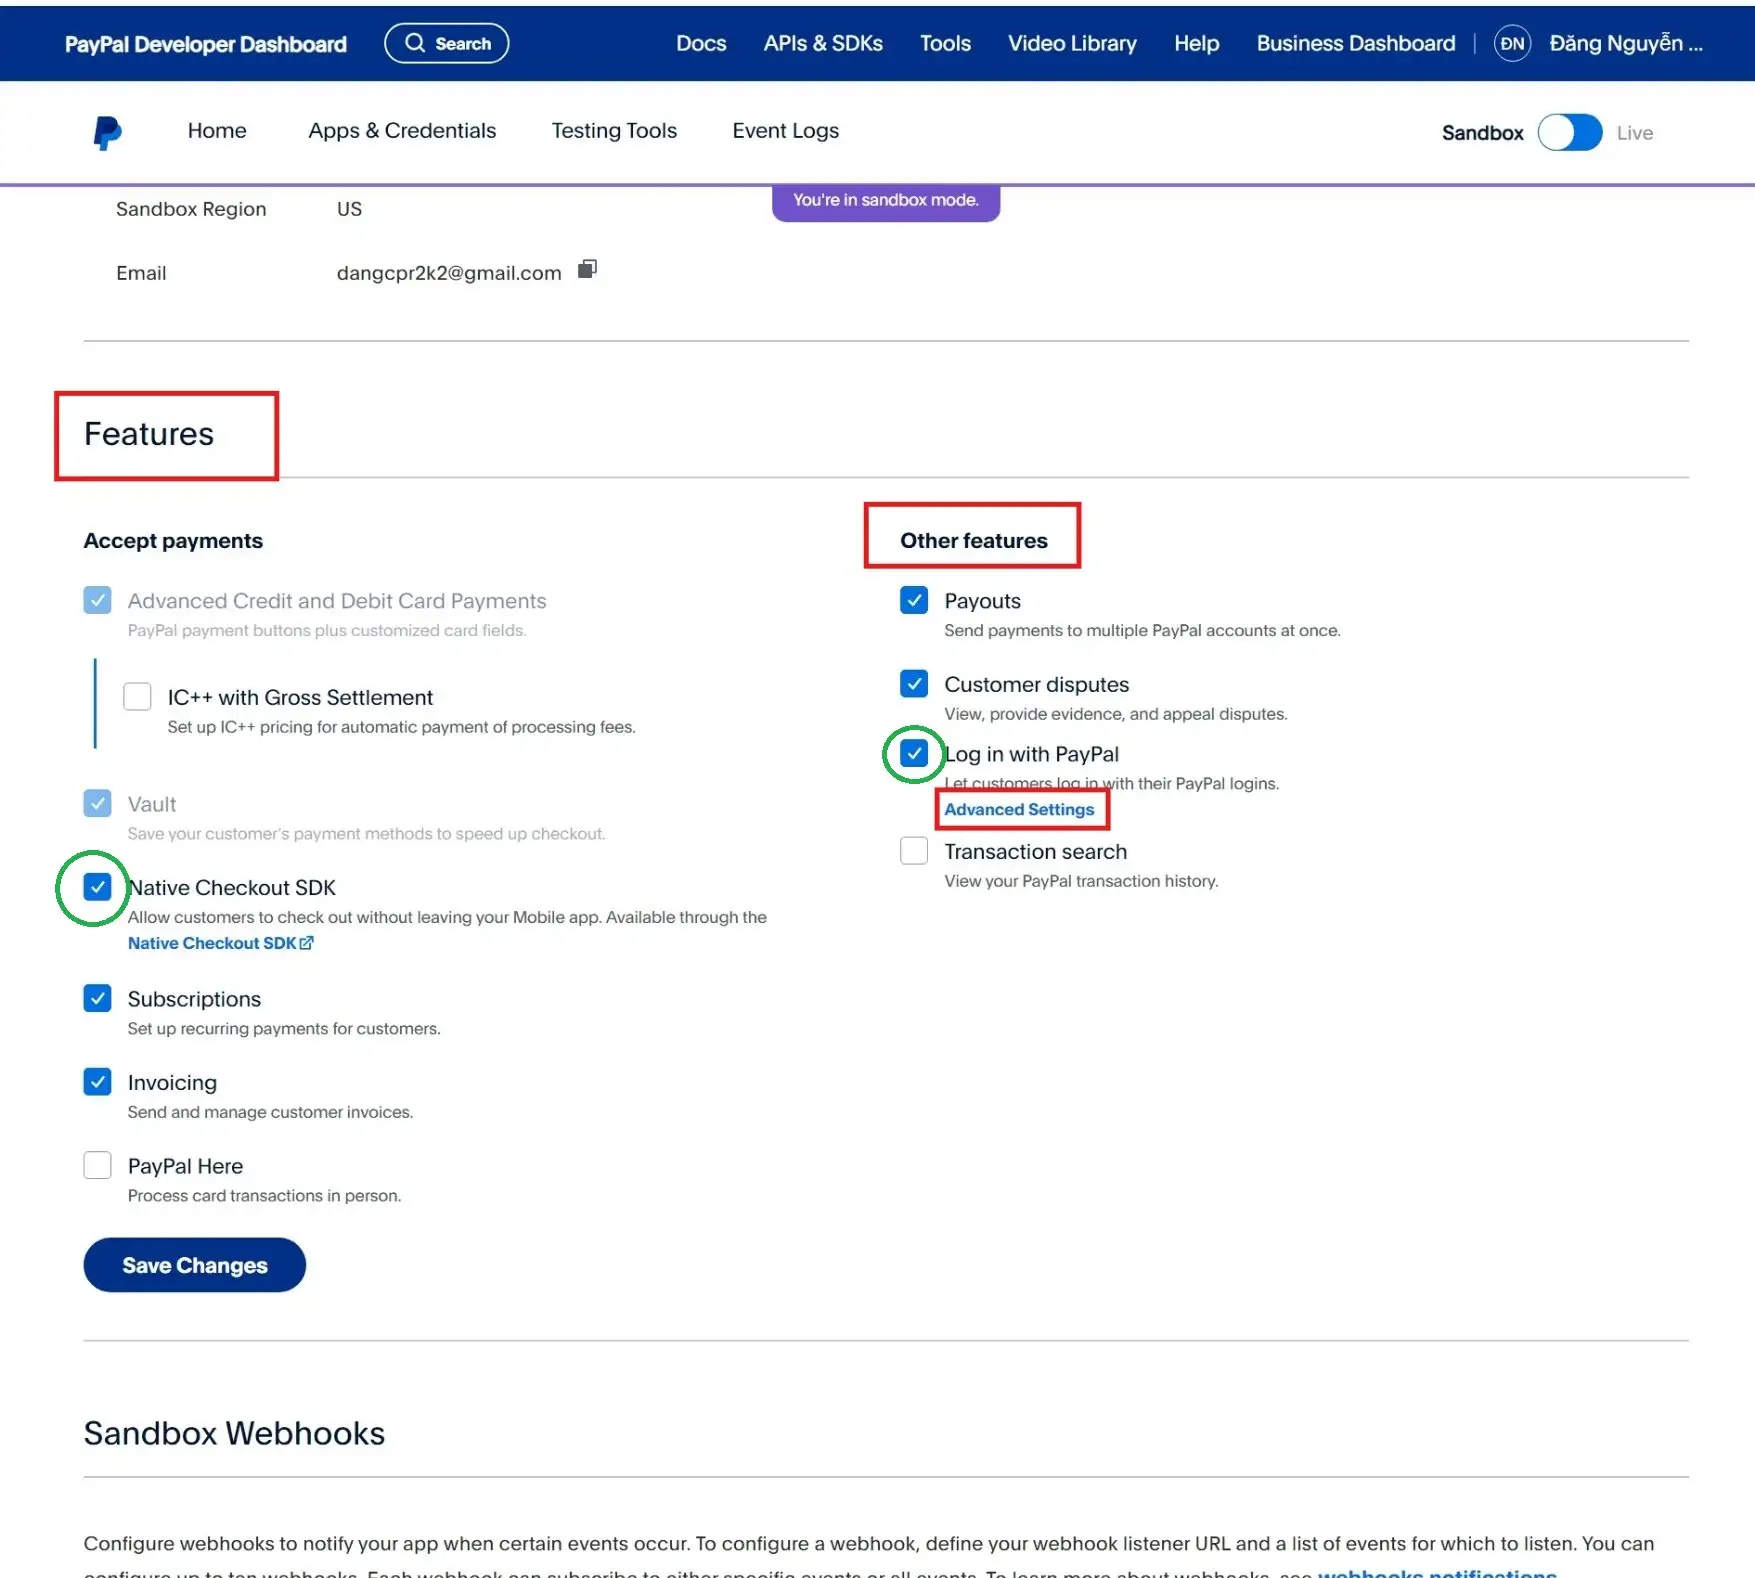
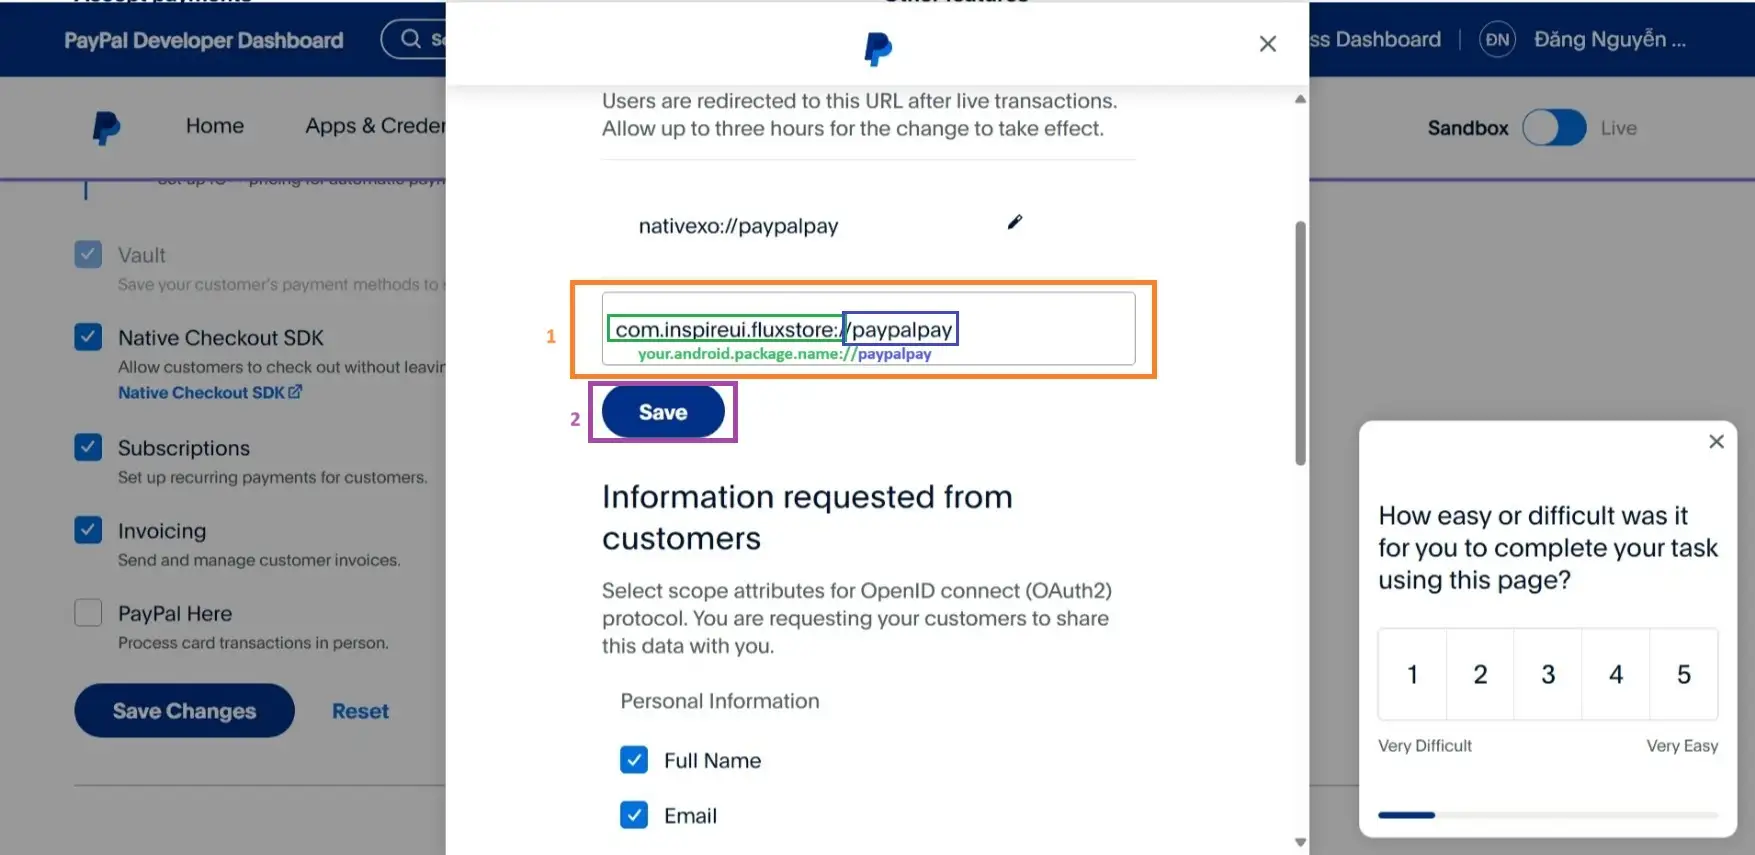
Step 6: Click + Add another Url . Then, in the Return URL field, enter your.android.package.name://paypalpay (for example: com.inspireui.fluxstore://paypalpay). Click "Save" Button.
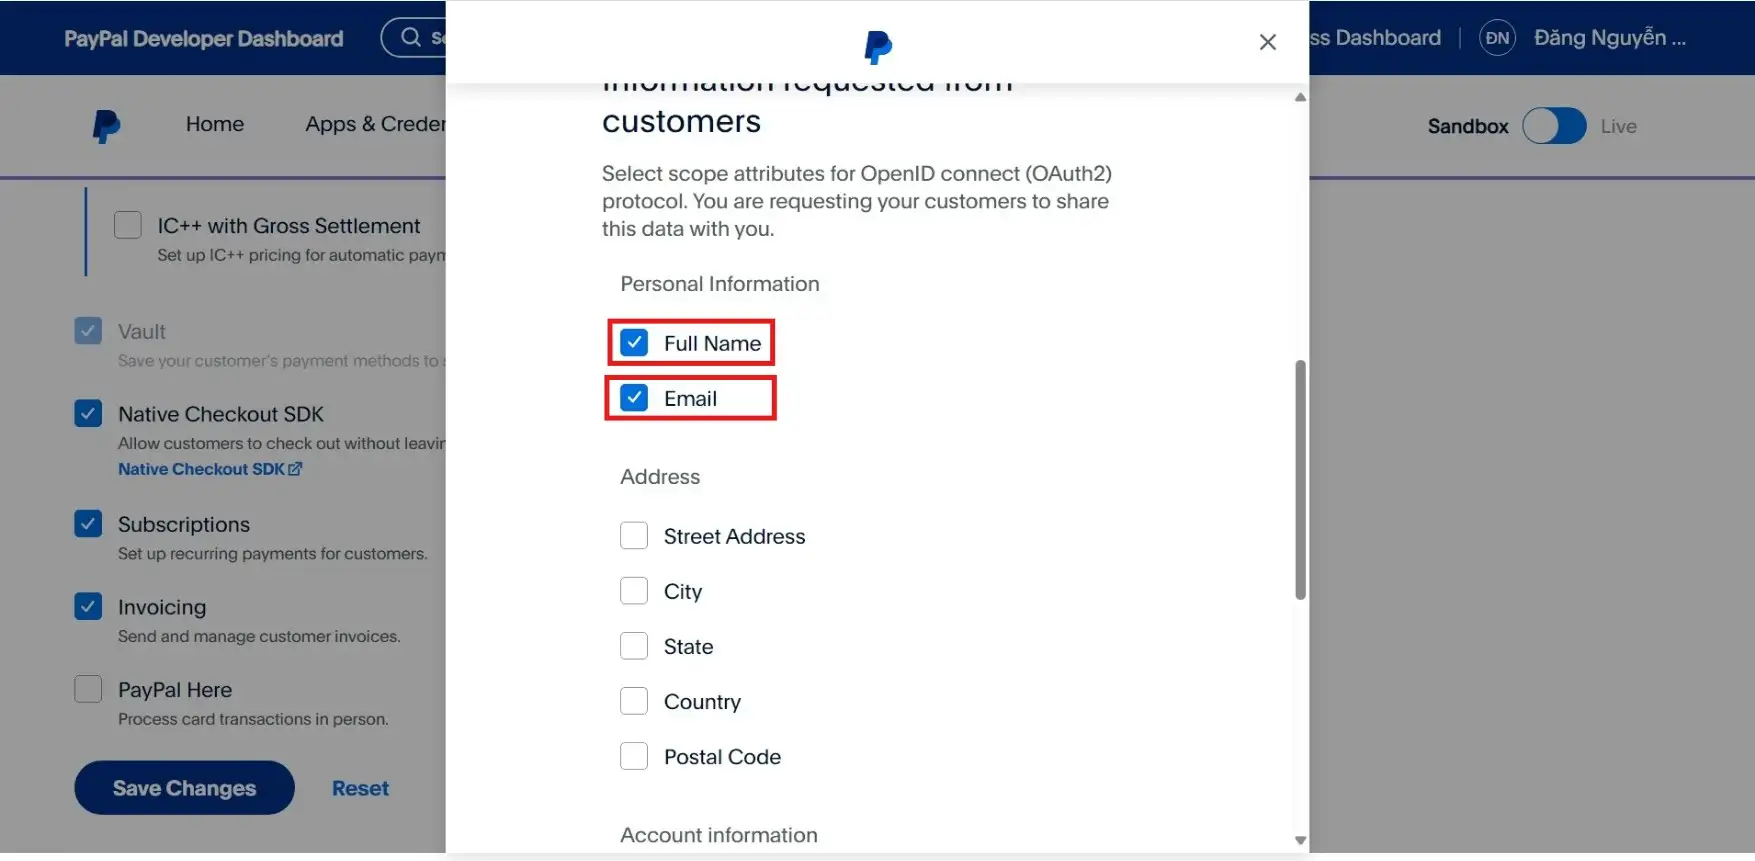
Step 7: Select the Full Name and Email checkboxes found within the Advanced Settings. Then, click "Save" button.
Step 8: Finally, click the "Save Changes" button.
That’s all!