Dynamic Links (DeepLink)
Dynamic Links
This section shows how to configure the Dynamic Links. There are some smarter ways to manage sharing links in your apps, please select and open one option to set up before proceeding with the following guides:
- ✅ FluxBuilder Dynamic Links: A new powerful sharing system that makes it easy to share product pages, categories, or blogs with deep links. FluxBuilder Dynamic Links is the top alternative to Firebase Dynamic Links. This system is fully integrated into FluxBuilder for better reliability, customization, and branding.
- Universal Links (Self-Hosted): Enable Self-Hosted Share Links to provide a seamless experience. Share links from your own website. No configuration required.
- Branch.io Links
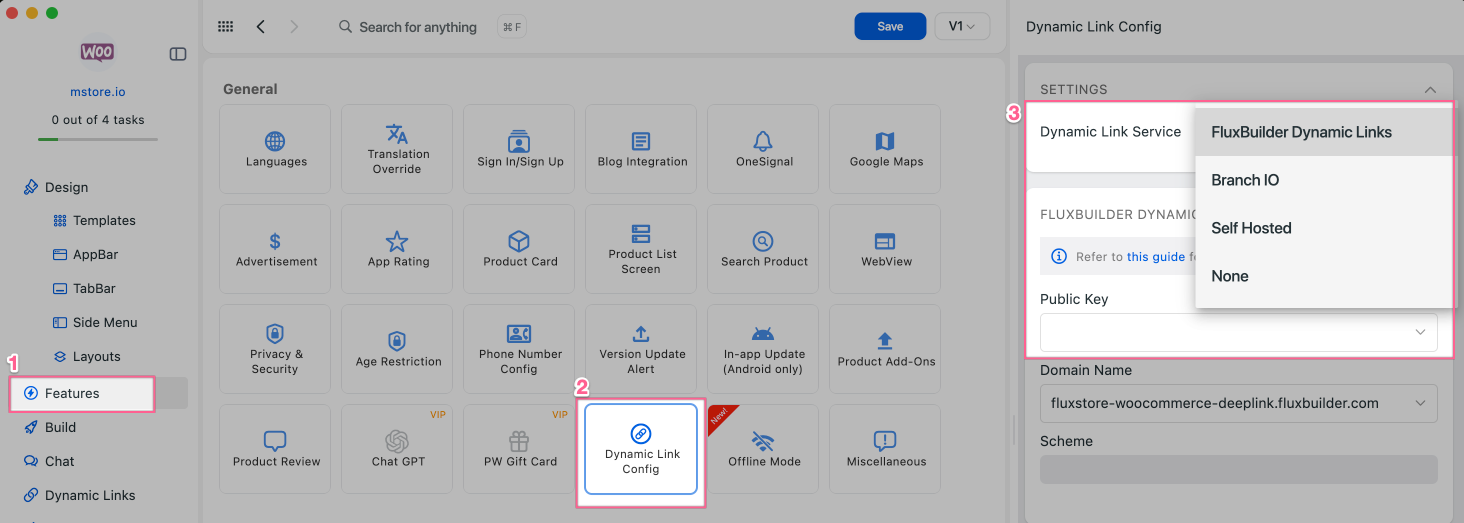
Enable this feature: create your app on FluxBuilder > Features > General > Dynamic Link Config > in the Dynamic Link Service, select "FluxBuilder Dynamic Links", "Branch IO", “Self Hosted”, or "None" > enter data.
1. Share a Product
This step guides to share a specific product (apply for WooCommerce platform).
- On your website, go to Admin Dashboard > Settings > Permalinks. At Product permalinks, edit Custom base:
/product/

- You can now get Dynamic Link by click on "Share" in a product. This is how this feature should work: Android demo reference & iOS demo reference
2. Share Tag
Users can share a list of products with the same Tag. When users open the link, the App will be launched and show all products under that Tag.
3. Share a Tab or Screen
Precondition:
- If you use FluxBuilder Dynamic Links, please follow this guide (section Create New Links) to create a dynamic link from the custom link above
- If you use BrancIO, please follow this guide to create a dynamic link from the custom link above
- If you use Universal Links/App Links, just use the custom link above directly.
Then:
To navigate users to a specific screen, you need to create a custom link: Fill the link as scheme: your-home-page + ? + screen you want to open. We currently support tab_number and screen. For example:
- tab_number: input a number like https://mstore.io?tab_number=3
- screen: input a screen name like https://mstore.io?screen=category
Note:
tab_numbersupports values from 1 to the number of tabs you have configured on your app.screensupports the following list:- home-search
- profile
- list-blog
- wishlist
- category
- category-search
- search
- cart
4. Share a Product List
Improved the Share Link feature to support more flexible product list configurations.
- Remove previous limitations in link creation, ensuring shared links always navigate to the intended screen regardless of layout configuration
- Users can now generate and open share links correctly even when layouts are / are not tied to a specific category, brand, or tag.
5. Push Notifications with dynamic link
The feature allows sending a Notification with the Product URL or a specific page. When users open Notification, App is launched with that product/page.
Manual guide:
Use FluxBuilder:
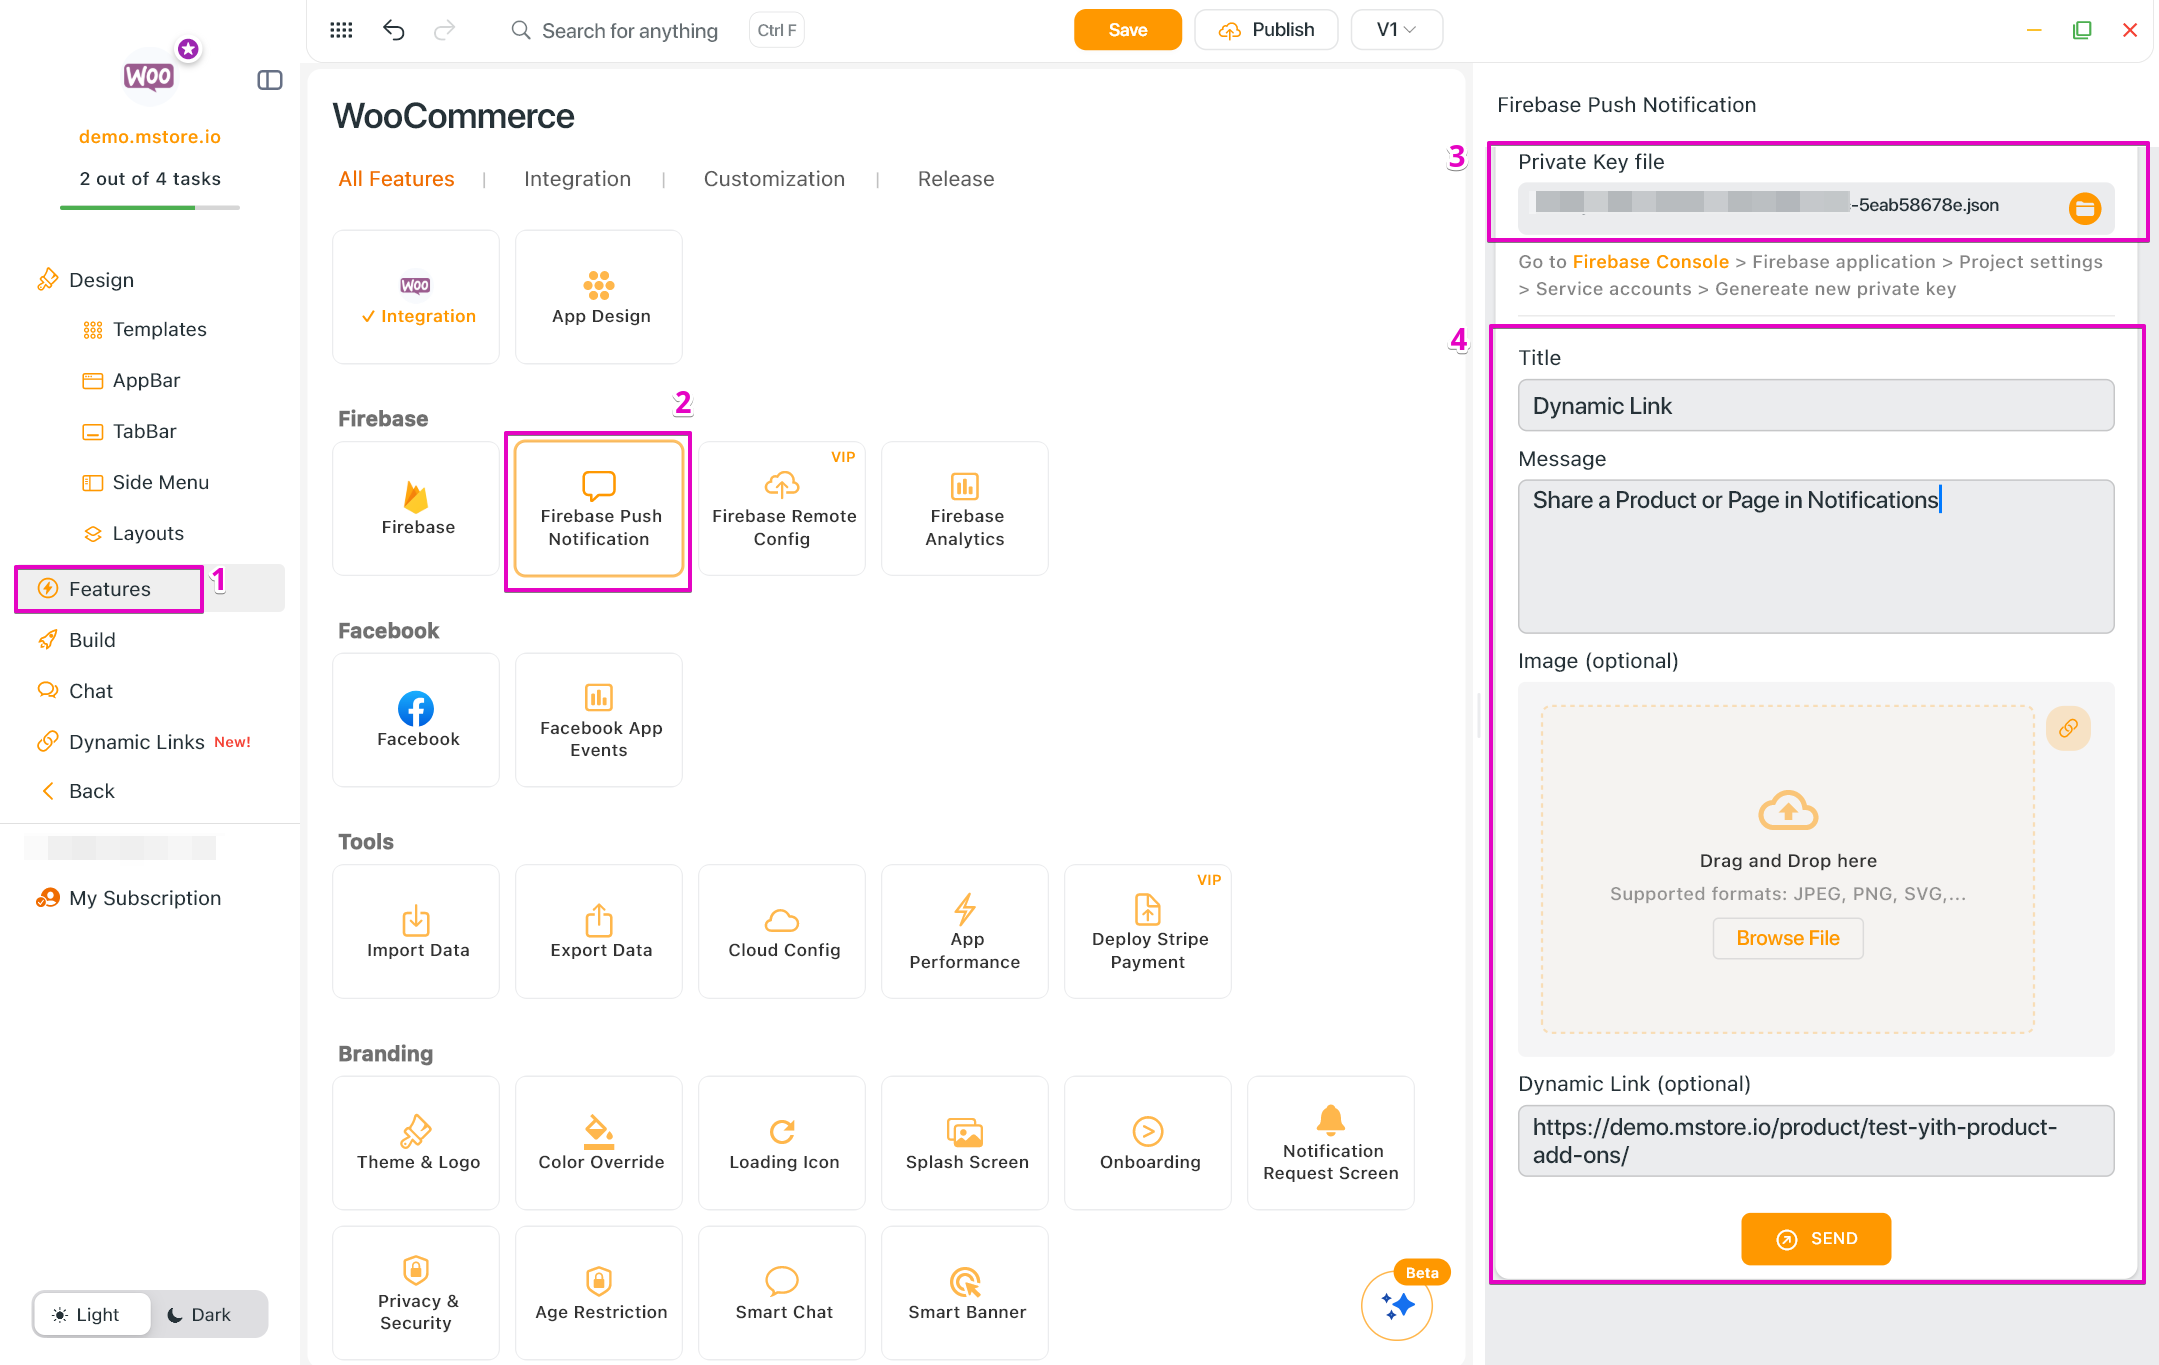
- Open your app on FluxBuilder.
- Go to Features. Open Firebase, enable the feature.
- Open Firebase Push Notification.
- Upload the Private Key File. (Follow this guide to get Private Key)
- Input Title, Message, and input the product URL into Dynamic Link.
- Click Send button.
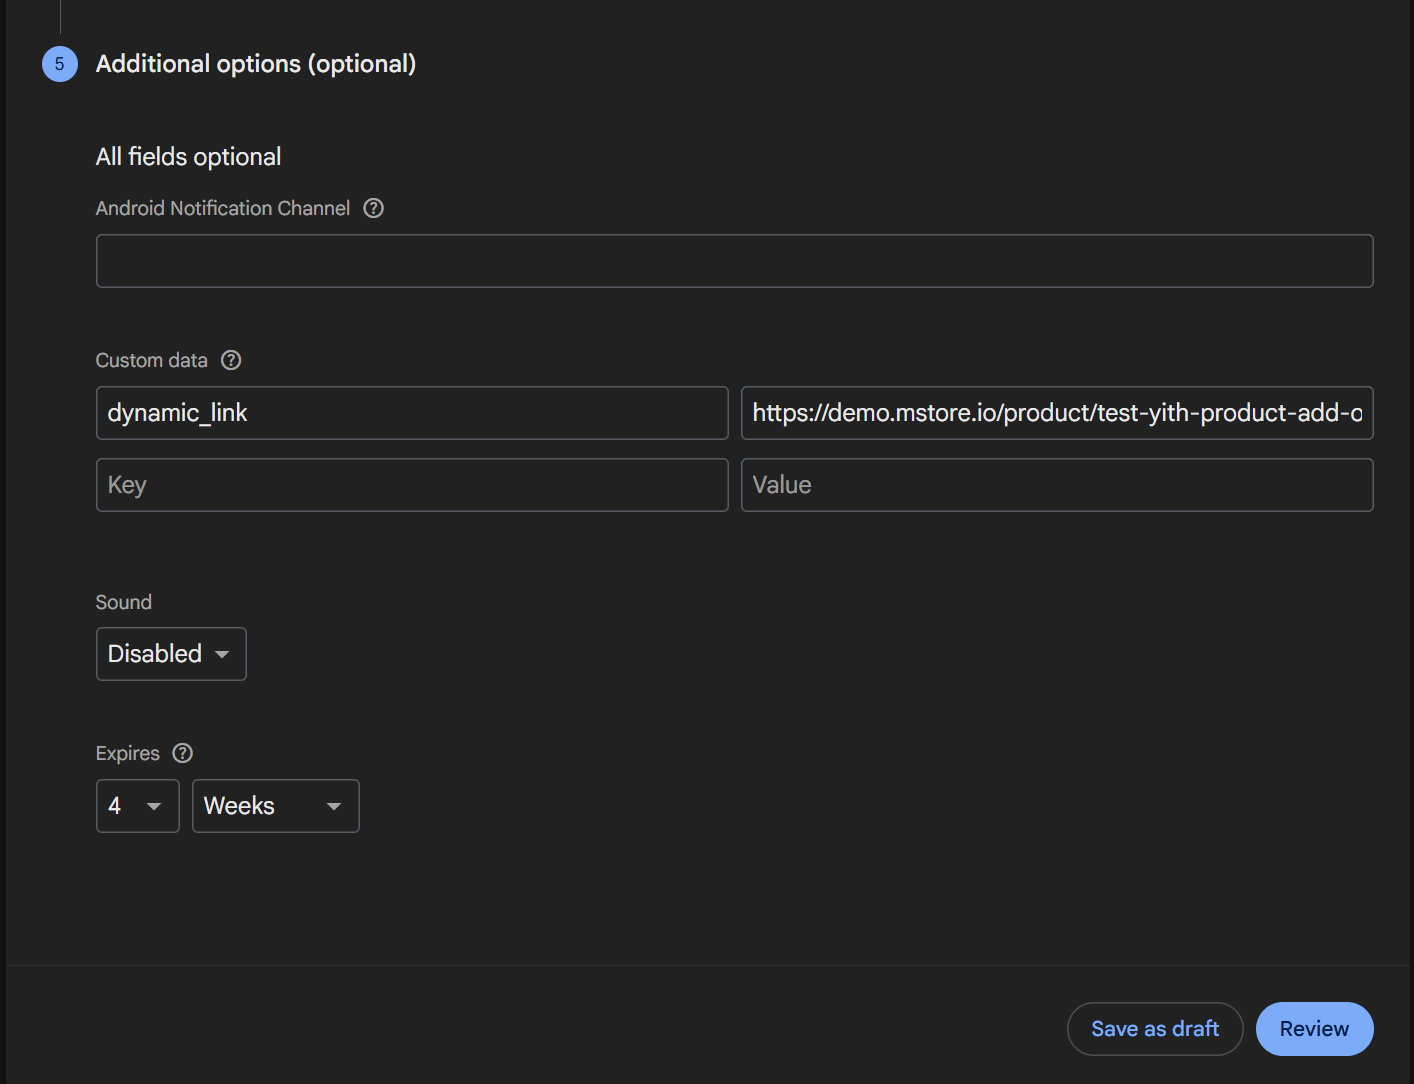
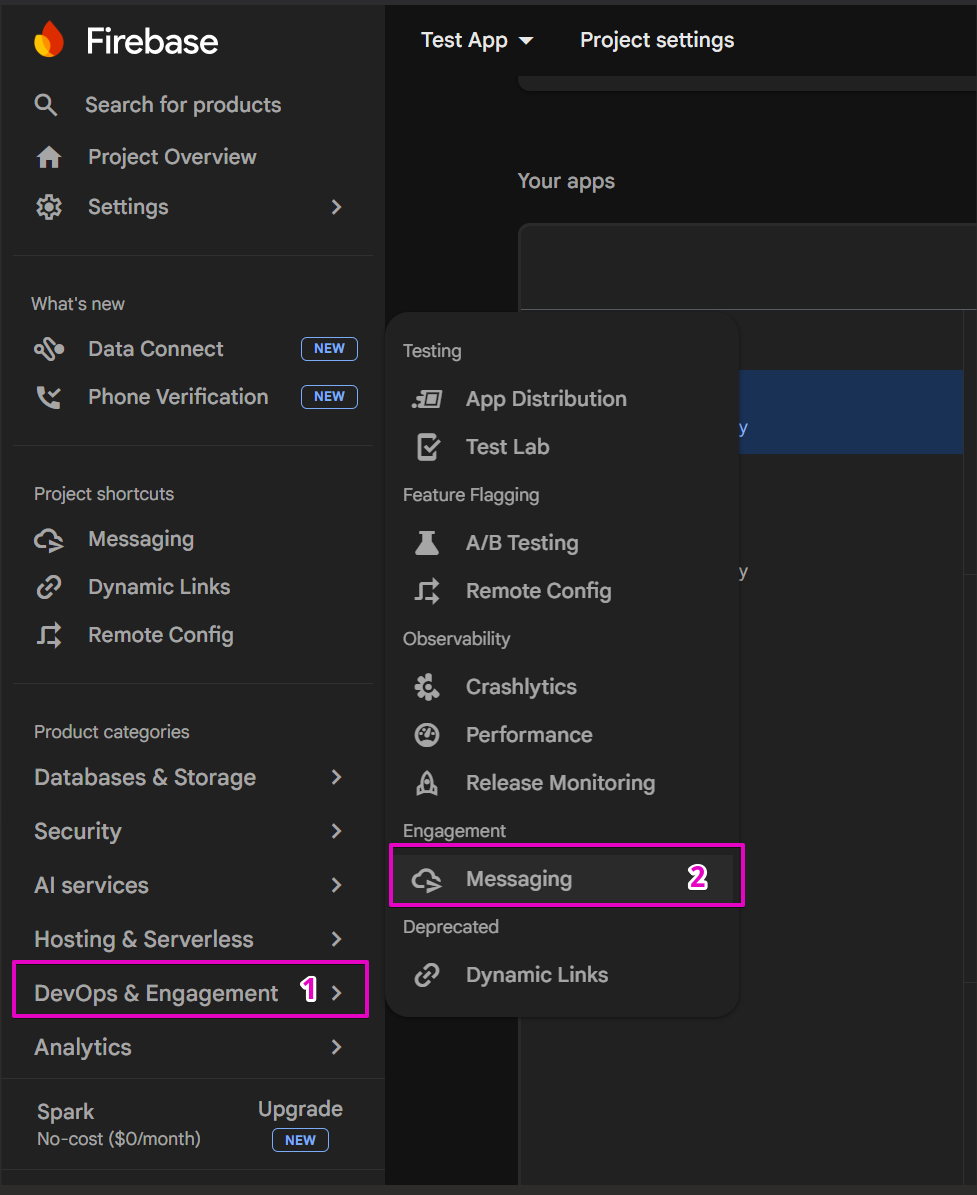
Or you can push notification directly on Firebase Console. To make the feature work, go to the DevOps & Engagement from Firebase Console, open Messaging. Then, click on New campaign button and select Notifications.
Then, on the Compose Notification screen, fill in the necessary information in all steps Information, Target, Scheduling, Conversion events (optional), and Additional options (optional).
In step 4 - Additional options (optional) - you will add a Key-Value for the Custom Data, fill dynamic_link for Key and the Product URL for Value.