Judge.me Review
The feature is available for the Shopify app only. If you want to set up product reviews, you can do so using the Judge.me. Follow these steps to get started:
1. Installing the Plug-in to Your Website
Go to https://apps.shopify.com/judgeme and install the plug-in onto your Shopify site.
2. Creating an App in Judge.me
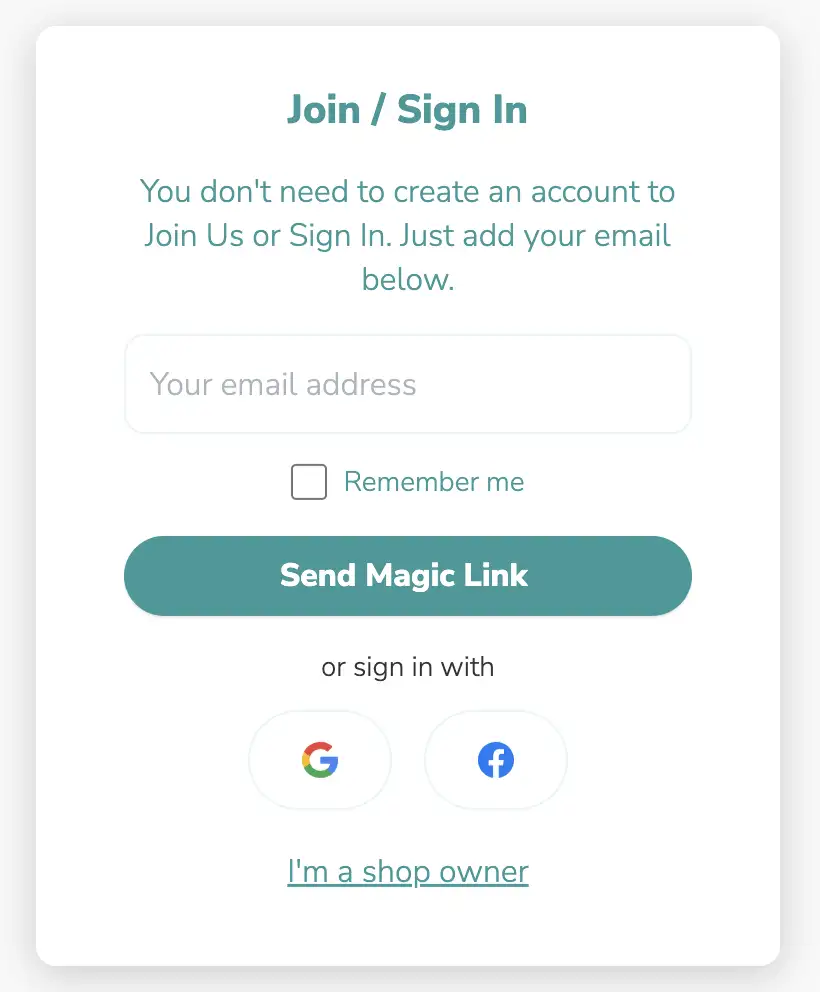
Step 1: Go to judge.me/login and enter your email address to log in as a reviewer.
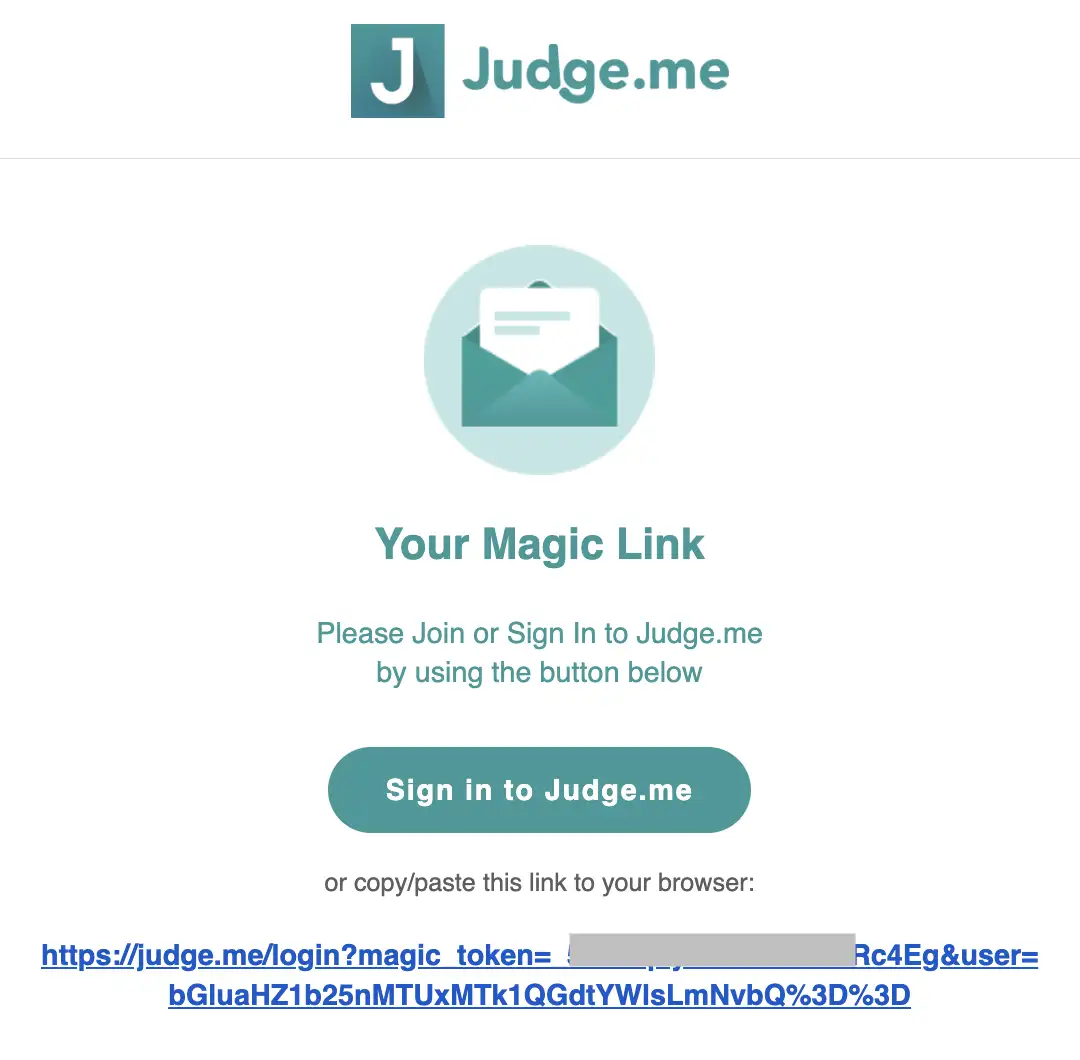
Step 2: Judge.me will send a "magic link" to your email, follow the link to continue the login process.
Step 3: Once you are logged in, simply click the link below to create your new app: https://judge.me/profile/apps/new
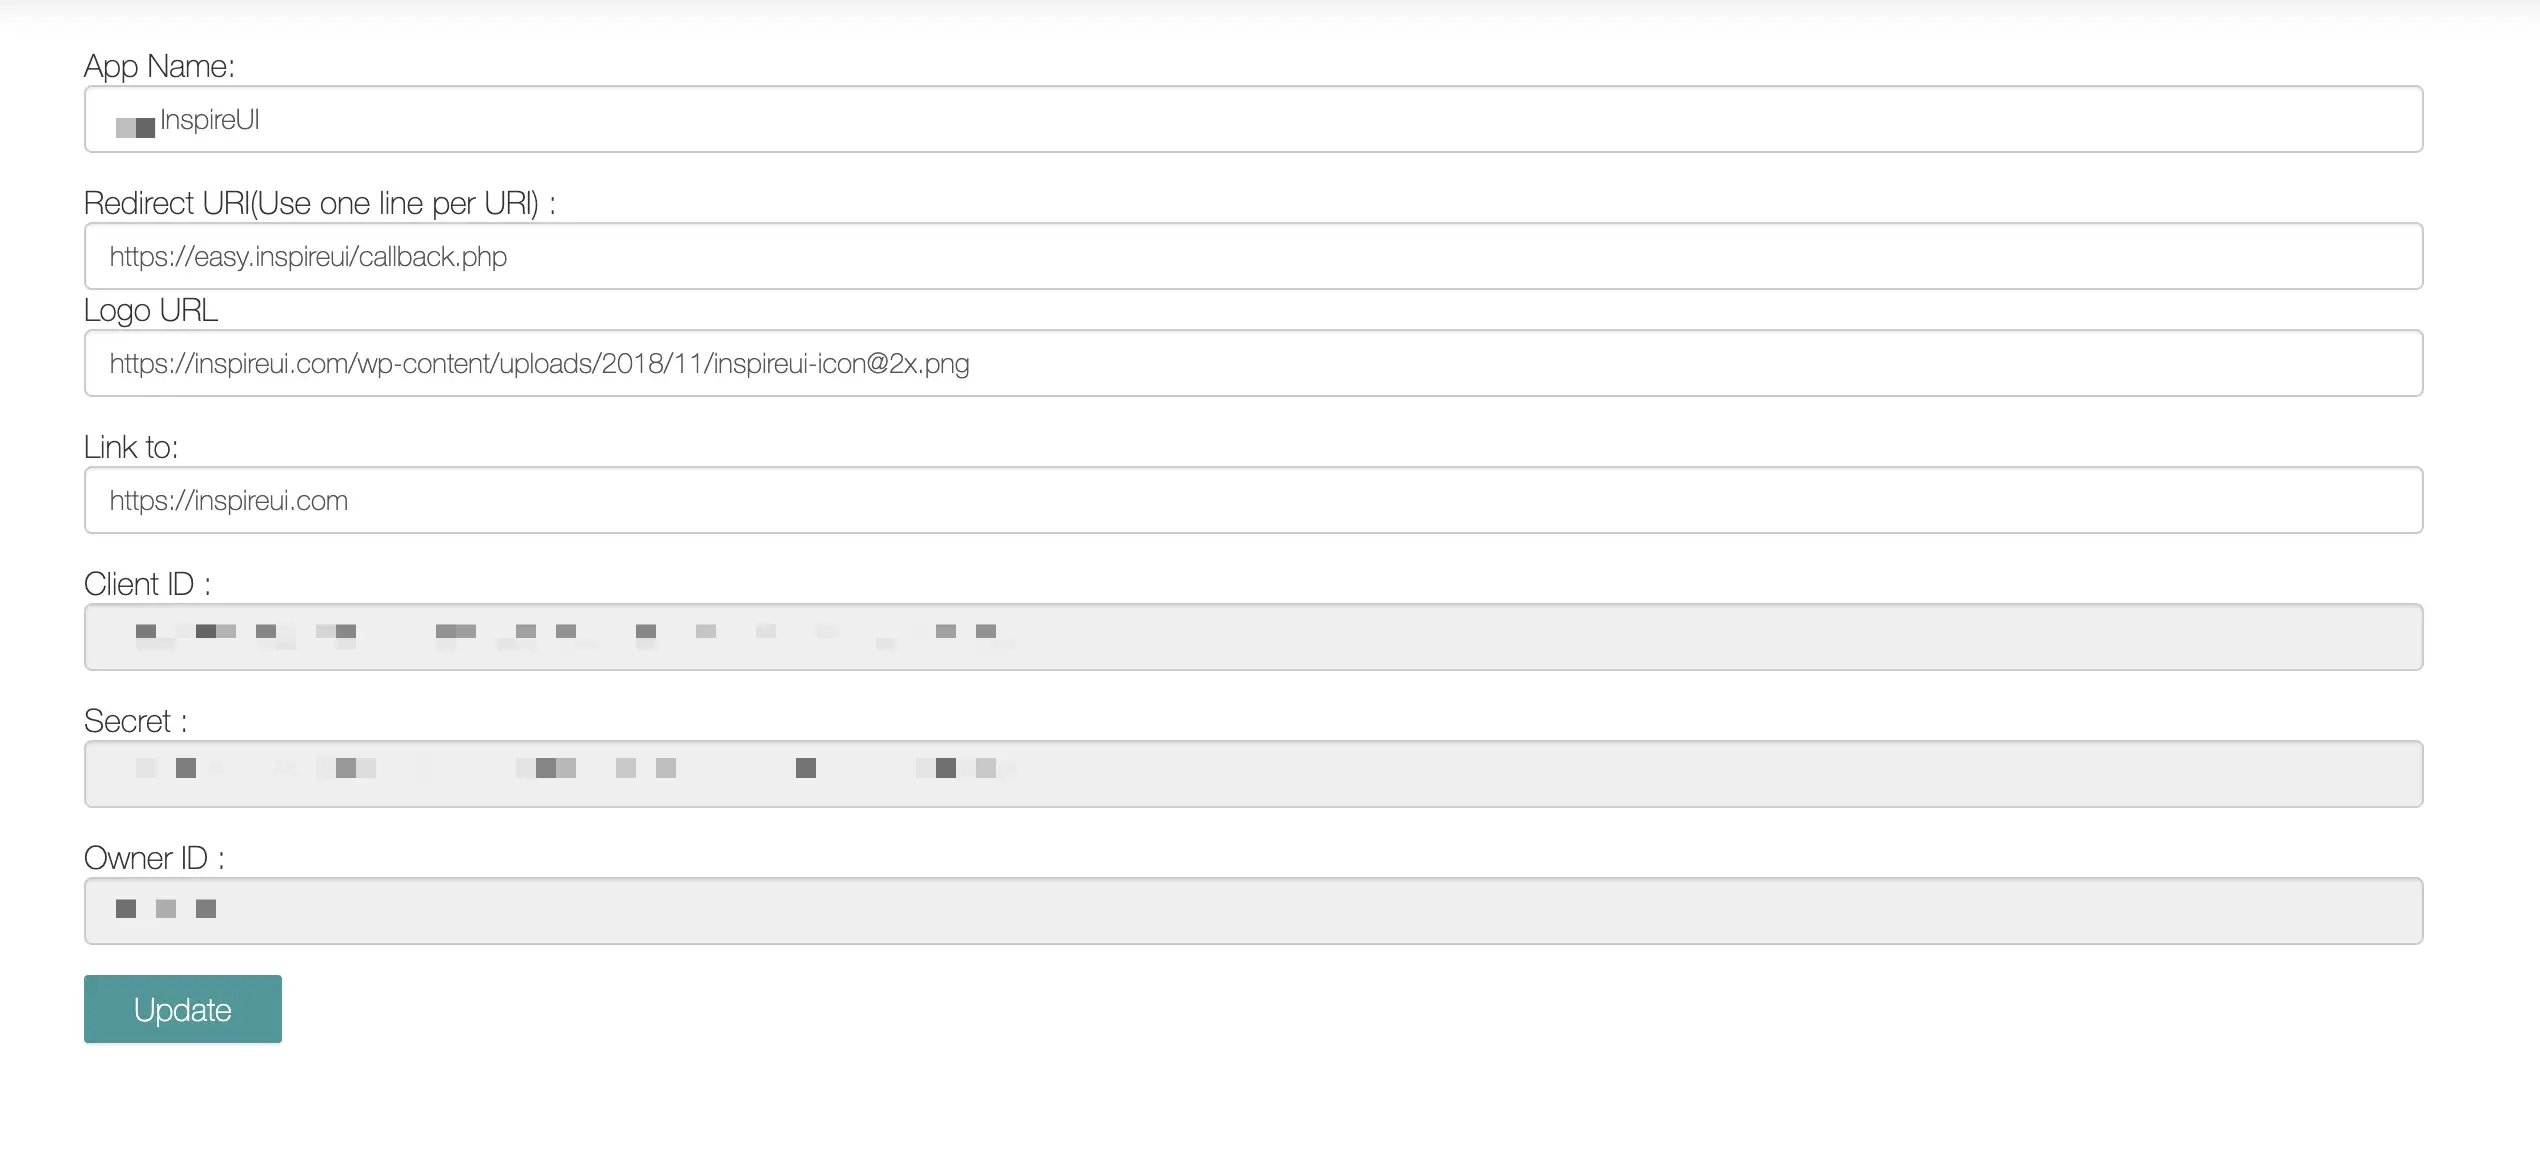
Step 4:Please complete all necessary fields and click the "Create" button.

- App Name: Please provide the name of your application.
- Redirect URI: This is the endpoint that Judge.me will use to send authorization confirmation with the authorization code back to your app server. Please provide the complete URL, for example: https://example.com/auth/judgeme/callback.
- Logo URL: Please provide a direct link to your application logo.
- Link to: Please provide a link to your application's homepage.
Step 5: Once your app is created, go to Select My Apps, simply click the "edit" icon to access the Client ID and Secret. You can use these values to make an authorization request and exchange them for an access token later.

Step 6: To proceed, kindly copy your Client ID and Redirect URI then replace it in this URL (replace [your_client_id] and [your_redirect_uri] in the following example link):
https://judge.me/oauth/authorize?client_id=[your_client_id]&redirect_uri=[your_redirect_uri]&response_type=code&scope=read_products%20read_reviews%20write_reviews&state=1
Step 7: Please copy the link above and paste it into your browser, then press Enter.
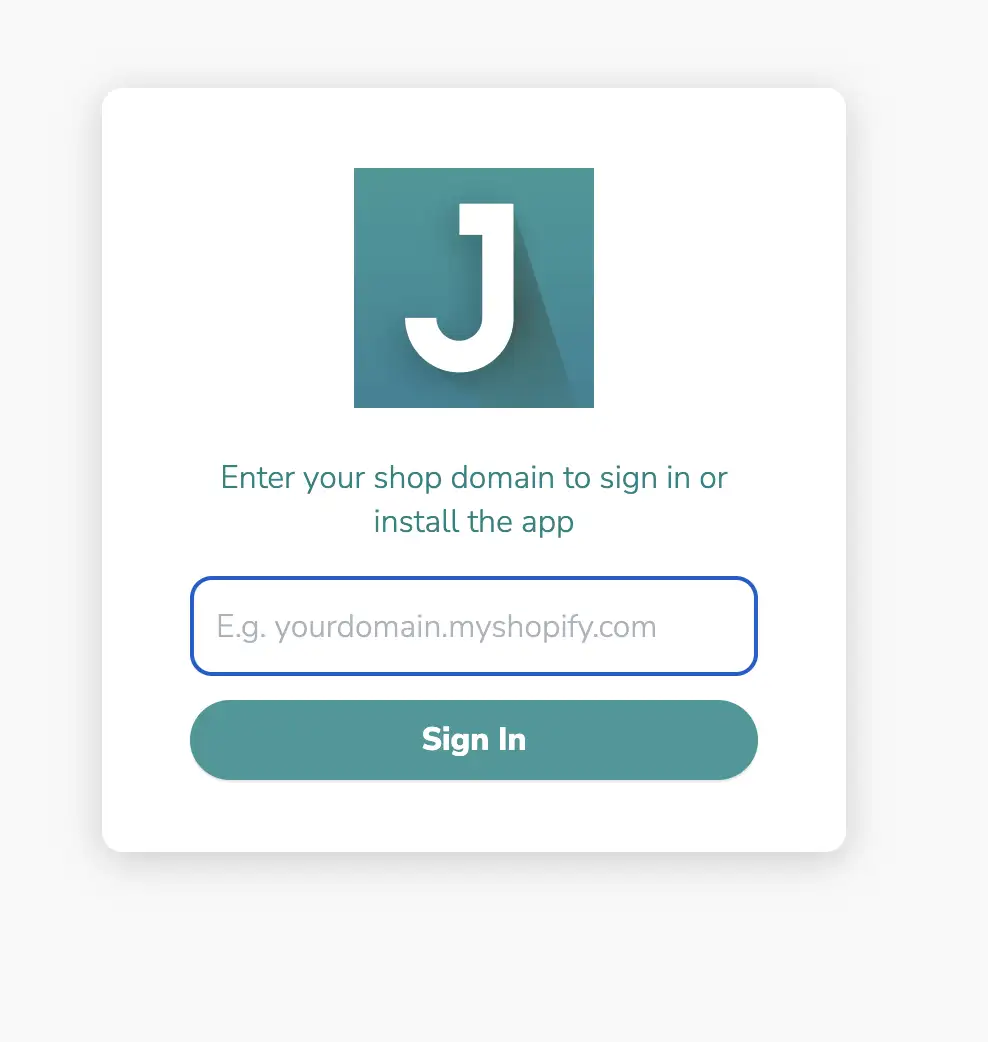
Step 8: Input your Shopify domain site and click Sign In. It will navigate to your admin dashboard.
Step 9: Paste this link to browser again and enter, It will show, click Authorize.
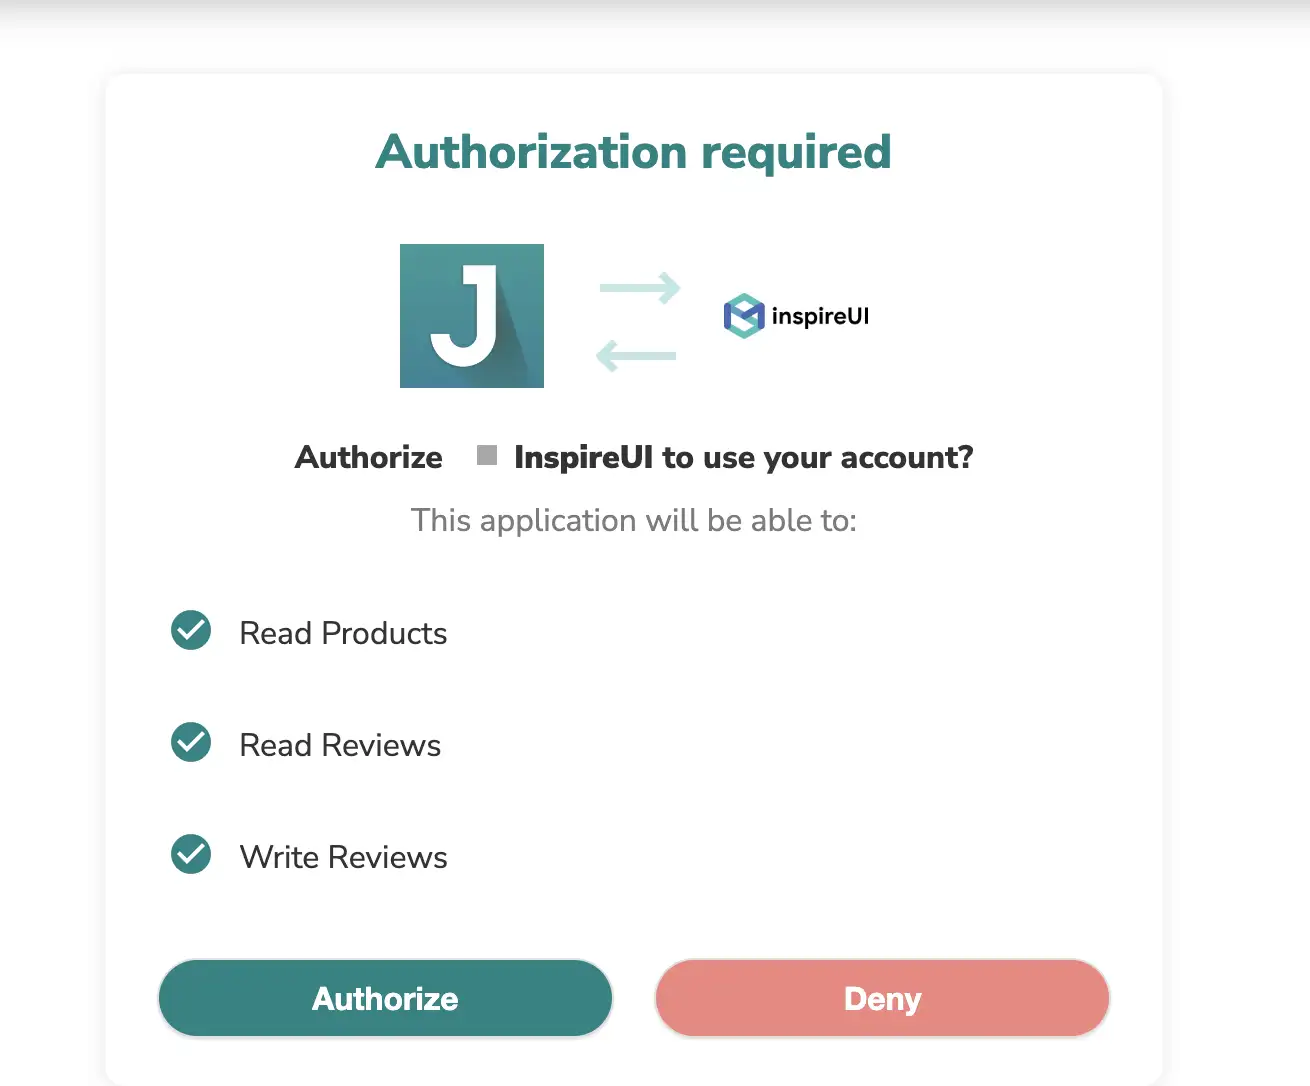
Step 10: After clicking Authorize, it will navigate to the page error like this, don’t worry, let copy the data after “code=”.

Step 11: Fill the data to this block code include:
- Client ID and Secret get from Step 5
- Code get from Step 10
curl --location "https://judge.me/oauth/token" --header "Content-Type: application/json" --data "{ \"client_id\": \"[your_client_id]\", \"client_secret\": \"[your_client_secret]\", \"code\": \"[your_code]\", \"redirect_uri\": \"[your_redirect_uri]\", \"state\": \"1\", \"grant_type\": \"authorization_code\"}"
After filling data to the block code below, please copy and paste it to Terminal on macOS or Command line tools on Windows and Enter, you will get accessToken like this
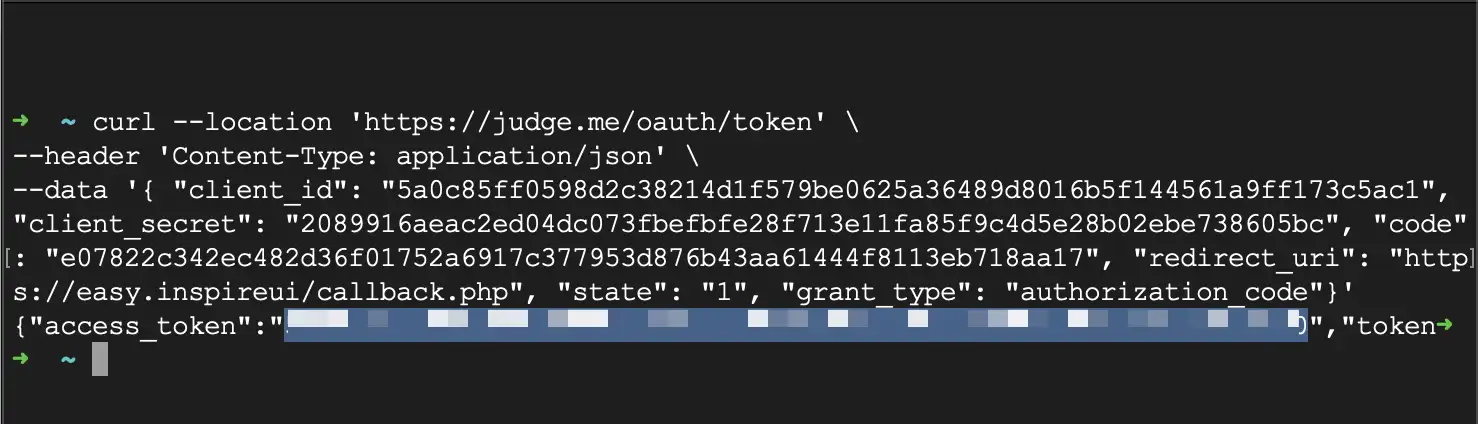
Step 12: Copy accessToken and save it for later use.
3. Enable Review on App
Video guide:
Manual guide:
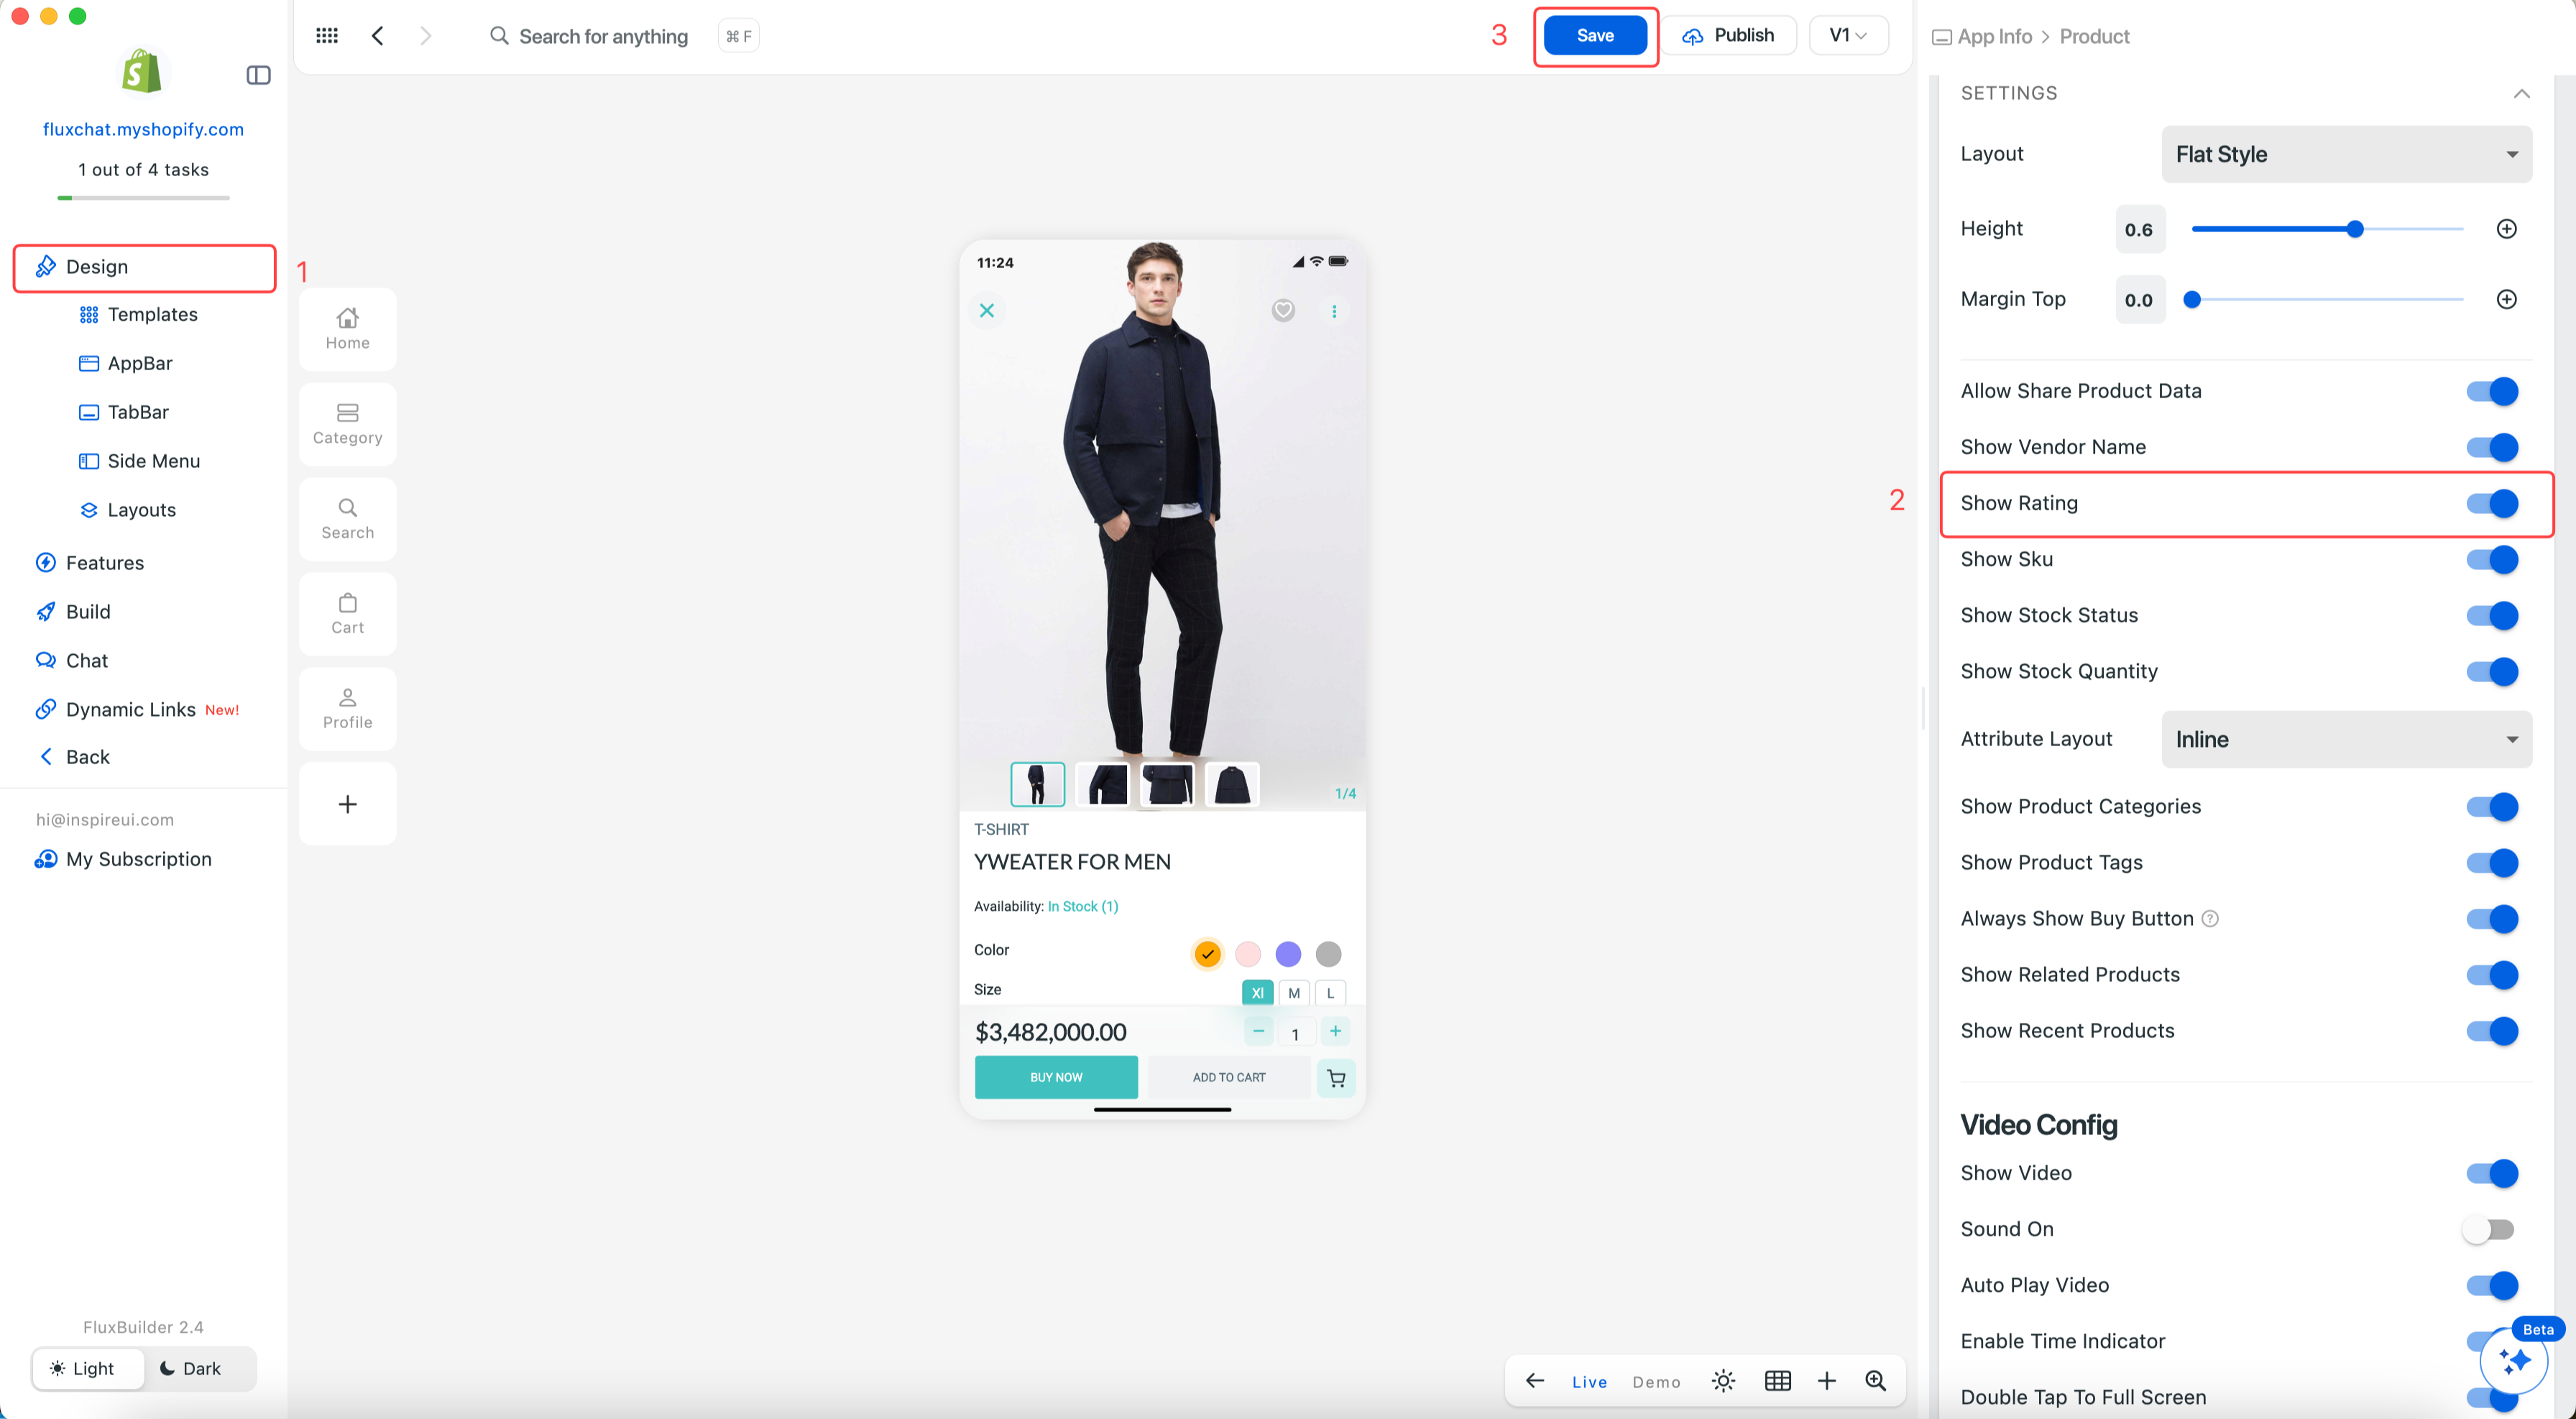
Step 1: Open your app.
Step 2: On the simulator, click on a product to open the PRODUCT config.
Step 3: Turn on Show Rating and click Save.
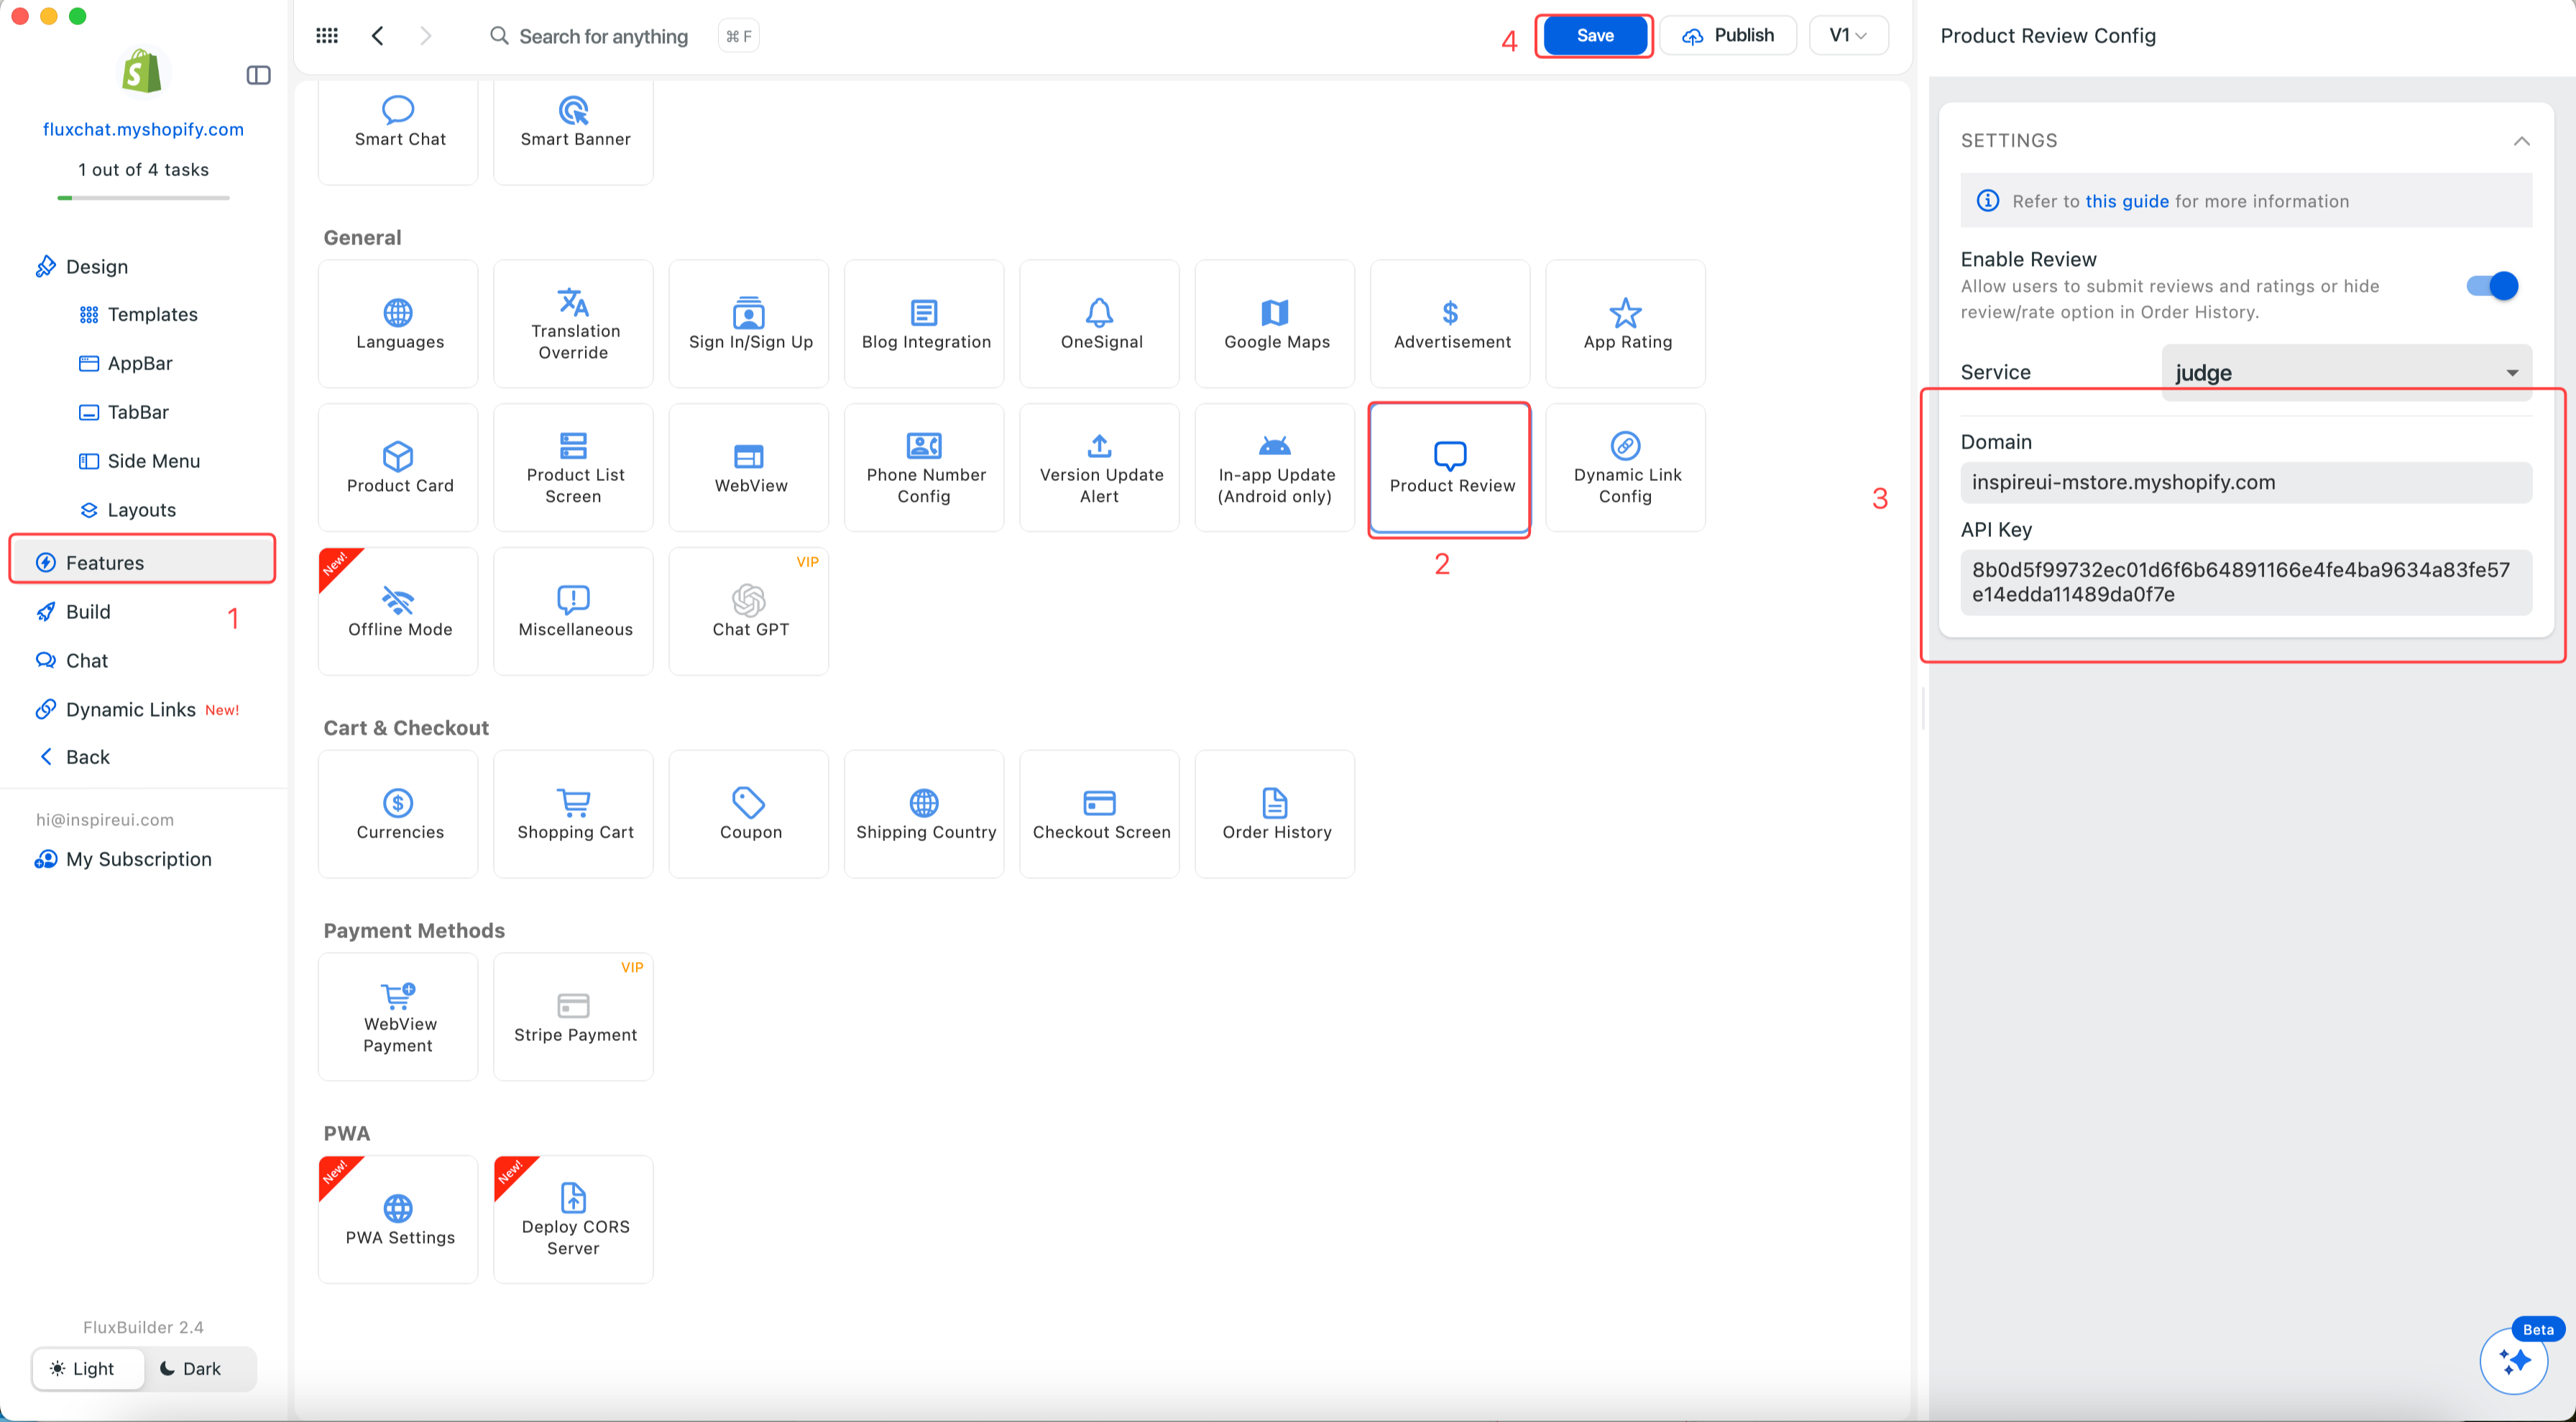
Step 4: Navigate to the Features on Side Menu. In General, open Product Review.
Step 5: Turn on Enable Review. Input Domain and API Key and click Save.
Changing the Rating Color:
To change the color of the Rating on Product Detail page:
- Go to Features on the left-side menu > select Color Override. In Rating Color, change new colors for the stars and linear progress bars and click Save.

- The result will be:

The Stars and Linear Progress bars in REVIEWS
Judge.me Review