Branch.iO Dynamic Links
1. Branch.io
Since Firebase Dynamic Links will be deprecated on August 25, 2025, it's time for a smooth transition.
This guide will show you how to use Branch.io to create dynamic links for your app.
Plus, we've built FluxBuilder Dynamic Links for FREE just for you! It provides a powerful, native, and pre-built deep linking solution that fits perfectly into your app. Create dynamic links with ease.
2. Setup
2.1 Sign up account
To begin using Branch.io's services, please create an account by clicking on the following link: https://dashboard.branch.io/. If you already have an account, simply sign in by visiting: https://dashboard.branch.io/login.
2.2 Configuration on Branch.io
2.2.1 Environment
Branch.io provides two environments - LIVE and TEST mode. First, switch to the TEST mode and configure all the Branch.io settings to ensure the app is working perfectly. Once everything is set up and tested in the TEST mode, you can then easily transition to the LIVE mode.

2.2.2 Configuration app information
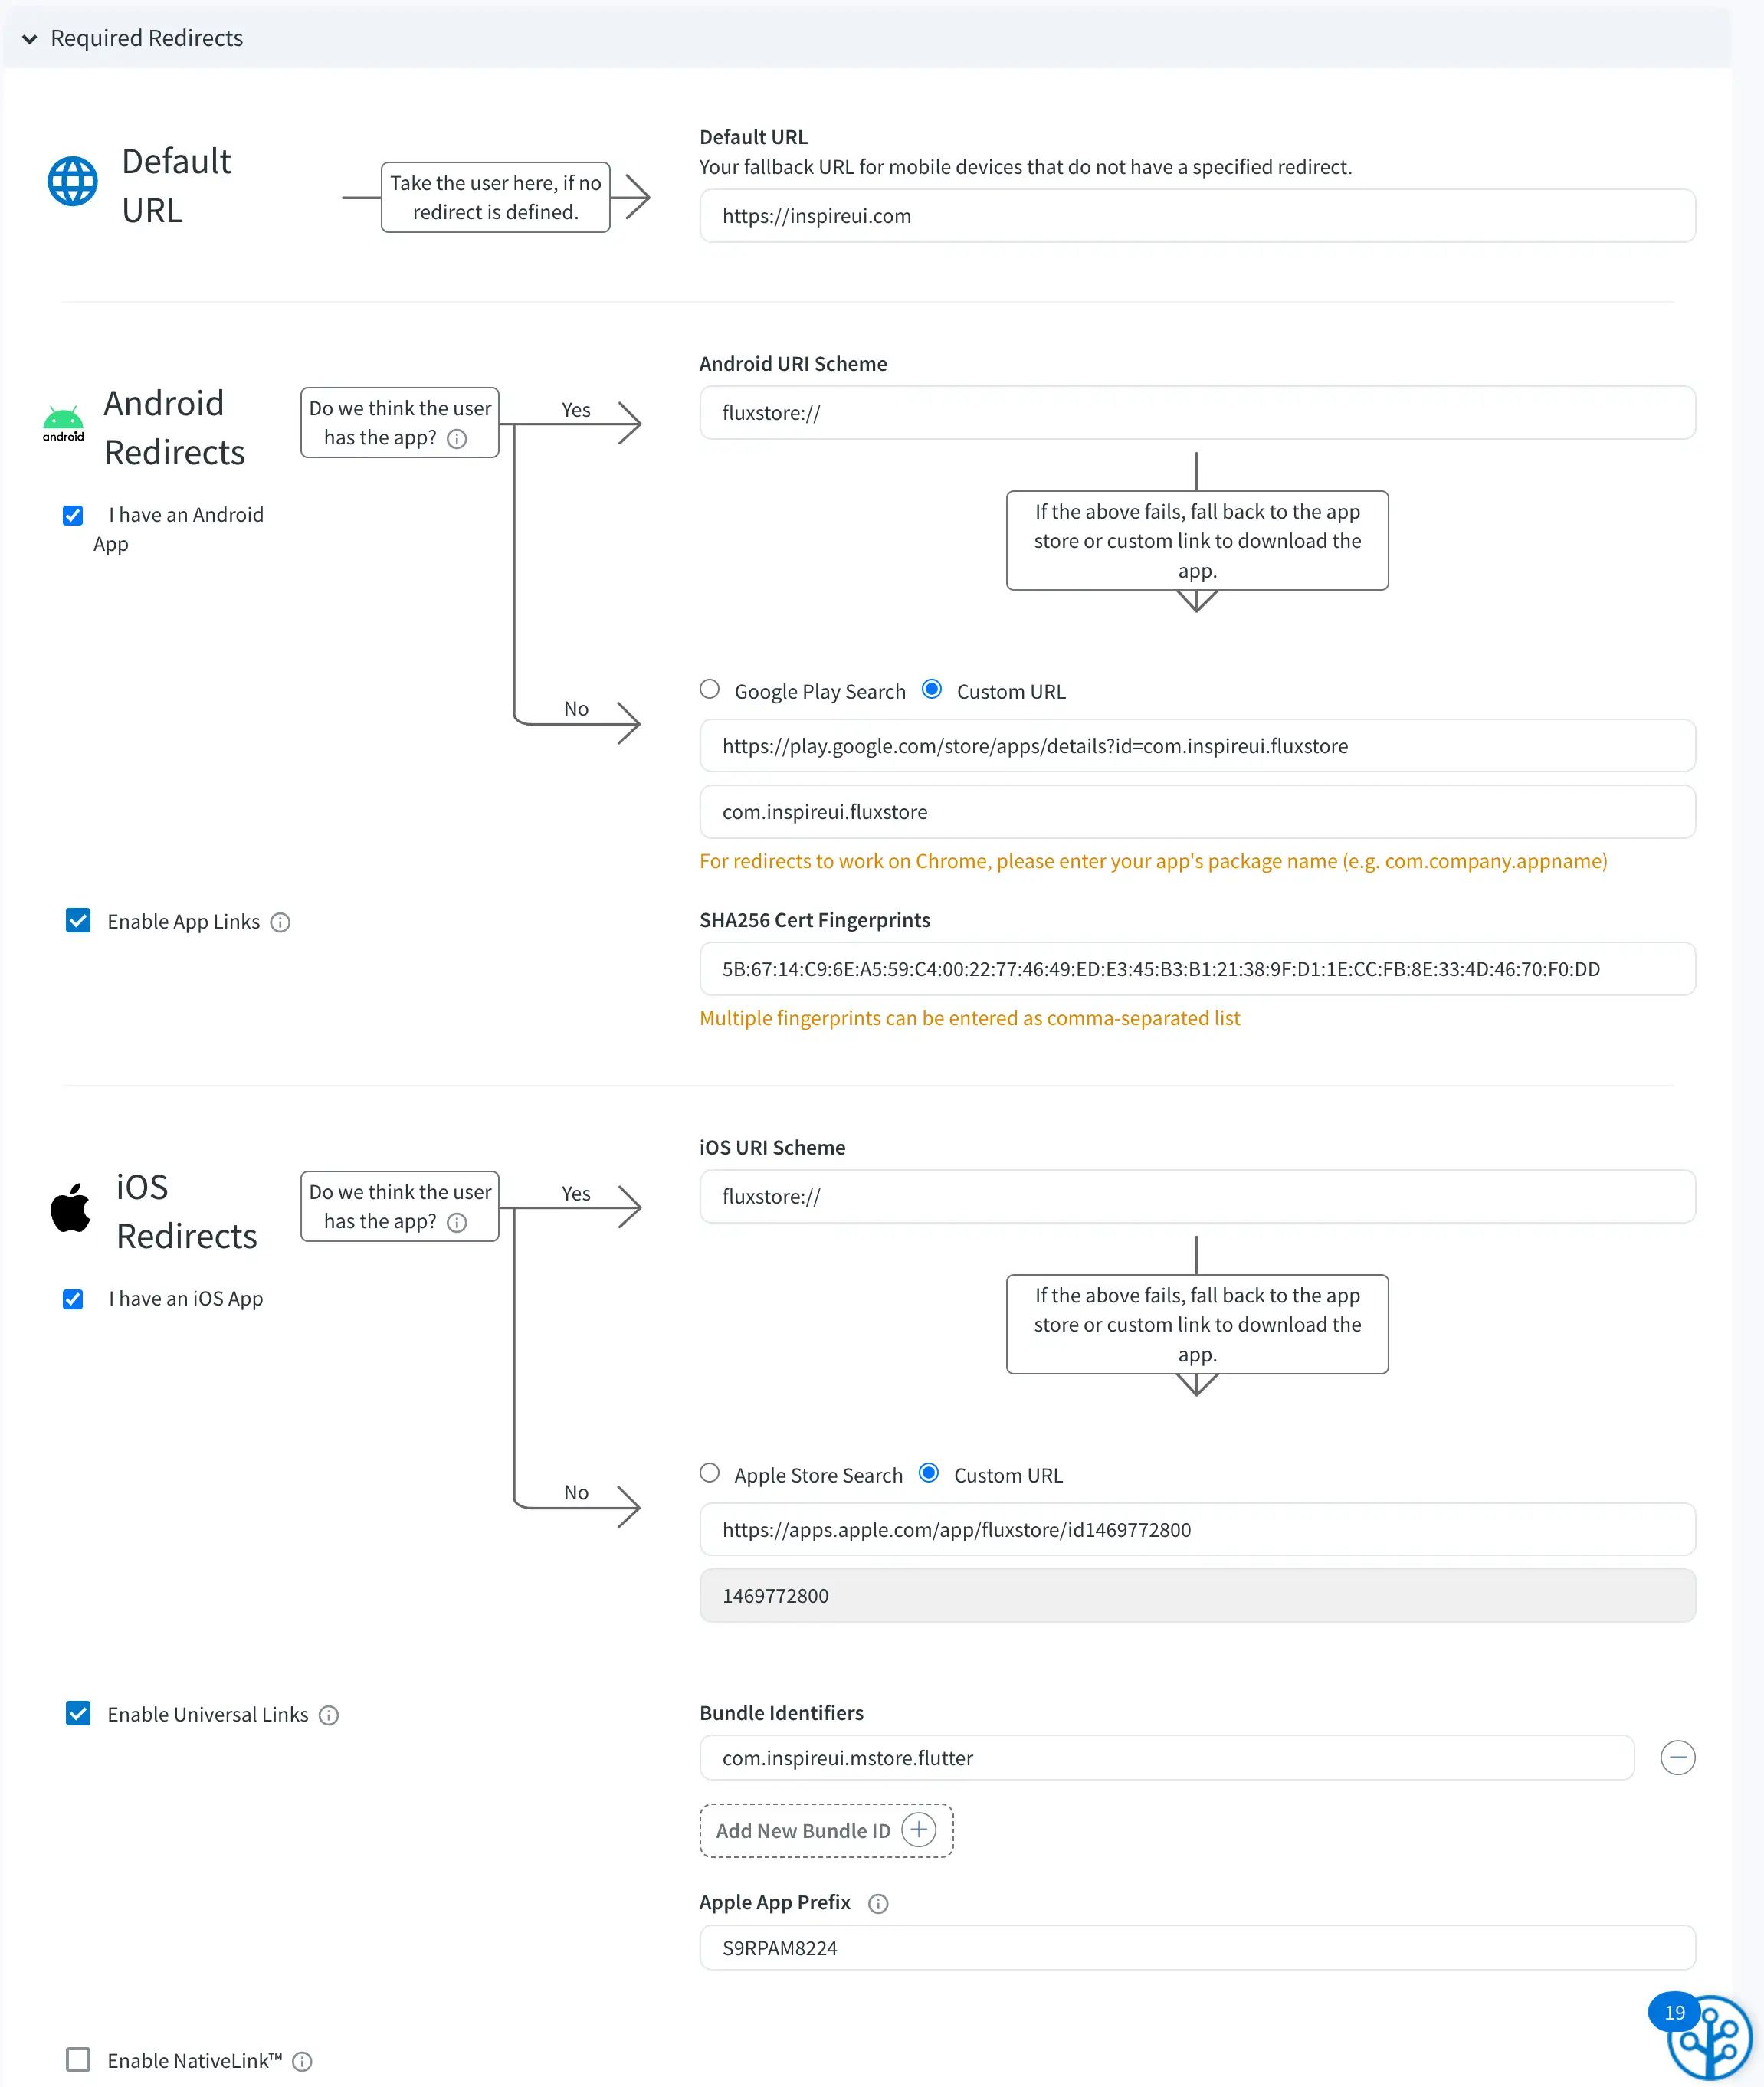
Click on the Configuration, section, and this image shows the complete setup after filling in all the required information.
Note: Branch.io may require adding a credit card to unlock certain feature. However, you will only be charged if you exceed the usage limits as mentioned in this link.
Explain:
💠 Default URL: Your fallback URL for mobile devices that do not have a specified redirect.
💠 Android:
- Android URI Scheme: Choose a unique URI scheme name for your app to avoid conflicts with other apps. A good practice is to use a scheme that matches your app's domain. You can refer to the rule for creating URI schemes from Branch.io for more detailed recommendations.

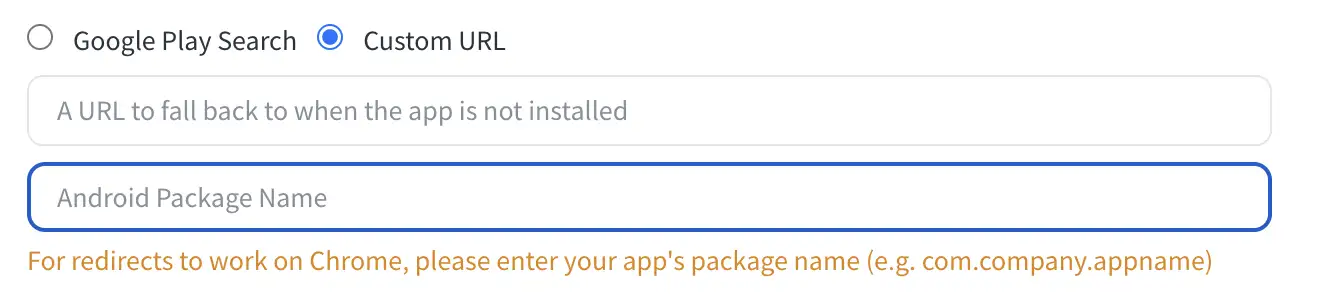
- Custom URL: Use a custom URL in the format https://play.google.com/store/apps/details?id=YOUR-ANDROID-PACKAGE-NAME, where you replace YOUR-ANDROID-PACKAGE-NAME with the actual Android package name of your app. This Google Play Store link will be used to redirect users to the app download page if they don't have your app installed on their device.

- Android Package Name: Fill YOUR-ANDROID-PACKAGE-NAME.
- Enable App Links: TICK ☑ and fill SHA256 Cert Fingerprints. To get the SHA256 key, please follow this instruction.
NOTE: If the Google Play Store displays both certificates, "App signing key certificate" and "Upload key certificate", you need to copy both of these SHA256 keys into Branch.IO and separate them with a comma. For example: KEY-APP,KEY-UPLOAD.

💠 iOS:
- iOS URI Scheme: Choose a unique URI scheme name for your app to avoid conflicts with other apps. A good practice is to use a scheme that matches your app's domain. You can refer to the rule for creating URI schemes from Branch.io for more detailed recommendations.

- Custom URL: Use a custom URL in the format https://play.google.com/store/apps/details?id=YOUR-ANDROID-PACKAGE-NAME, where you replace YOUR-ANDROID-PACKAGE-NAME with the actual Android package name of your app. This Google Play Store link will be used to redirect users to the app download page if they don't have your app installed on their device.
- Enable Universal Links: TICK ☑️
- Bundle Identifiers: Input your iOS bundle identifier.

- Apple App Prefix: Get it in Apple Developer dashboard as this image.

2.3 Configuration on App
2.3.1 TEST mode
Still the tab Configuration, scroll to the Link Domain section and save the Default Link Domain.
Go to tab Account Settings, save the Branch Key.
2.3.2 LIVE mode
Go to tab Configuration and switch to LIVE. After that, follow the same steps as in the previous section 2.2.2.
In the tab Configuration, scroll to the Link Domain section and copy the Default Link Domain.
Go to tab Account Settings copy the Branch Key.
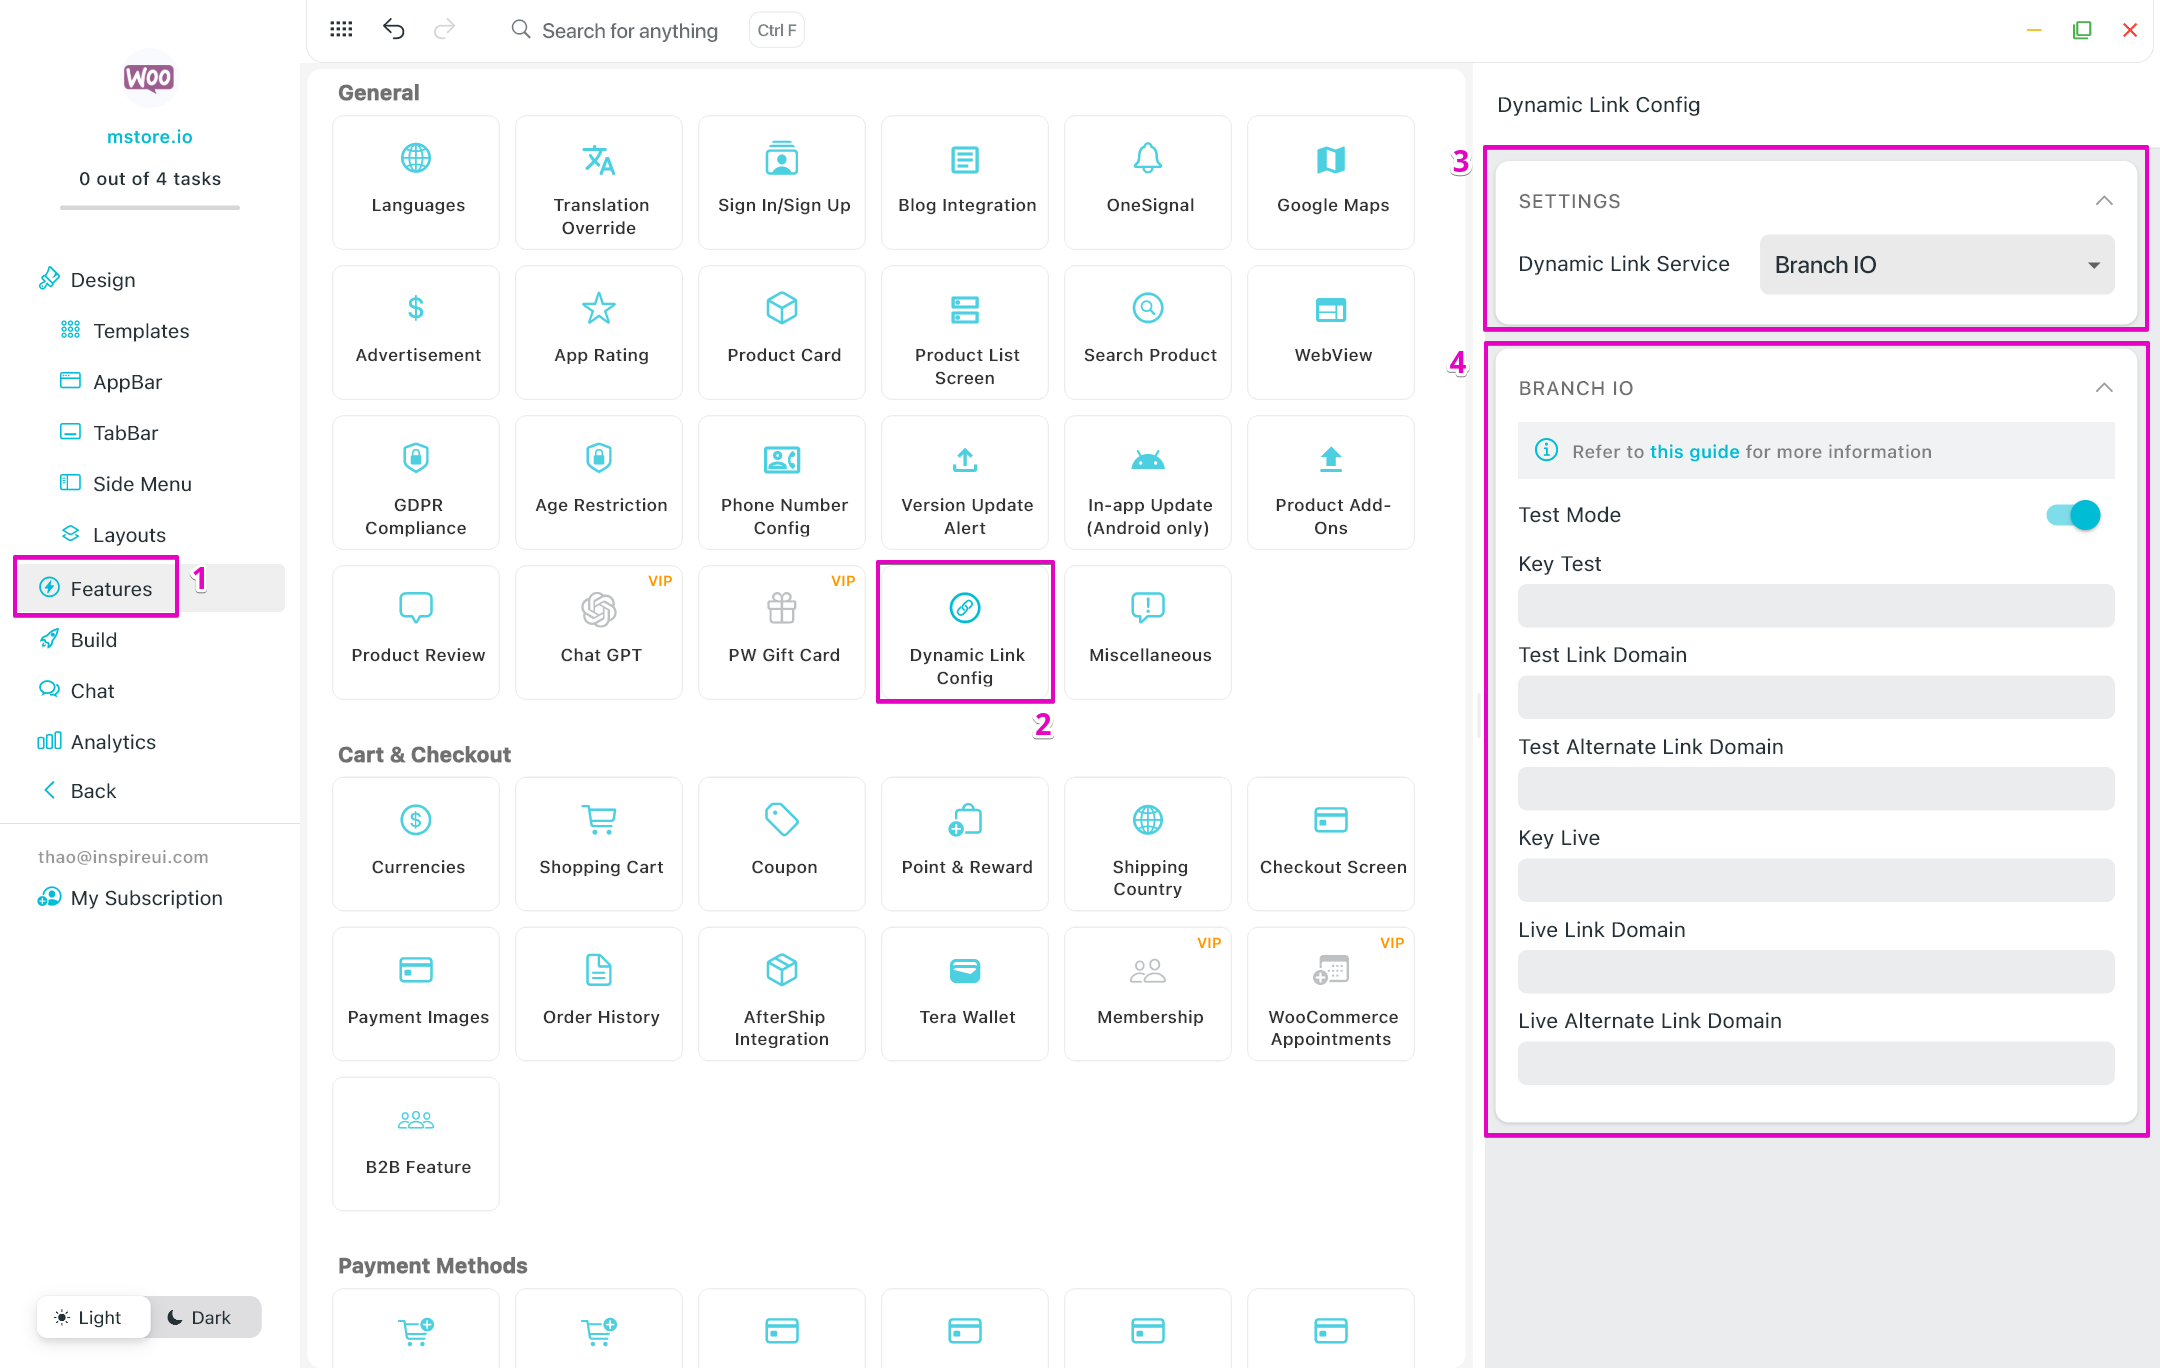
2.3.4 FluxBuilder Config
Step 1: On FluxBuilder, open your app.
Step 2: Go to Features, and open Dynamic Link Config.
Step 3: In Dynamic Link Service, select Branch IO.
Step 4: Turn on/ Turn off Test Mode and input the value collected from above to all fields.
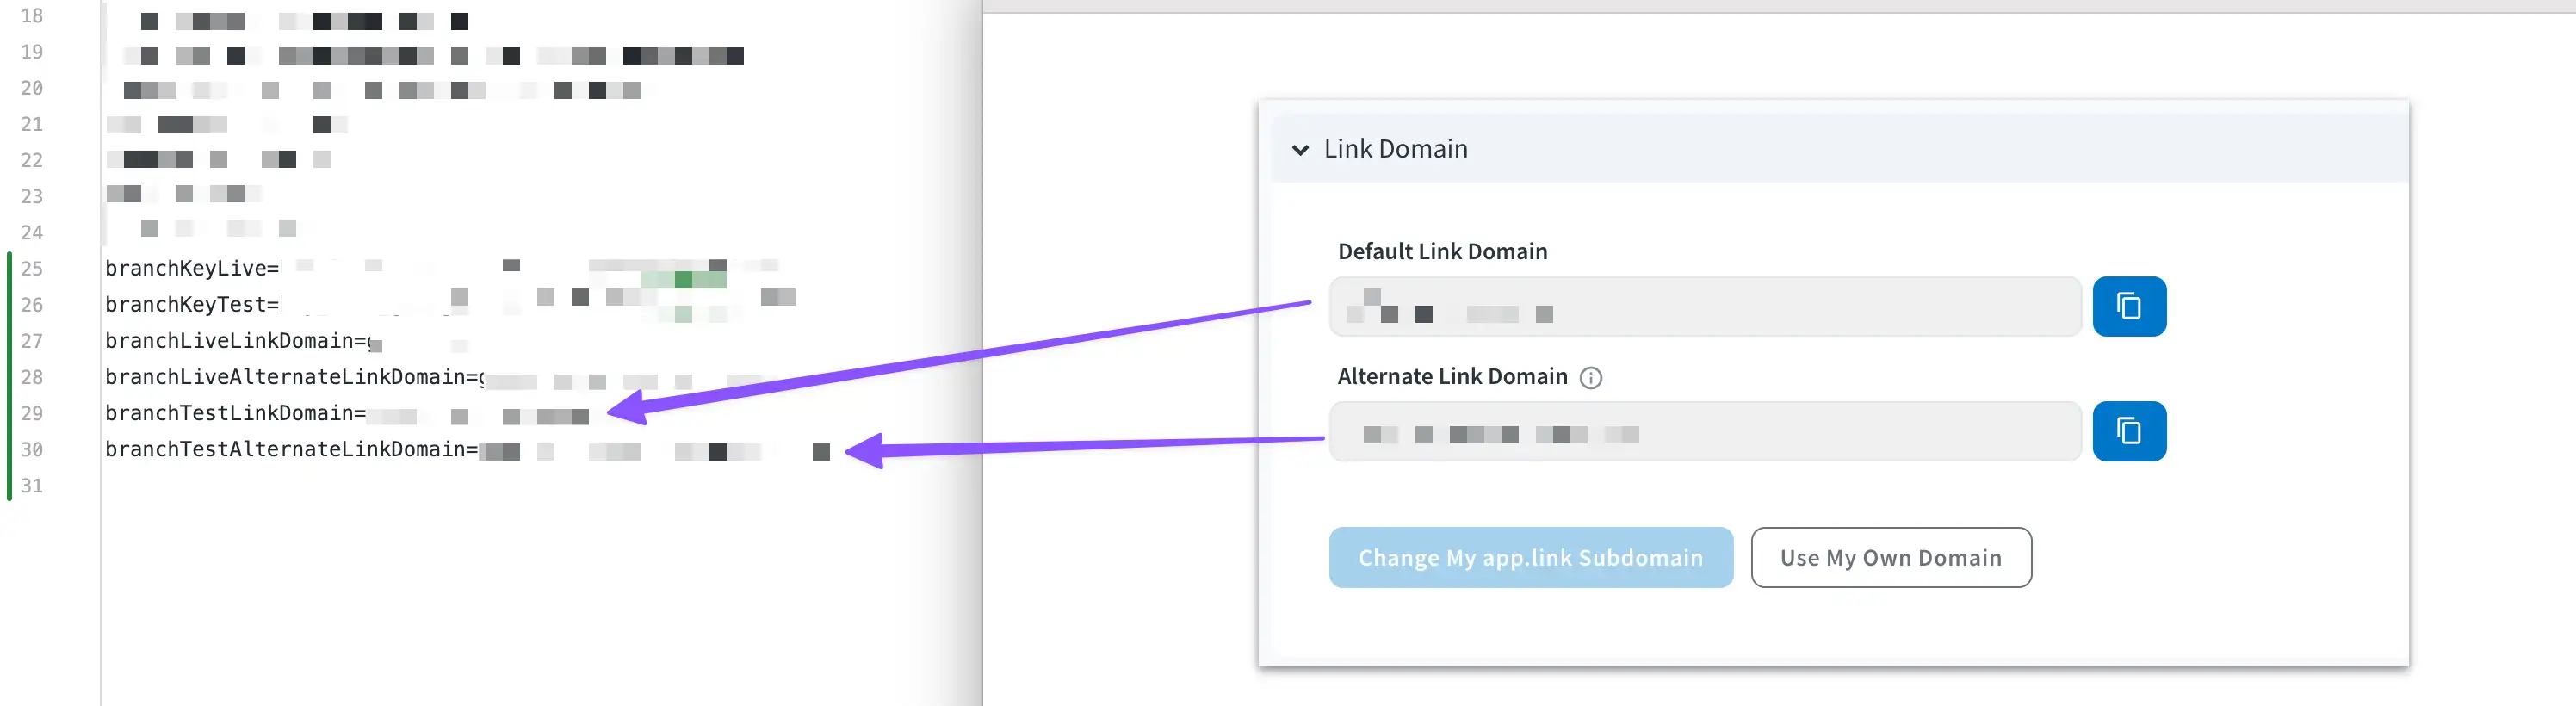
Note: For users who do not use Build on Cloud, you should update some config in env.props file.
- For Test Mode: paste the Default Link Domain to variable
branchTestLinkDomain, Alternate Link Domain tobranchTestAlternateLinkDomainin theenv.propsfile. At the same time, paste the Branch Key to the variablebranchKeyTest**.**


- For Live Mode: paste the Default Link Domain to variable
branchLinkDomain, Alternate Link Domain tobranchAlternateLinkDomainin theenv.propsfile. At the same time, paste the Branch Key to the variablebranchKeyTest**.**