Push Notifications via Firebase
Your app can receive and process push notifications on Android and iOS. Besides, you are able to automatically send Order Status Notifications when order status changes.
1. Setup Firebase Cloud Messaging (FCM)
iOS App
Follow steps below to enable push notifications on iOS app:
1. Execute the Firebase Settings
Create your project on Firebase. Then add iOS App into your project following this guide Firebase Settings. (Skip this step if you already did)
2. Setup Cloud Messaging in Firebase
Step 1: Open the Firebase page https://console.firebase.google.com
Step 2: Open your Firebase project. Select Settings option, and select General
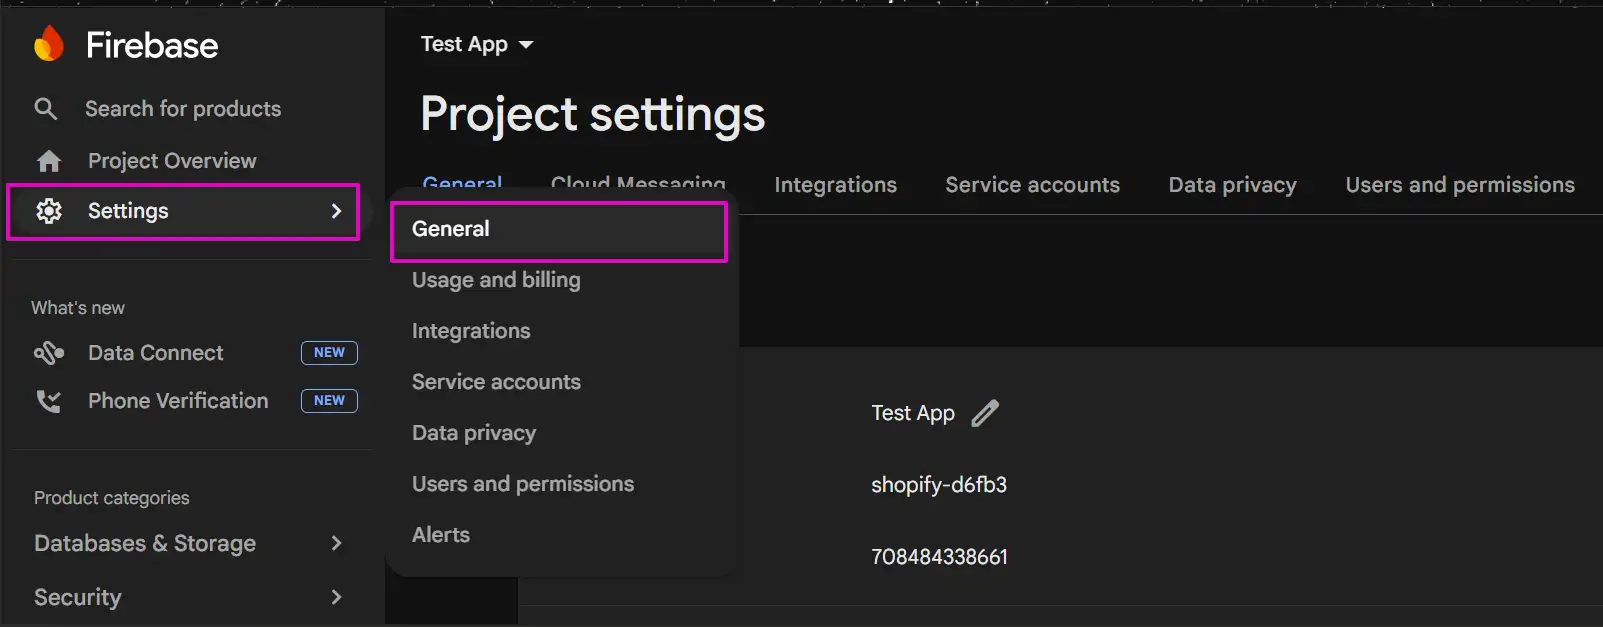
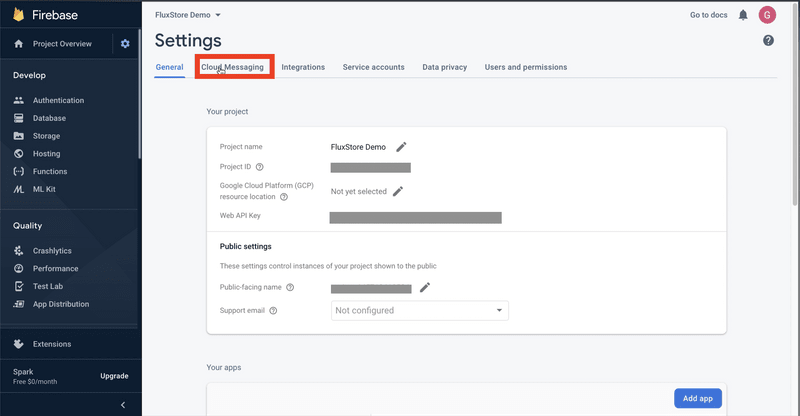
Step 3: Click Cloud Messaging as shown:
Step 4: Select your iOS app, and click Upload button:
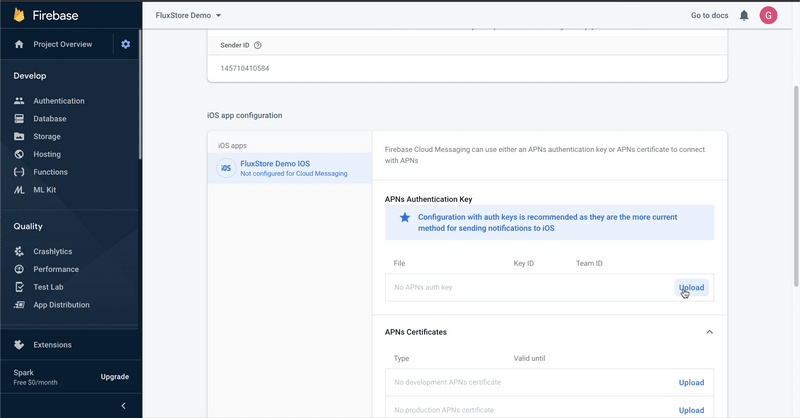
Note: at this step, the Cloud Messaging requires you to upload the auth key APNs. To get this key, you must have an apple developer account.
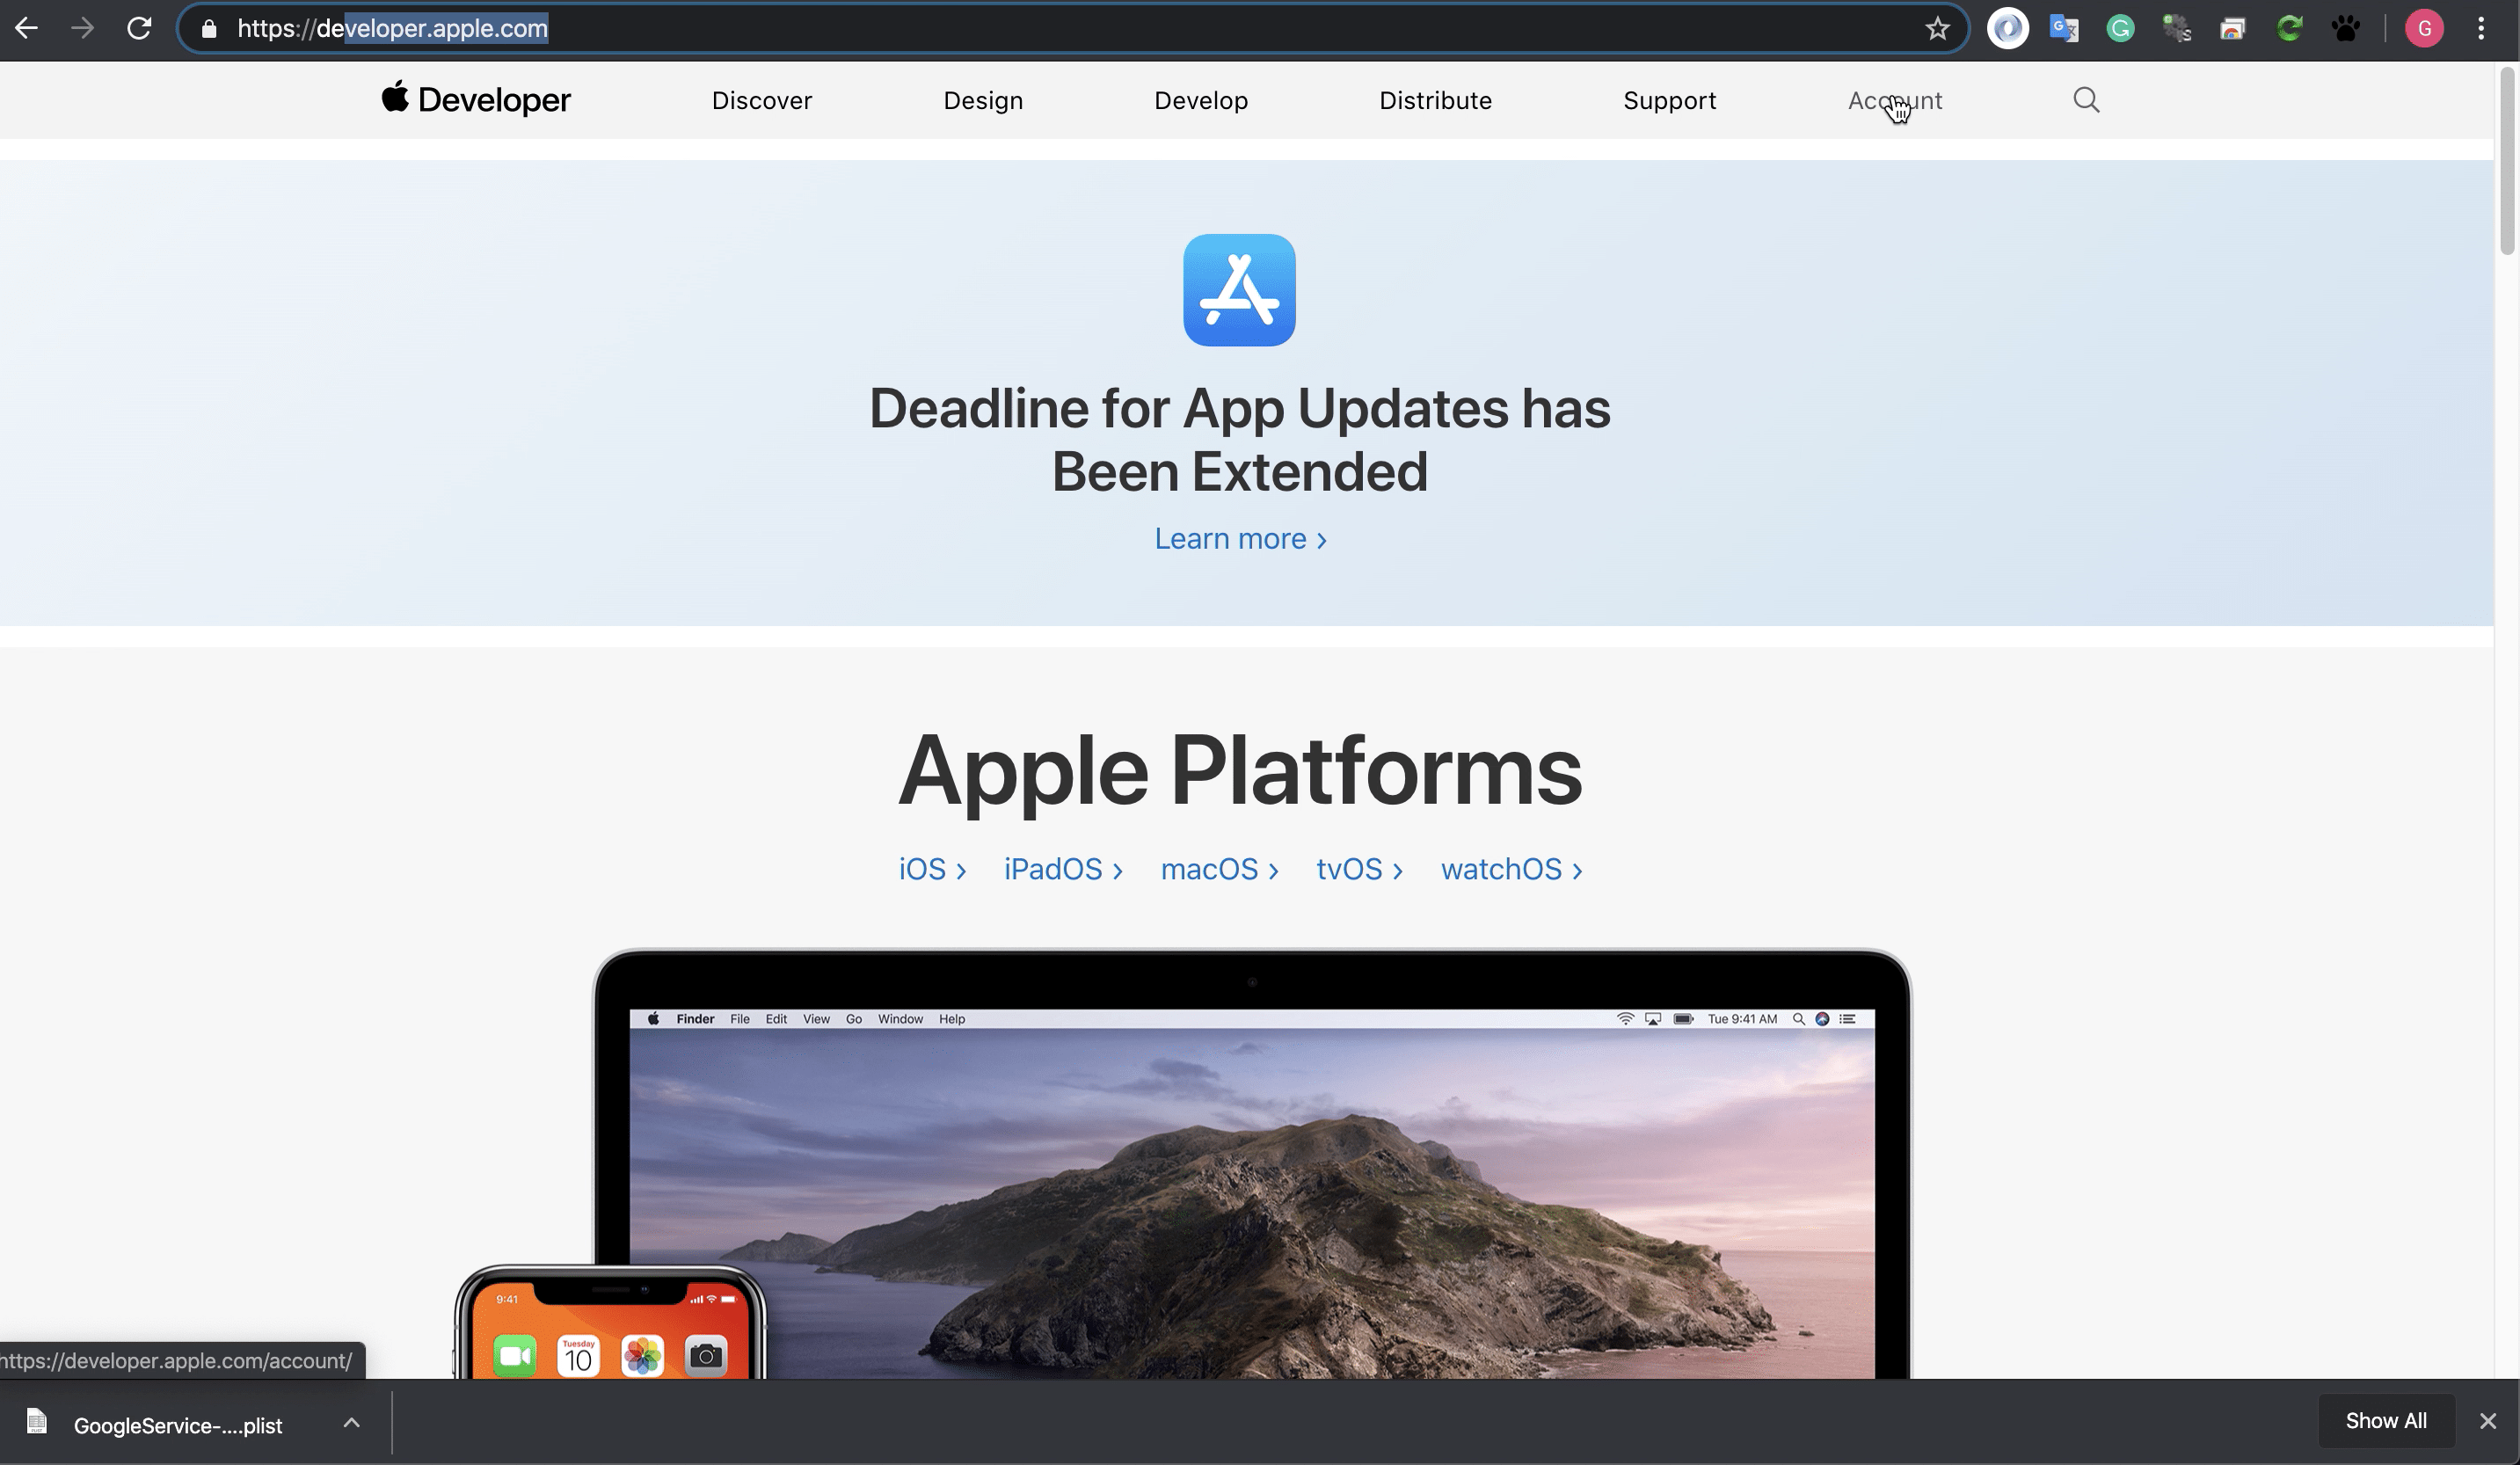
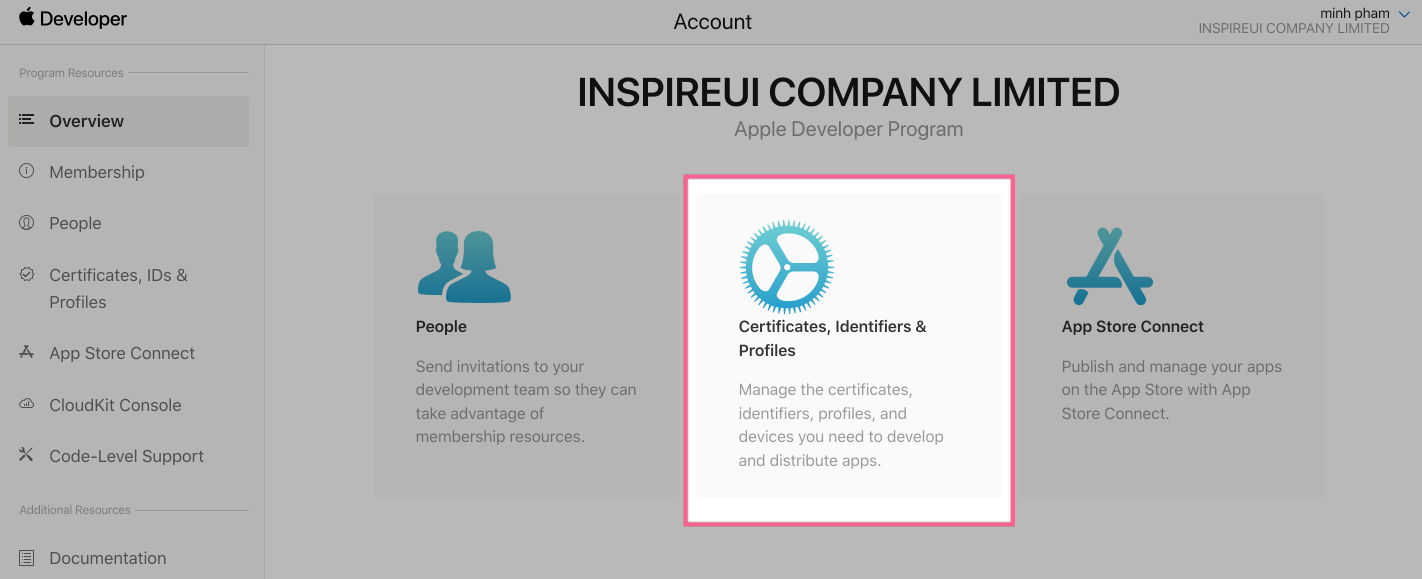
- Visit page https://developer.apple.com select
Accountas shown:
- Then choose
Certificates, identifiers & Profiles
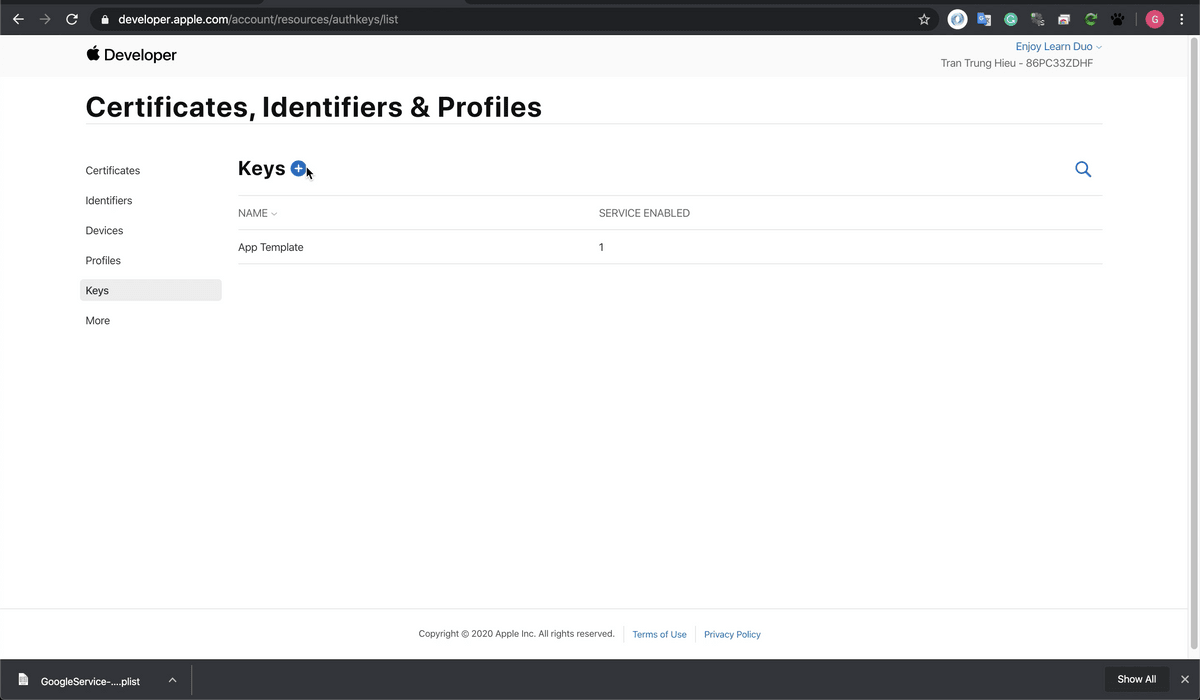
- Select Keys on the left menu, then click the plus icon to add a new key:
Note: 1 developer apple account can only create 2 keys, please consider before creating. But you can still delete them if needed.
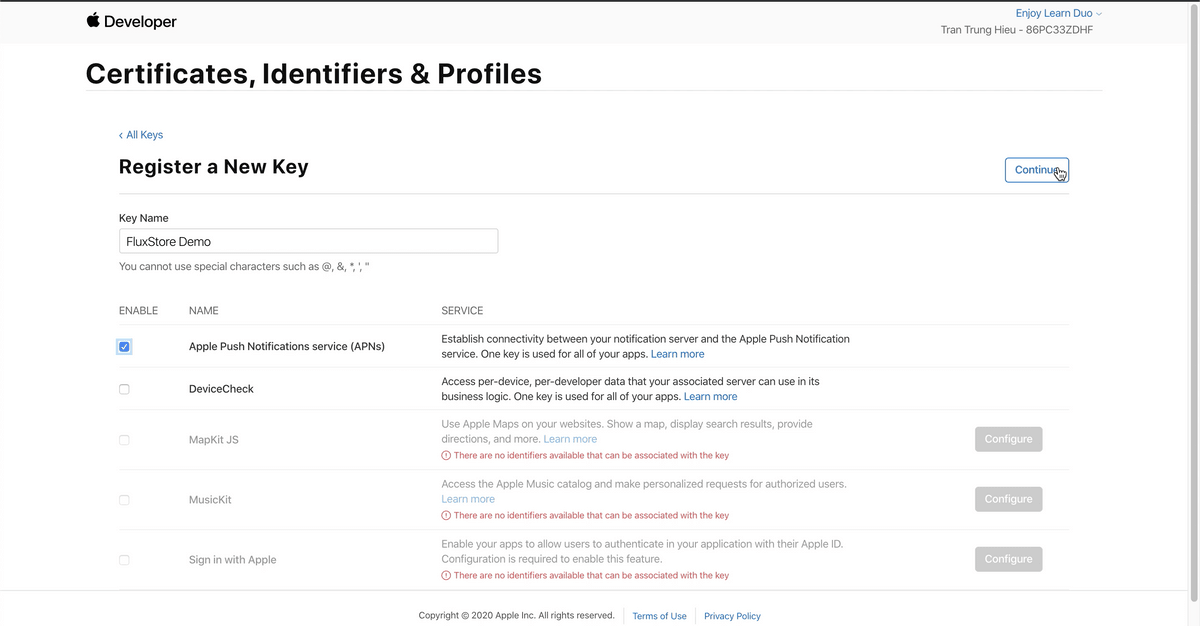
- Enter the key name and select Apple Push Notification service (APNs) then click
continue
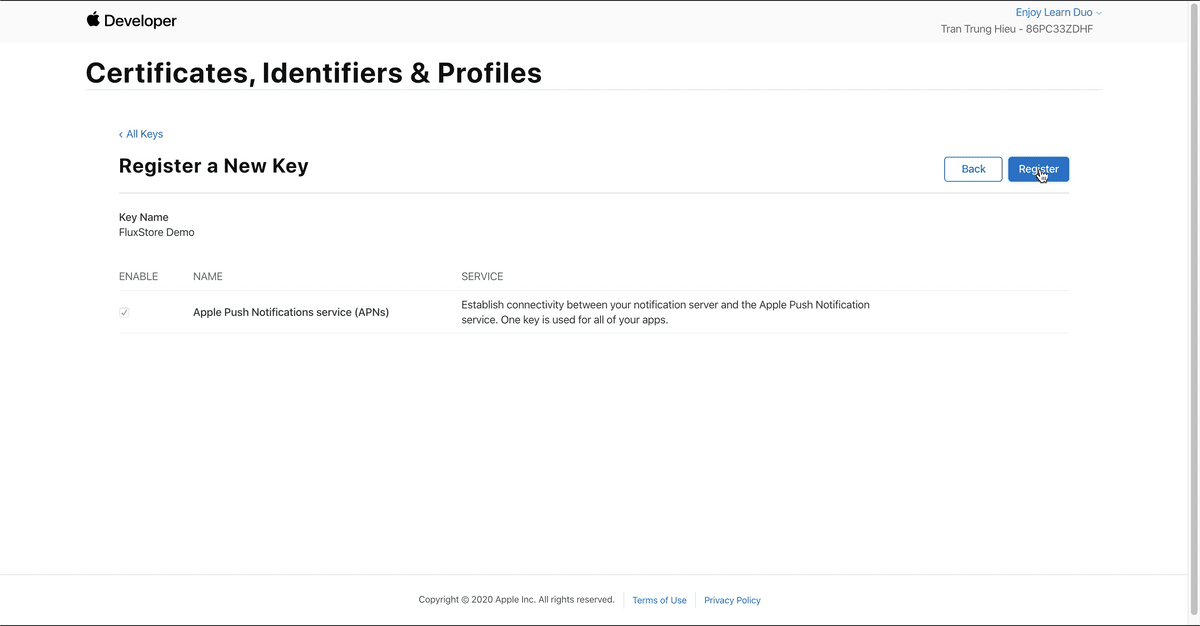
- Click
Register
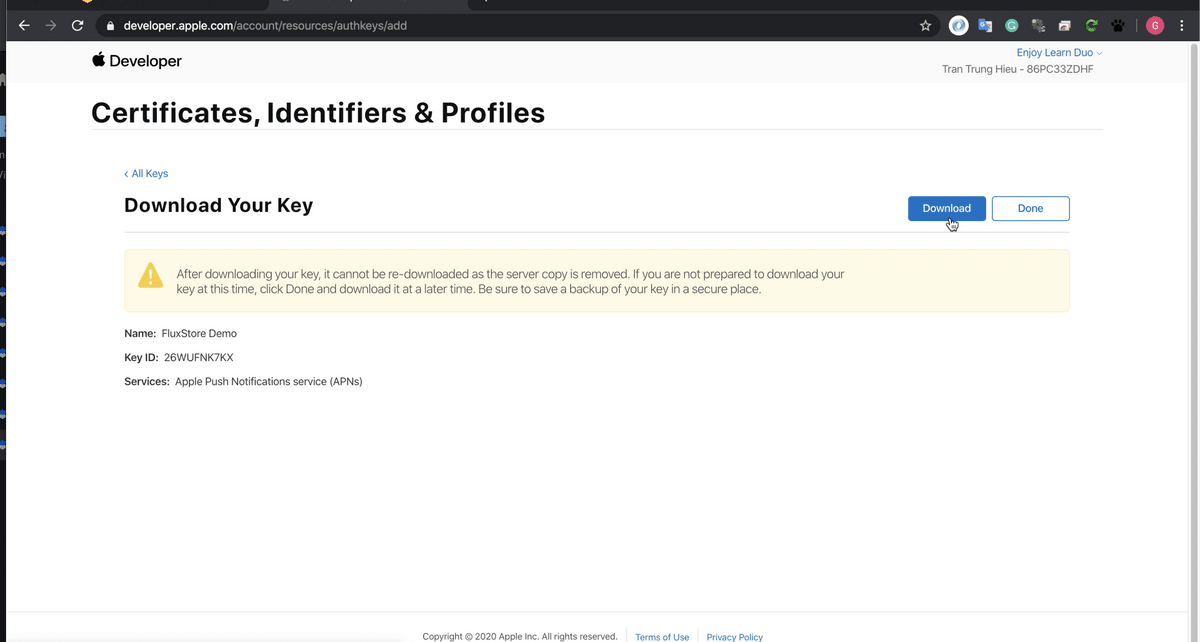
- Click
Downloadto download the APNs key file
- Return to the firebase console to update the APNs auth key.
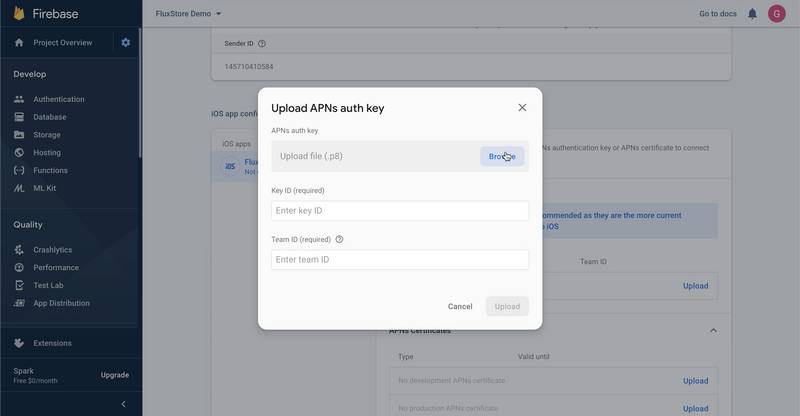
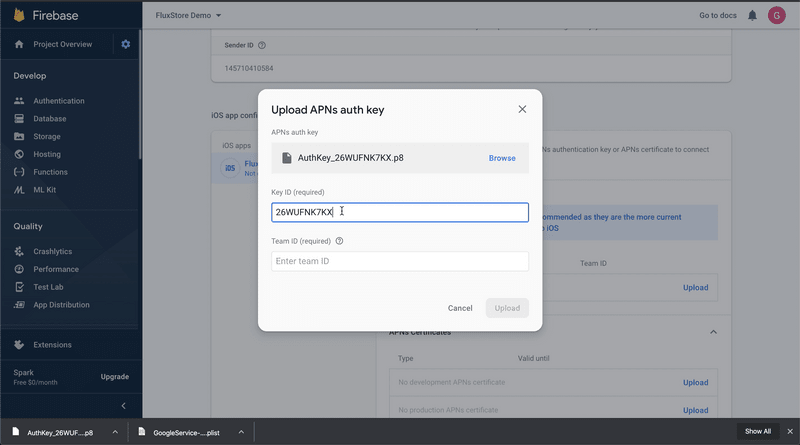
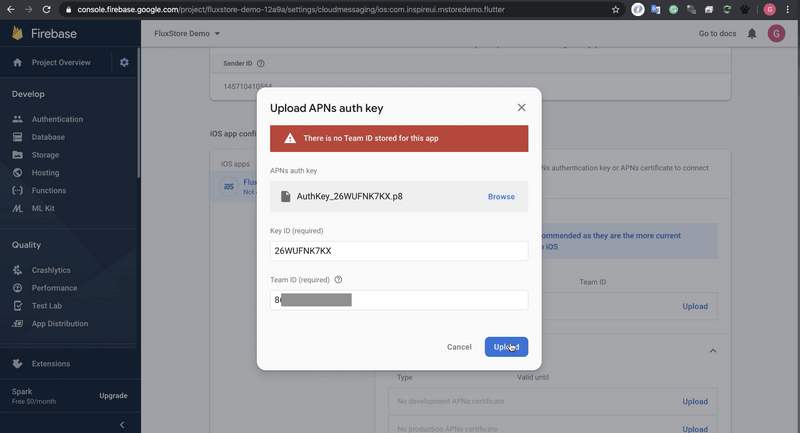
Step 5: Click the Browse button and refer to the APNs auth key:
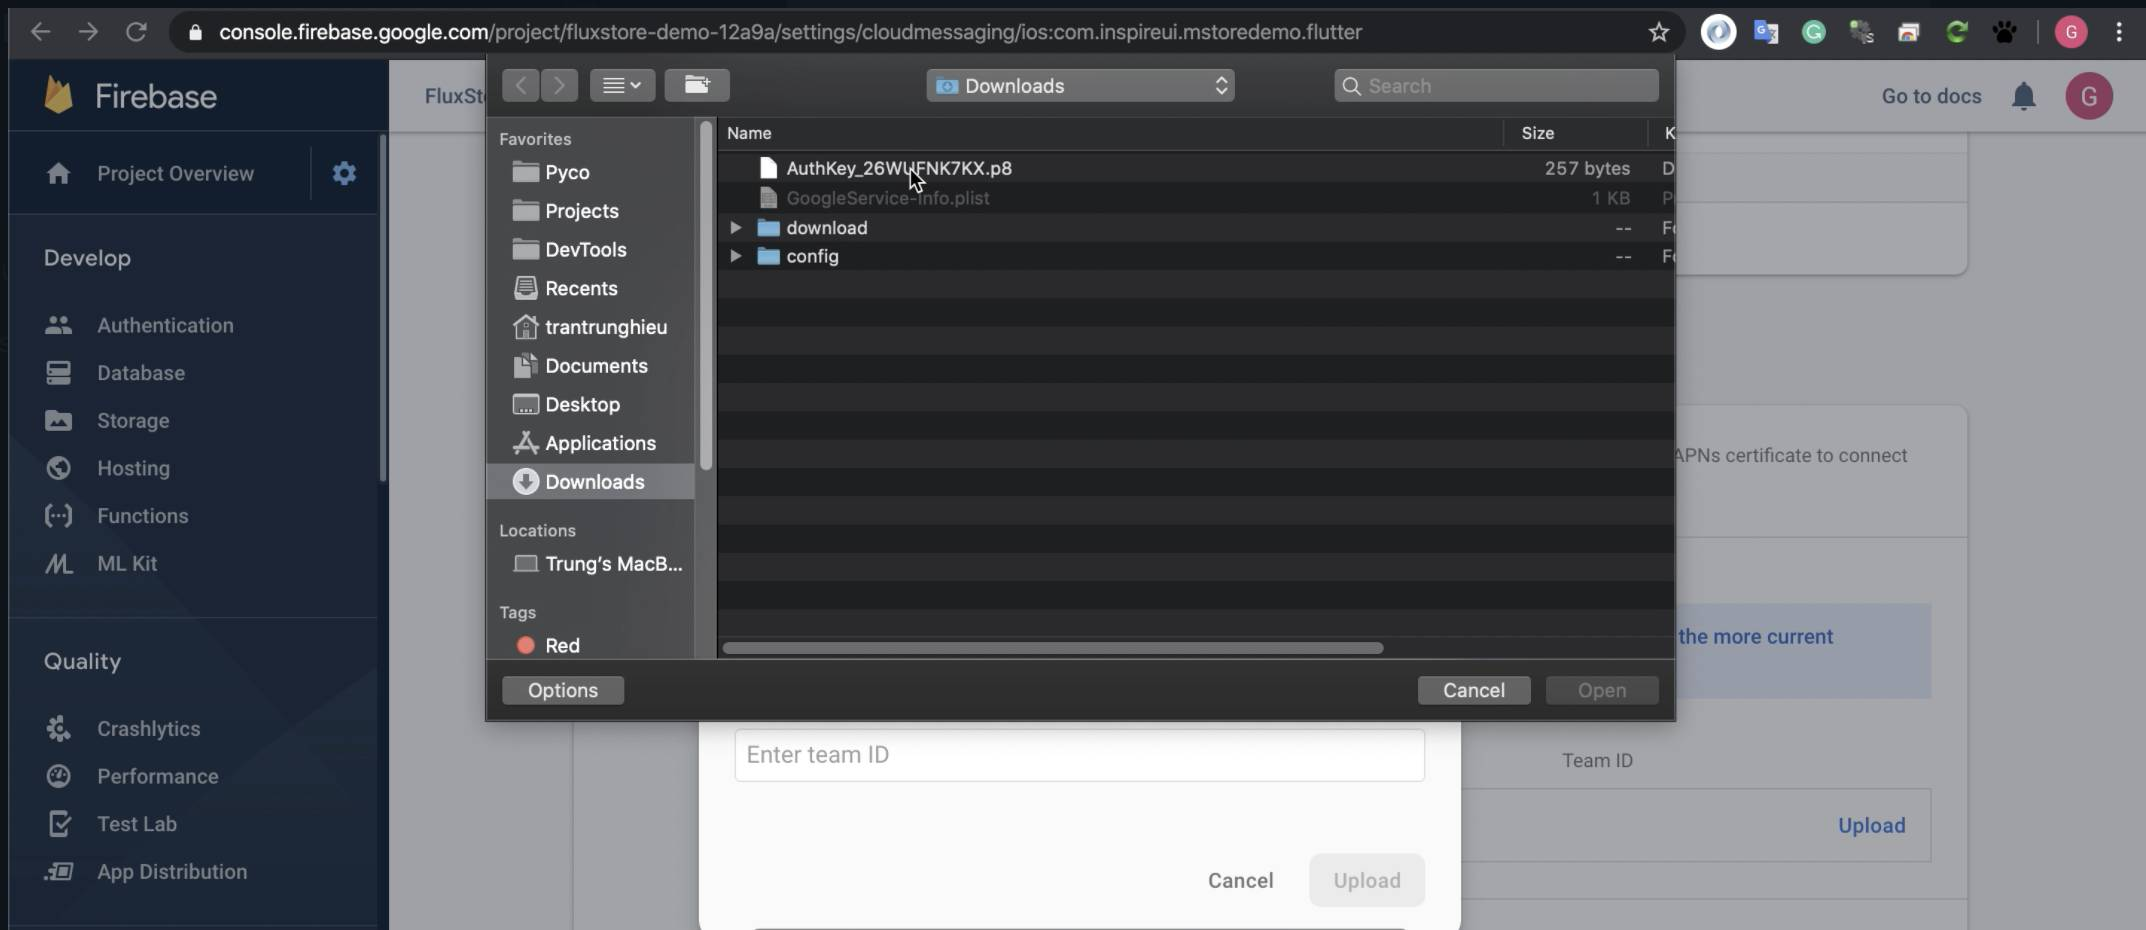
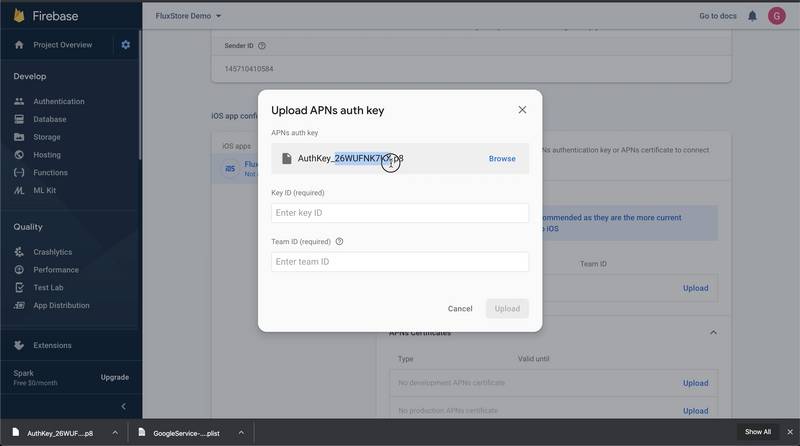
- The key ID is the back part of the downloaded key file name:
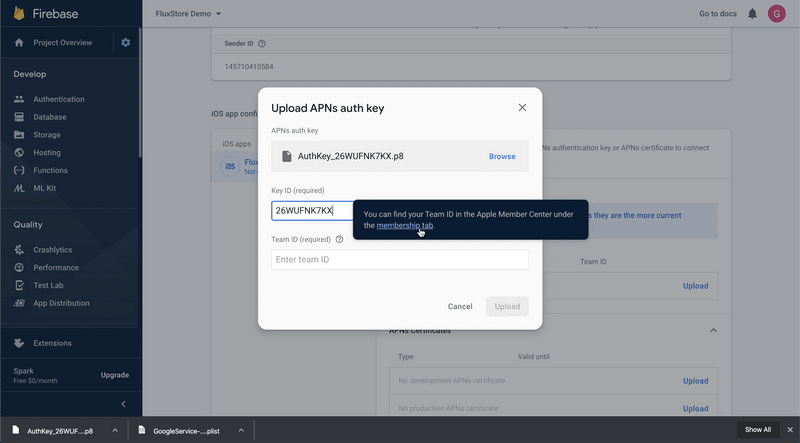
- Enter Team ID, if you do not know where Team ID is coming from, please click on the question mark as shown in the picture, then click on the
membership tab
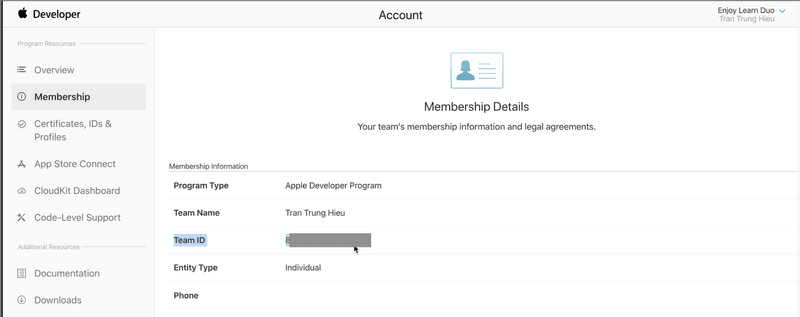
This is Team ID, copy it and enter the form in firebase:
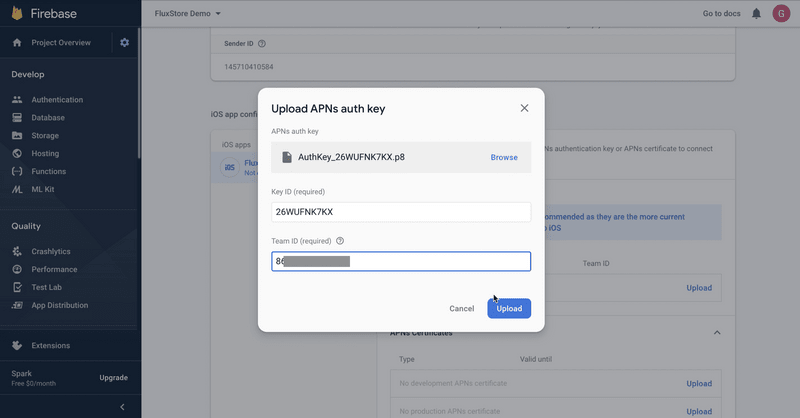
- Click
Upload:
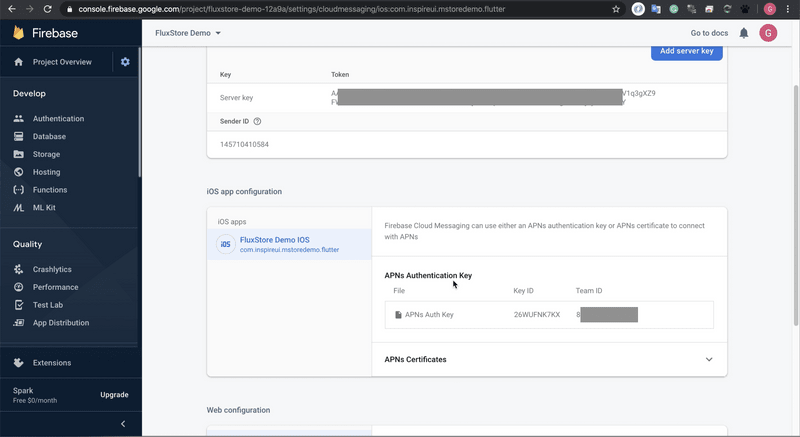
In some cases, this error will be displayed (in some cases it will not be). If this is the case, please click Upload again:
If the following screen appears, congratulations, you have successfully configured:
Android App
Only need to create your project on Firebase. Then add Android App into your project following this guide Firebase Settings. (Skip this step if you already did)
2. Execute the Push Notifications feature
After finishing setting up Firebase Cloud Messaging (FCM), you can push notifications to the end-user. The end-user will receive the notifications on their smart devices.
You can choose to push notifications via FluxBuilder or via Firebase directly.
Option 1: Firebase Push Notifications on FluxBuilder
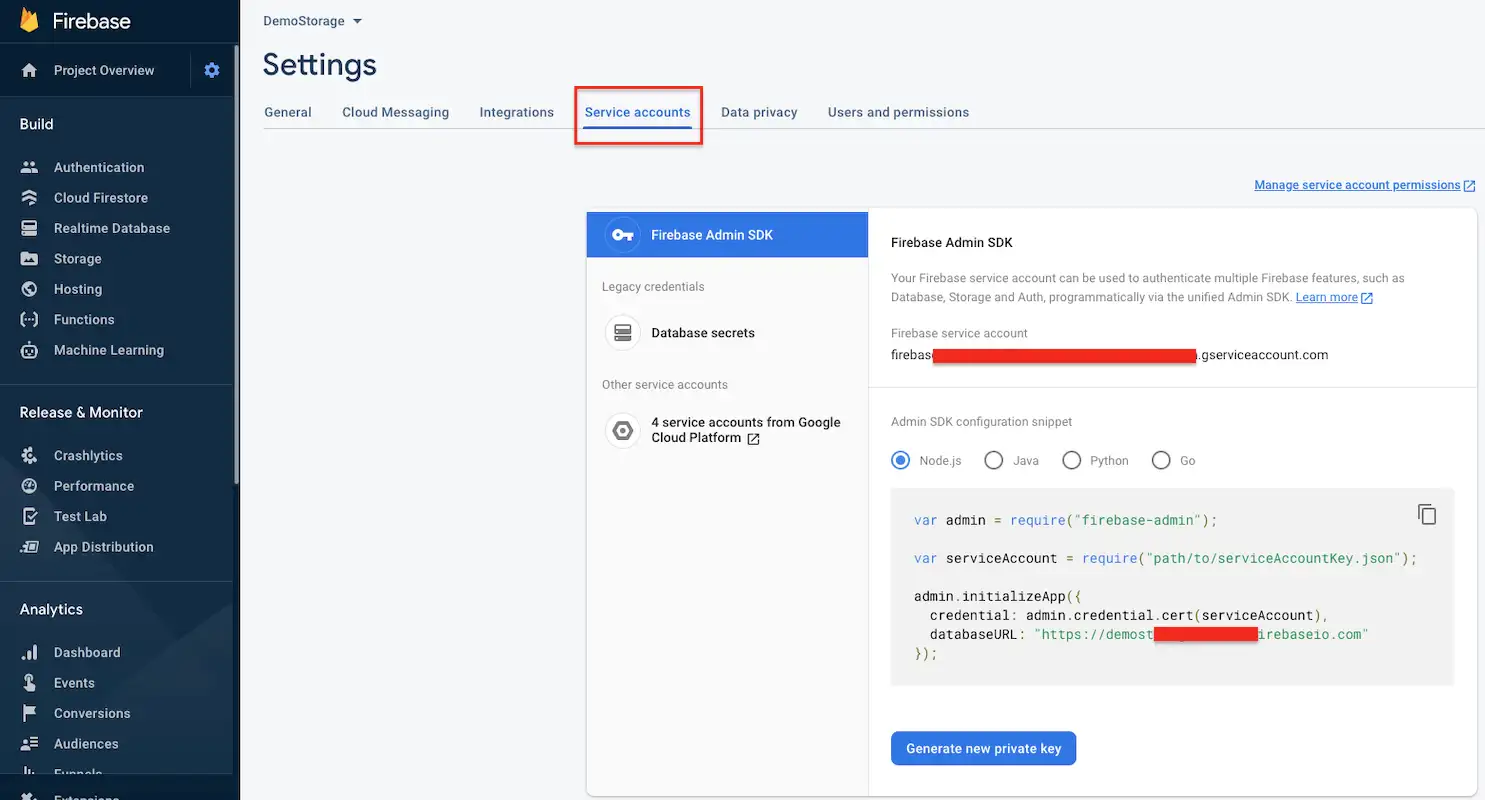
Step 1: Get Private Key
- Open your project in Firebase Console, select Settings option, and select General. Then, select the
Service accountstab

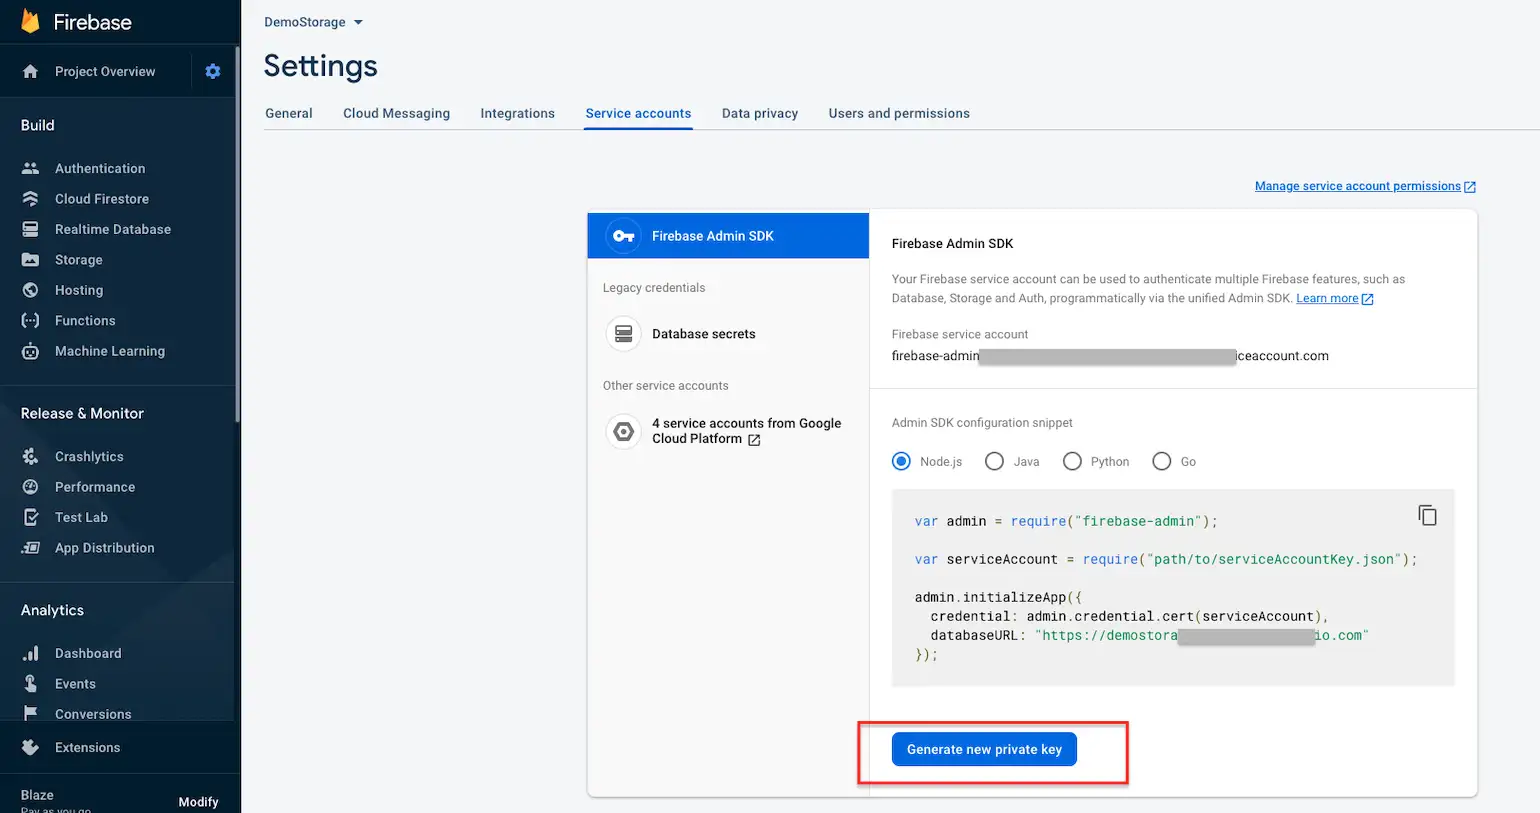
- Click the
Generate new private keybutton to download the key:
Step 2: Input the Private Key File into FluxBuilder
After you have obtained the Private Key file, go back to the FluxBuilder App, open the Features Tab → select the Push Notification feature → upload the Private Key file.
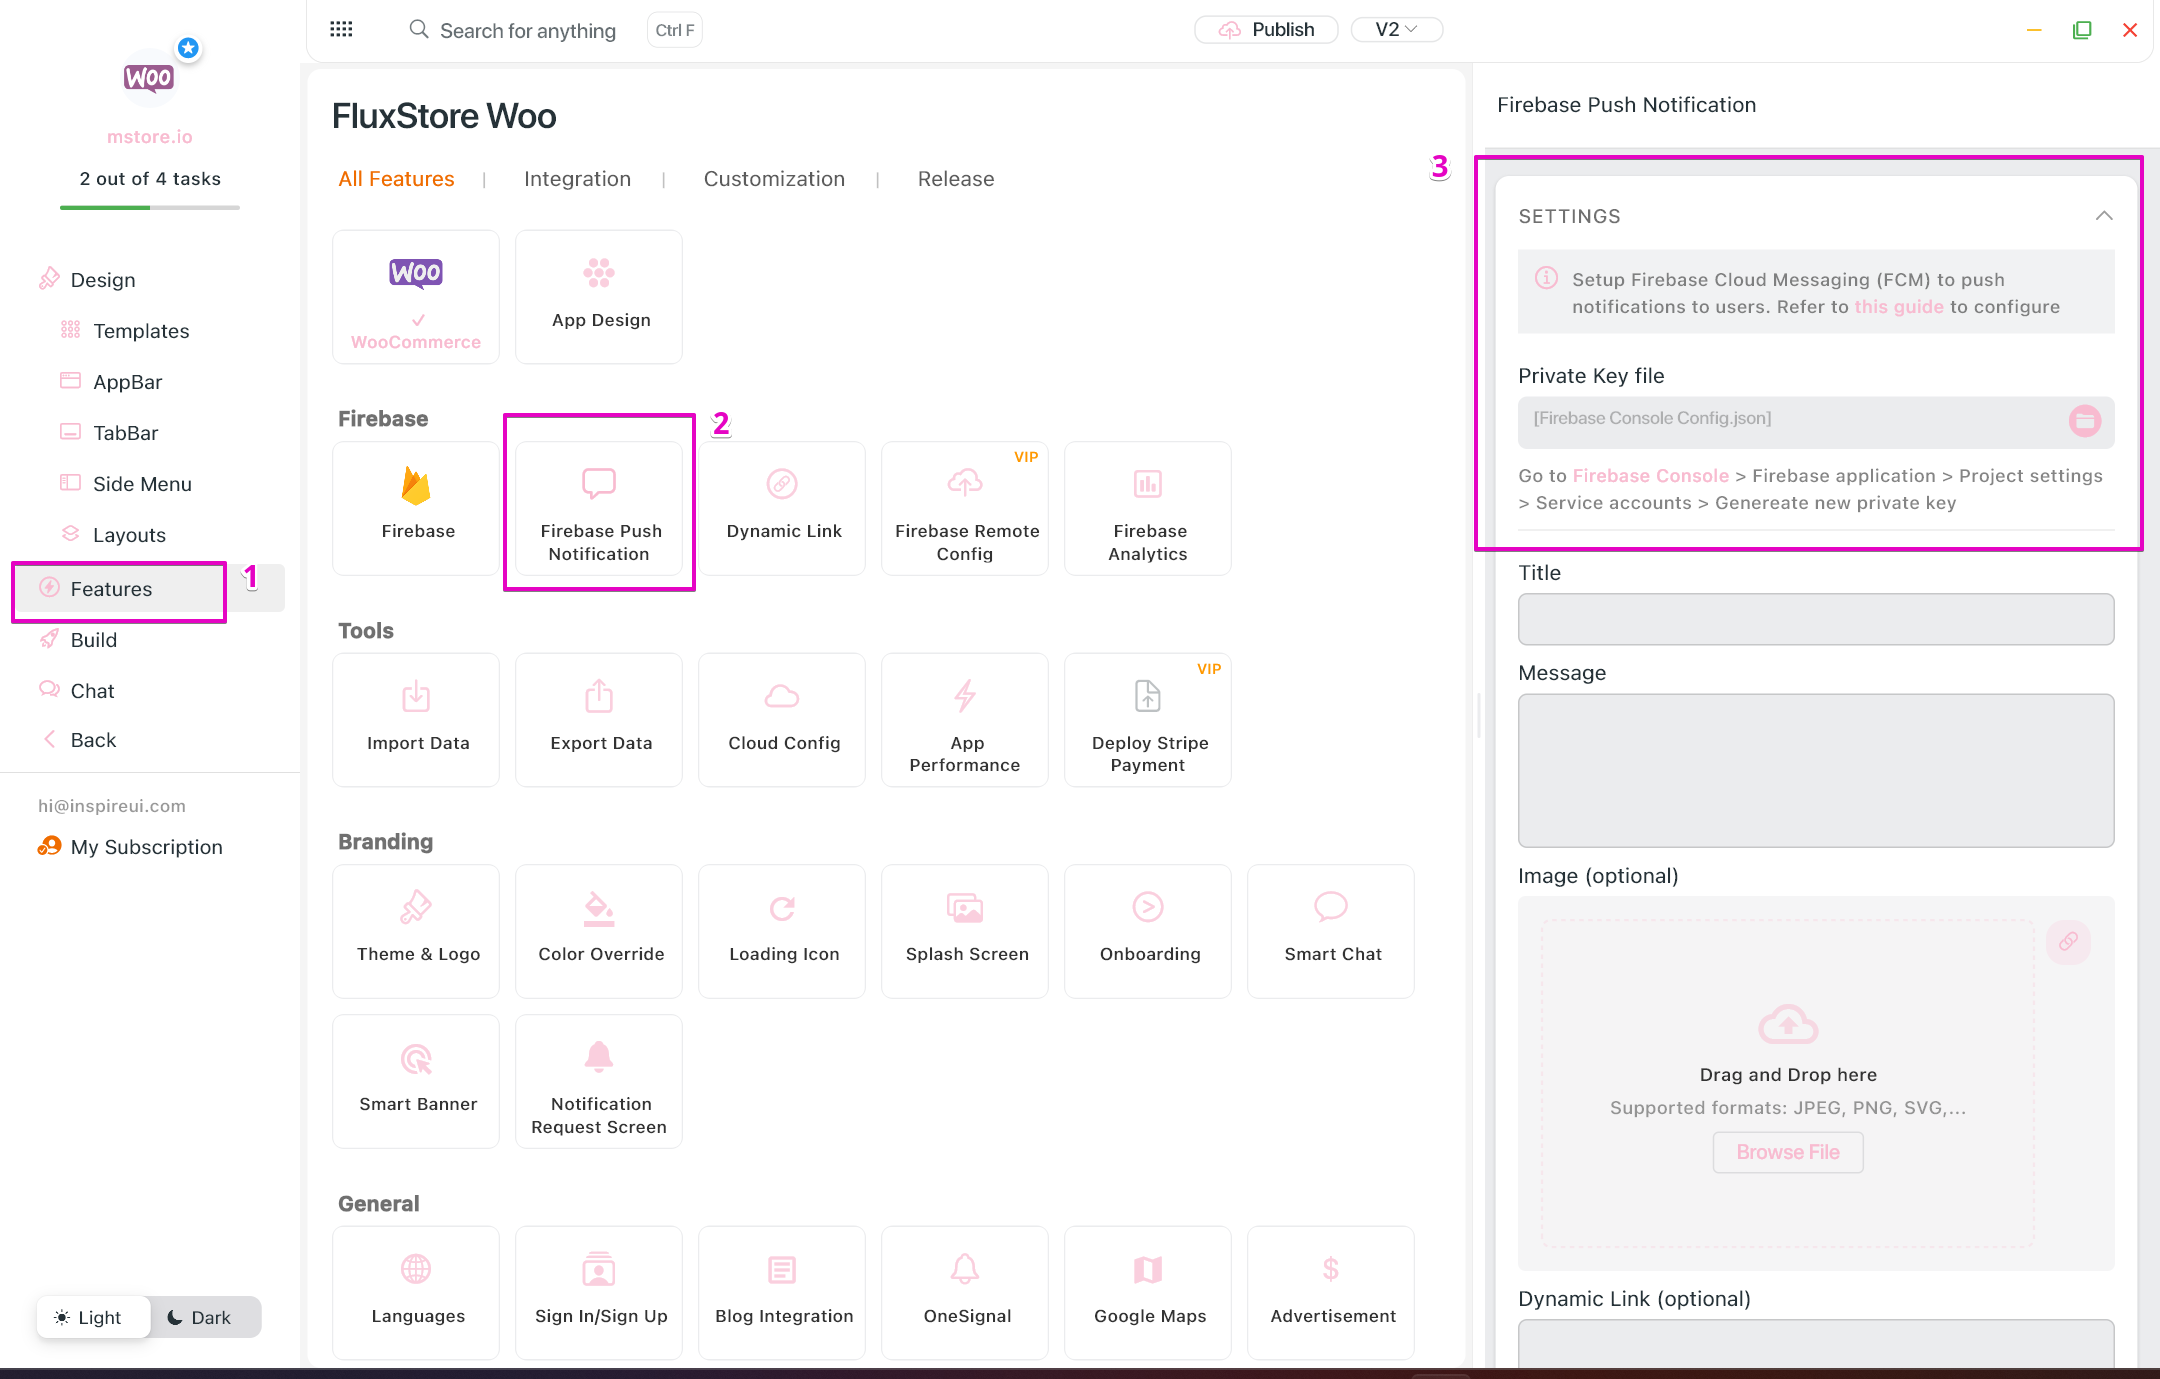
Step 3: Send Messages
Enter any missing information and click SEND button.

4. Note
- Your project must have Setup firebase cloud messaging completely.
- The Private Key file taken must belong to that project
- Finally, do not share the Private Key file.
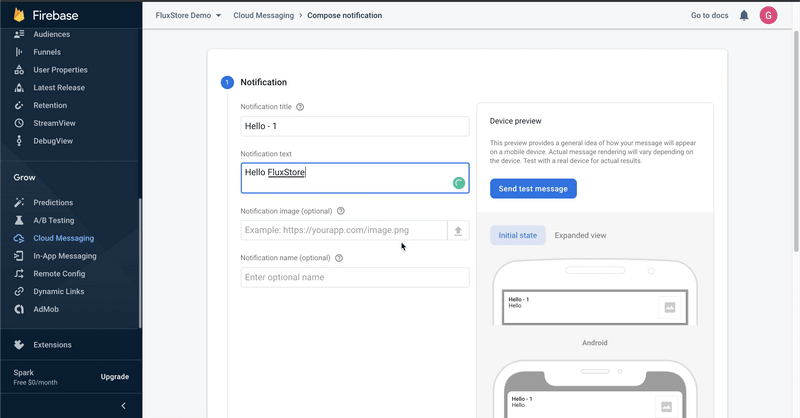
Option 2: Firebase Push Notifications on Firebase
Instead of FluxBuilder, you can go to Firebase to push notification manually as these following steps:
- Drag the left menu to the bottom, the Grow section will have Cloud Messaging. Click
Cloud Messaging, thenSend your first message:

- Create a new messenger, fill in the messenger information, and click next:
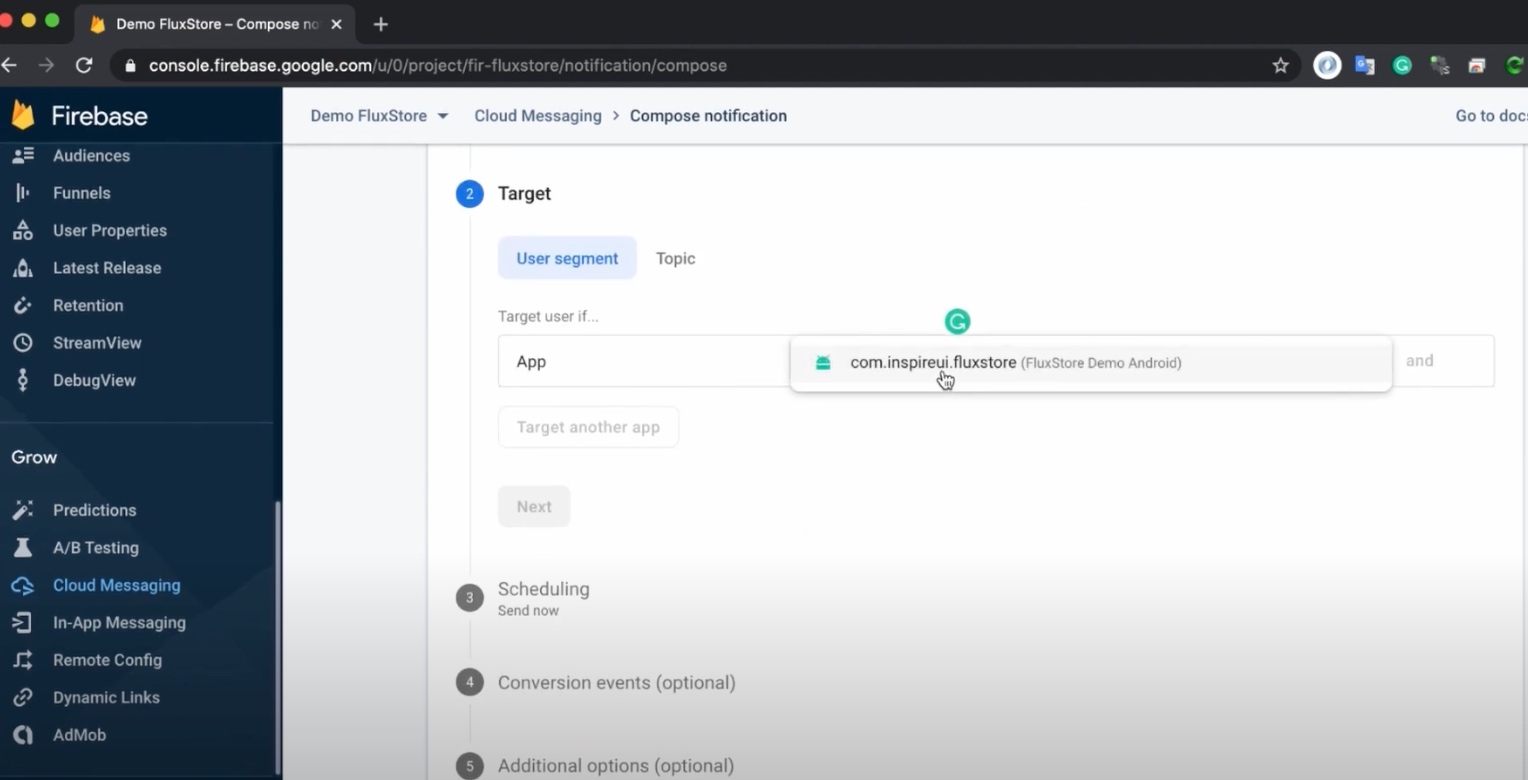
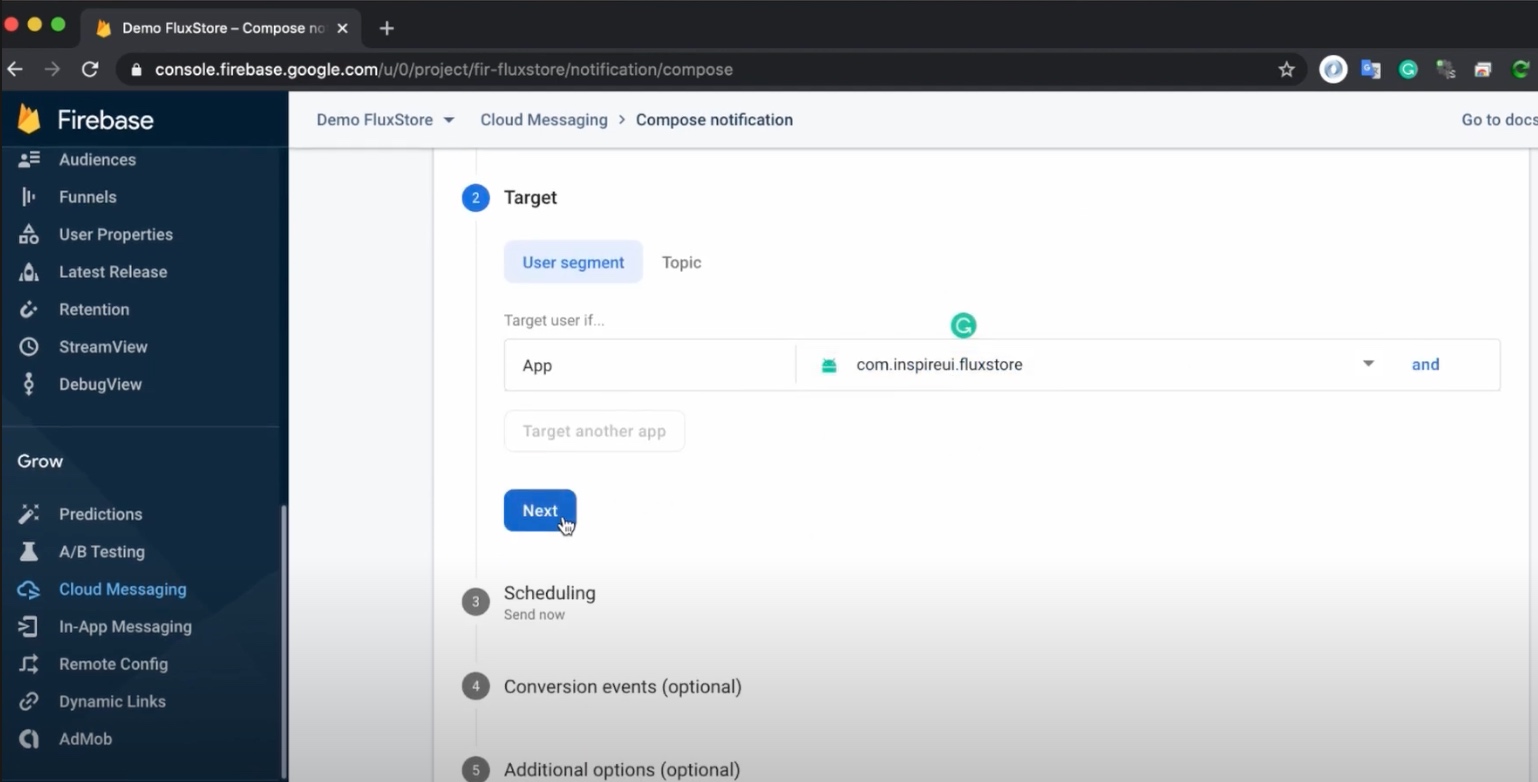
In the Target part, select the application you want to send, here select the iOS / Android application that was configured in Firebase before:
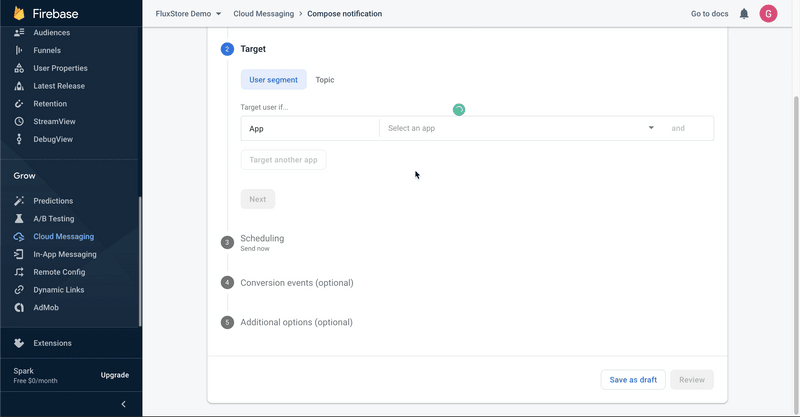
- Click
Next:
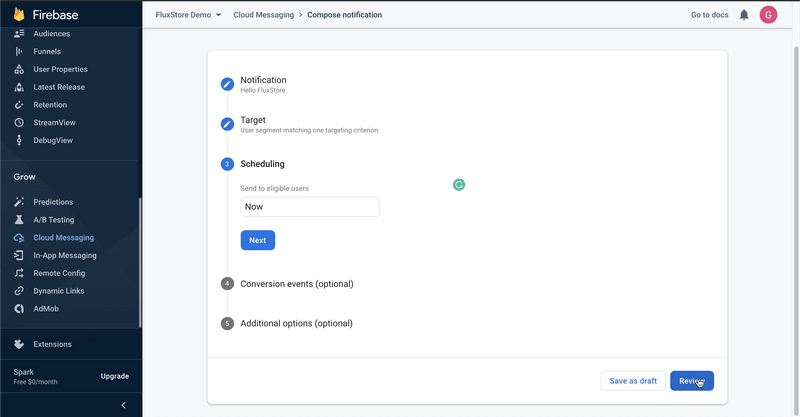
- The remaining steps can be ignored, continue to click Review:
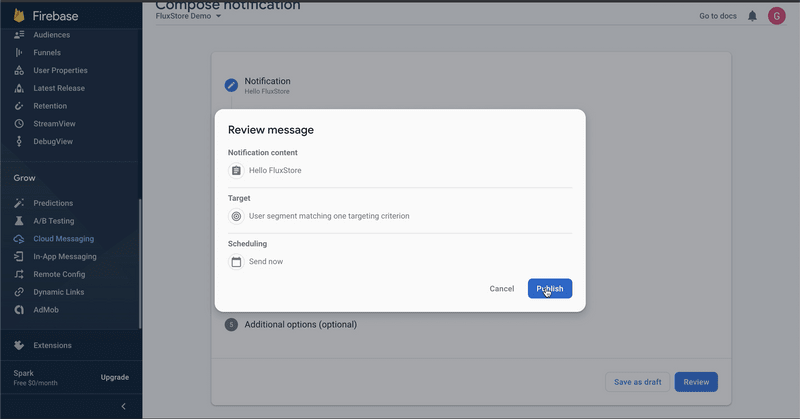
- Click Publish button:
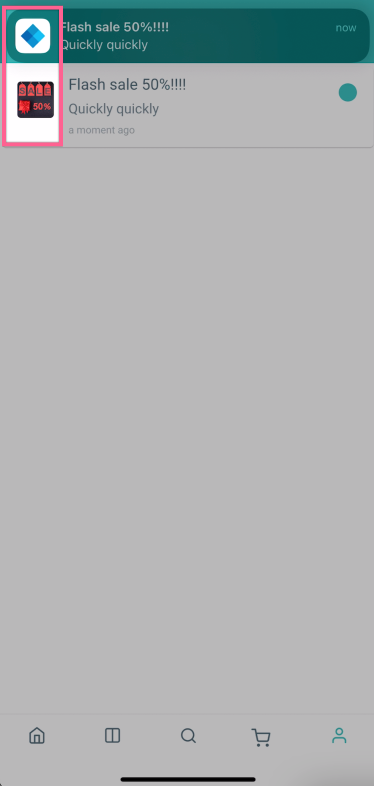
- Now go back to the app and check if it works:
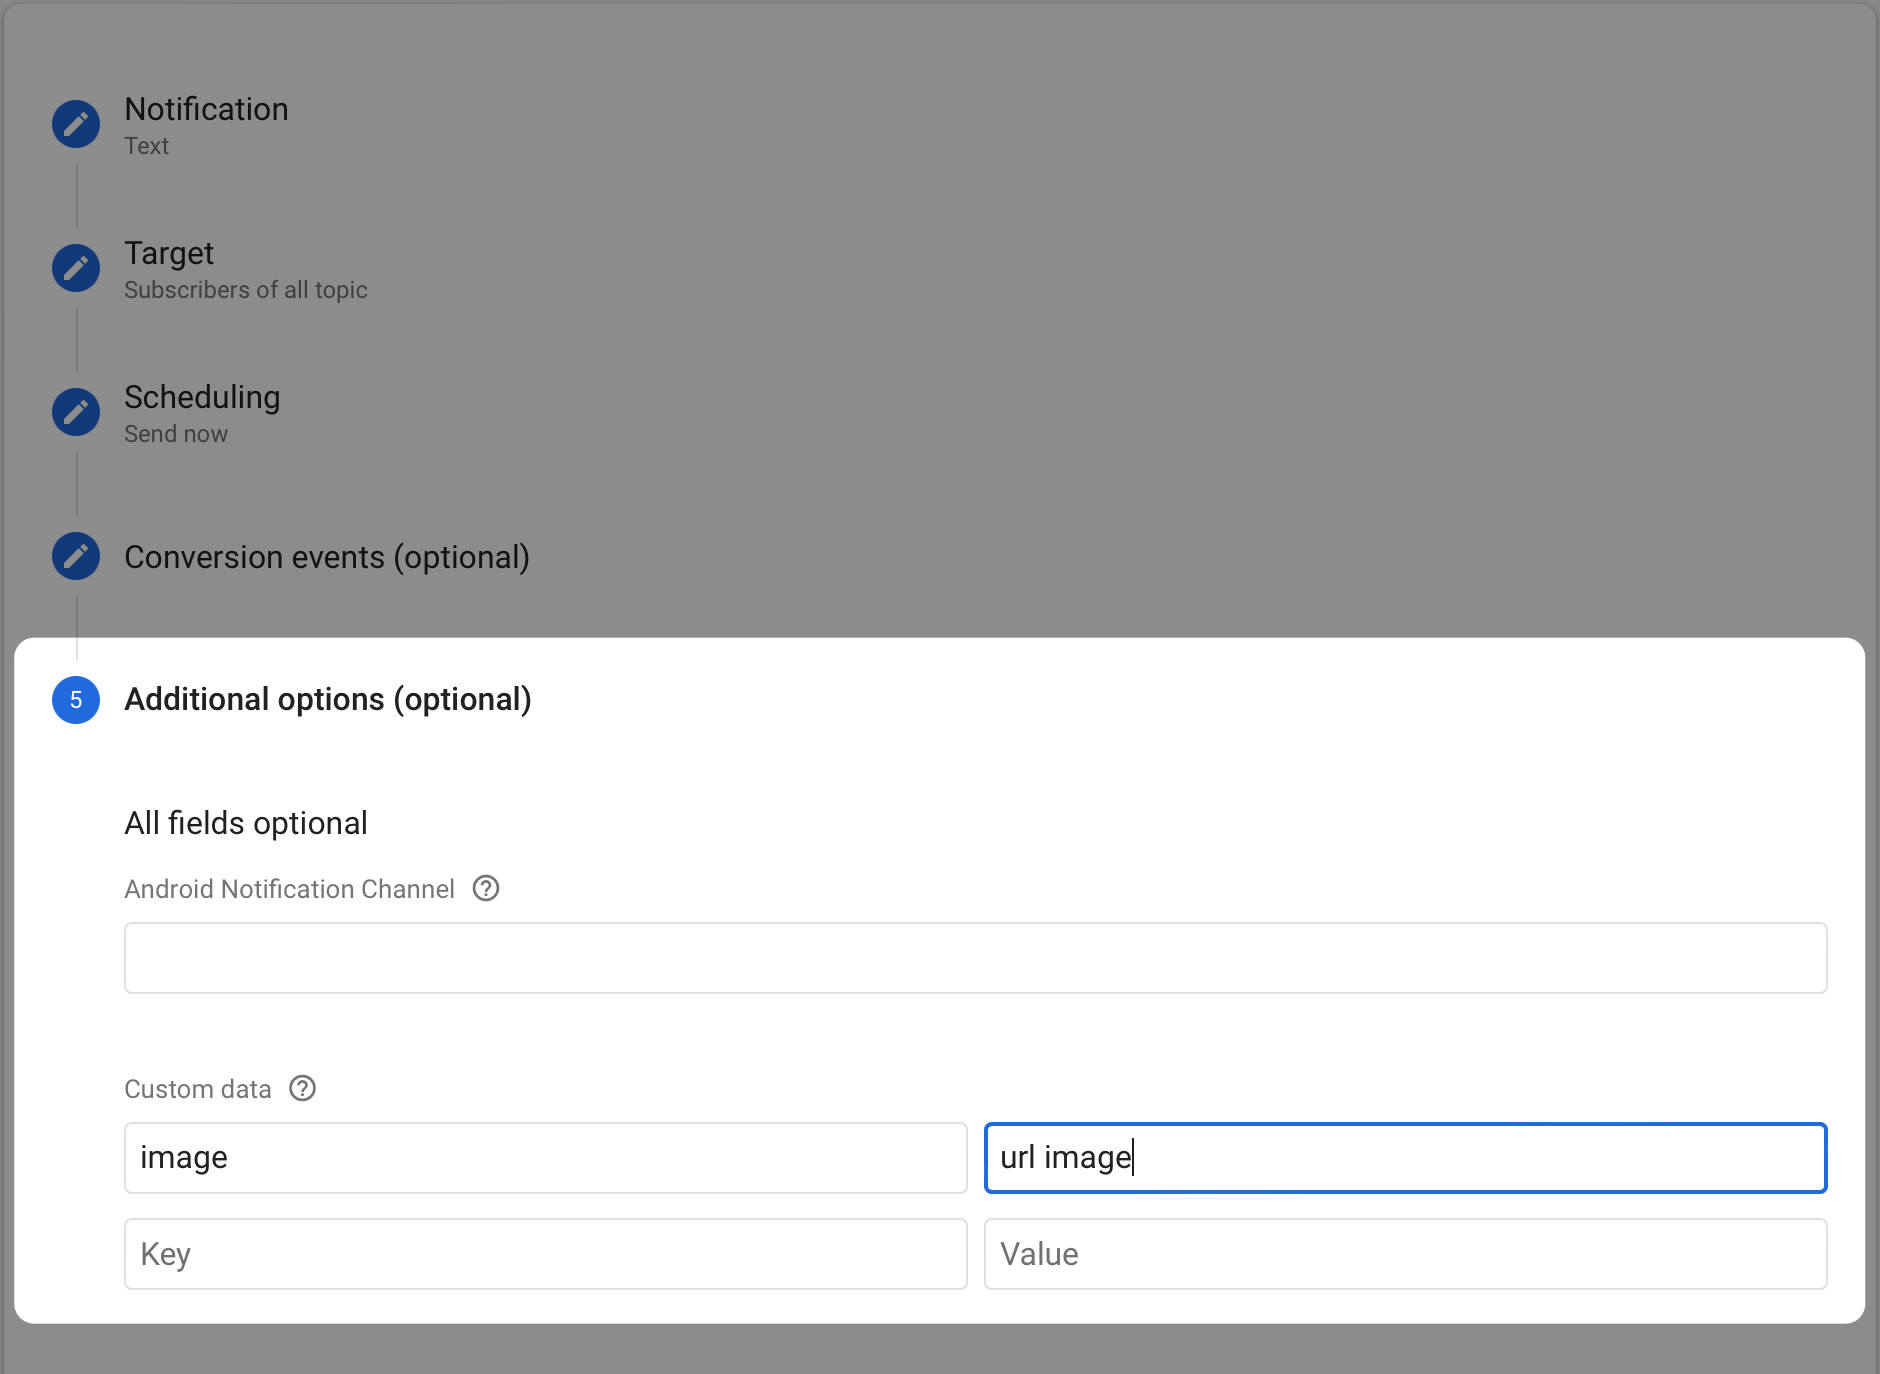
3. Add an Icon on Notifications
To custom icon of notification item, you need to add an image field in additional data when pushing the notification like this:
4. Push Notifications with dynamic link
Ability to share a Product or Page when you Push Notifications. The feature allows sending a Notification with the Product URL or a specific page. When users open Notification, App is launched with that product/page.
Guide: refer to "Push Notifications with dynamic link".
That’s all :)