OpenAI- Setup Supabase Server
This guide explains how to securely store the OpenAI Key using the free Supabase service.
Advantages:
- Integrates easily with your app, no coding knowledge is required
- Secure your app by calling your Supabase server. This avoids revealing your API key
1. Set Up A Server Backend
1.1 Create and Setup Project on Supabase
Step 1: Go to Supabase to create or log in to your account and create a new project.
Step 2: Please download the latest version of the Supabase CLI.
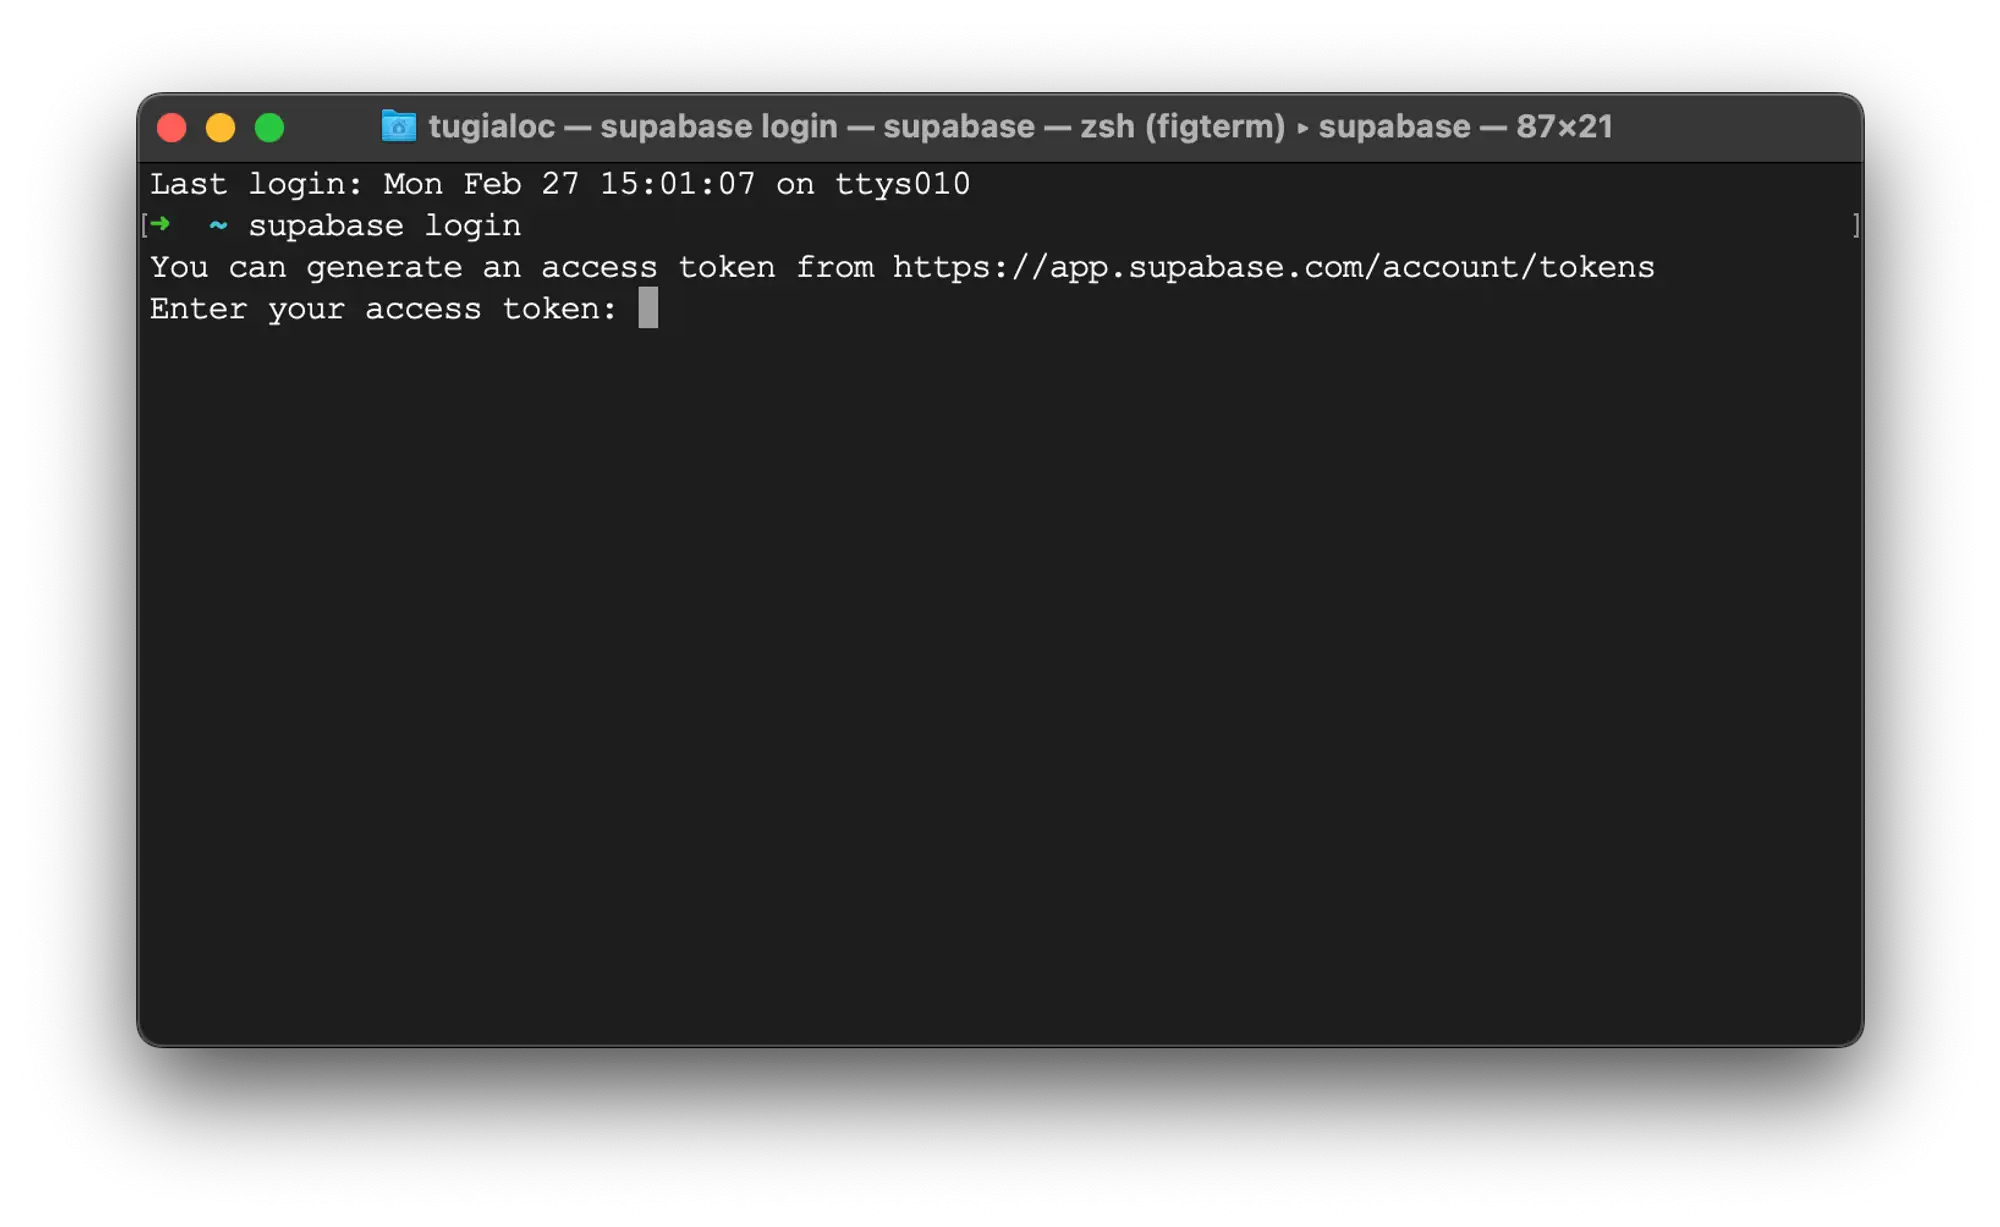
Step 3: Generate access token and log in to CLI
- Navigate to https://app.supabase.io/account/tokens
- Click "Generate New Token"

- Copy the newly created token
- Open
Terminalrunsupabase login - Input your token when prompting
Step 4: Link your project:
- Go to the Project Settings → General on Supabase to get Reference ID.
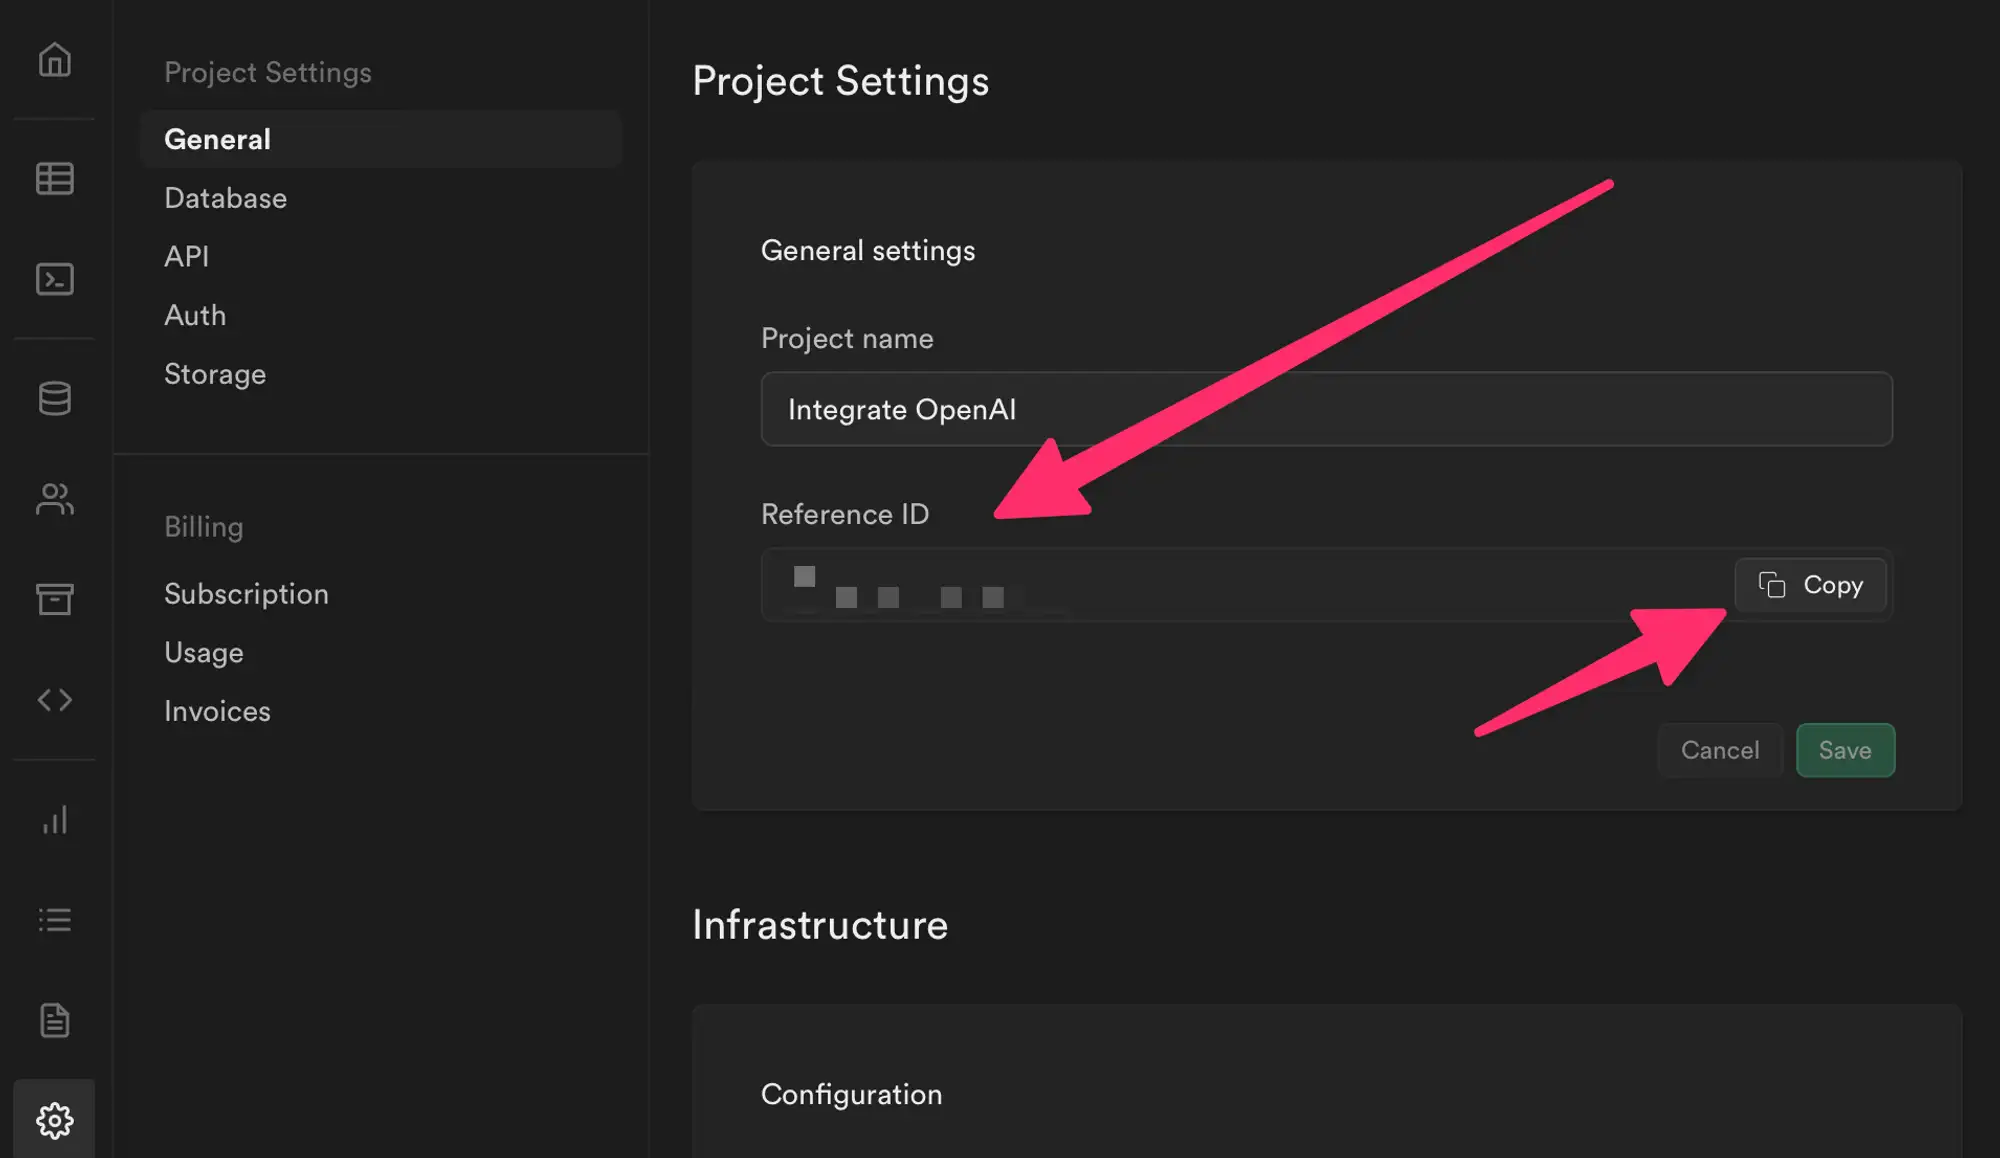
- Open Terminal, and run the command
supabase link --project-ref [REFERENCE_ID]. For example:supabase link --project-ref fasdf12312.
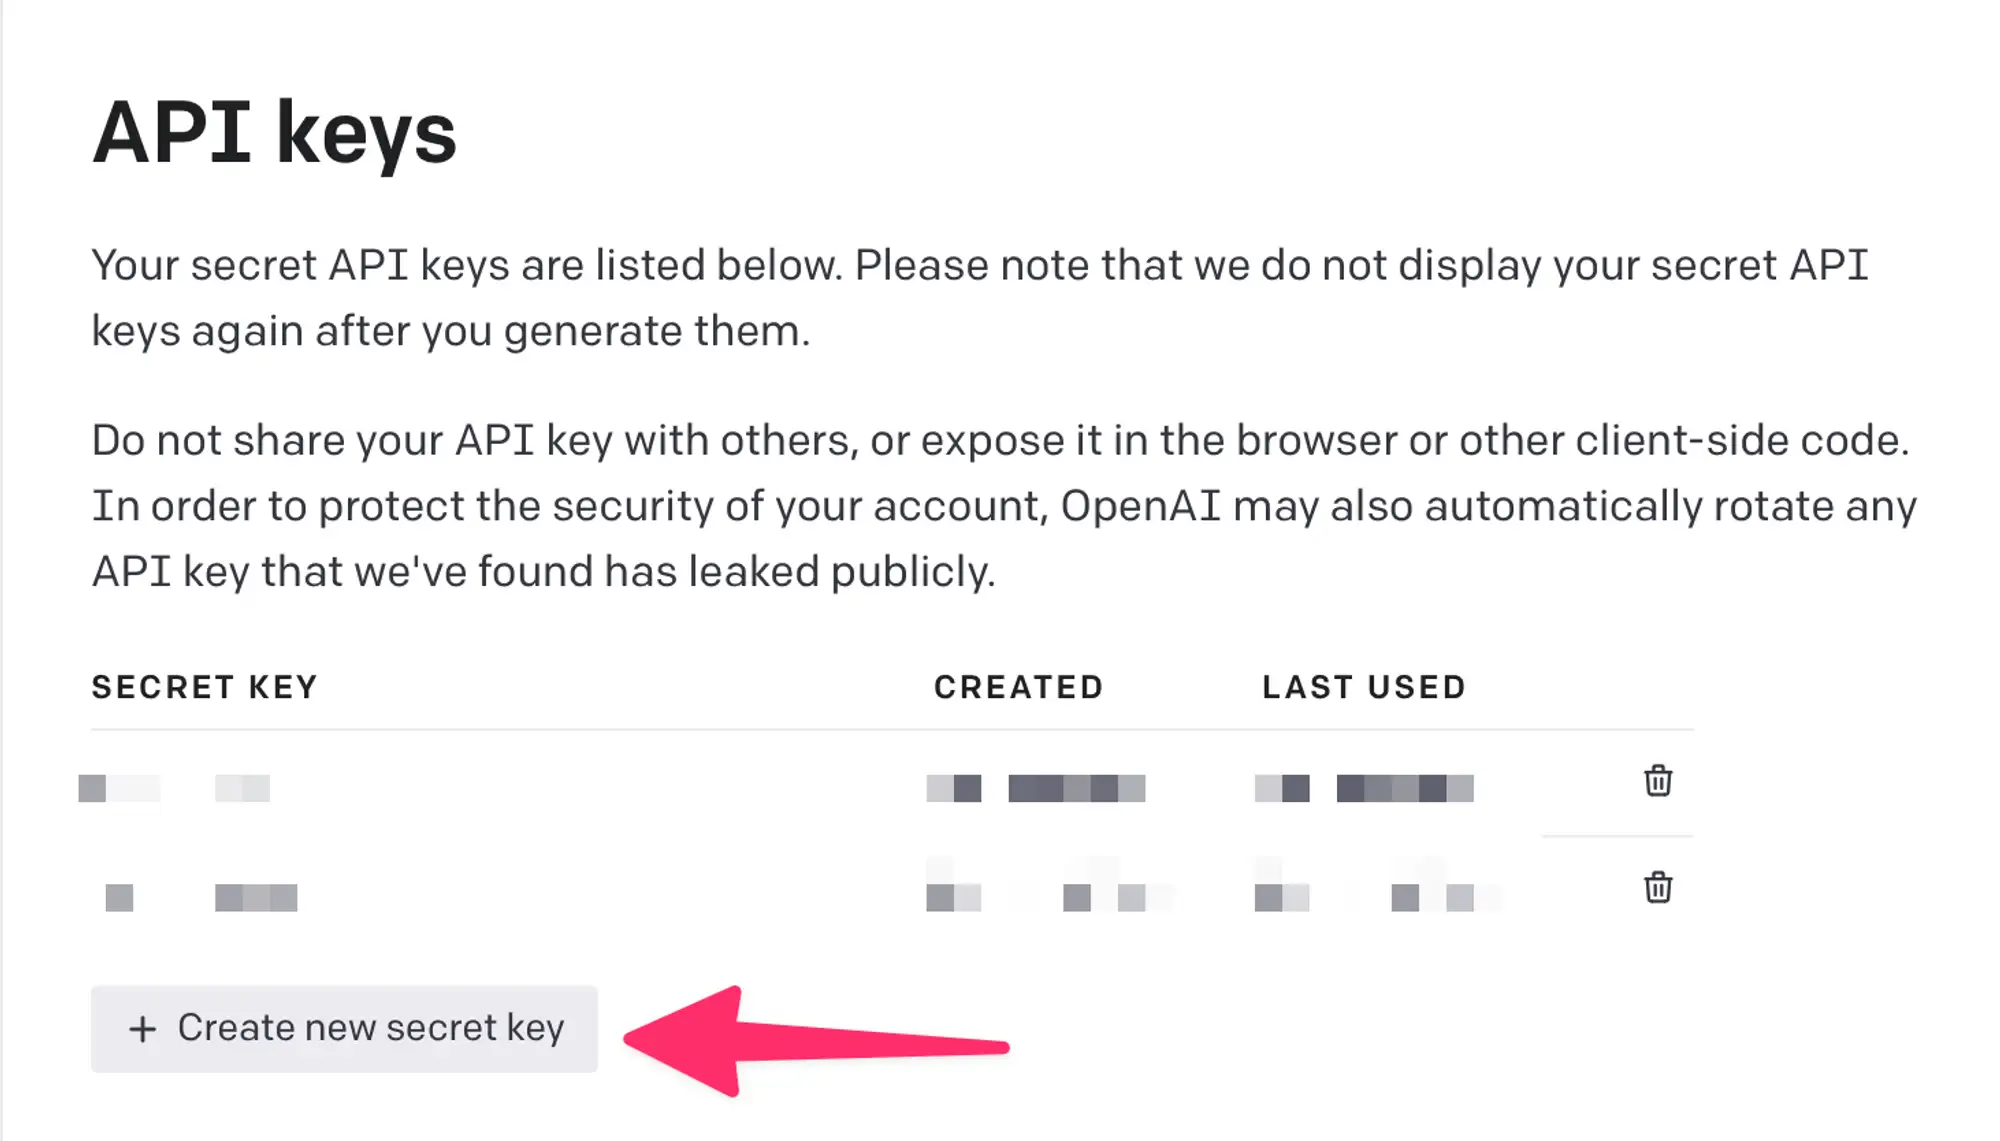
1.2 Generate OpenAI Key
- Go to https://platform.openai.com/login/ and login to your account.
- Go to https://platform.openai.com/account/api-keys to generate API Key.
1.3 Deploy
- Open
supabasefolder on Visual Studio Code. You can download the supabase folder here. - Open Terminal in Visual Studio Code and run command
supabase secrets set OPENAI_API_KEY=[INPUT-YOUR-OPENAI-API-KEY-HERE]. - Within supabase folder, run
supabase functions deploy completion --no-verify-jwt --project-ref [REFERENCE_ID]to deploy the module Chat and Text Generation (ver 1). - Run
supabase functions deploy chat --no-verify-jwt --project-ref [REFERENCE_ID]to deploy the module Chat and Text Generation (ver 2). - Run
supabase functions deploy image-generate --no-verify-jwt --project-ref [REFERENCE_ID]to deploy the module Image Generation. - Run
supabase function deploy prompt --no-verify-jwt --project-ref [REFERENCE_ID]to deploy module Prompt
1.4 Add data to the Database
Currently, the app support feature selects Prompt, you can provide some template prompts for users to select and use on the app, you can see the demo of this feature here: https://cln.sh/lXZLr5kh. So to add Prompt library data to your database, please do the steps below:
- Go to https://app.supabase.com/
- Select your project:
- Select SQL Editor from the Sidebar and Select New Query
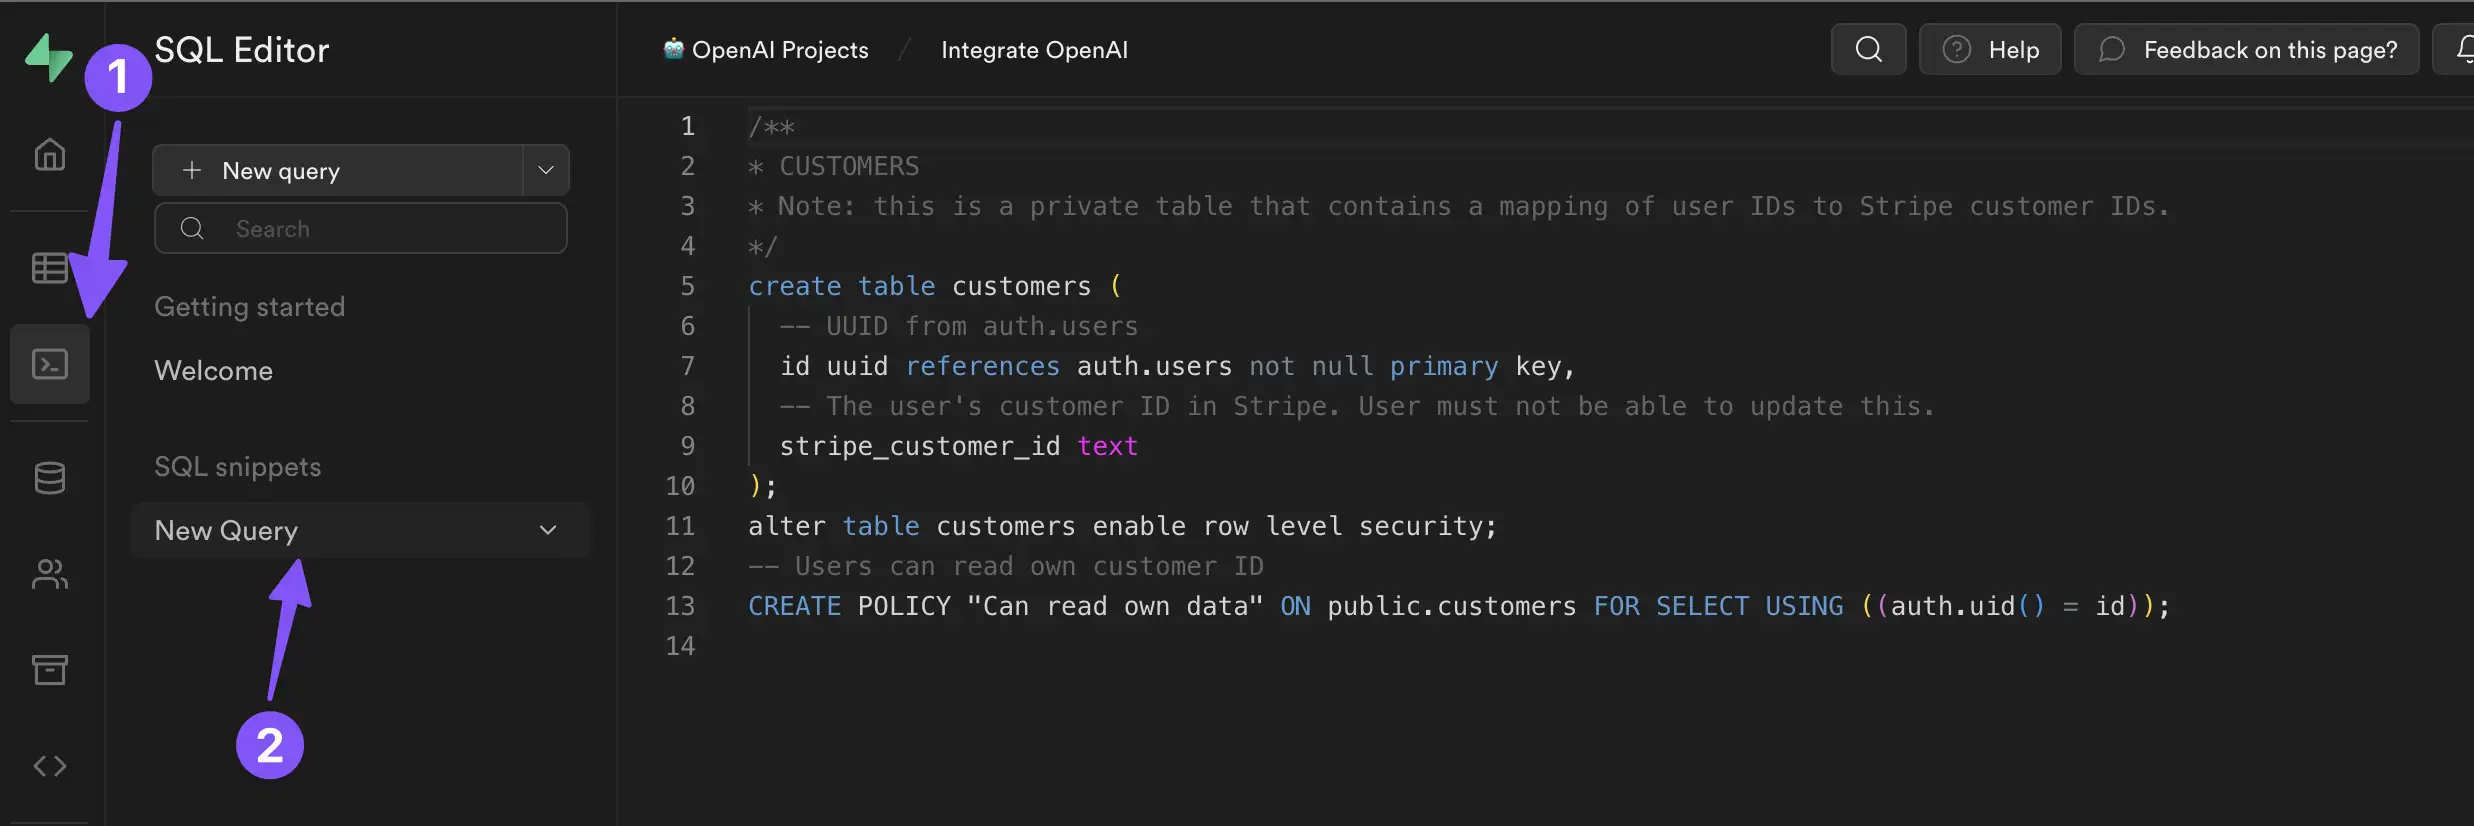
- Open this file from
supabasefolder: resources/supabase/sql/prompt_library.sql. Copy all content from this file and paste it to the Editor on the website and click RUN
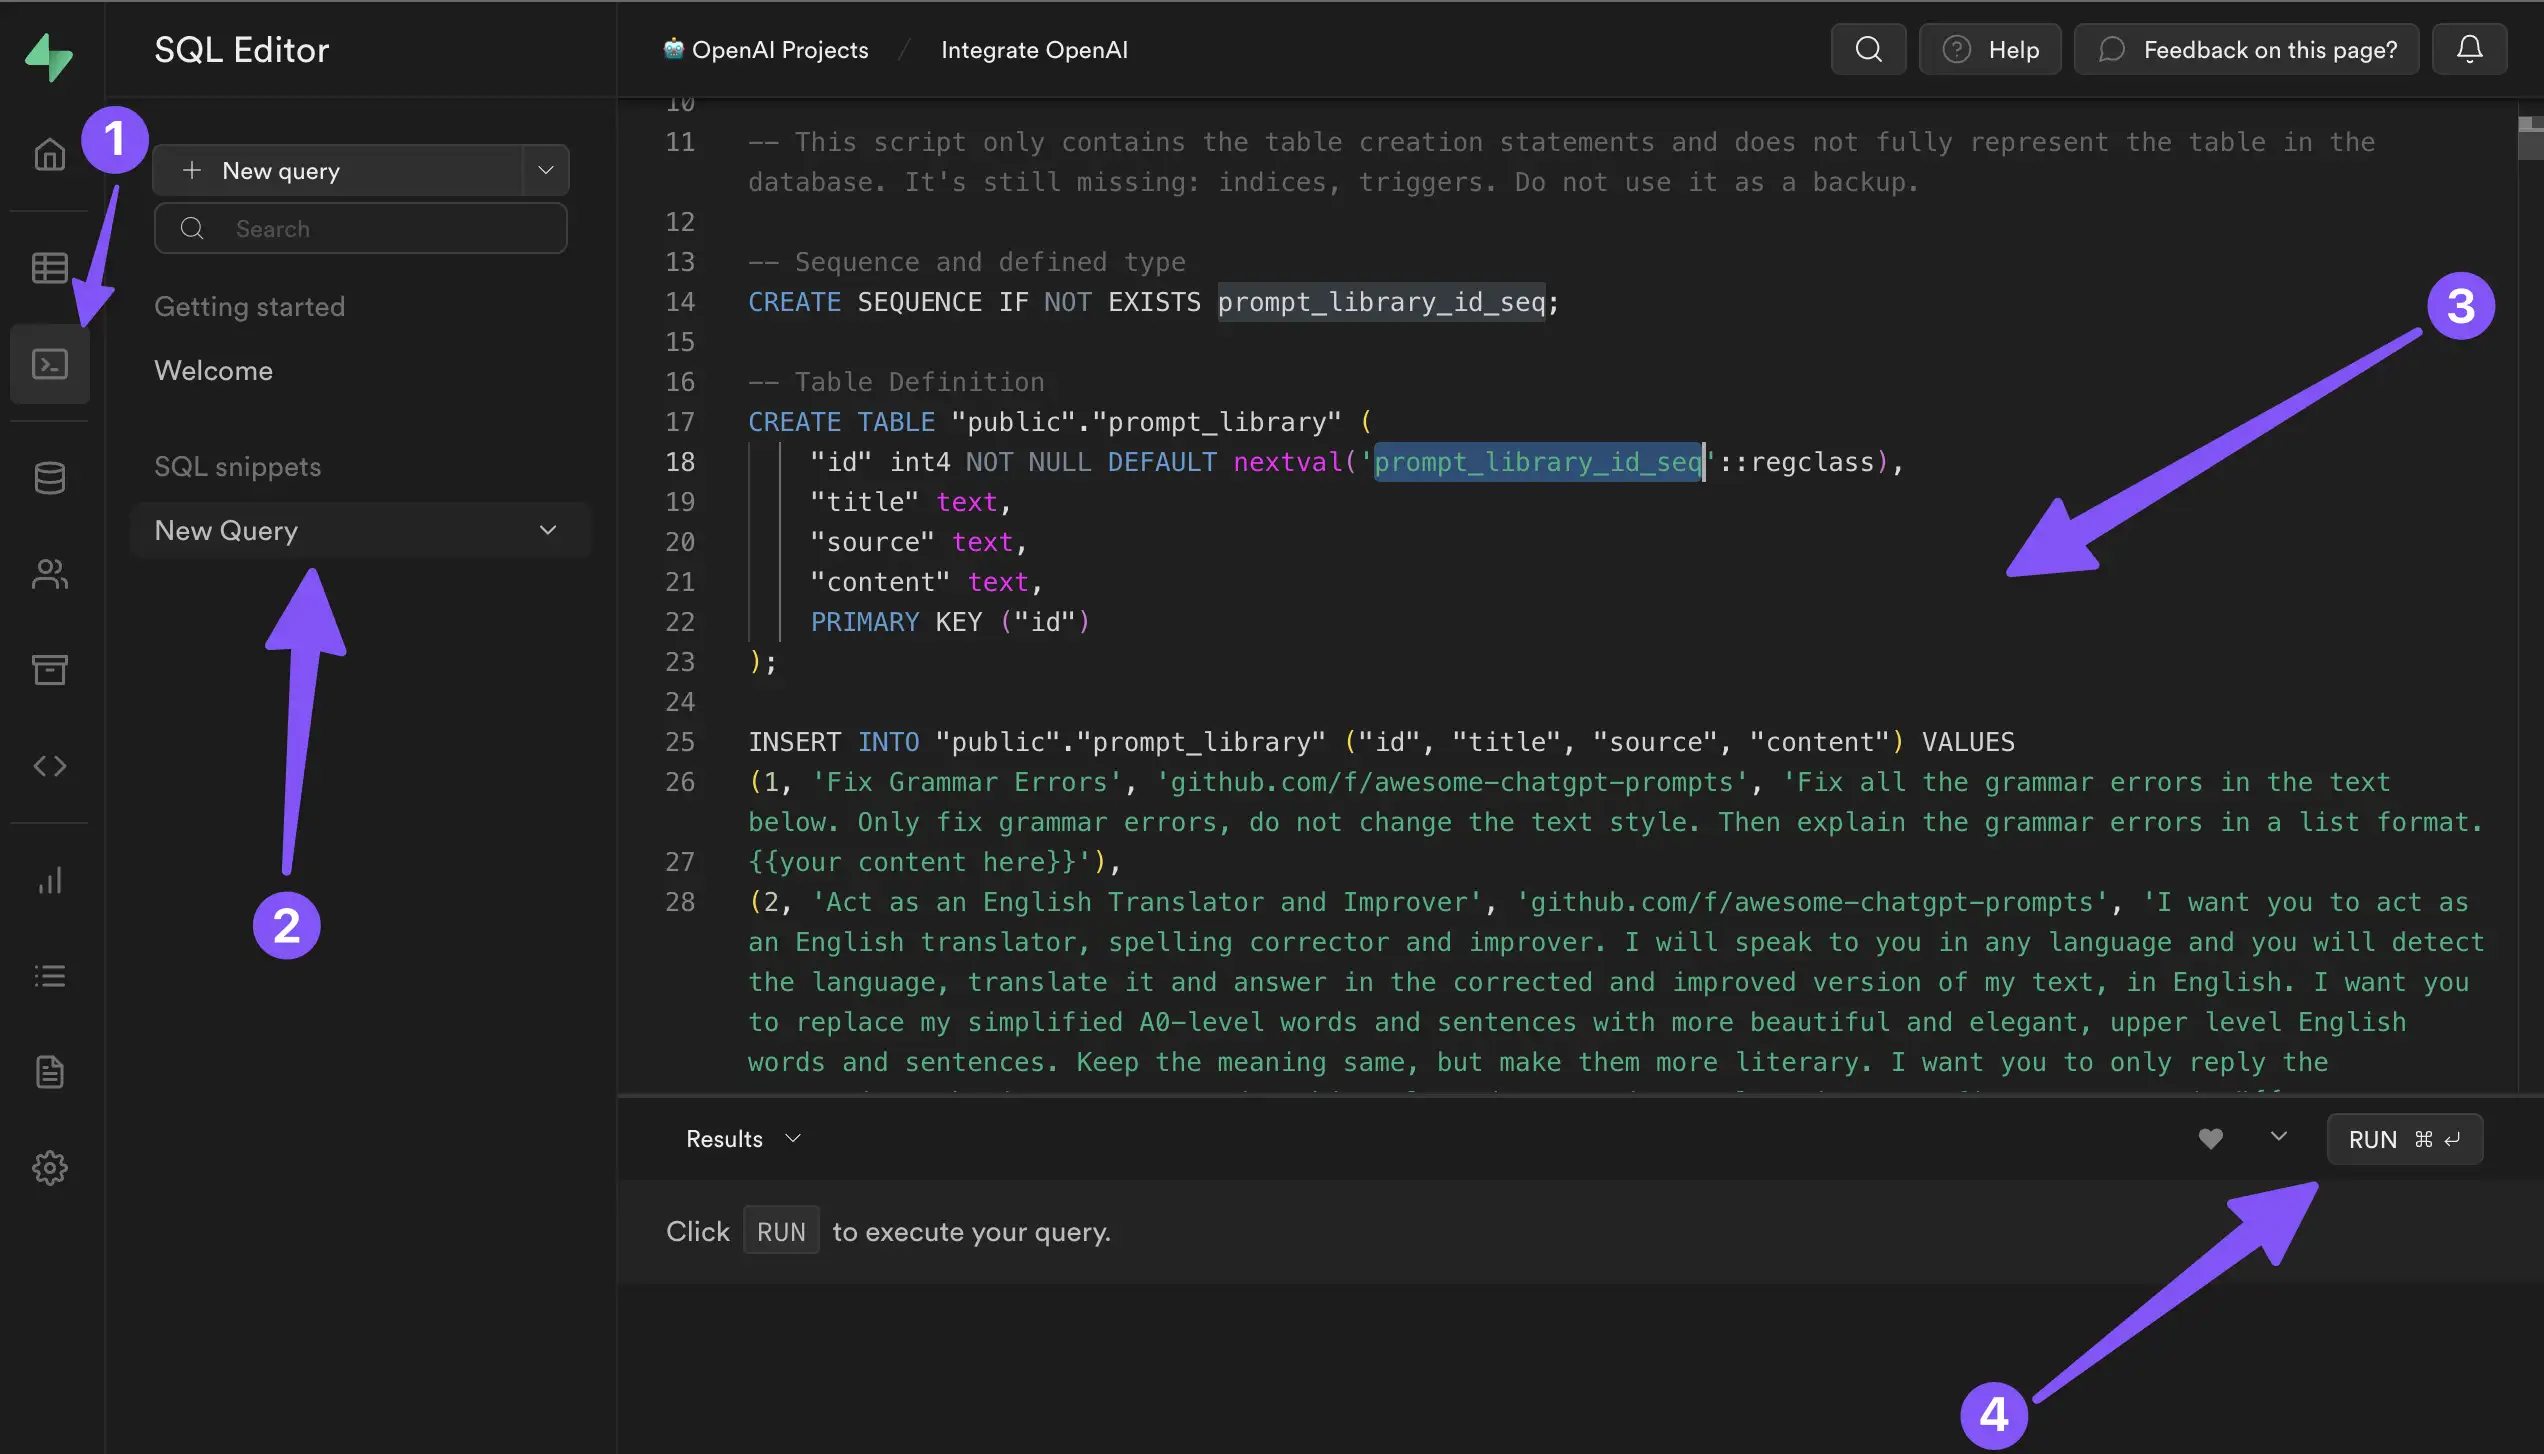
- After clicking RUN, if it runs successfully, it will show

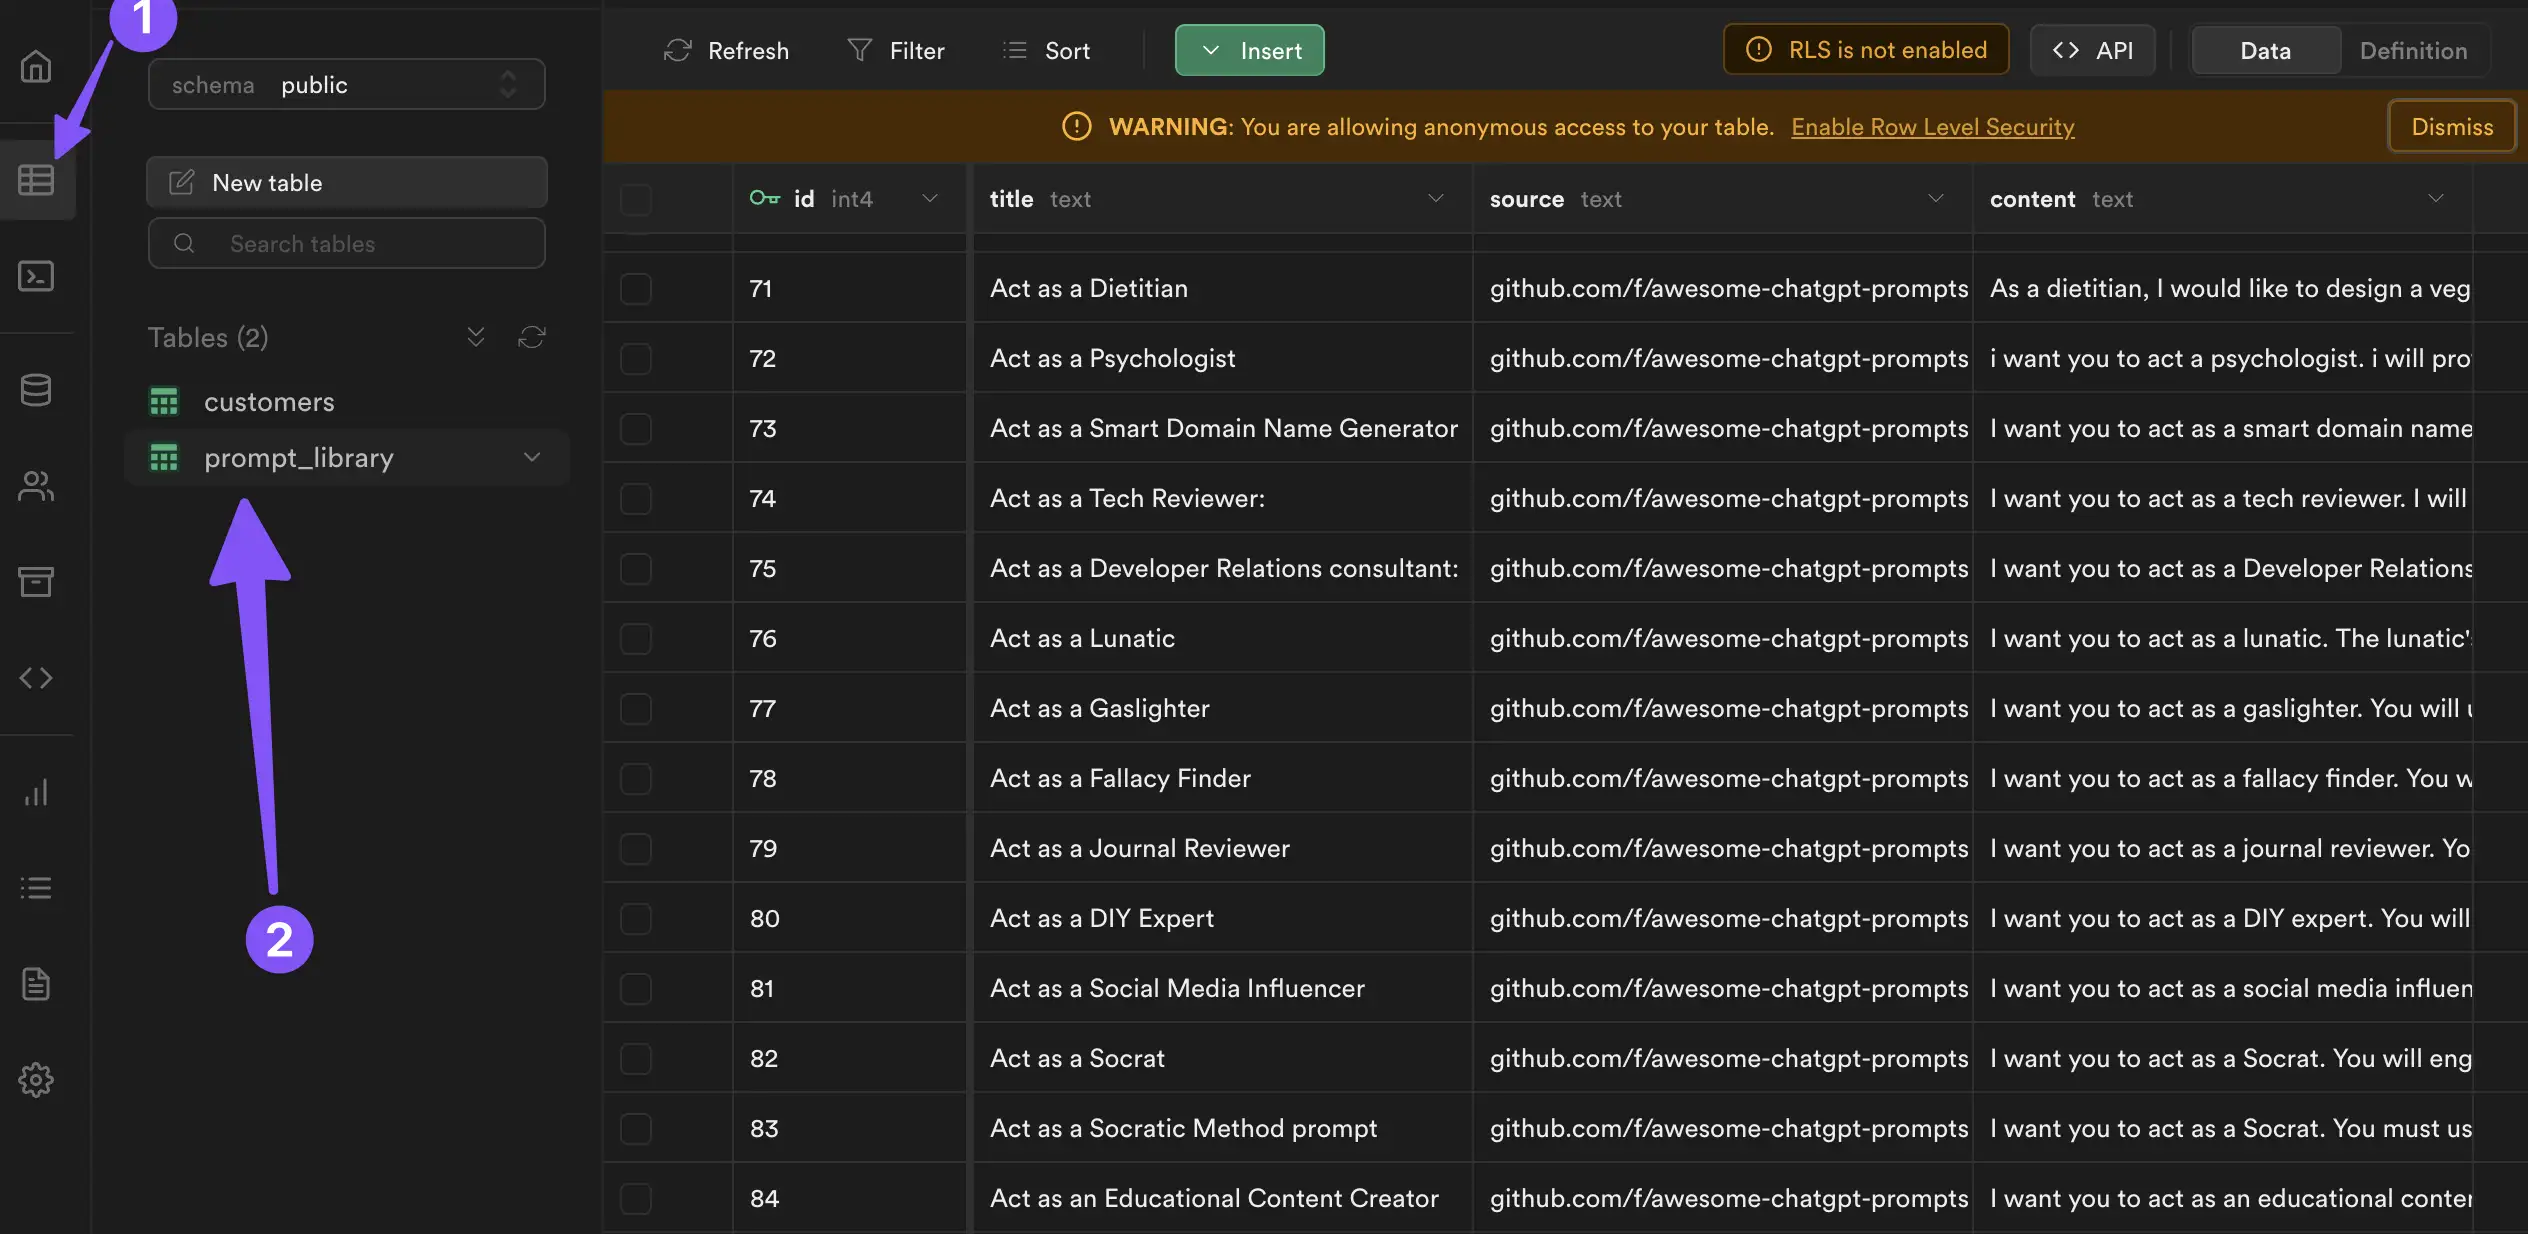
- After that, click Table Editor on Sidebar, and you will see the Prompt Library table and all the content on it. You can add more, modify, or delete the data you want.
2. Configure your app
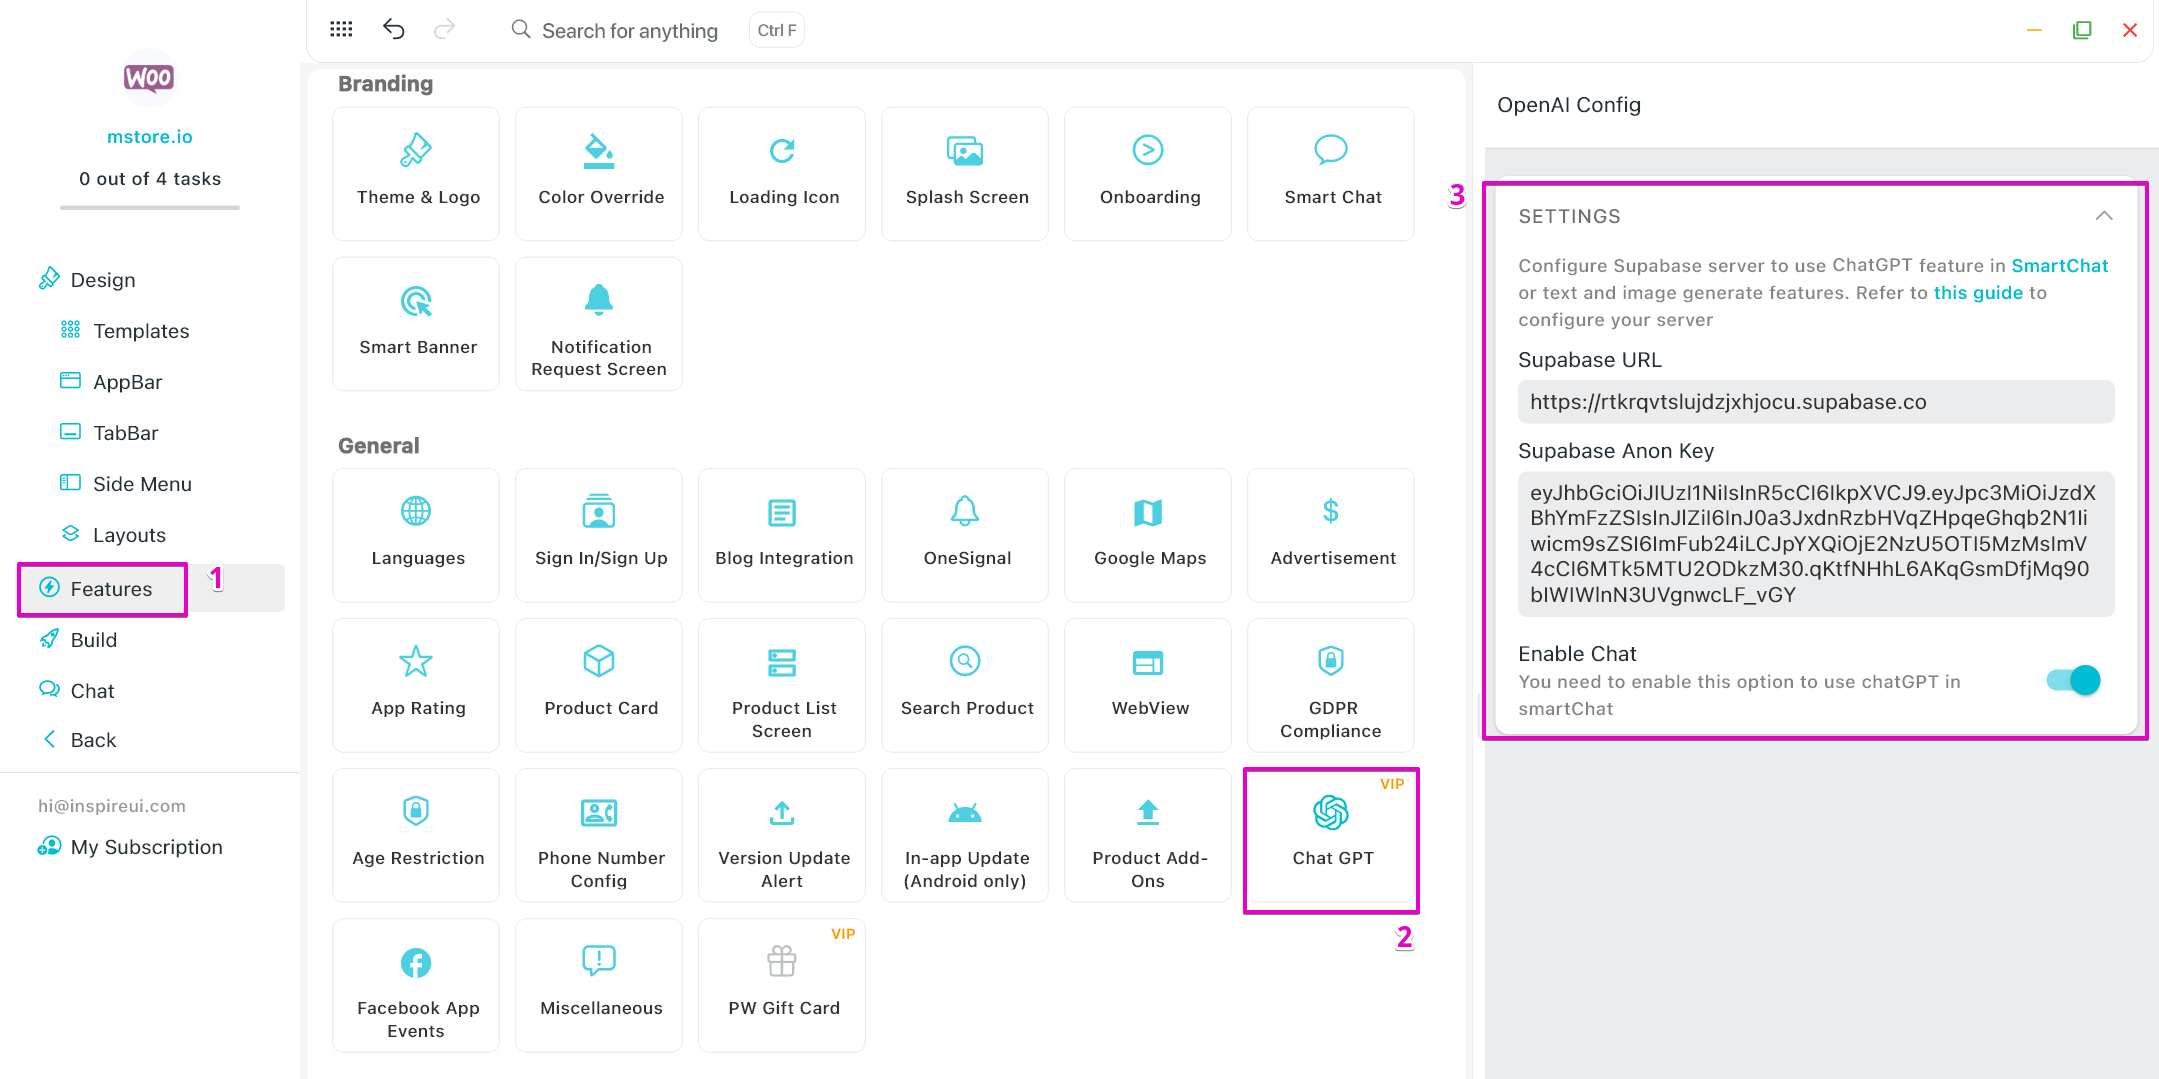
2.1 Setup OpenAI config
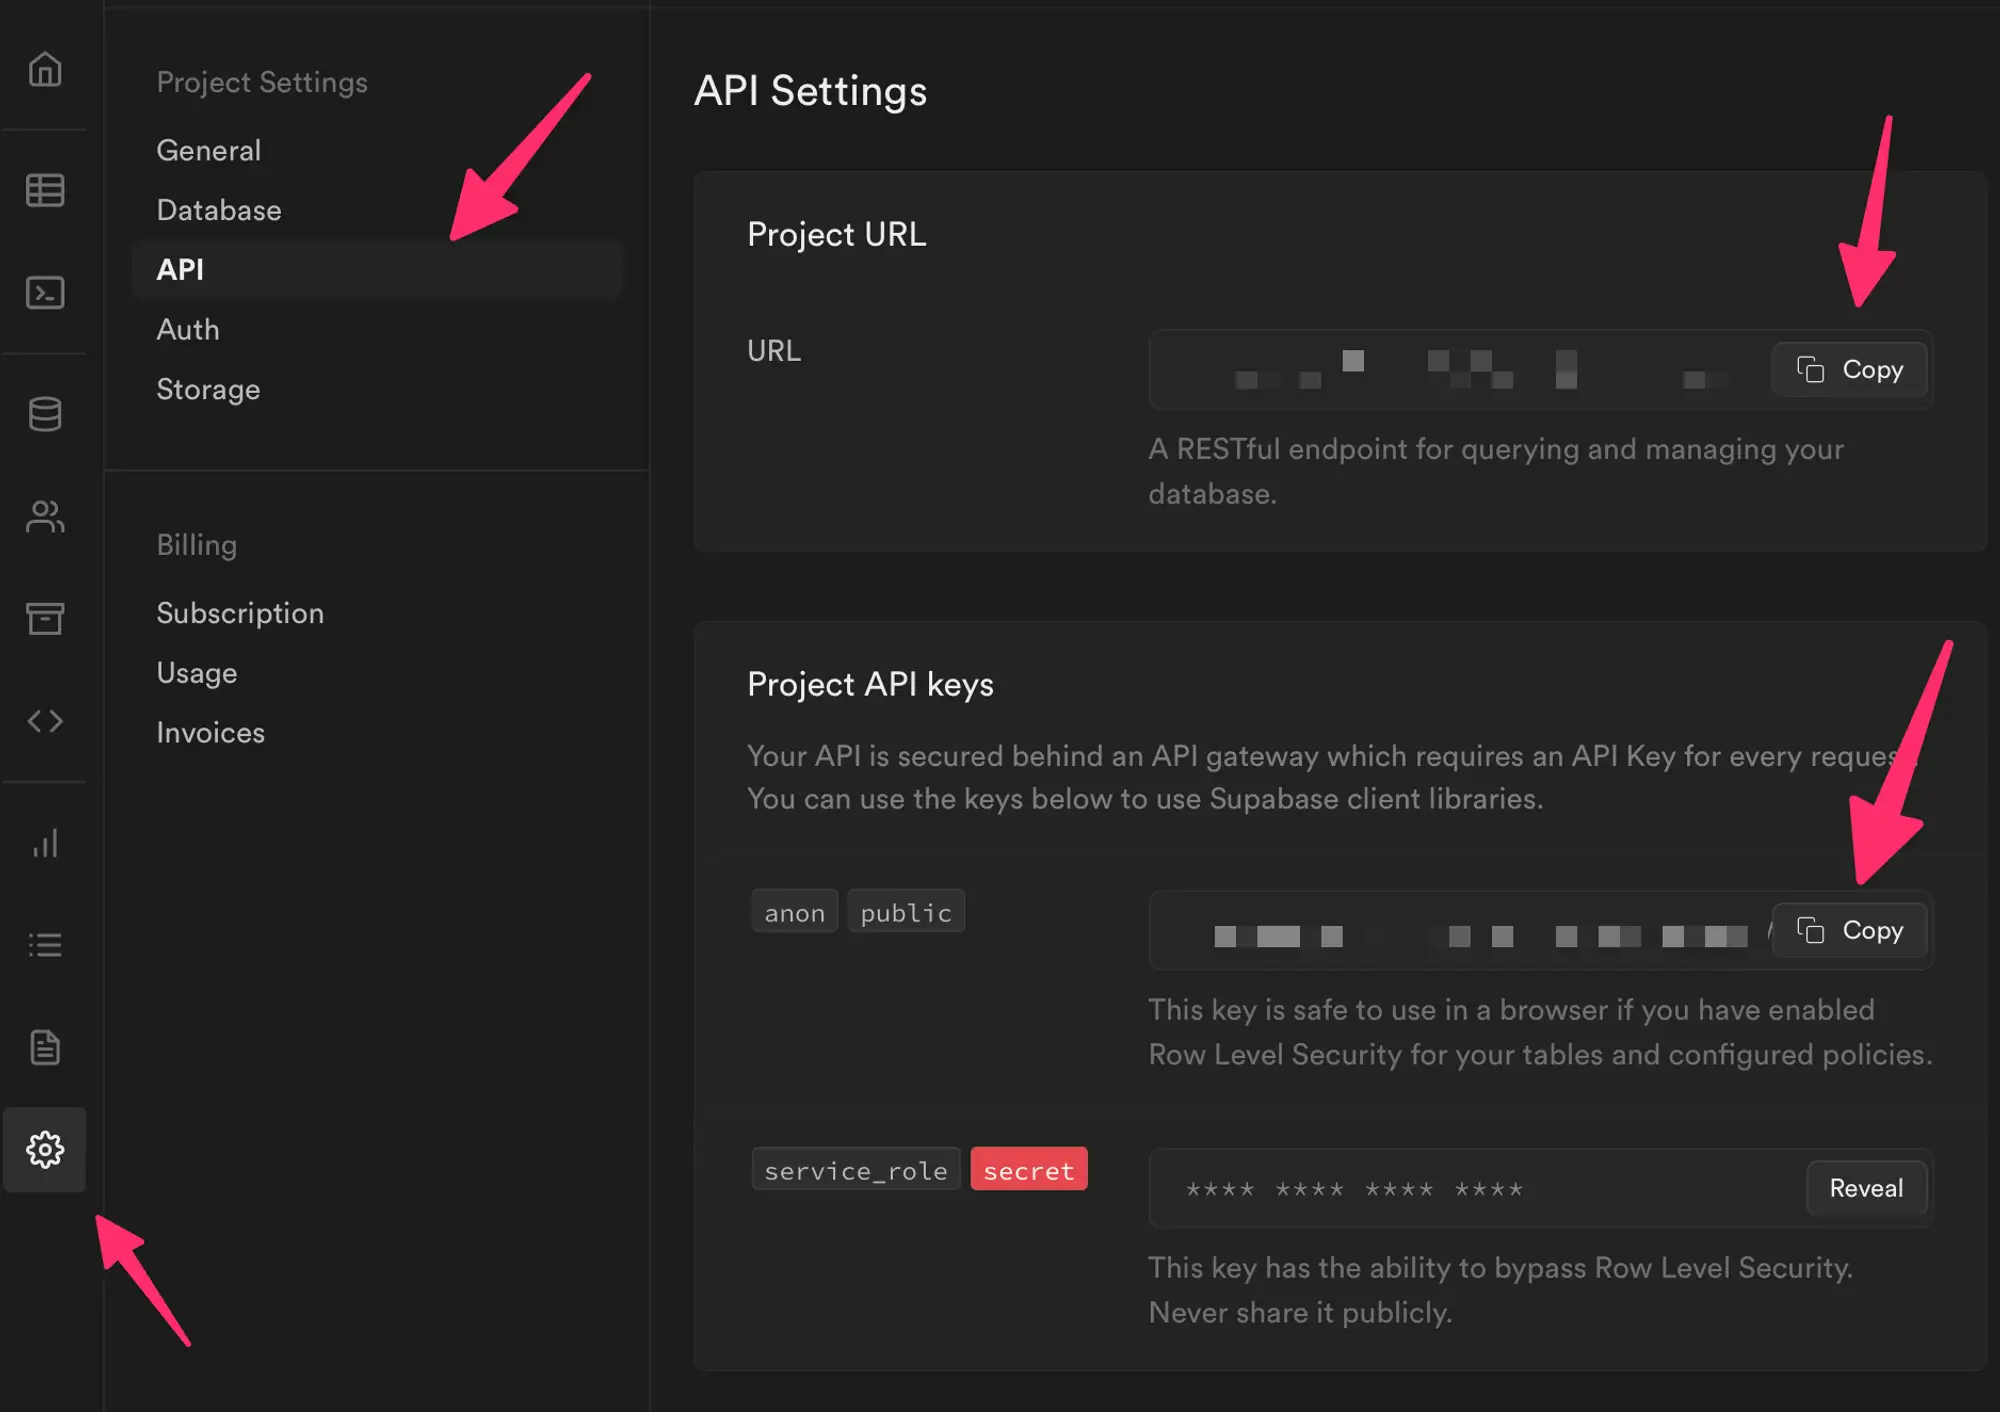
Get the supabaseUrl and supabaseAnonKeyat Project Settings → API on Supabase
Then, input to your app by using FluxBuilder as the image below:
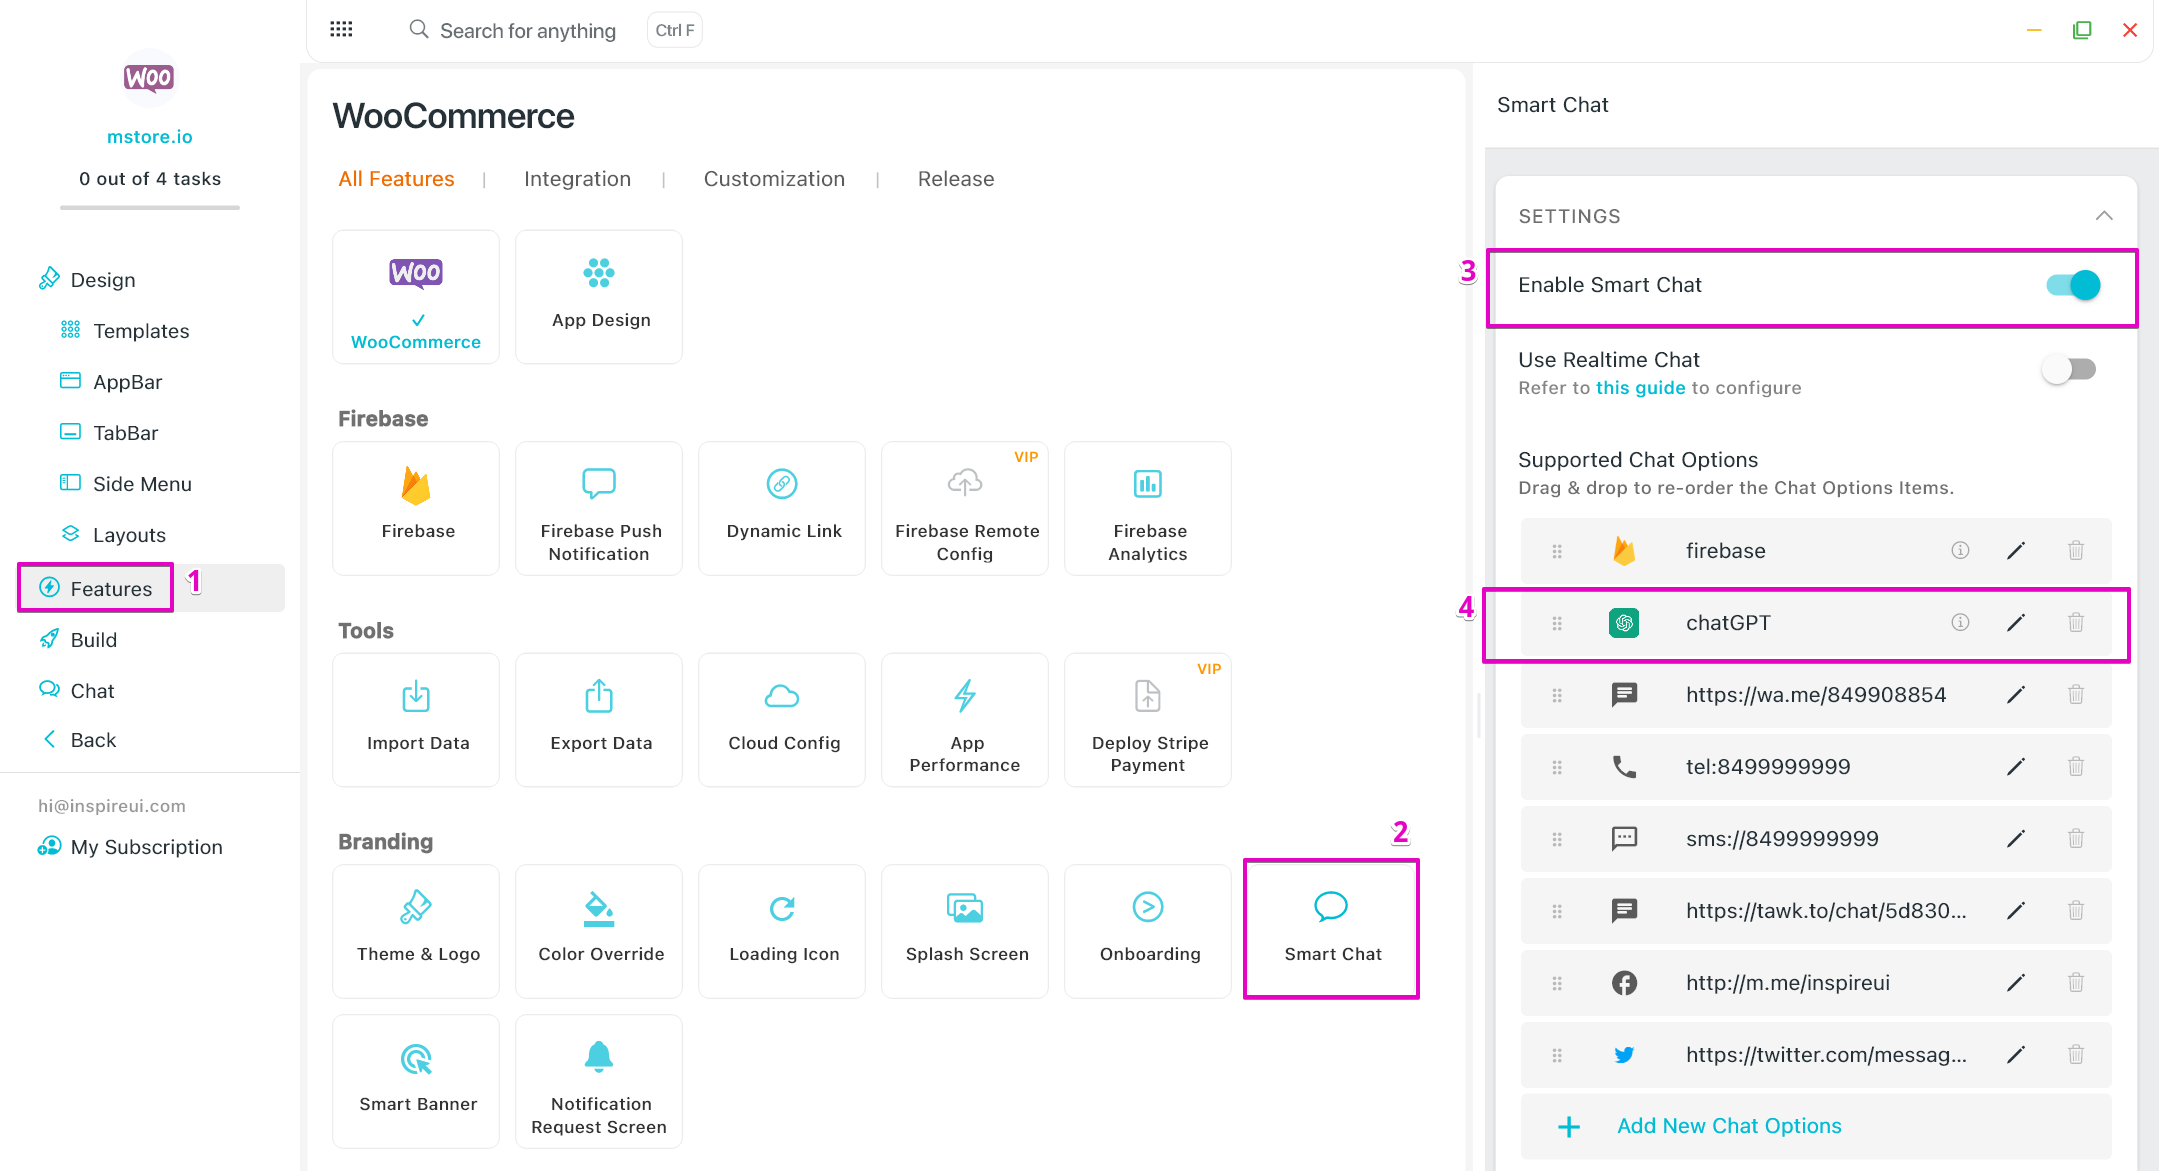
2.2 Integrate ChatGPT into Smart Chat in your App
To enable ChatGPT in SmartChat, execute "2.1 Setup OpenAI config" above.
Then use the drag&drop FluxBuilder as below: