Shopify Payment
1. Prerequisites
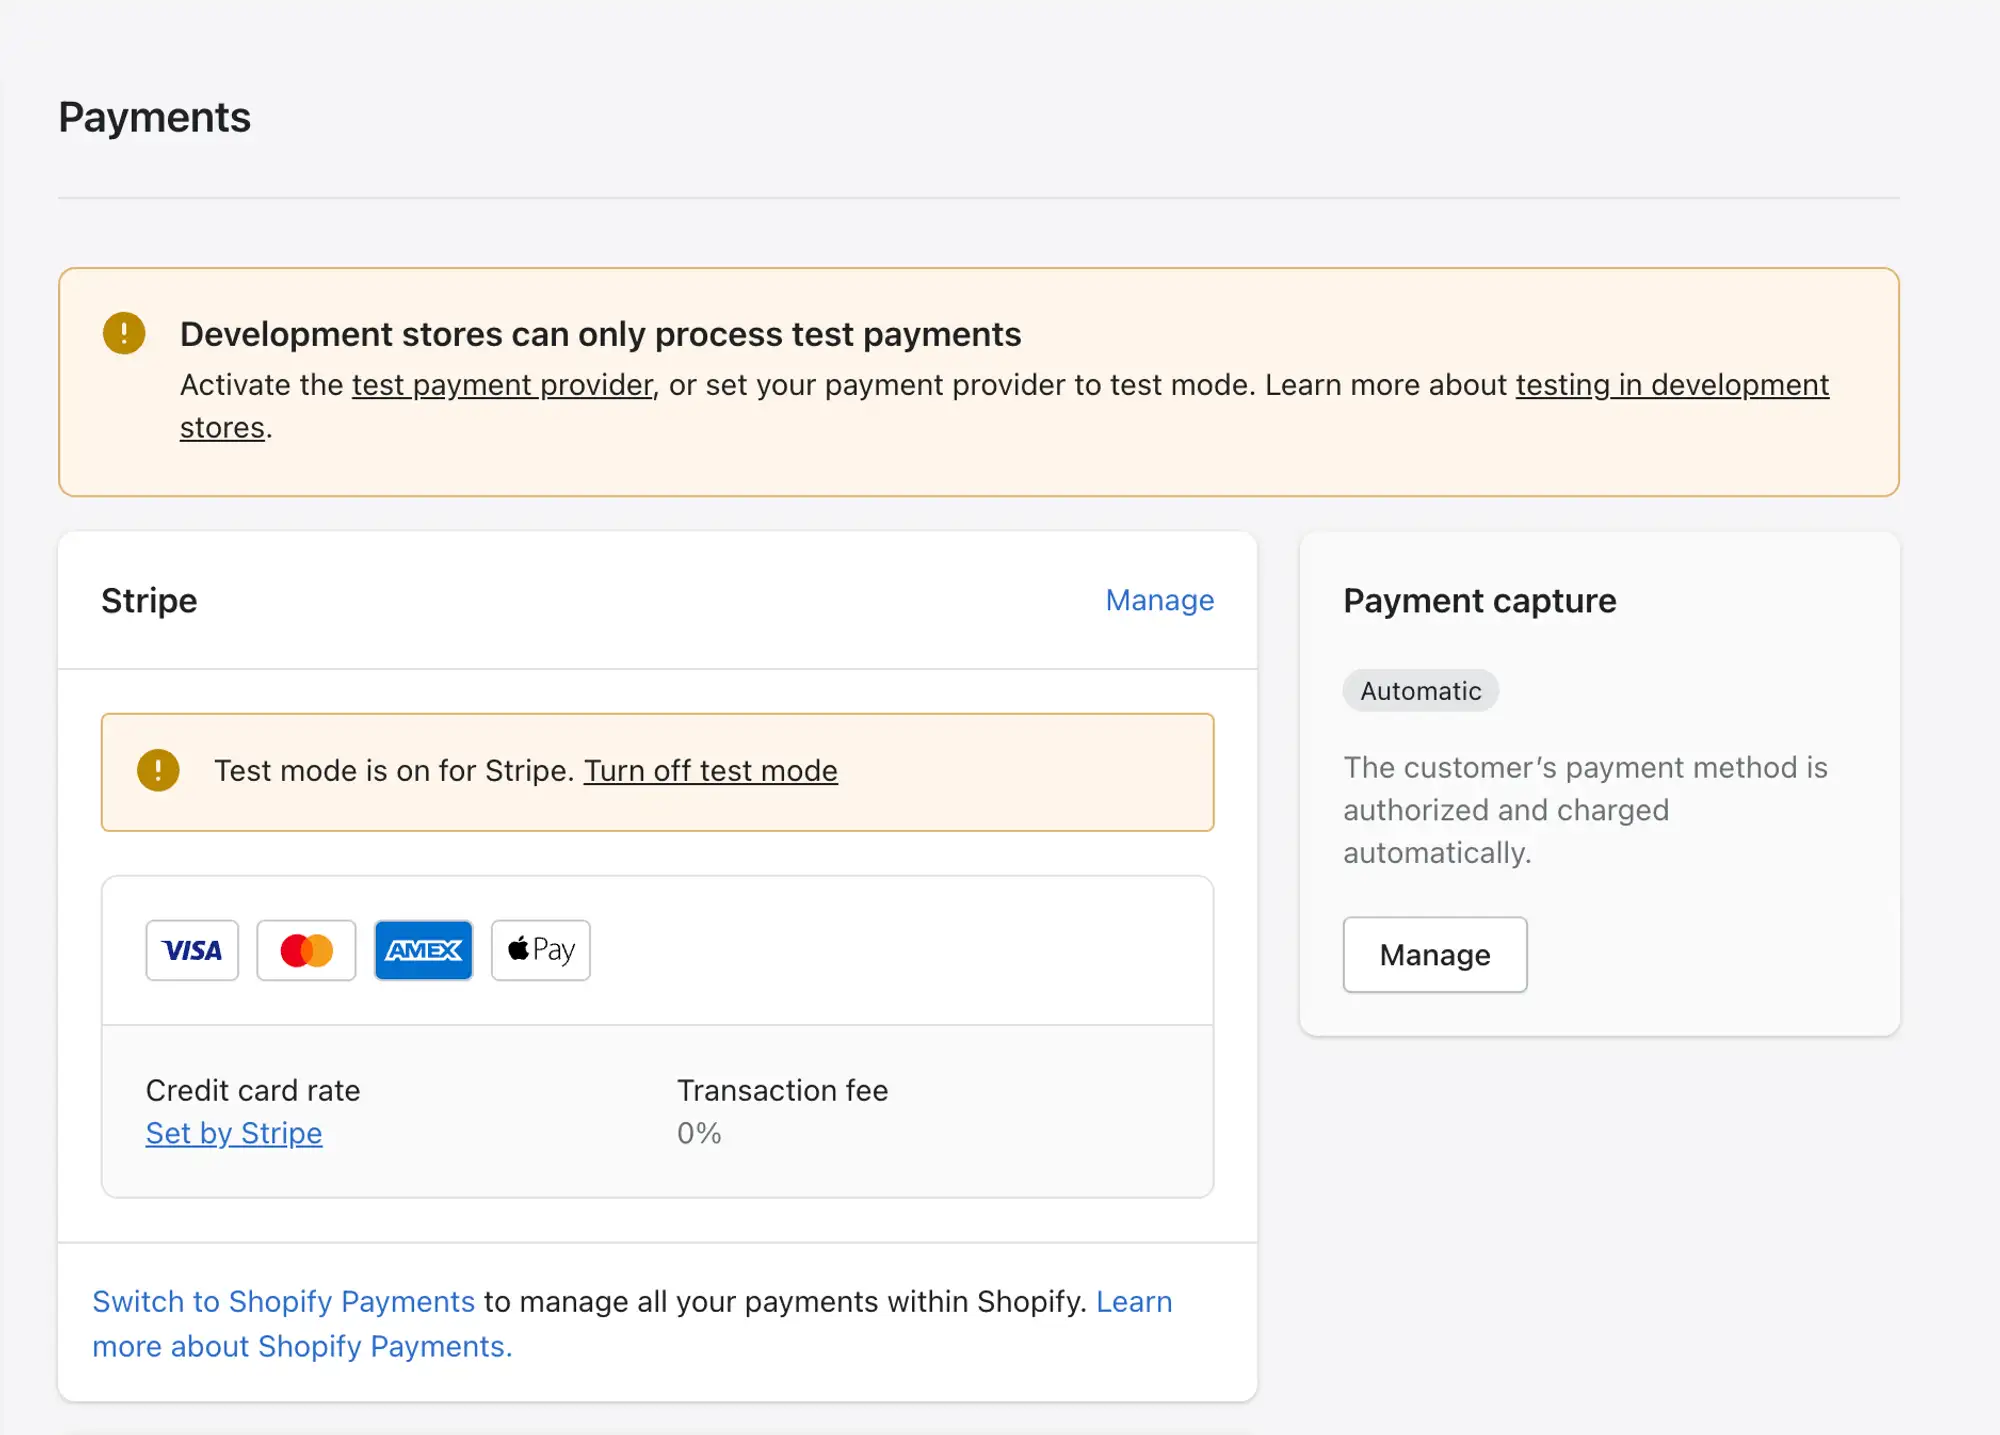
- To use ApplePay, GooglePay, and Stripe Card, please ensure that Stripe has been successfully connected to your website as shown below:
- Please make sure your country supports ApplePay, you can double-check here: https://help.shopify.com/en/manual/payments/accelerated-checkouts/apple-pay
- Please make sure you have set up the App to get Storefront Access Token before, if not, please check out the guide: https://support.inspireui.com/help-center/articles/50/57/8/app-installation#2-manual-guide
2. Apple Pay
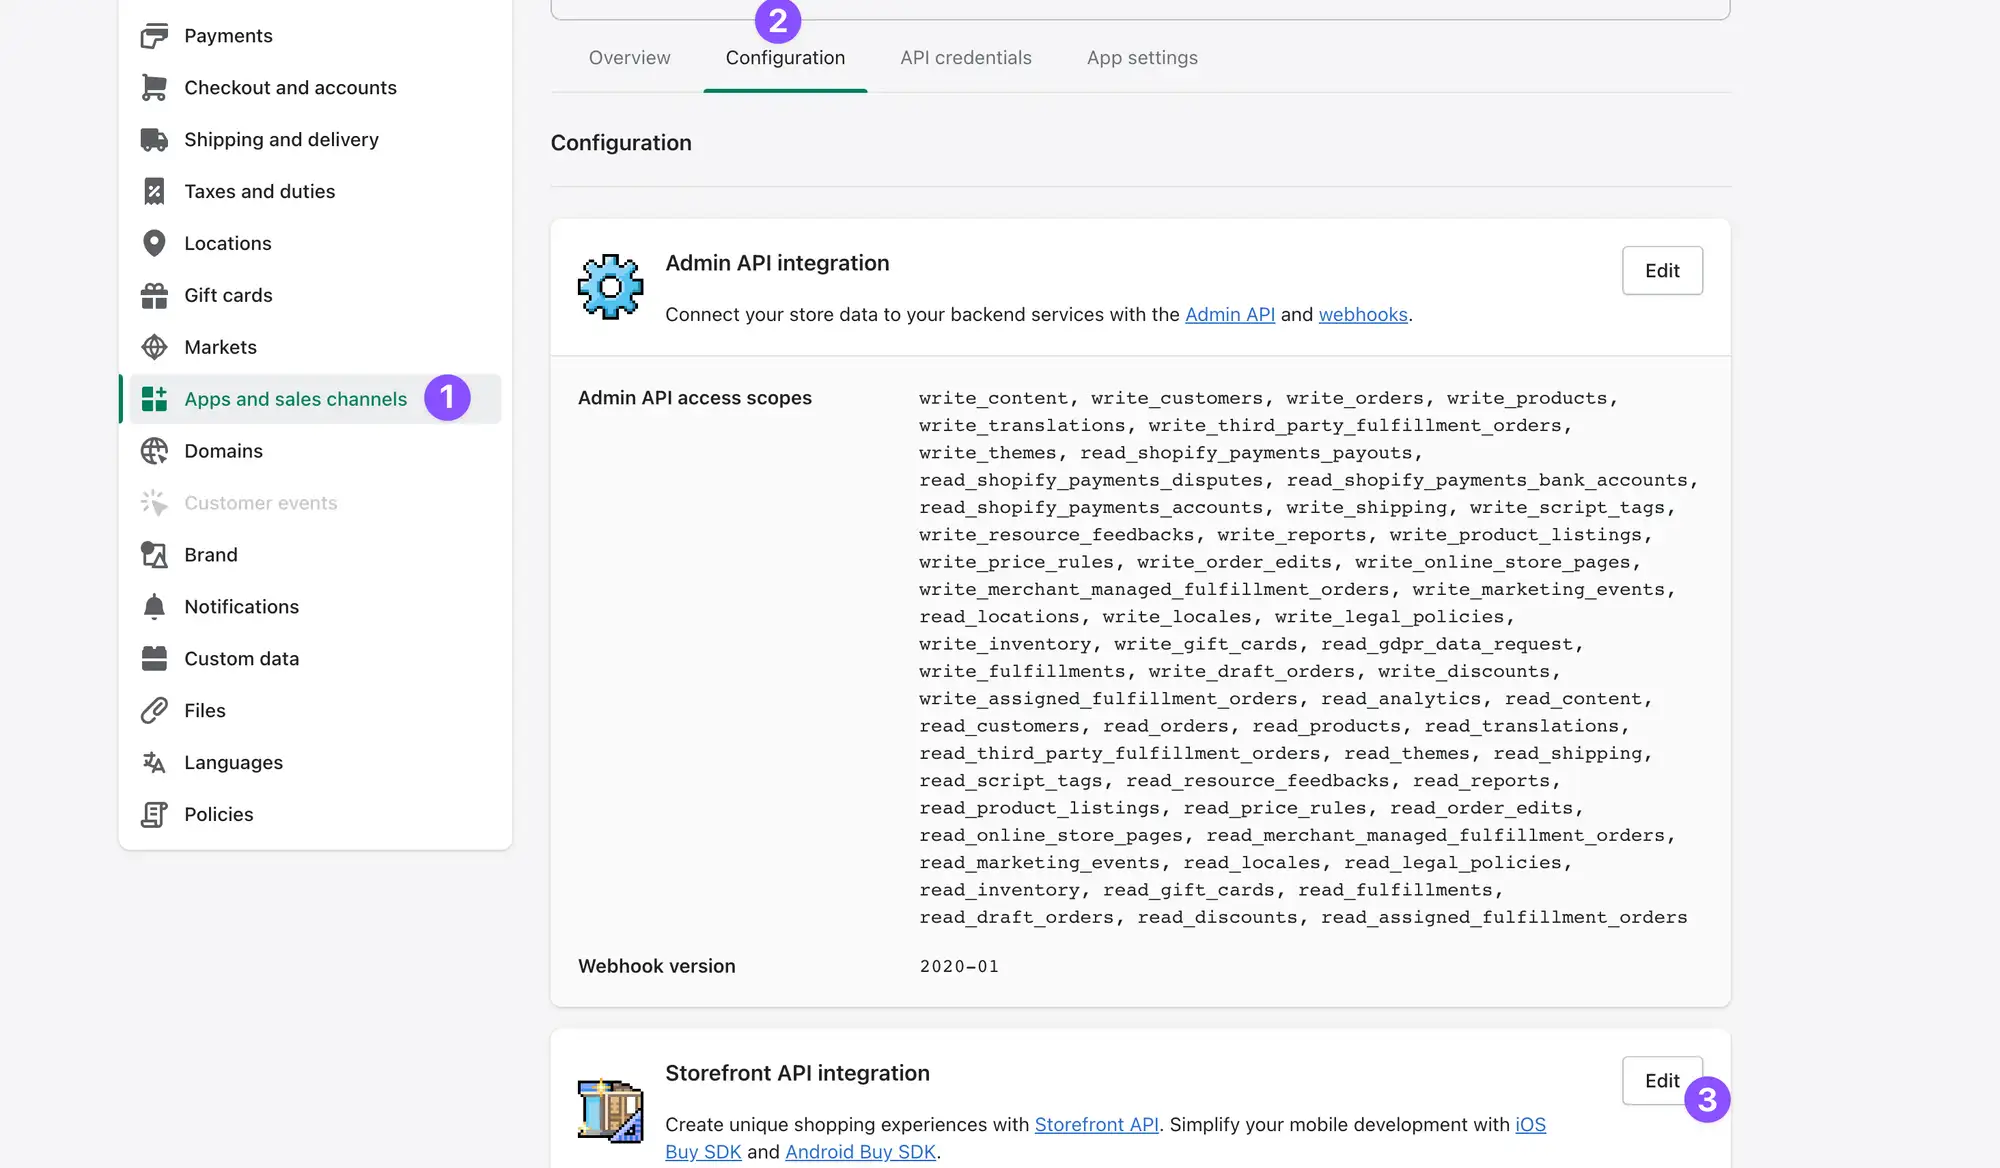
2.1 Go to your app and Edit.
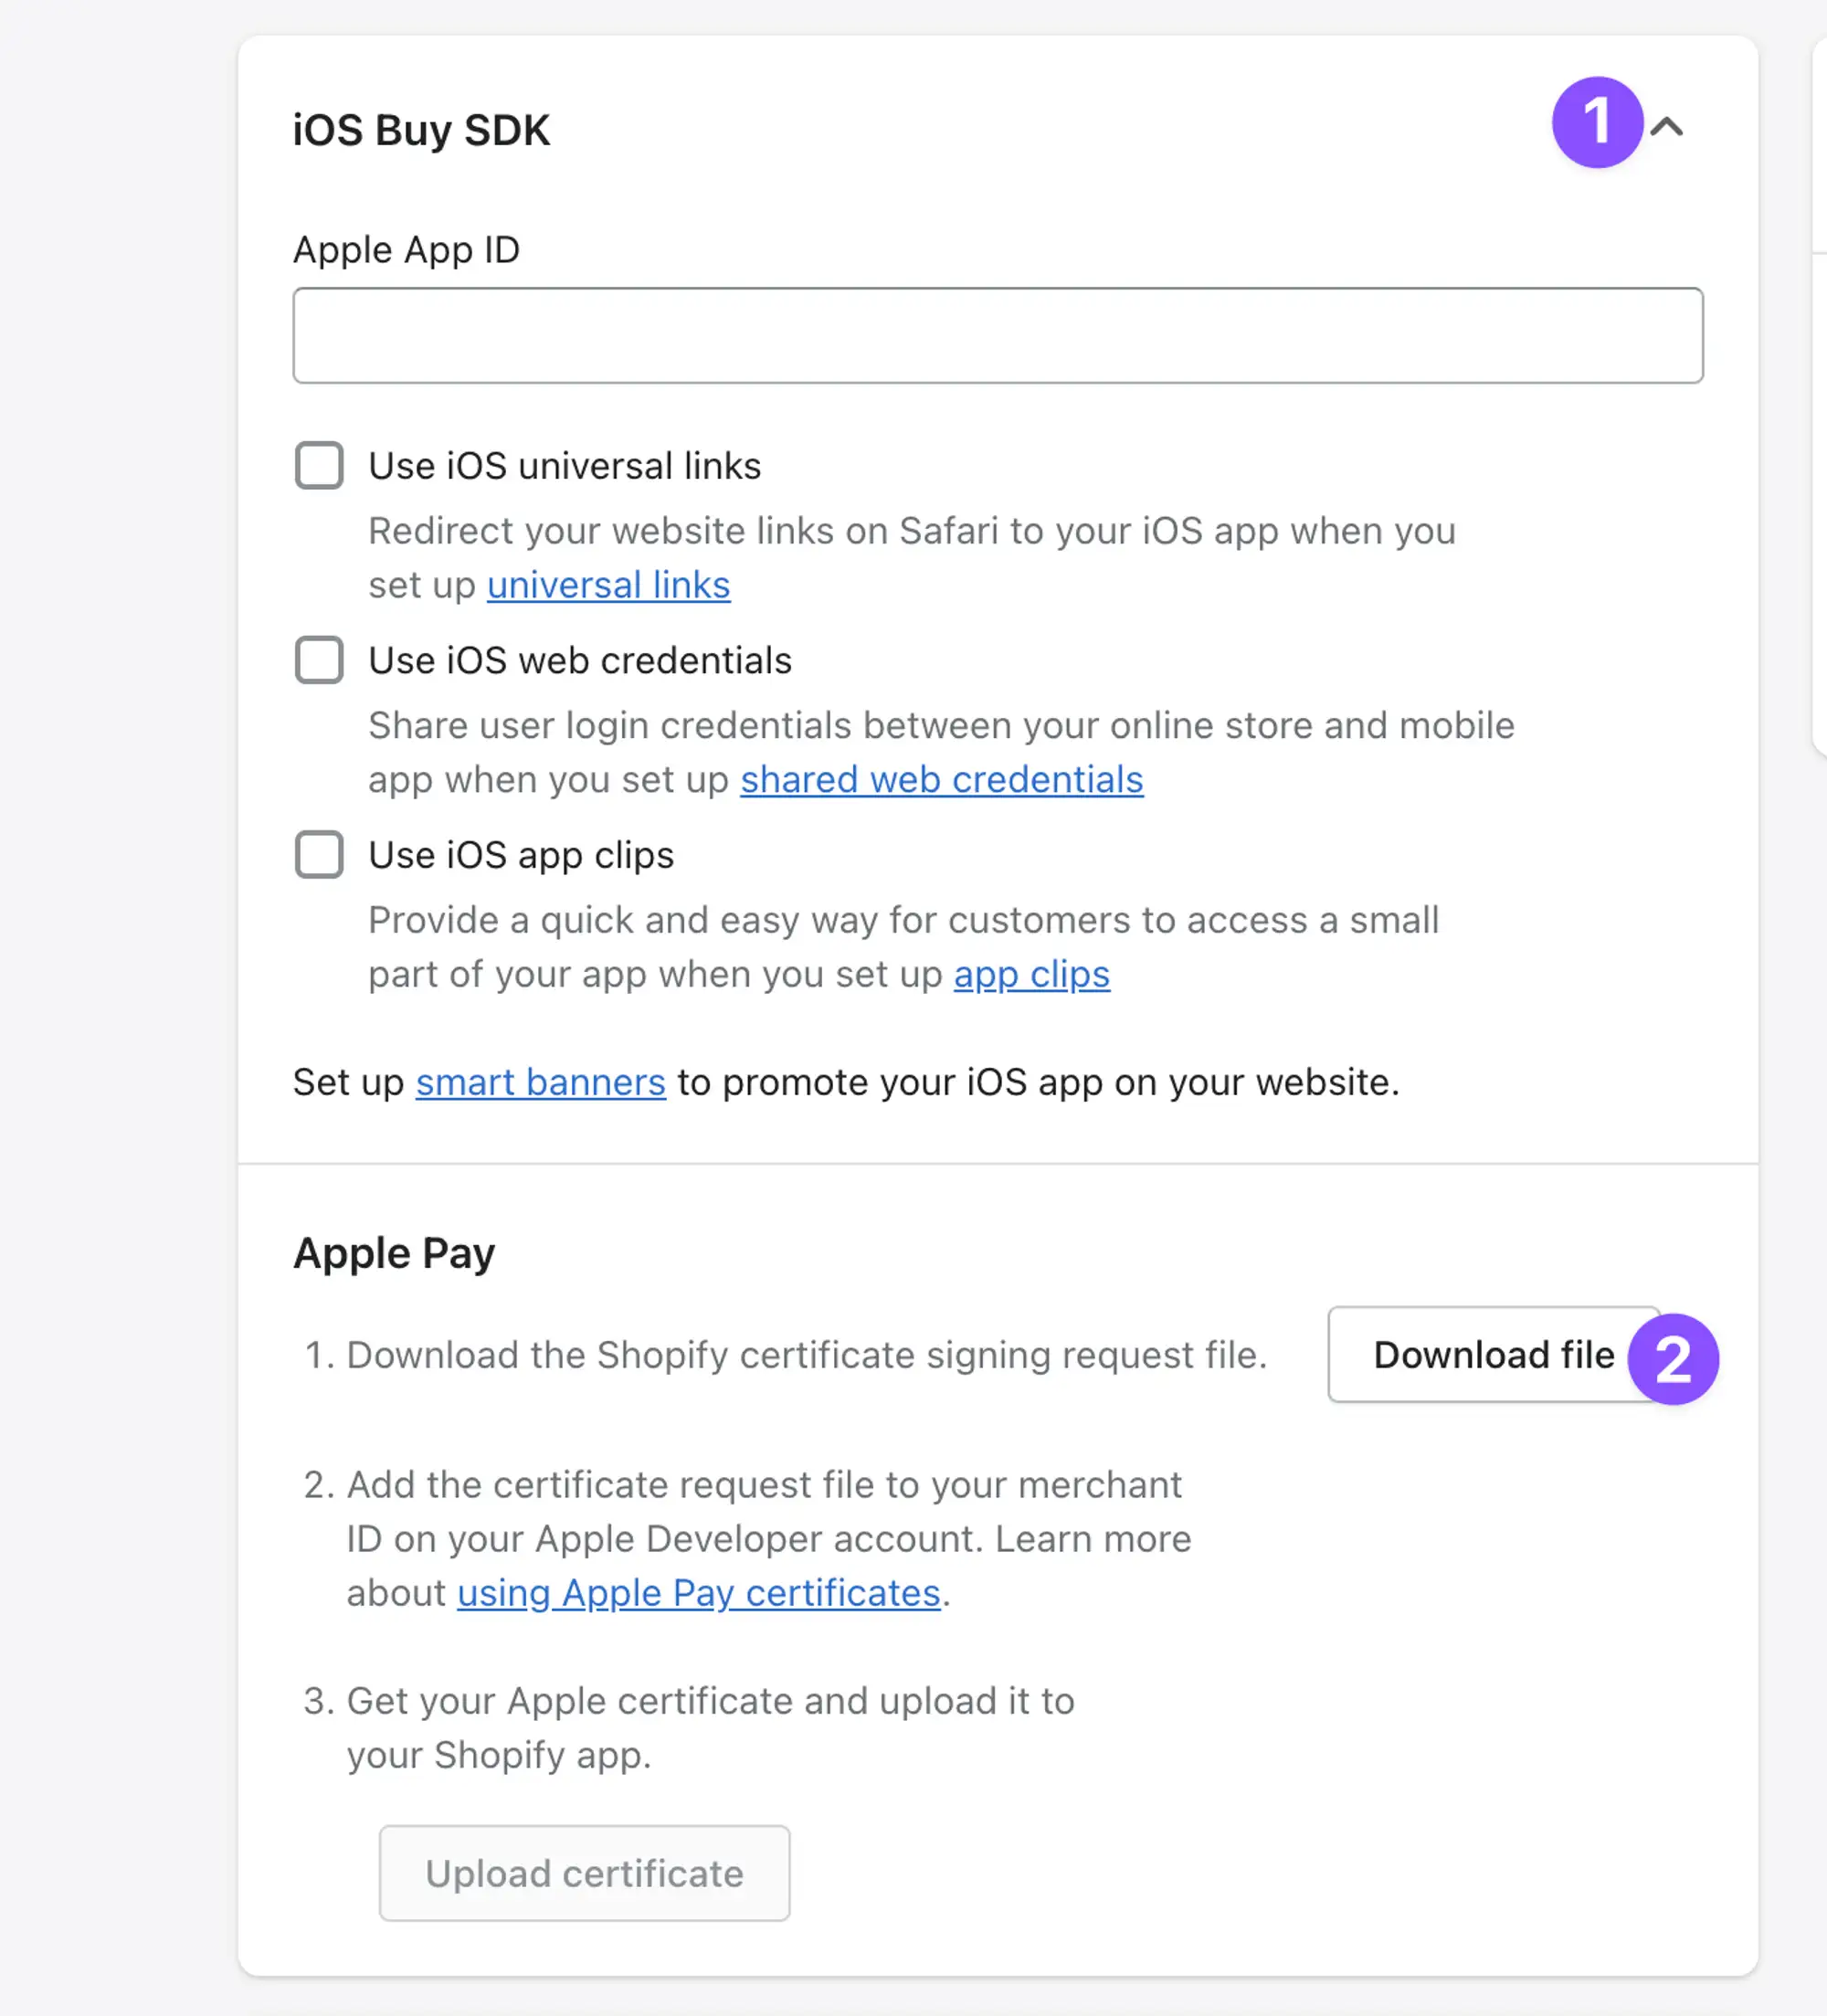
2.2 Scroll to the end of the page and download the Certificate.
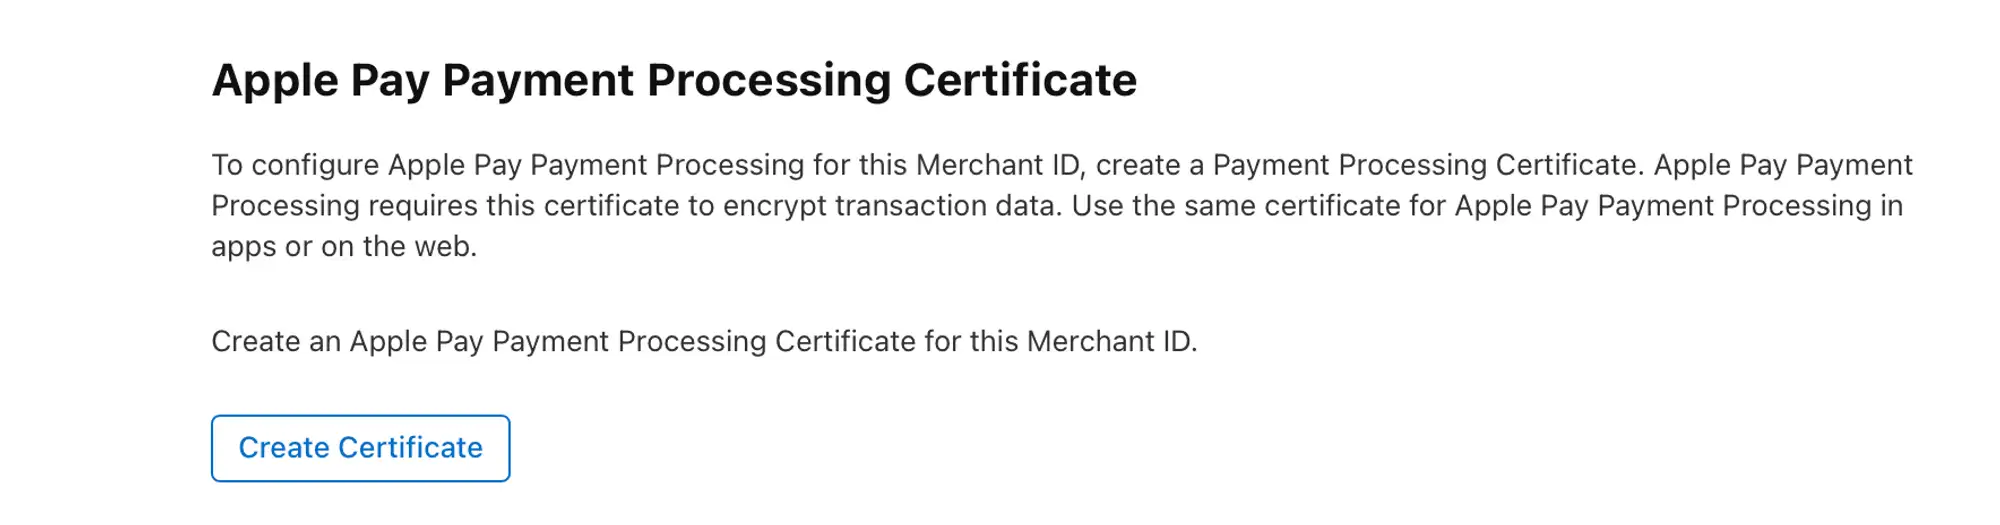
2.3 Go to https://developer.apple.com/account/resources/certificates/list, select Apple Pay Payment Processing Certificate, and click Continue.

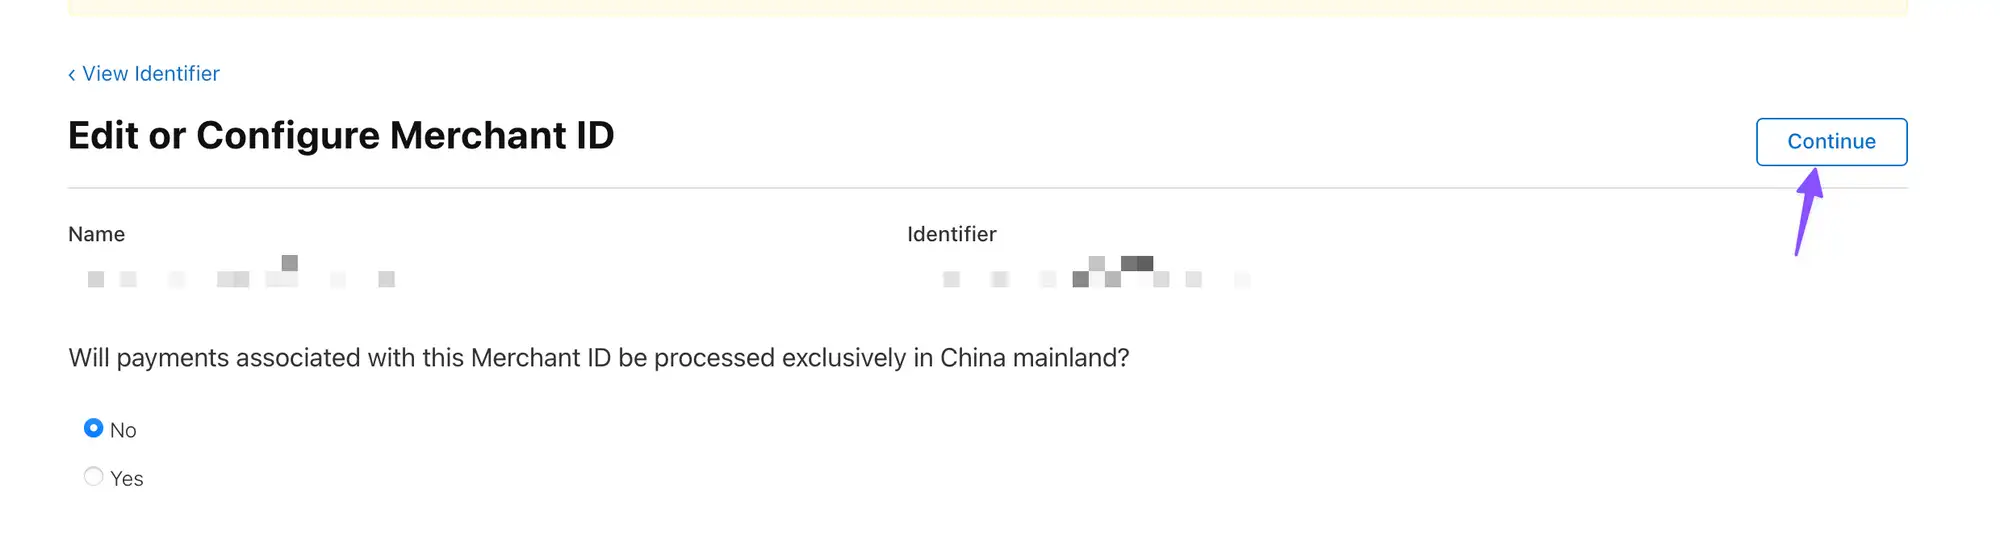
2.4 Select the Merchant Identifier of your app and click Continue (example: merchant.com.inspireui.mstore.flutter).

2.5 Click Create Certificate.
2.6 Click Continue.
2.7 Click choose file and upload, select the file that has been downloaded at step 1.2, and click Upload.

2.8 Click Download.

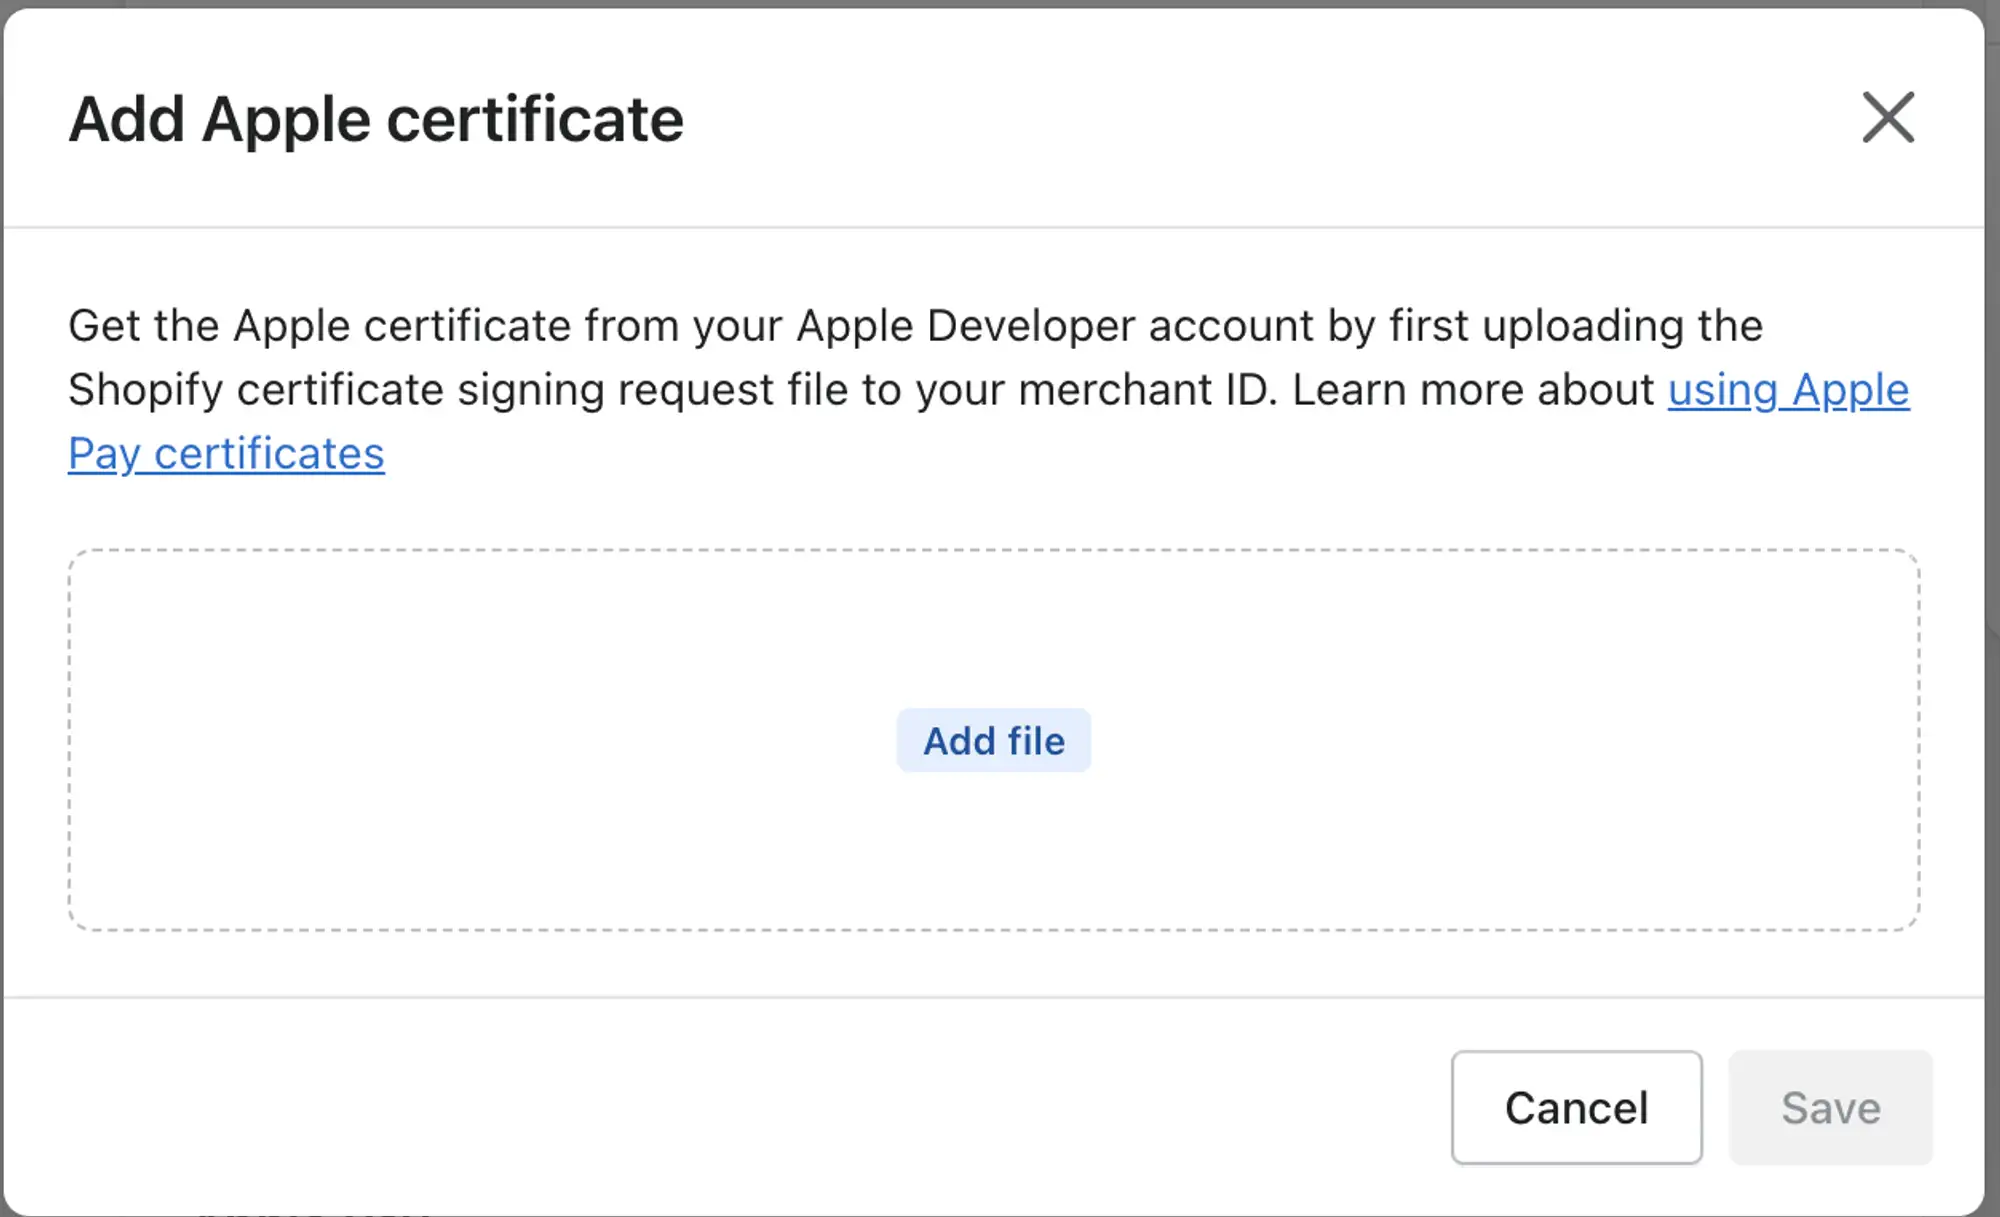
2.9 Back to the website at step 1.3 and click Upload certificate, then click Add file, select the file downloaded at step 1.8, and click Save.

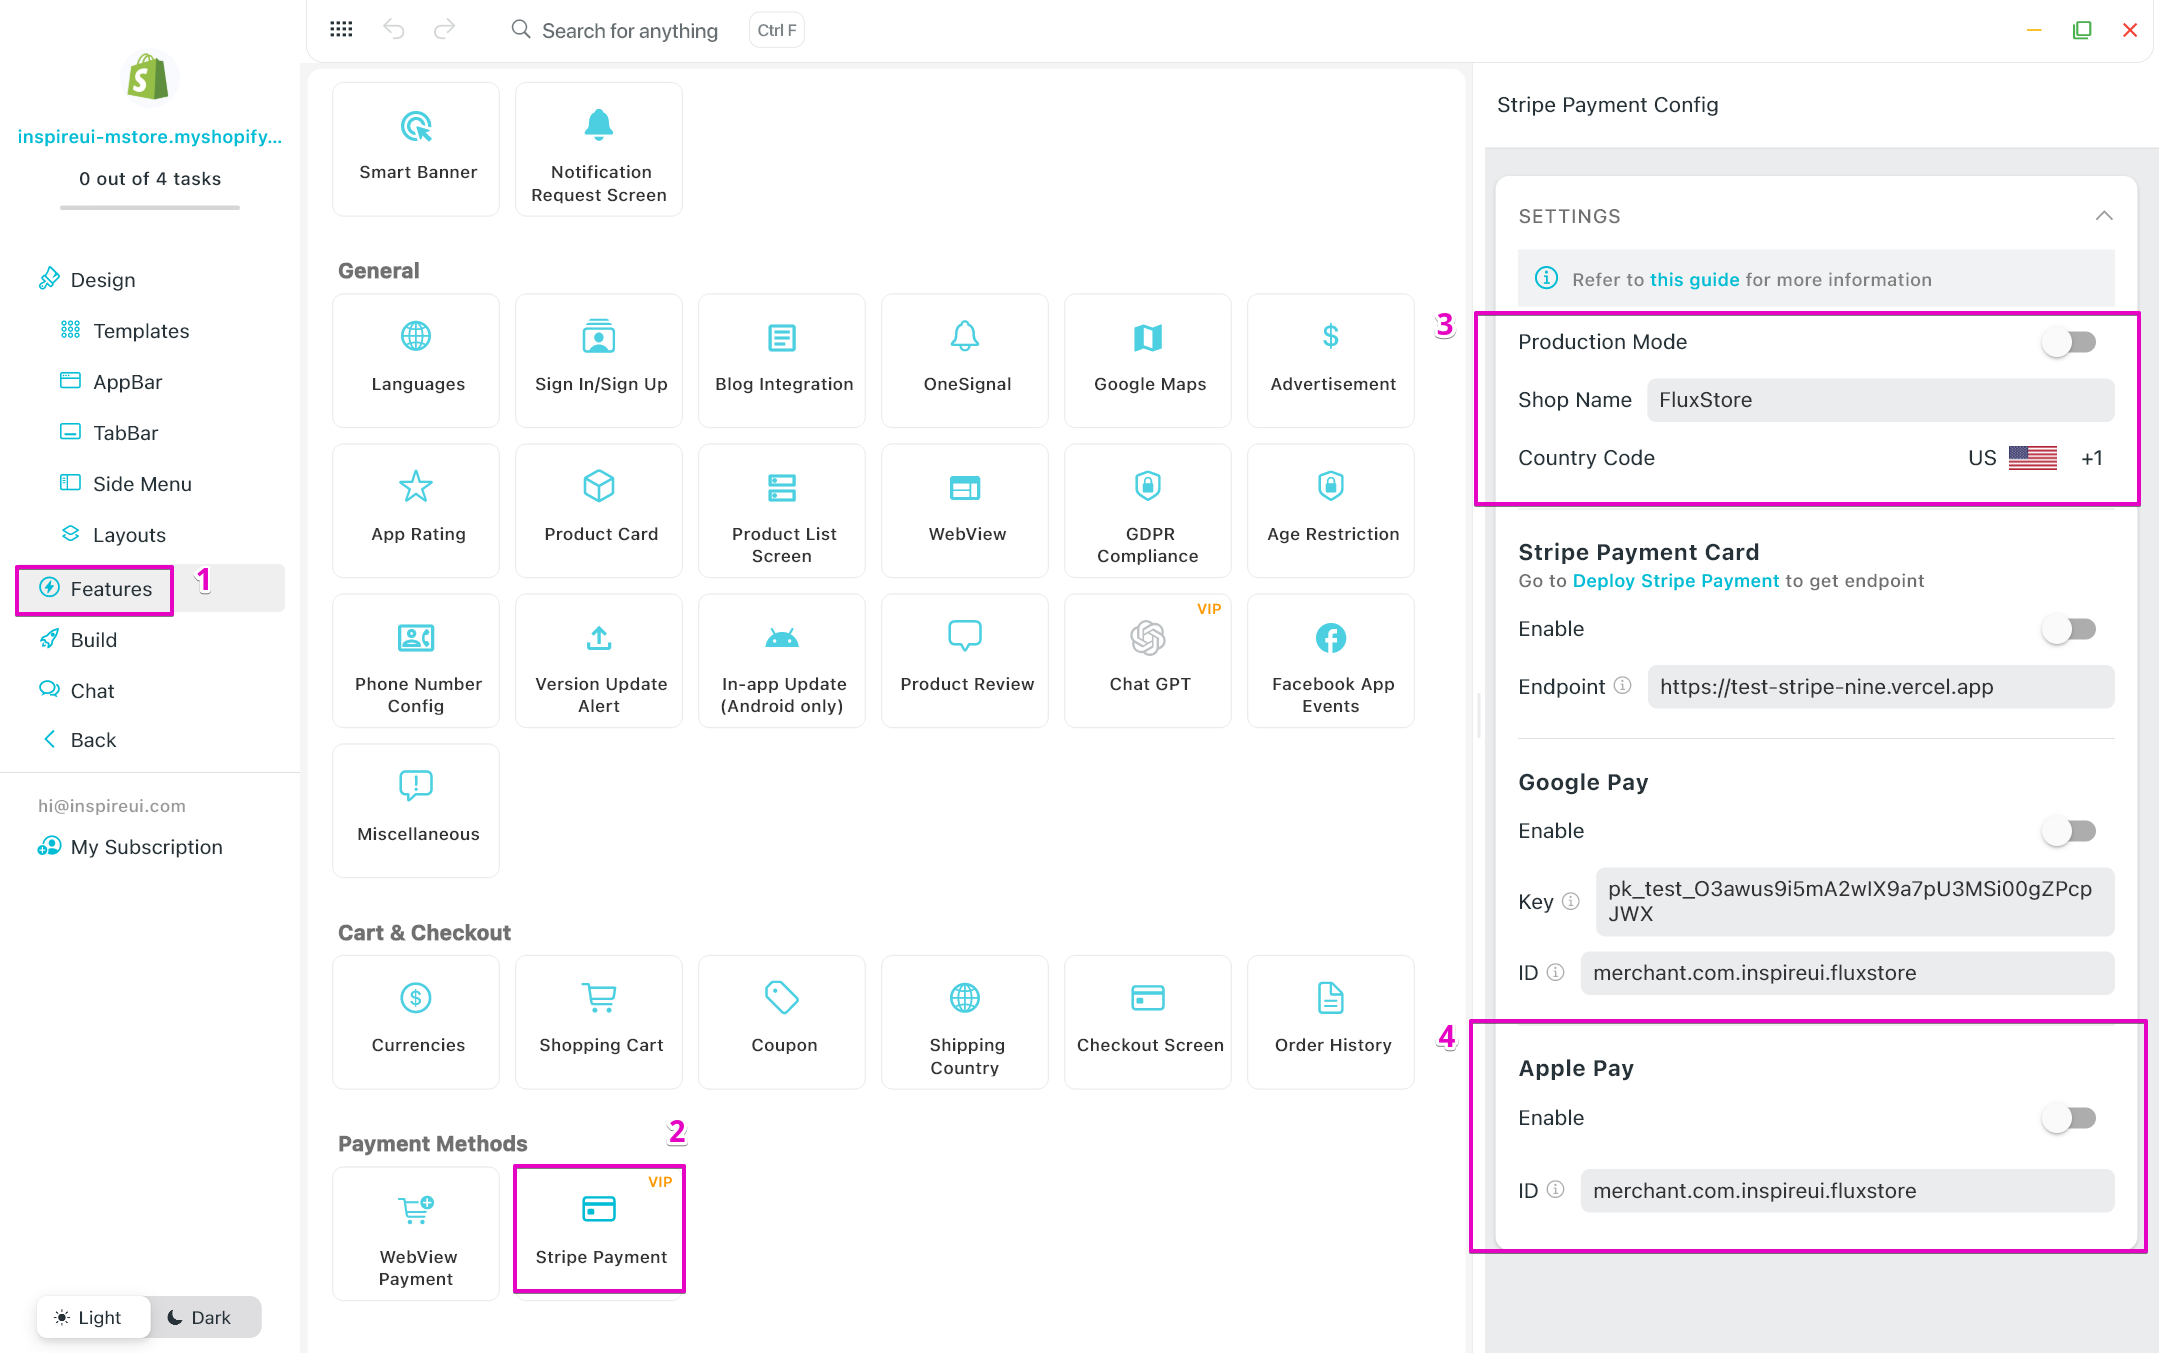
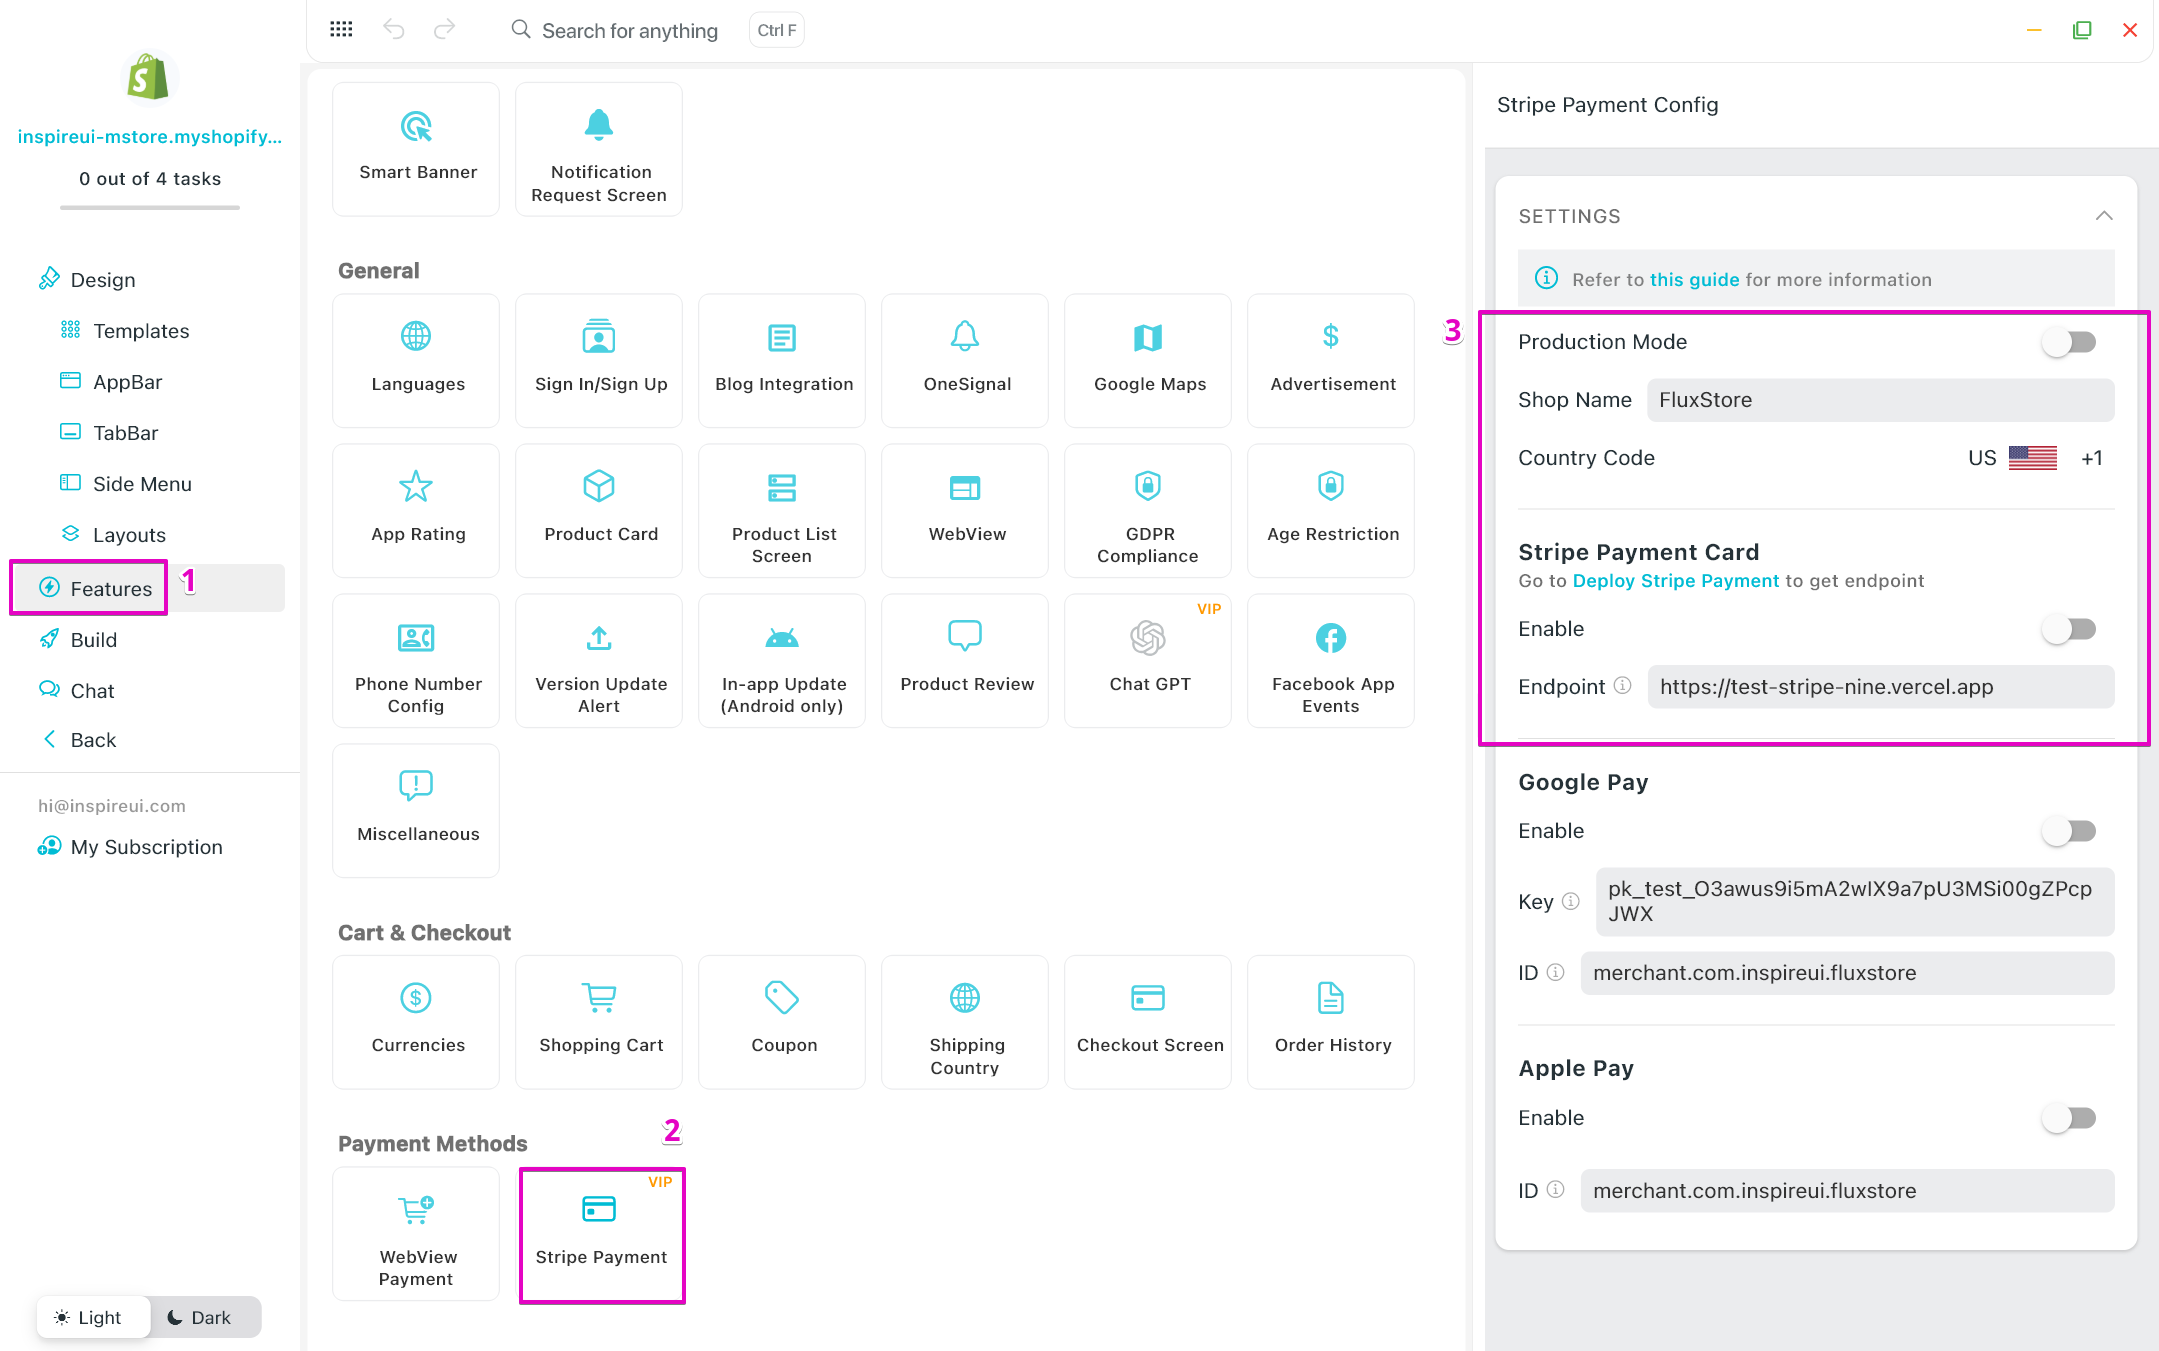
2.10 Then configure this feature into your app by Using FluxBuilder:
3. Google Pay
3.1 Take a look at the integration requirements.
3.2 Sign in to the business console, and create a business.
3.3 Fill in all business information, and Request production access to the Google Pay API for your app. You can wait a few days for the validation.
3.4 Get your merchant ID:

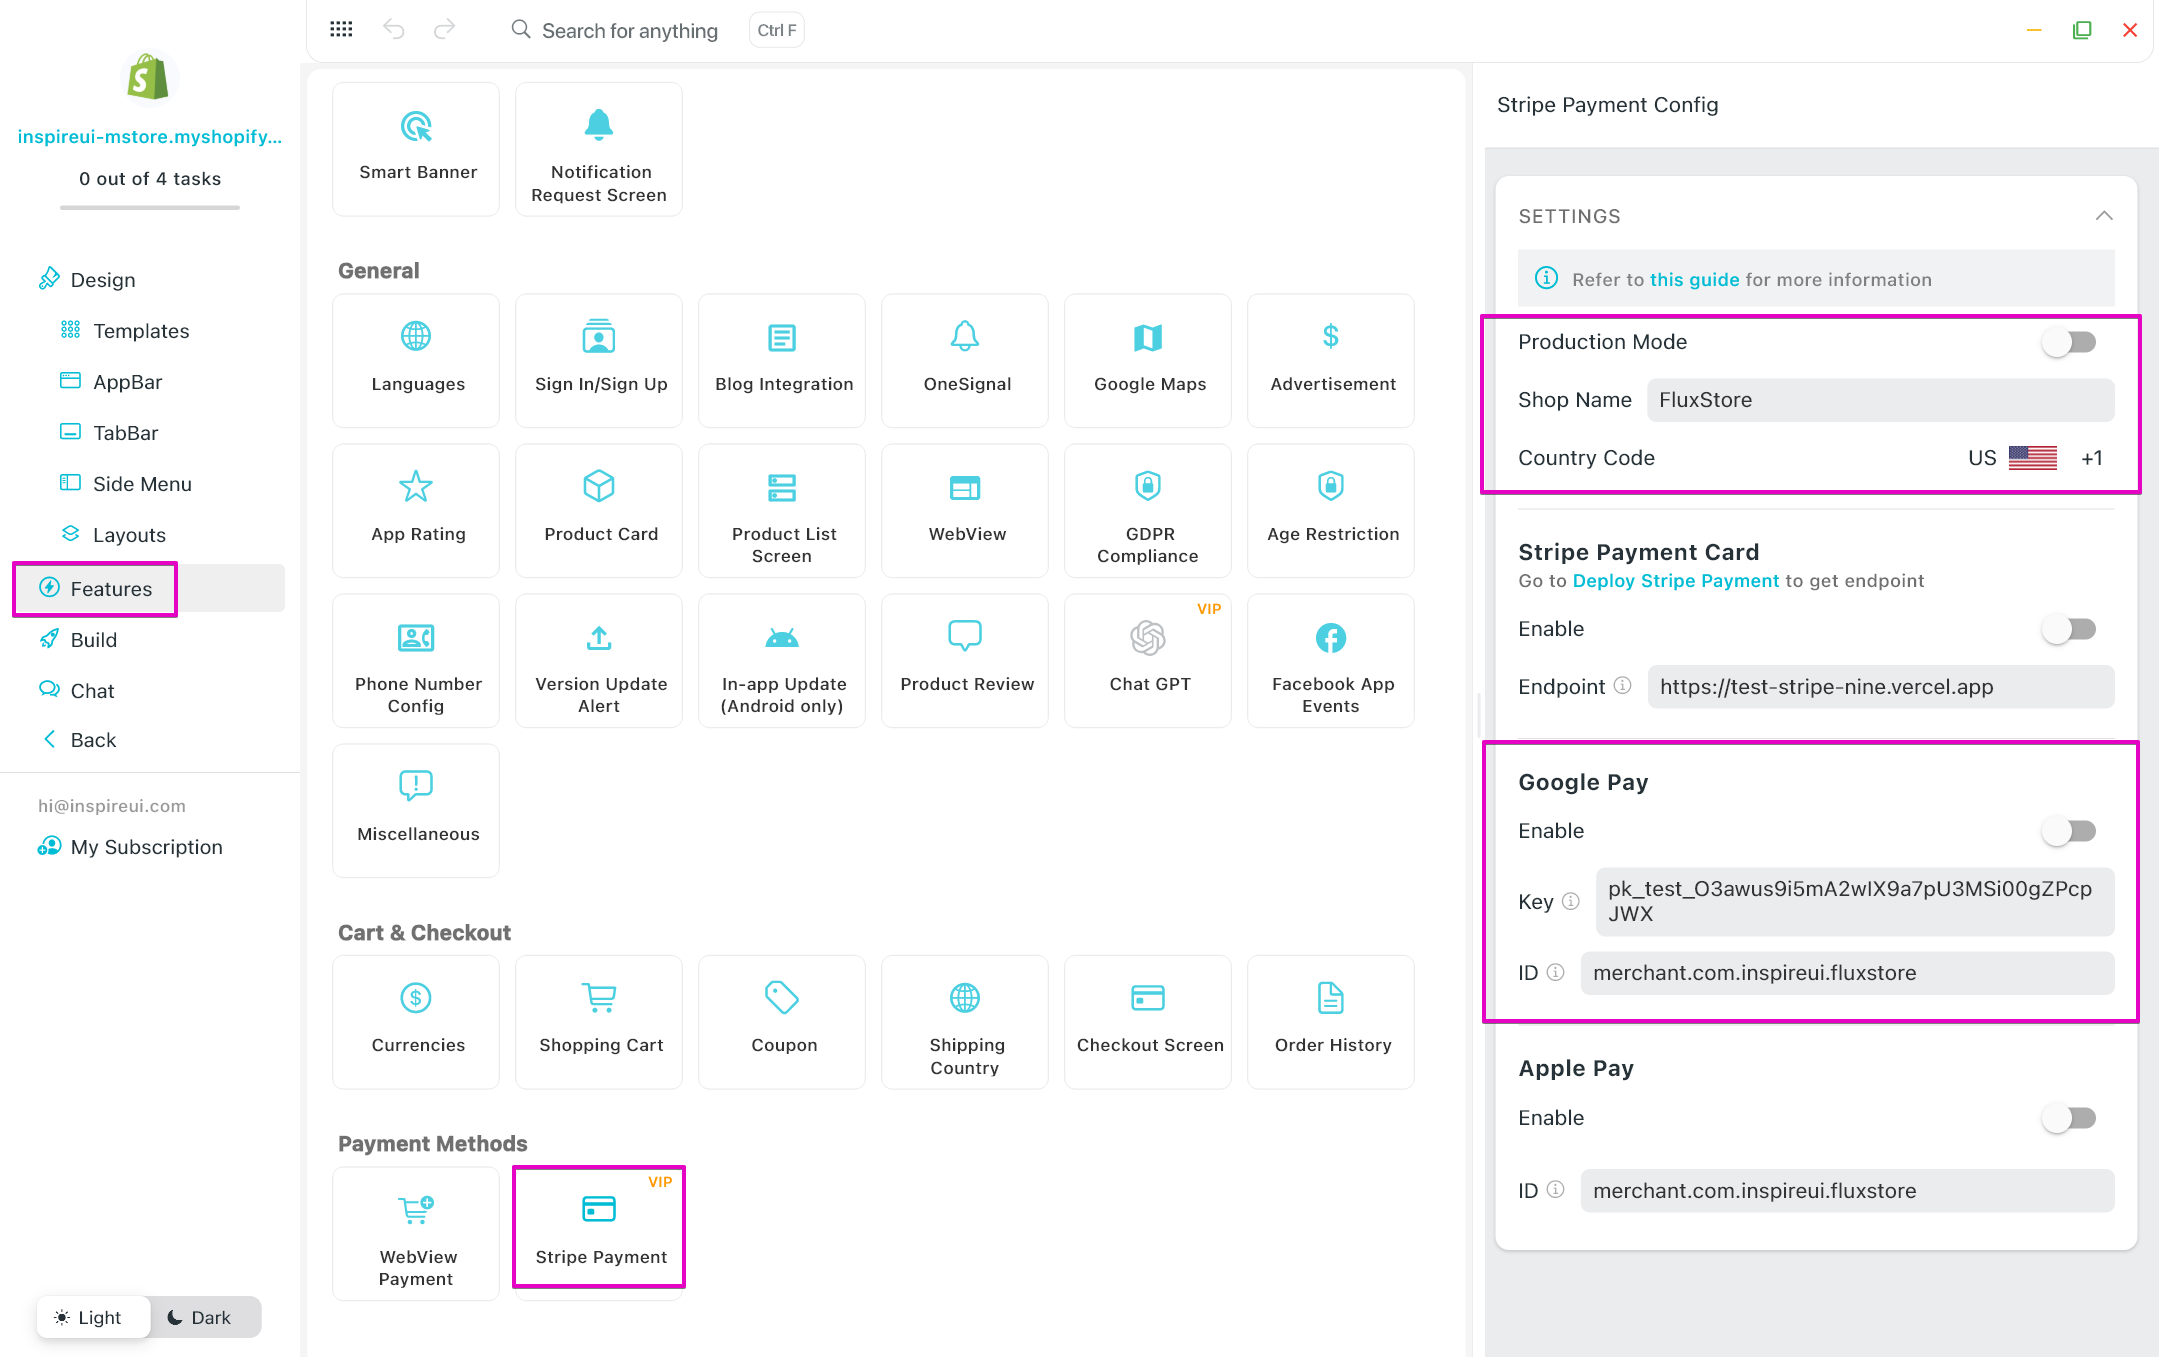
3.5 Then configure this feature into your app by Using FluxBuilder:
4. Stripe
4.1 Setup Stripe Node Server
Use FluxBuilder:
- Open your app and go to Features
- In Tools → select Deploy Stripe Payment
- Deploy Stripe server and save to your local to update into the Stripe Payment feature

4.2 Configure Stripe Payment Card into your app
Test
- Test API keys (publishable key & secret key) can be taken here.
- You can use a card number
4242 4242 4242 4242with any CVV, and any future expiry date to test Stripe payment (this only works with test keys).