Vendors
This guide includes some configurations for vendors in the Multi Vendors app.
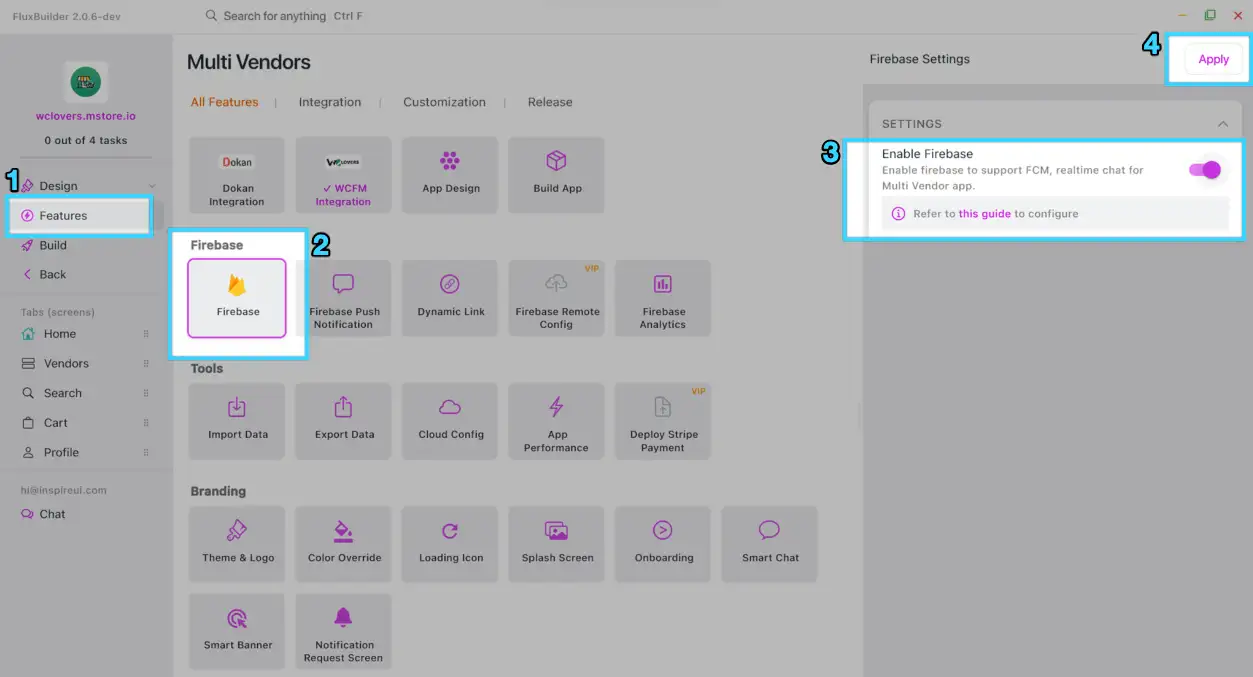
1. Show/Hide Vendor Chat icon
Follow this guide to show or hide the Vendor Chat icon on the Vendor Detail and Product Details screens.
Go to Features > Firebase > turn on Enable Firebase > click Apply
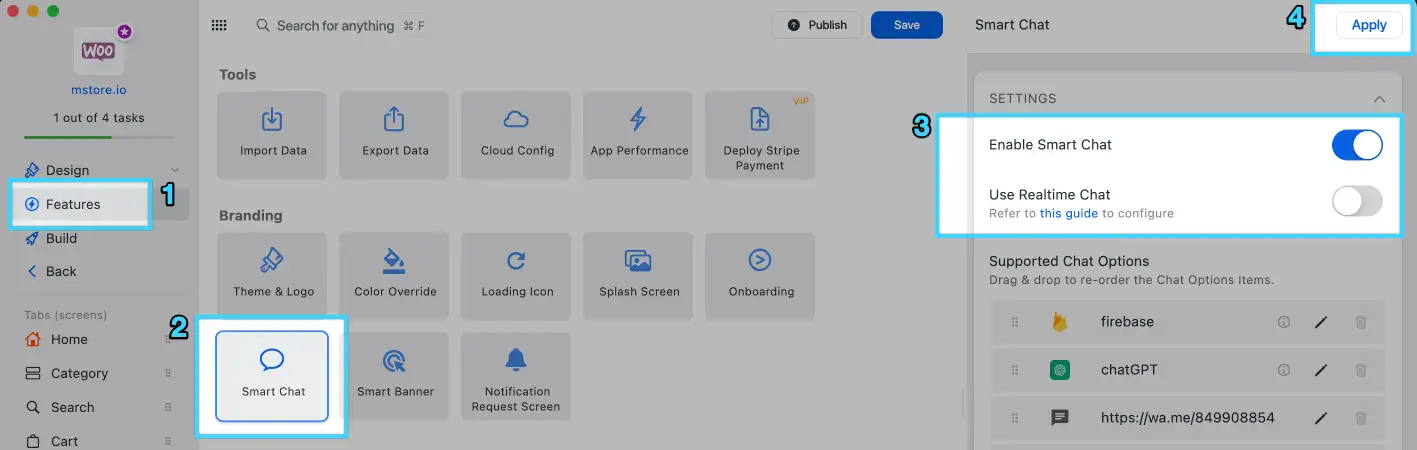
Go to Smart Chat > turn on Enable Smart Chat. Then enable Use Realtime Chat > click Apply
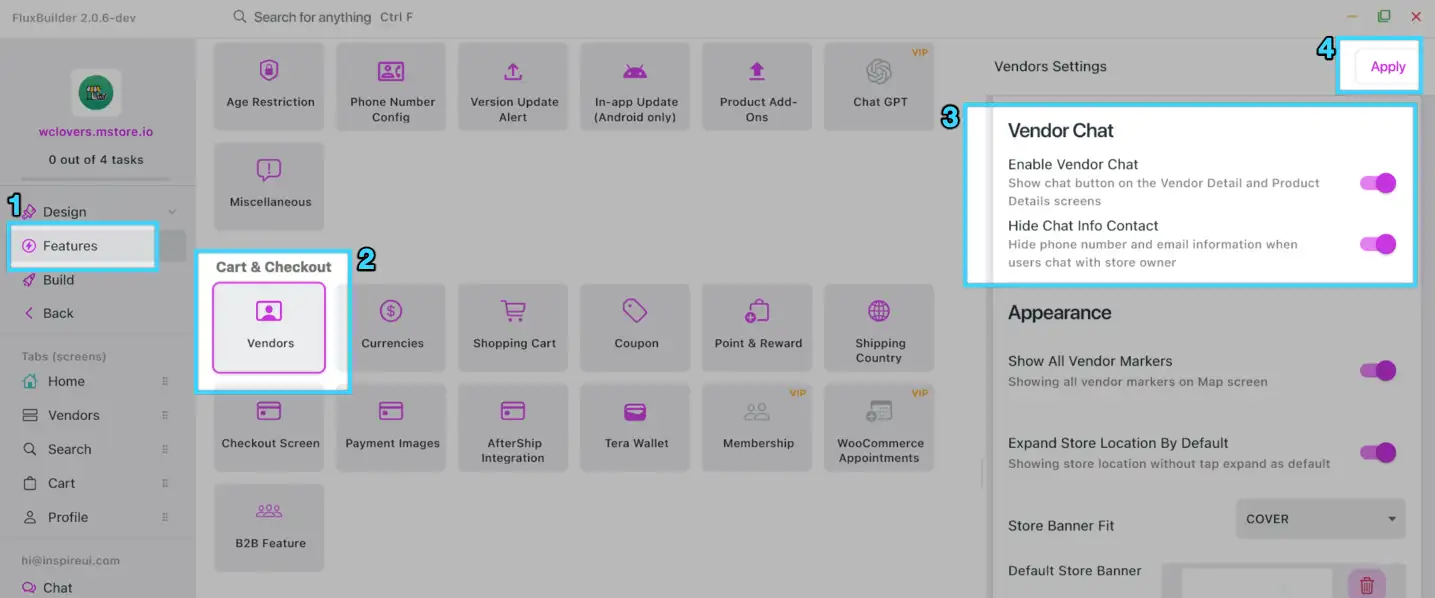
Go to Vendors > turn on Enable Vendor Chat > click Apply
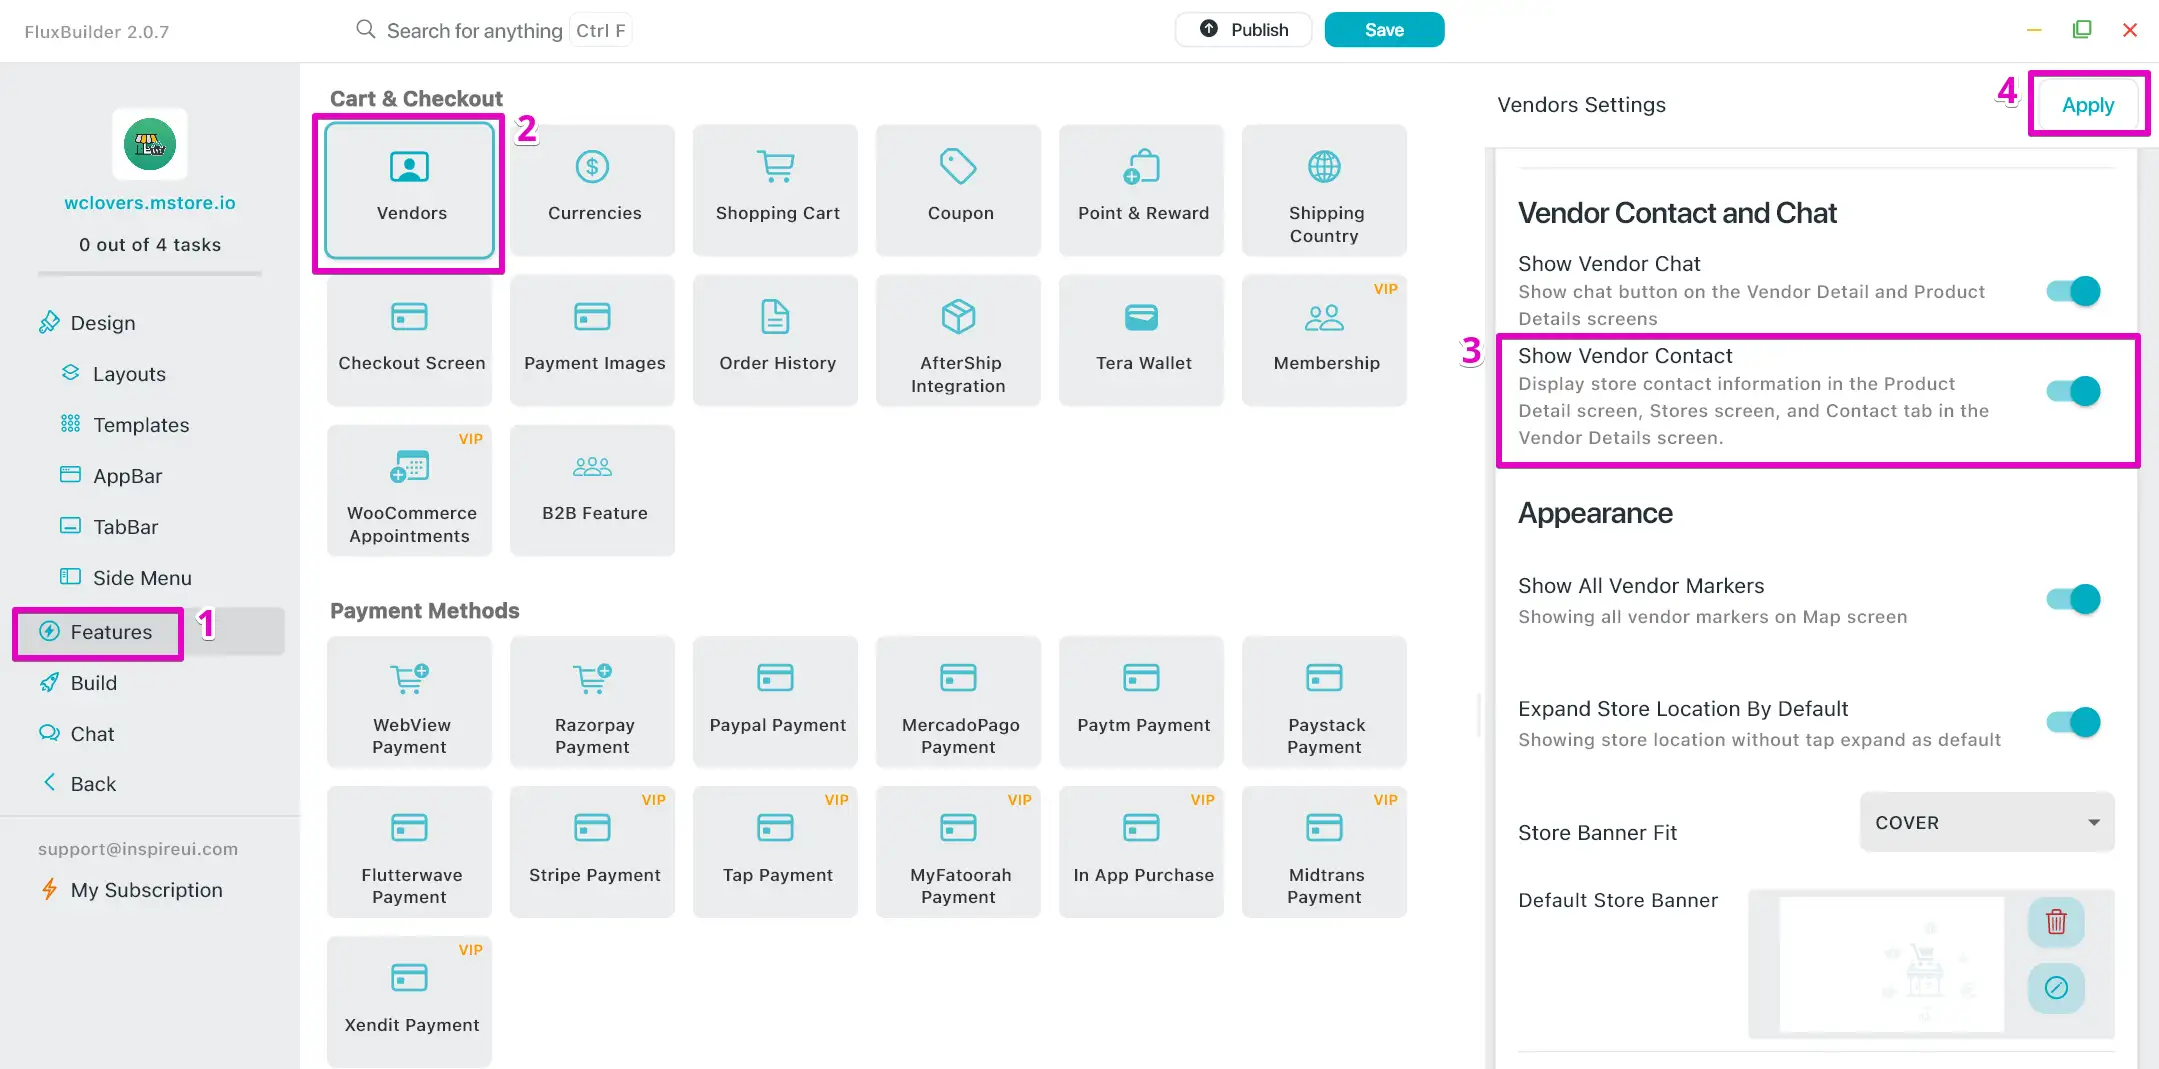
2. Show/Hide Vendor Information
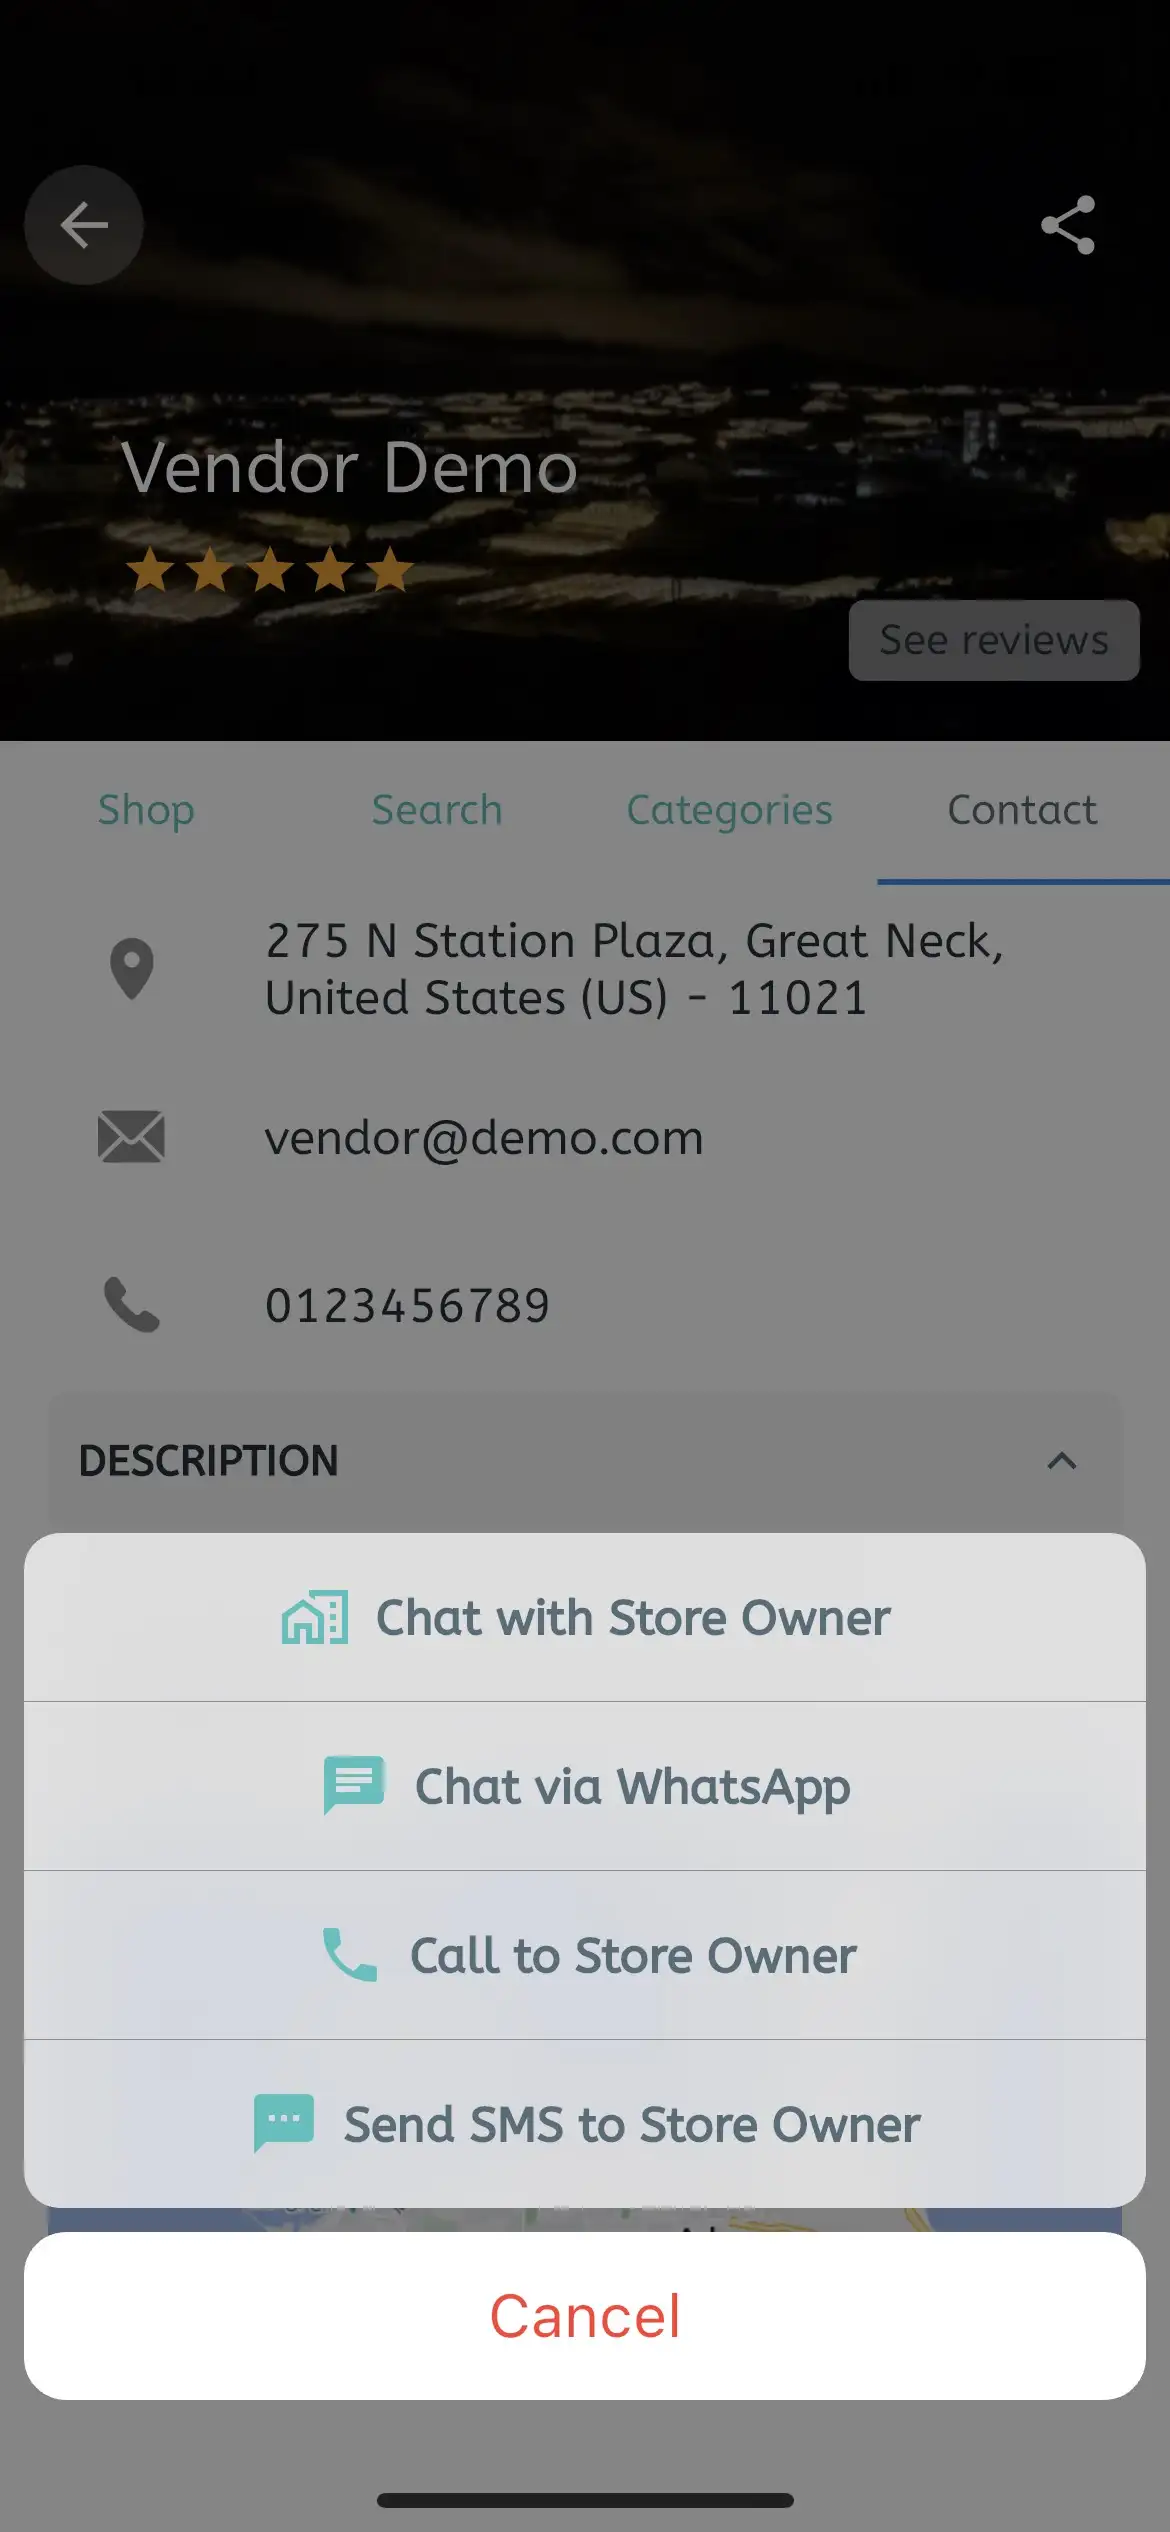
Some clients don't want the Customer and Vendor to exchange contact details anyhow. So they want to hide the phone number, email, and address of the store Vendor on all screens, including:
- Contact tab in the Vendor Details screen
- Stores screen
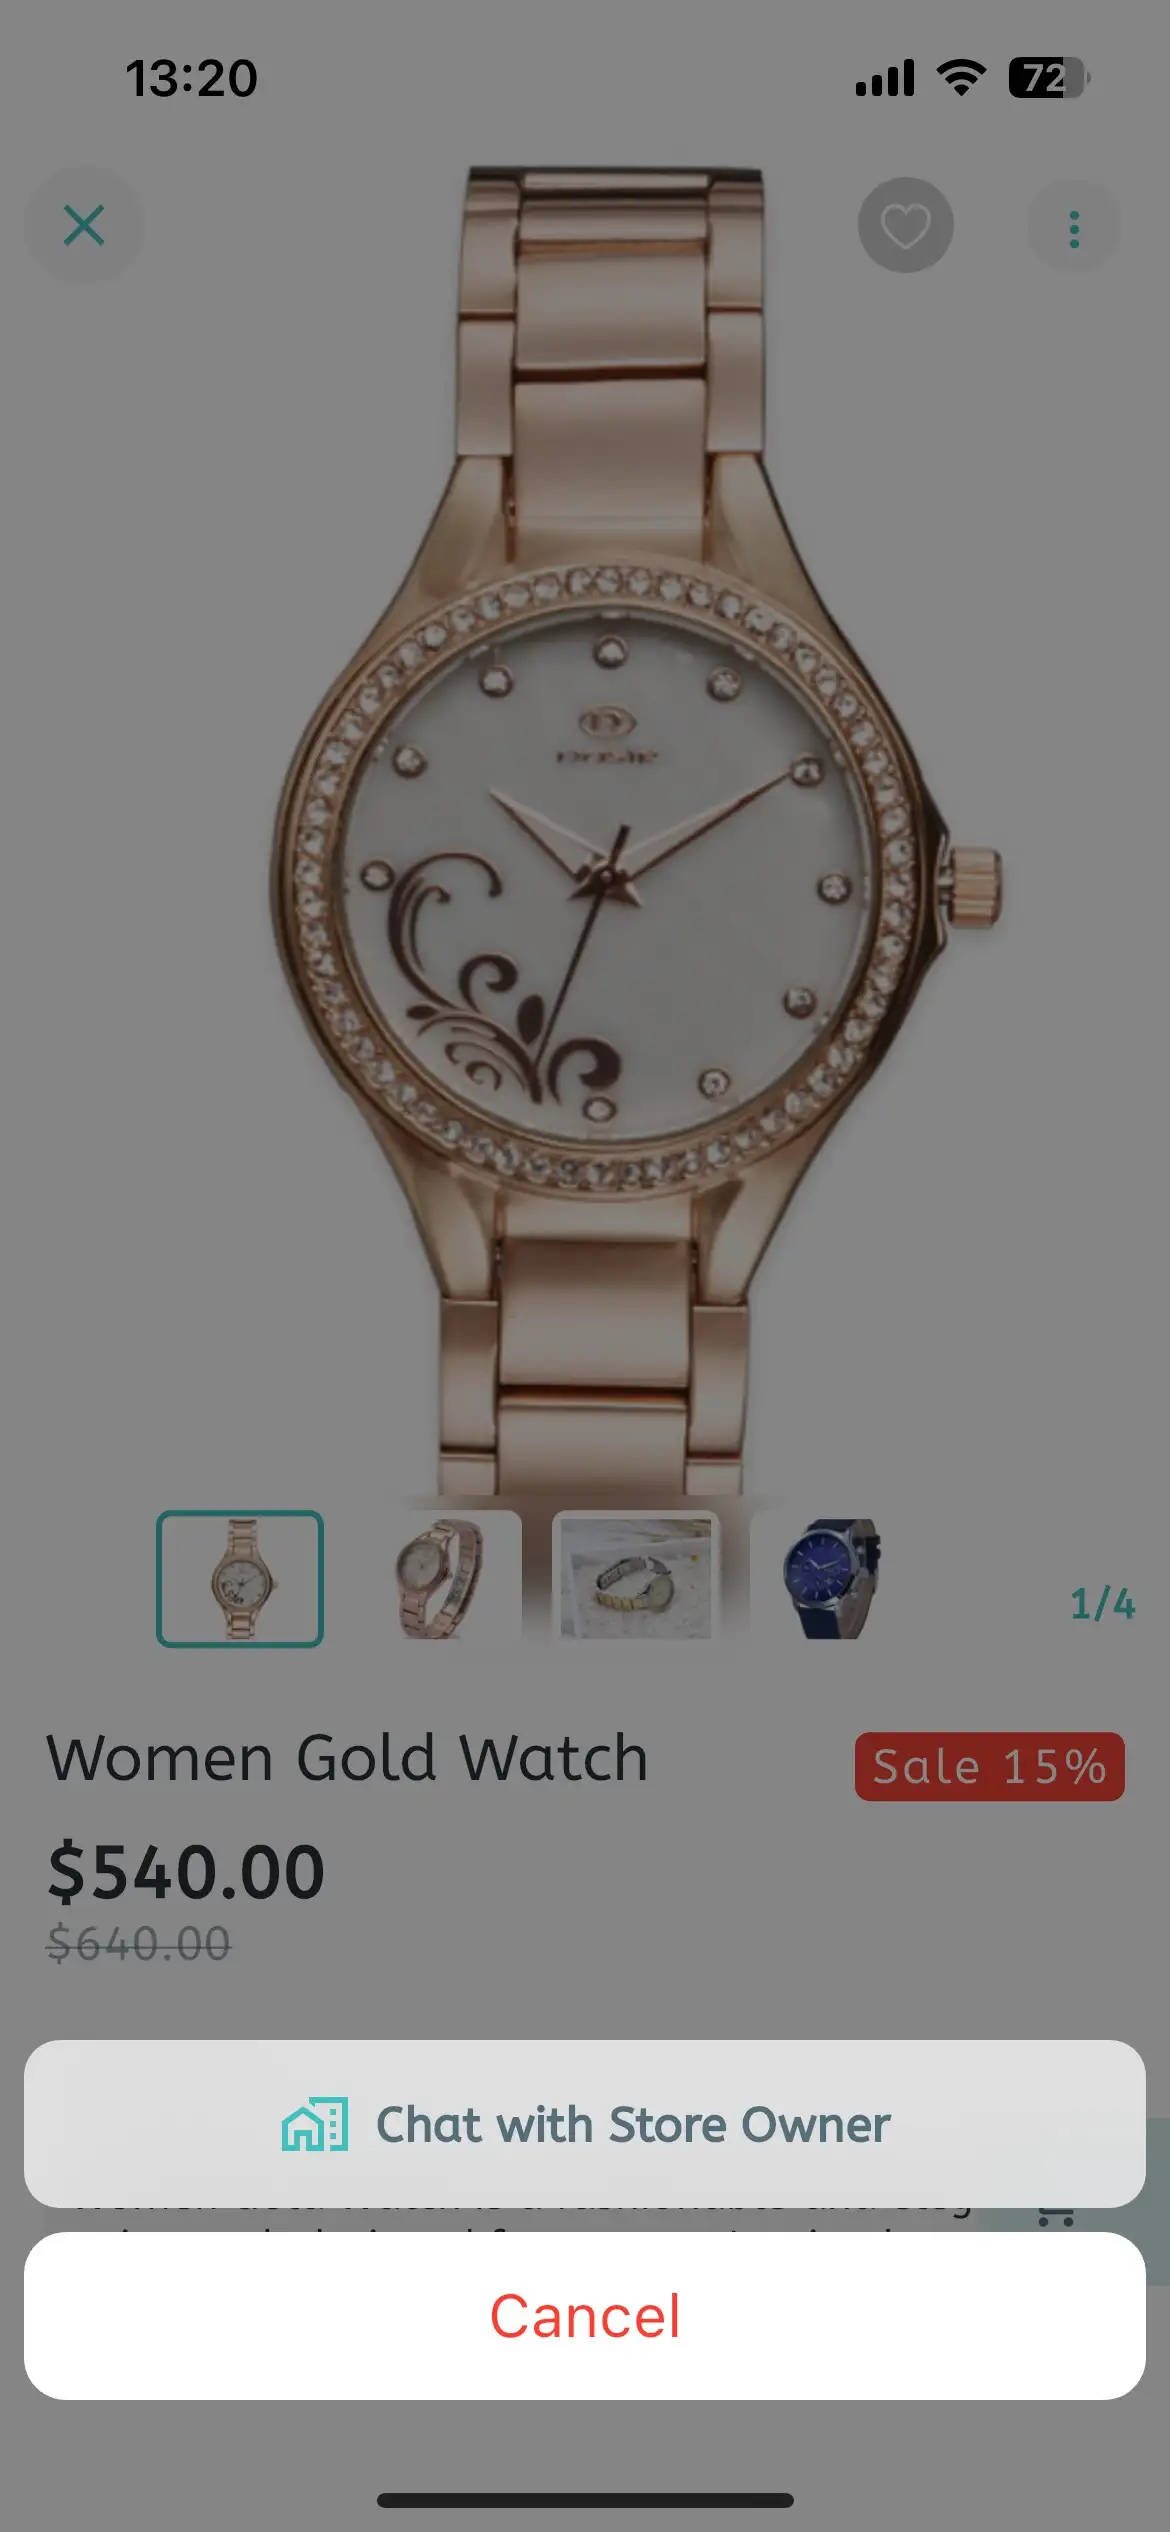
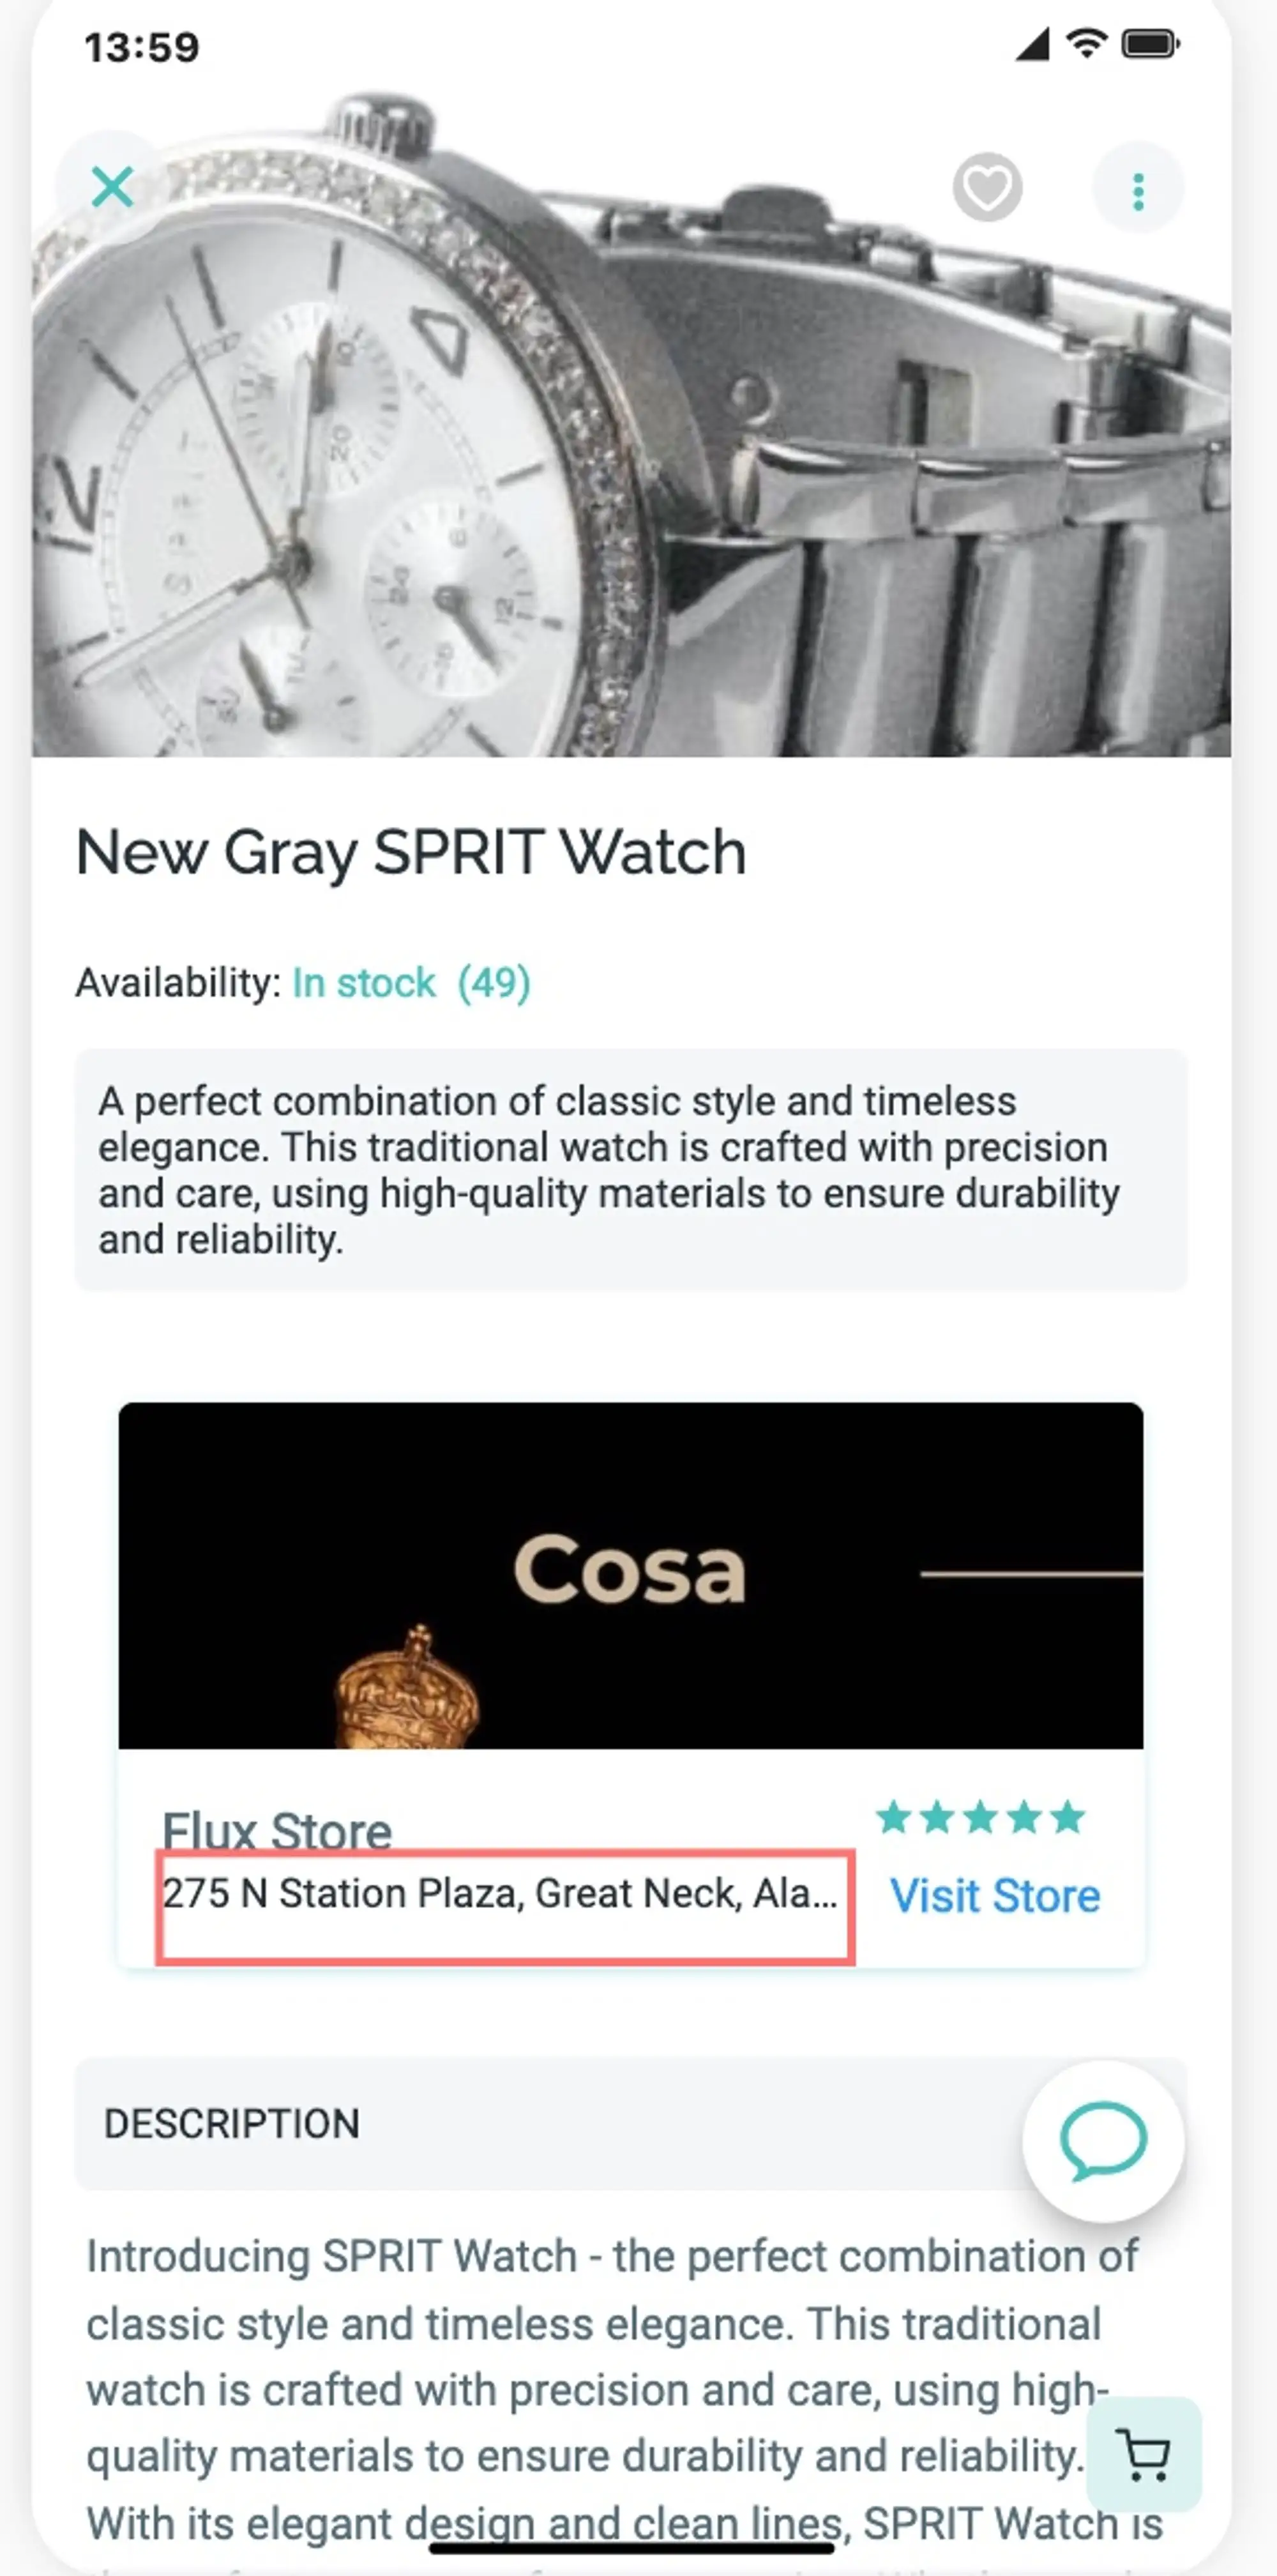
- Product Detail screen
To hide the phone number, email, and address of the store Vendor on all screens, follow this guide:
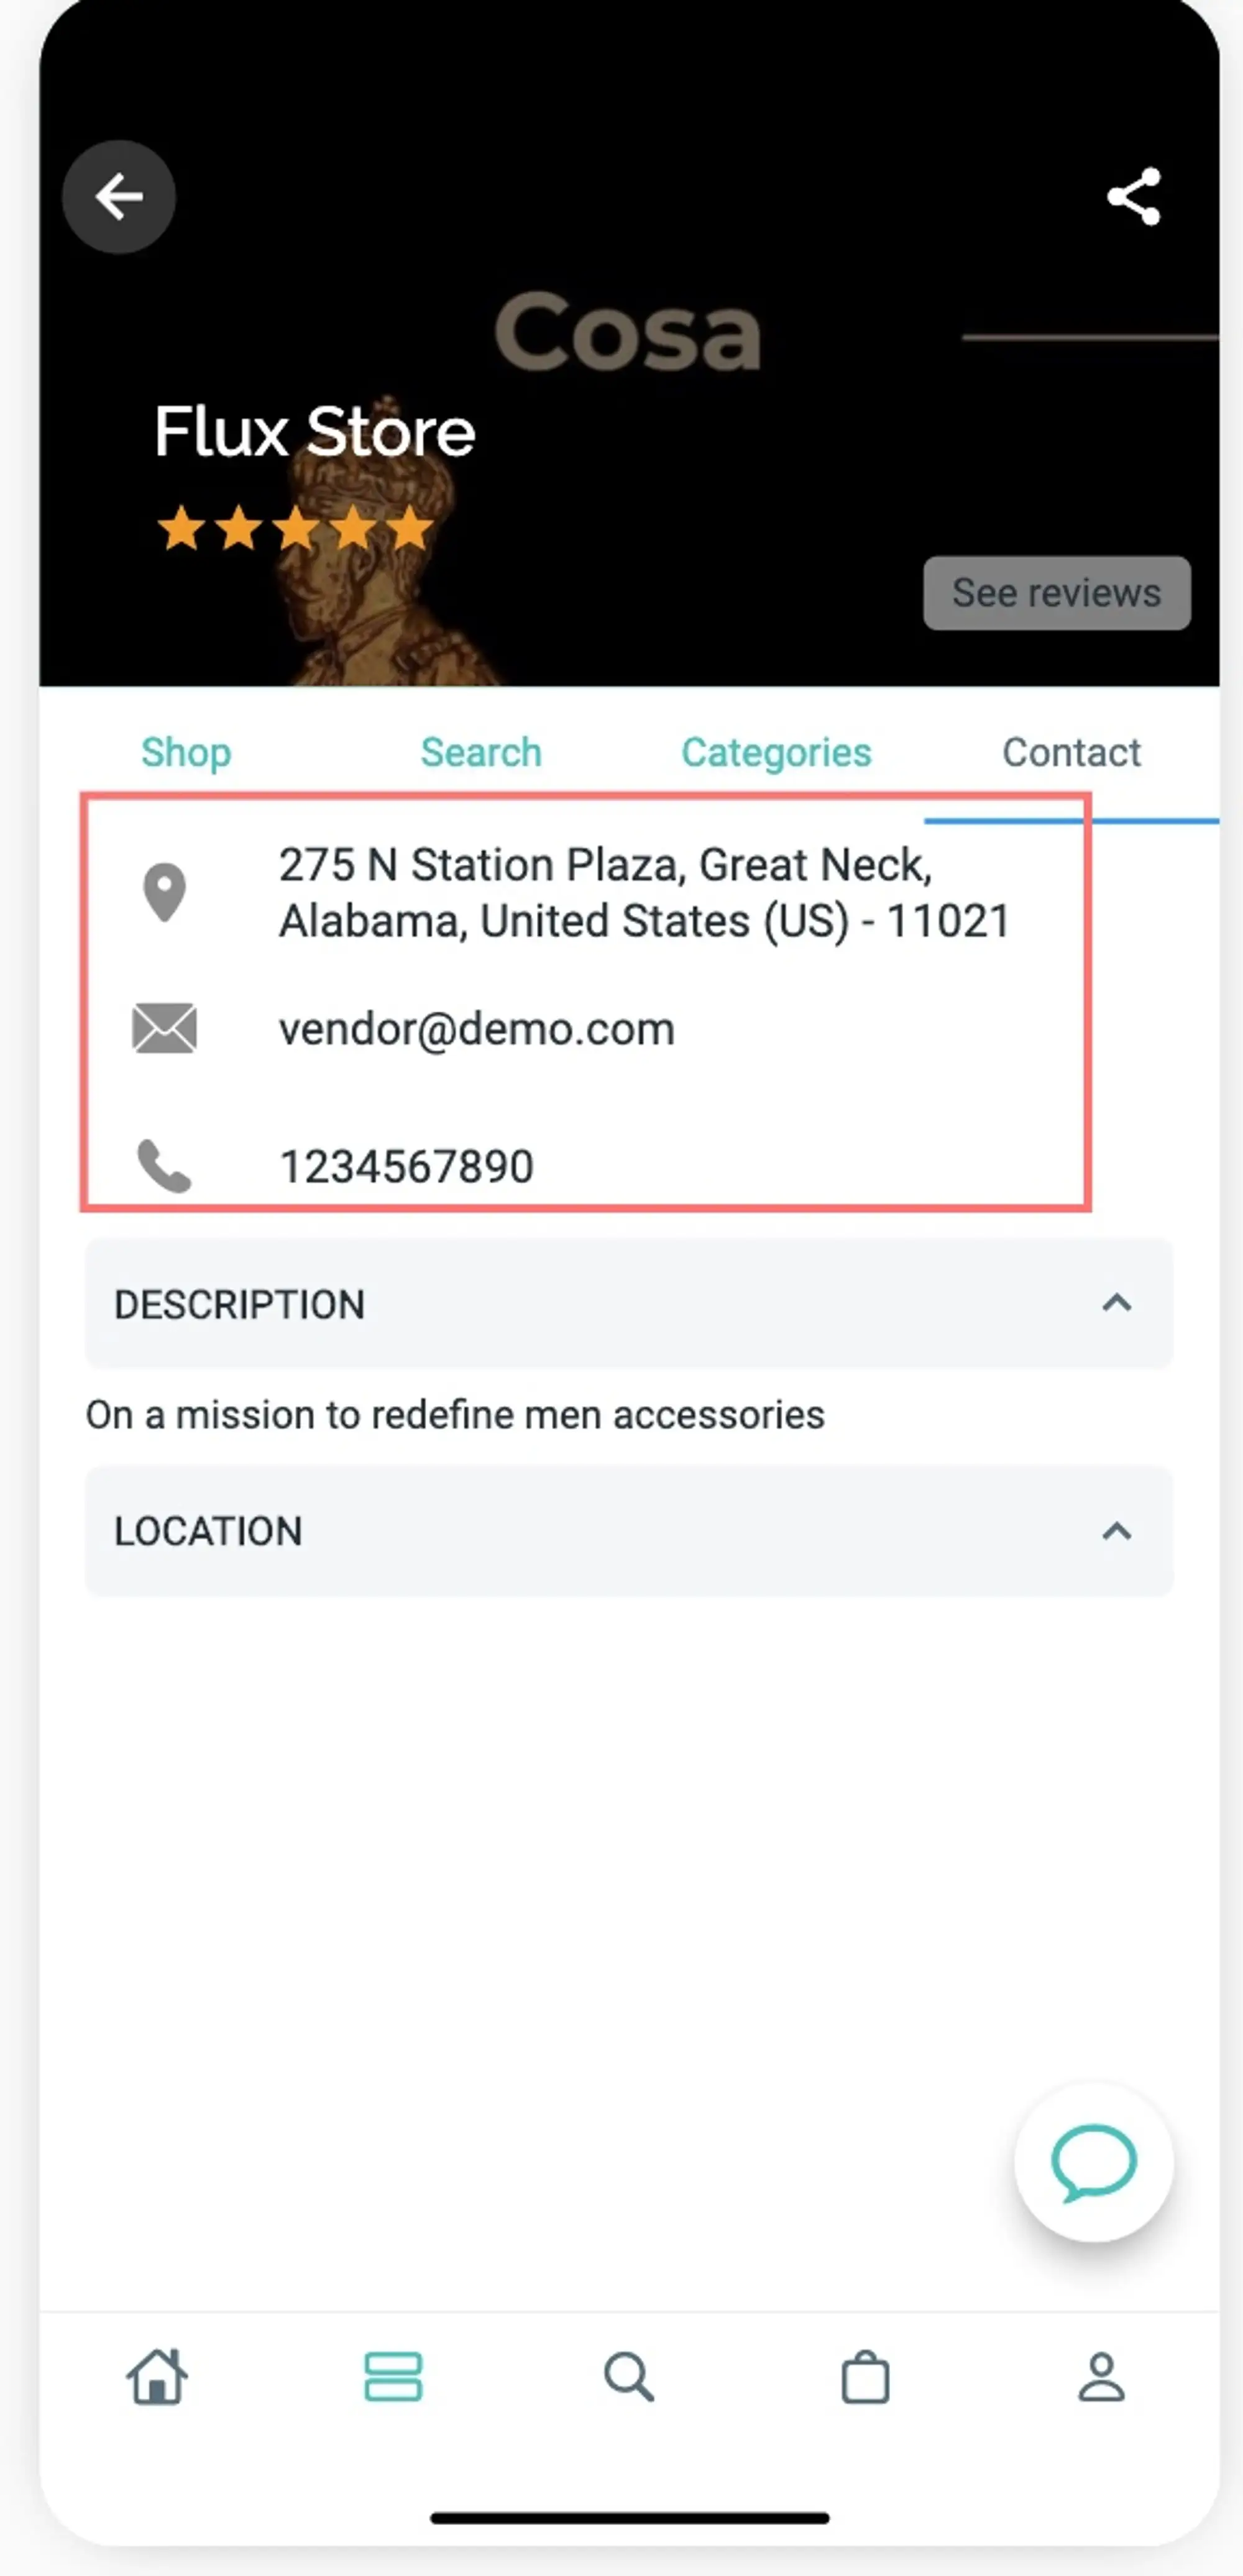
This solution will hide the Vendor contact in these screens:
- Contact tab in the Vendor Details screen:
- Stores screen
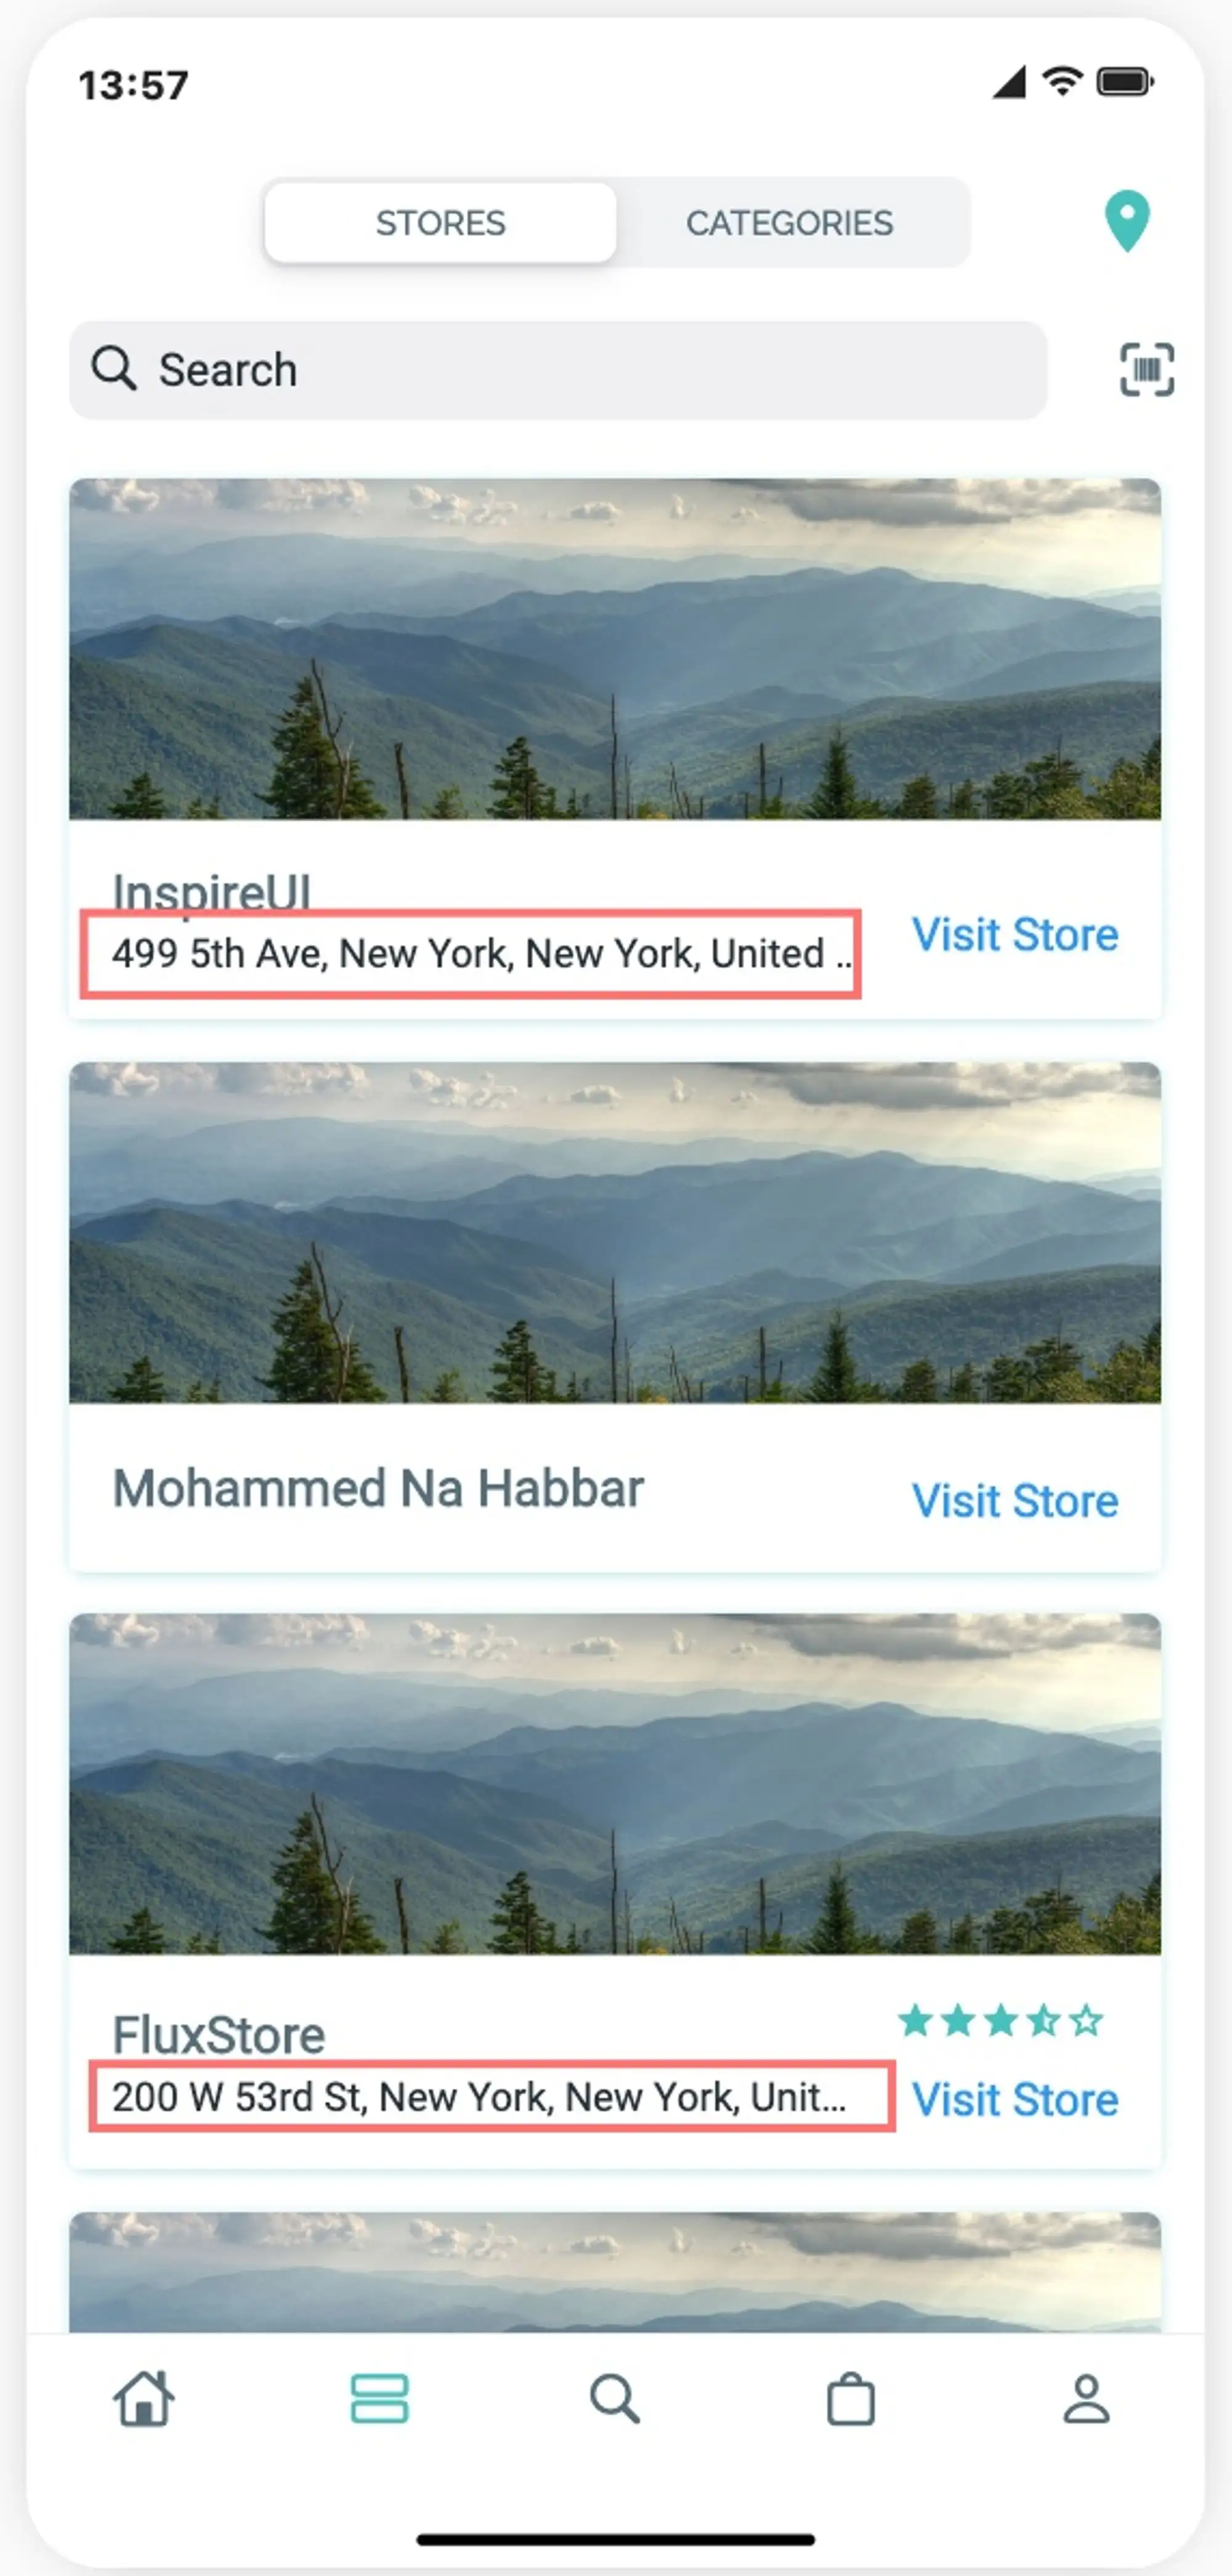
- Product Detail screen:
3. Order from Multi/Single Vendor
Enable Multi/Single Vendor
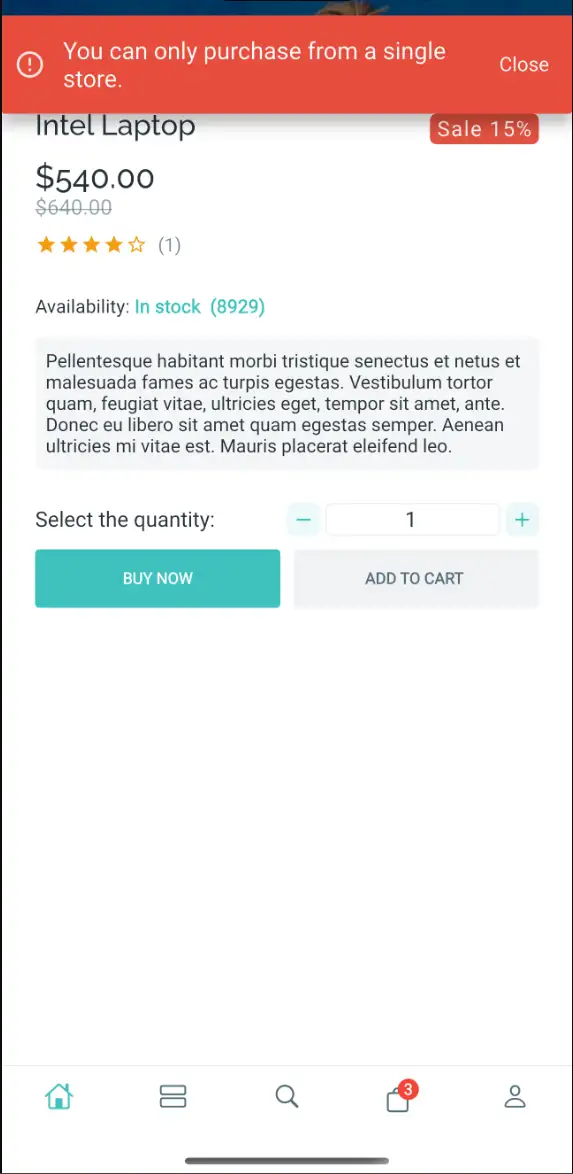
On the app, you can add an option: Prevent users from adding products from multiple vendors.
- Open your app on FluxBuilder
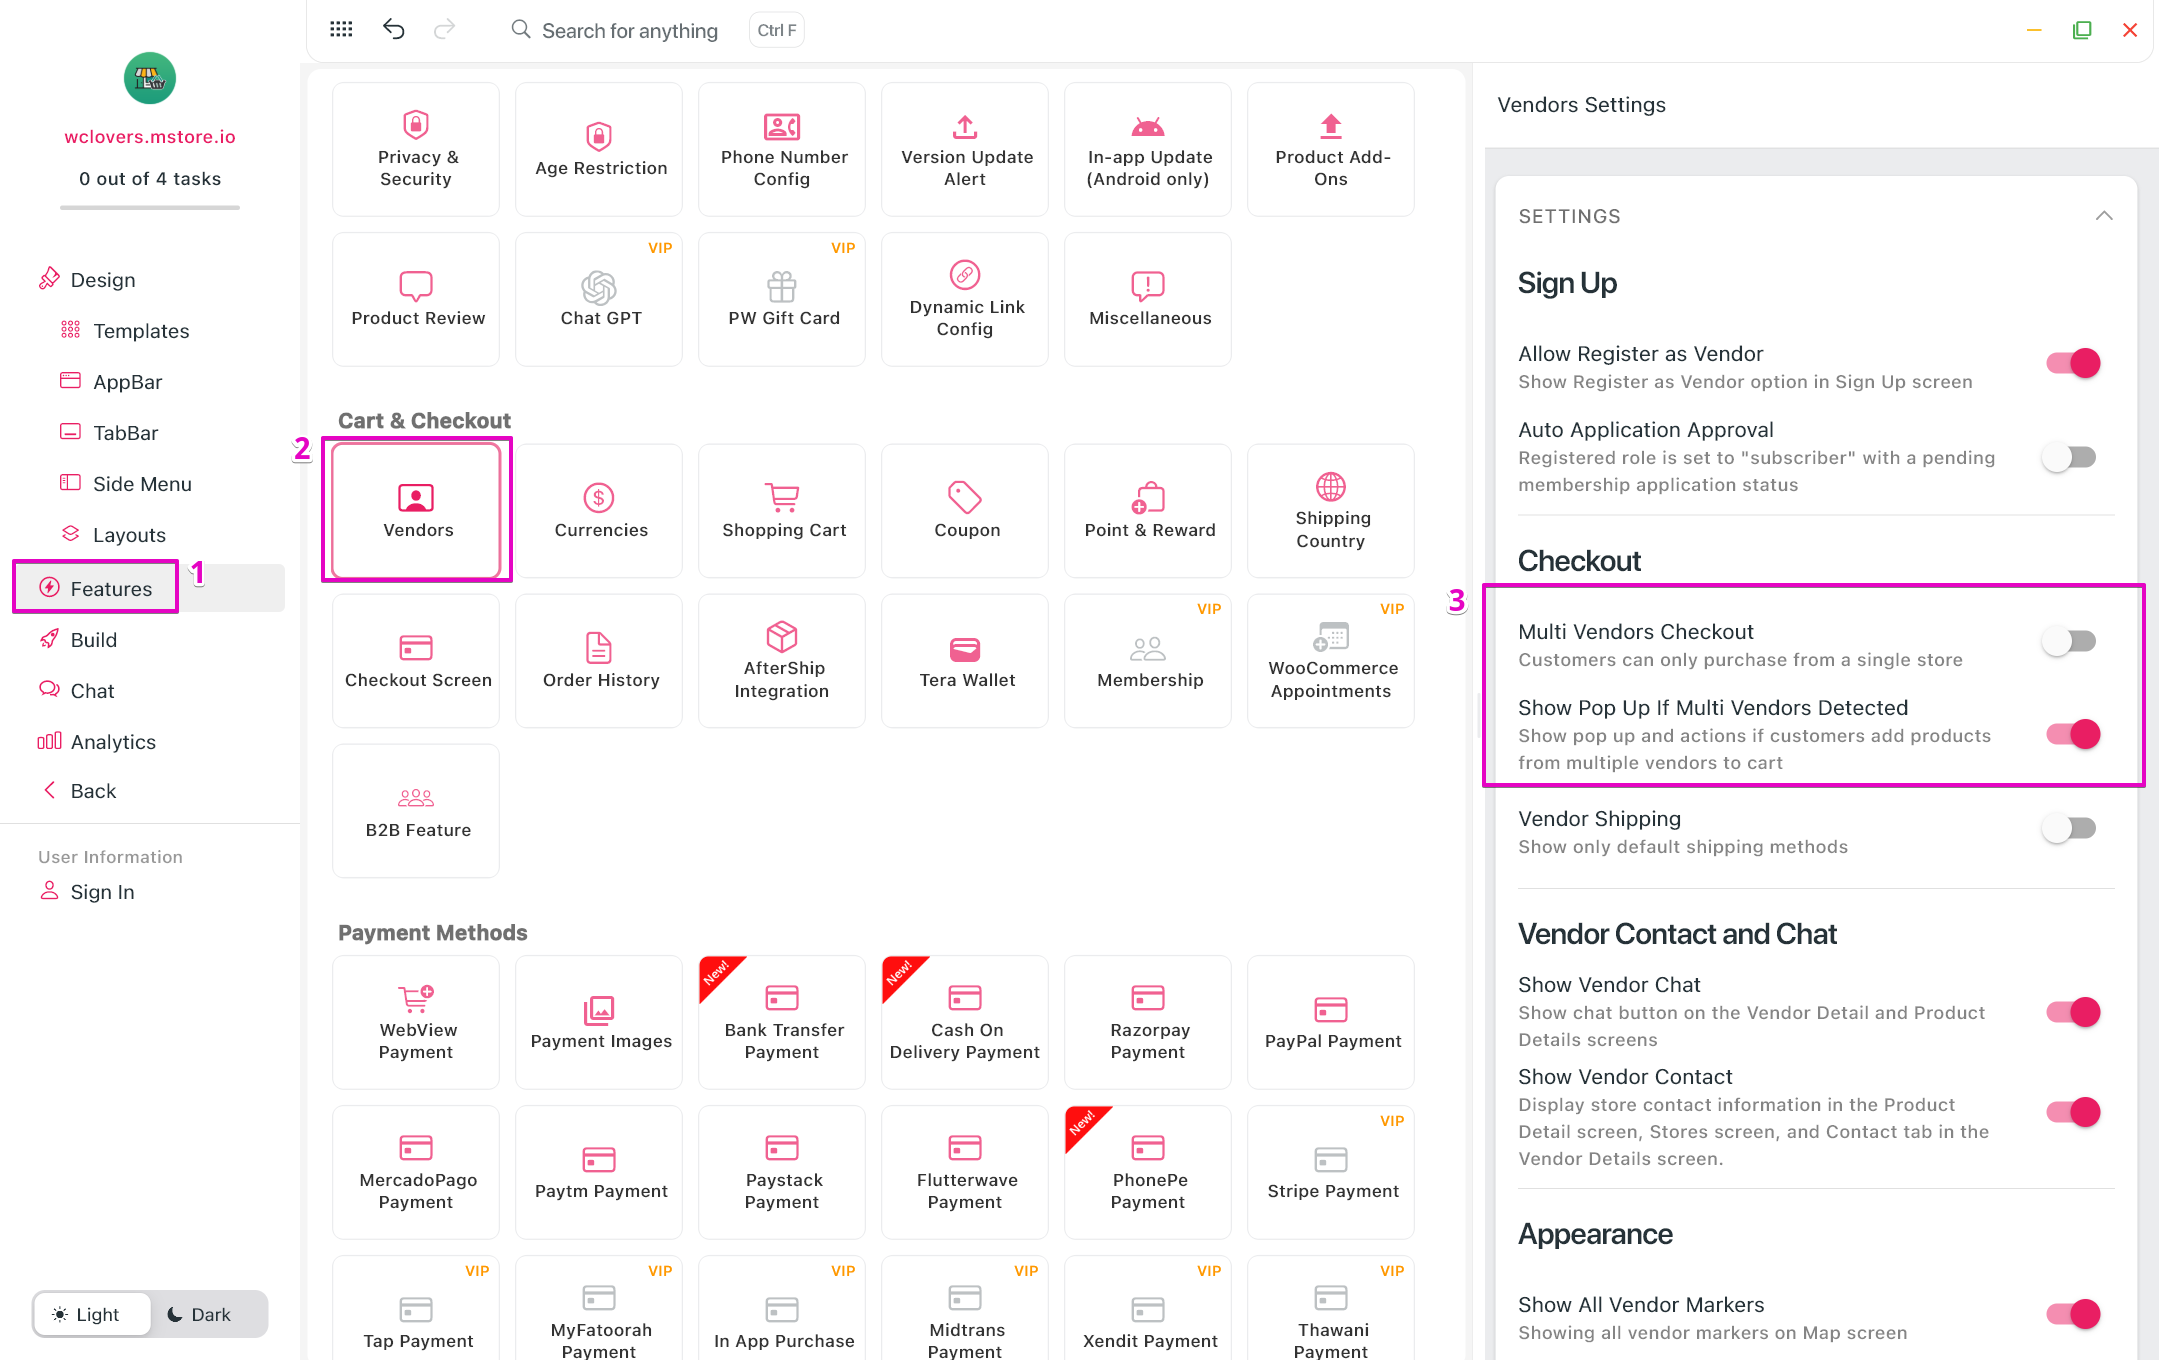
- Go to Features → in Cart & Checkout, select Vendors
- Disable Multi Vendors Checkout
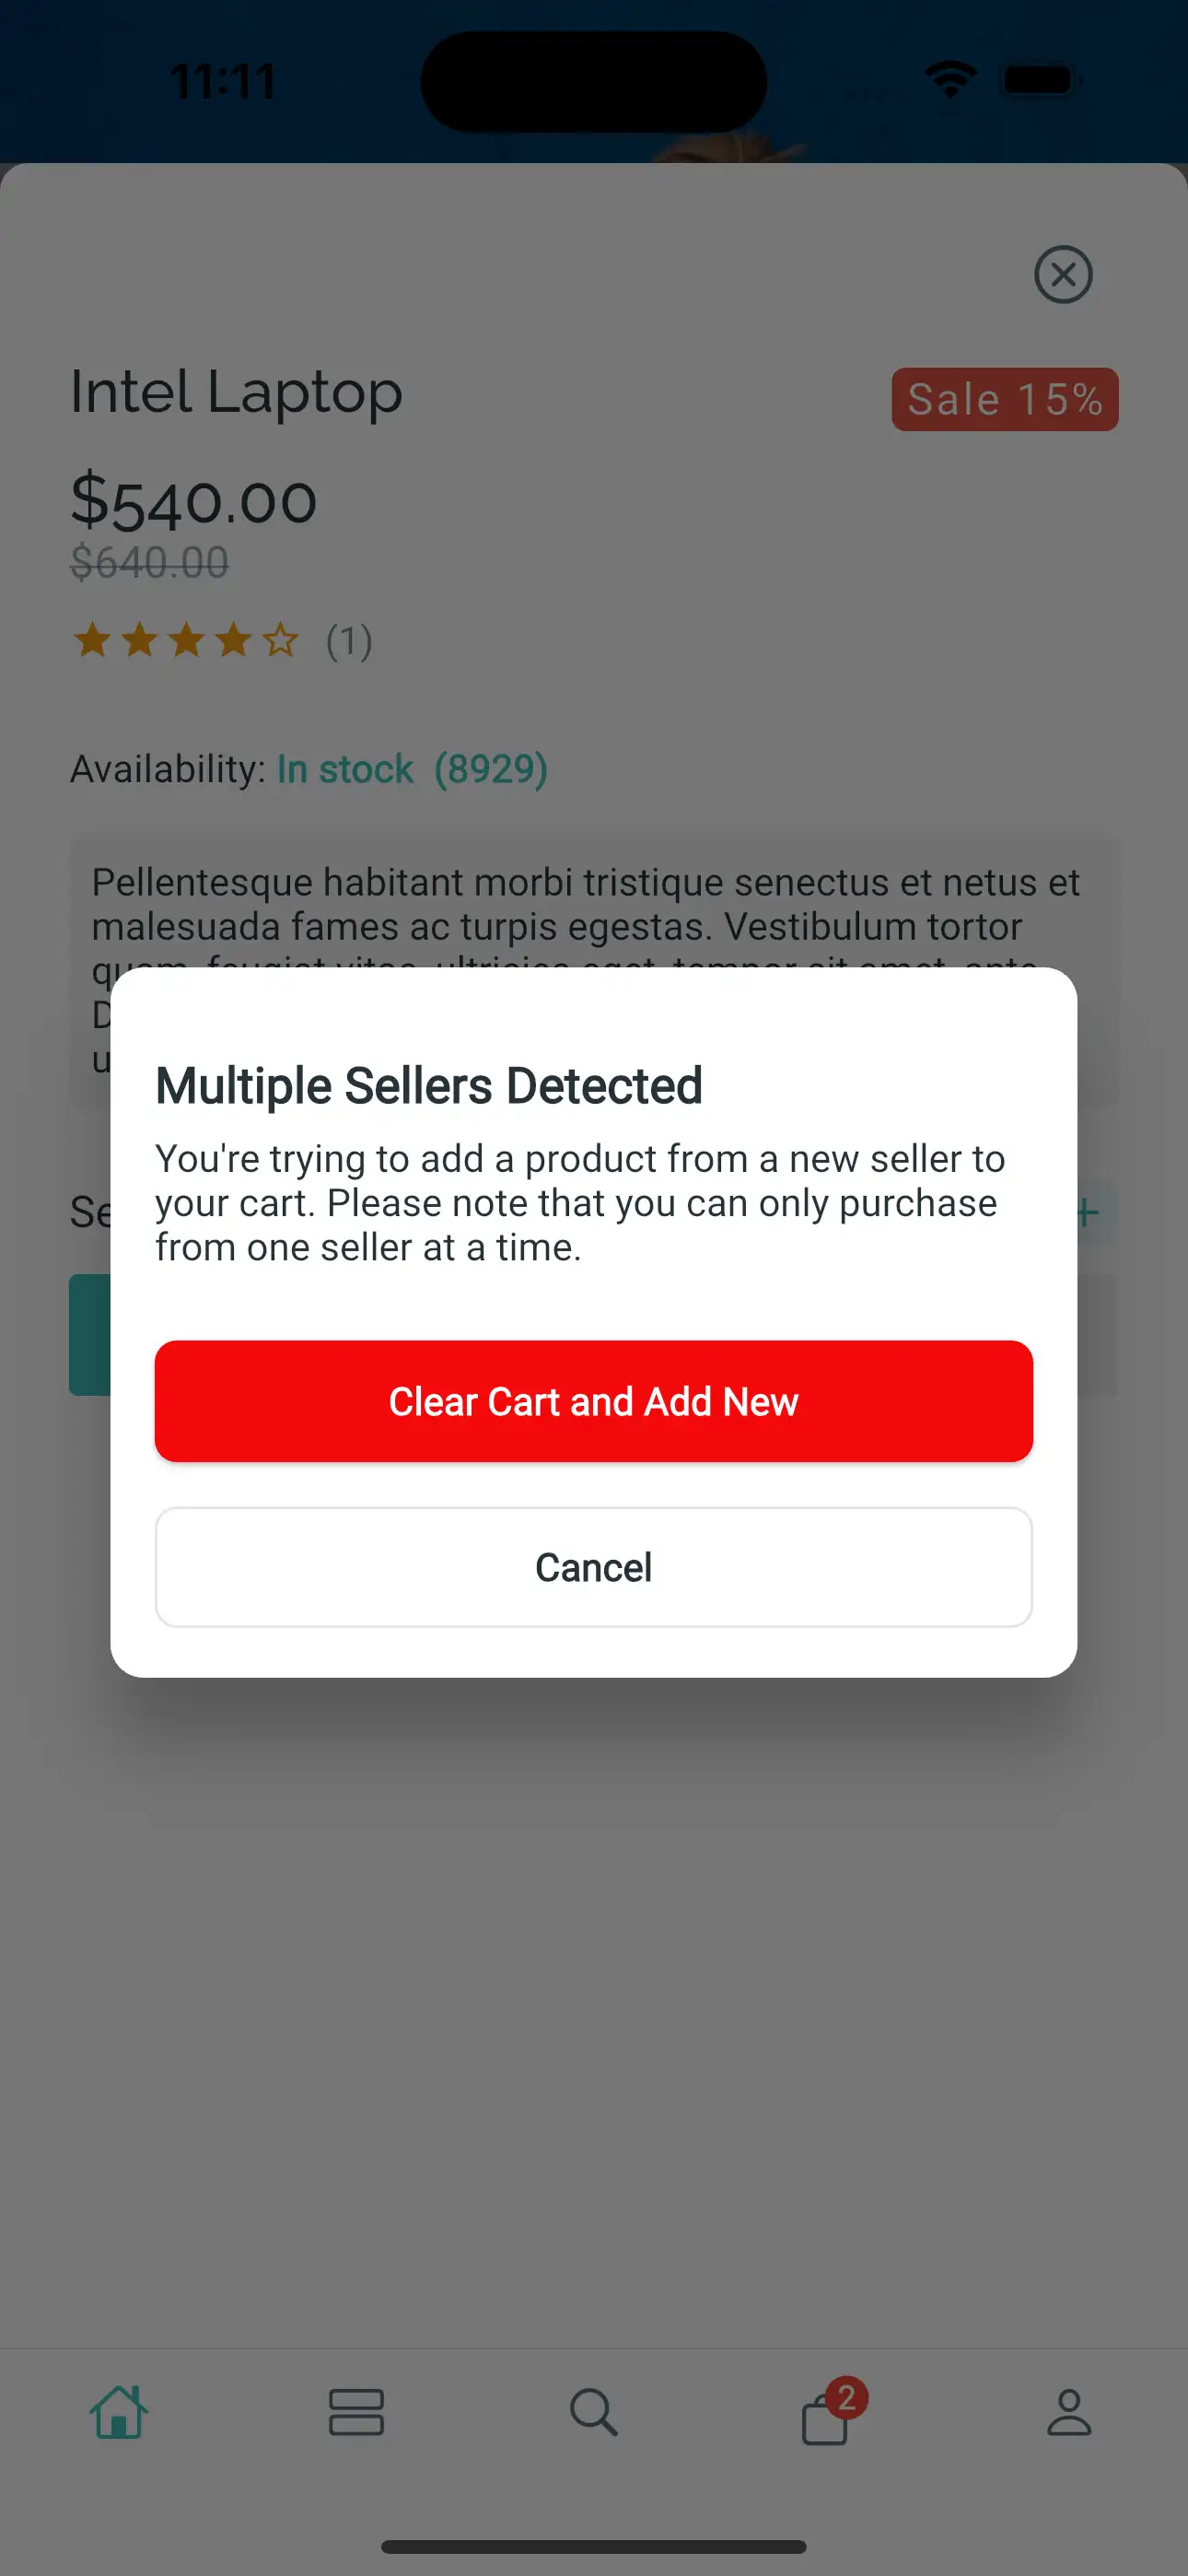
Multi Vendors Detected PopUp
The apps support showing a Multi Vendors Detected PopUp to remind users after preventing users from adding products from multiple stores.
Steps:
- Open your app on FluxBuilder.
- Go to Features > Vendors.
- In Checkout, disable Multi Vendors Checkout and enable Show Popup If Multi Vendors Detected.
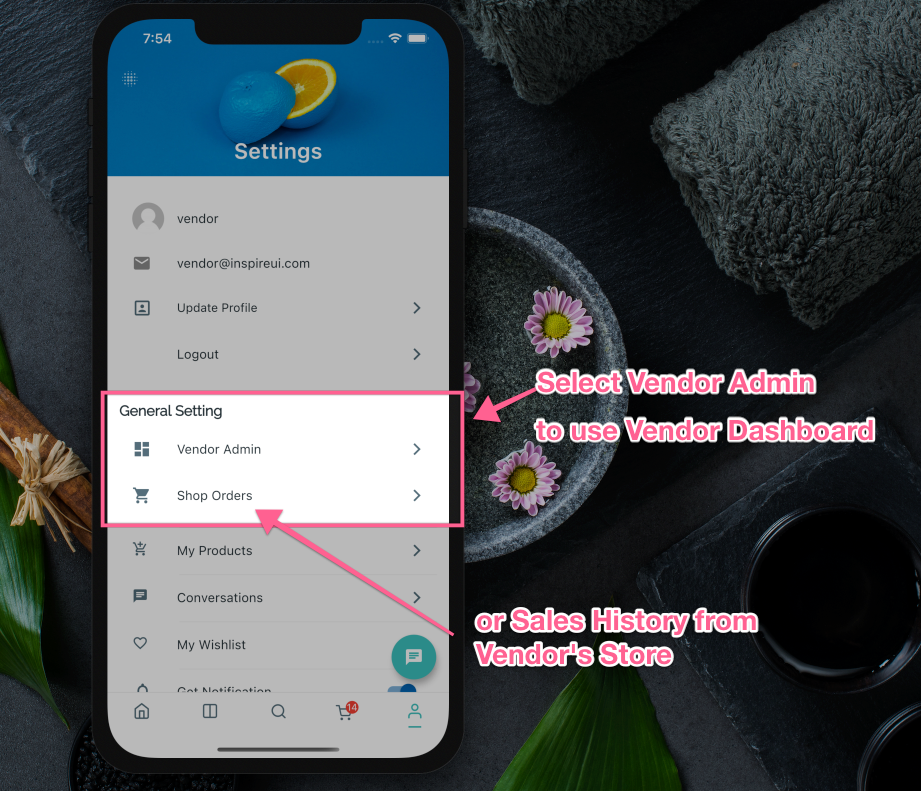
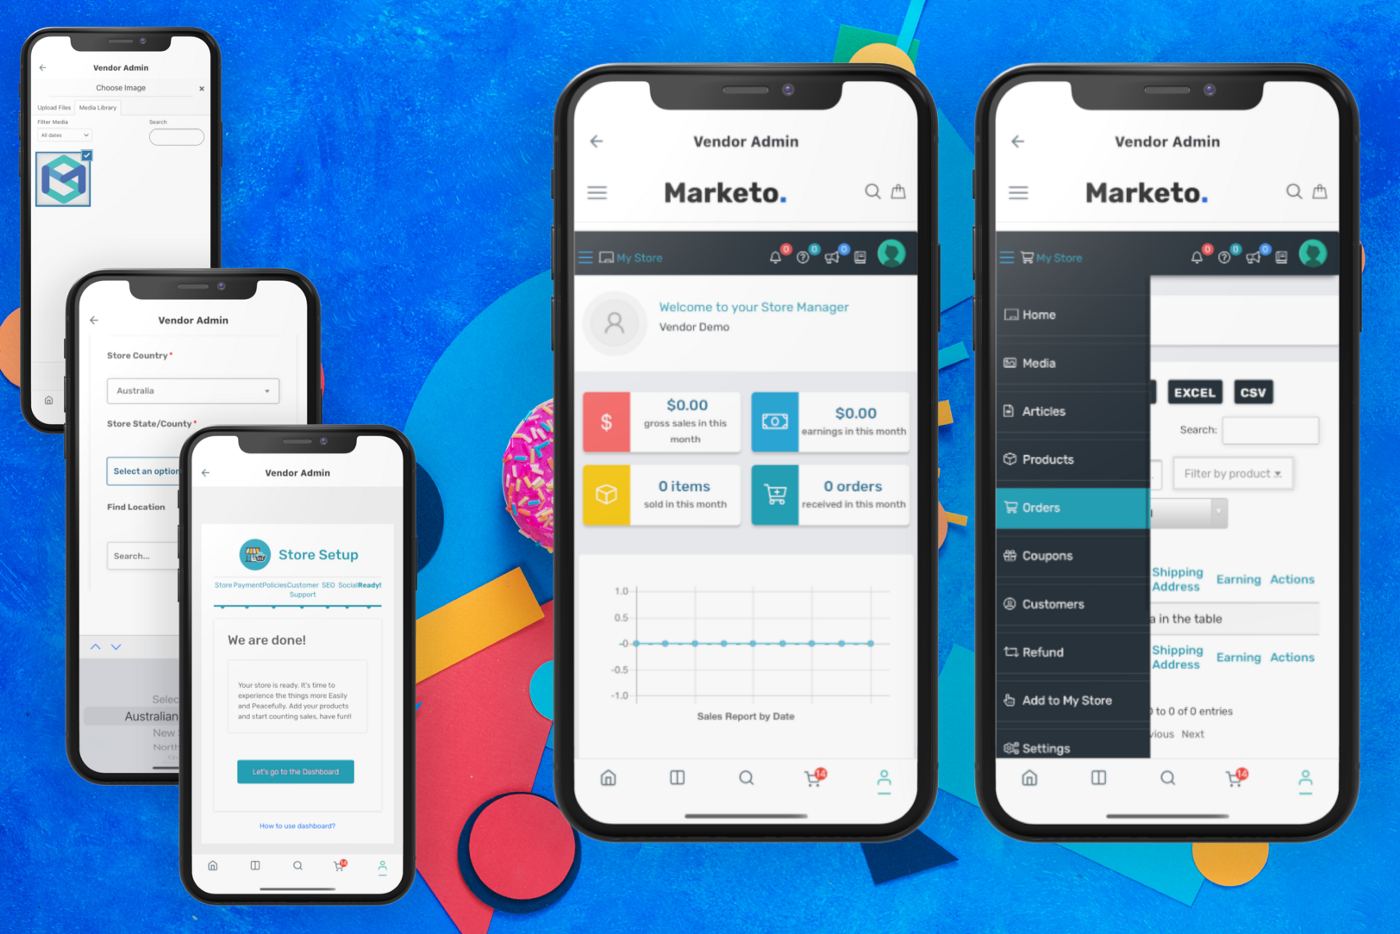
4. Vendor Admin
The Vendor Admin feature is available for WCFM only (when user login by vendor/admin account).
You are also able to purchase the Manager app for this feature in native. This Vendor app is compatible with WooCommerce and WCFM plugin.
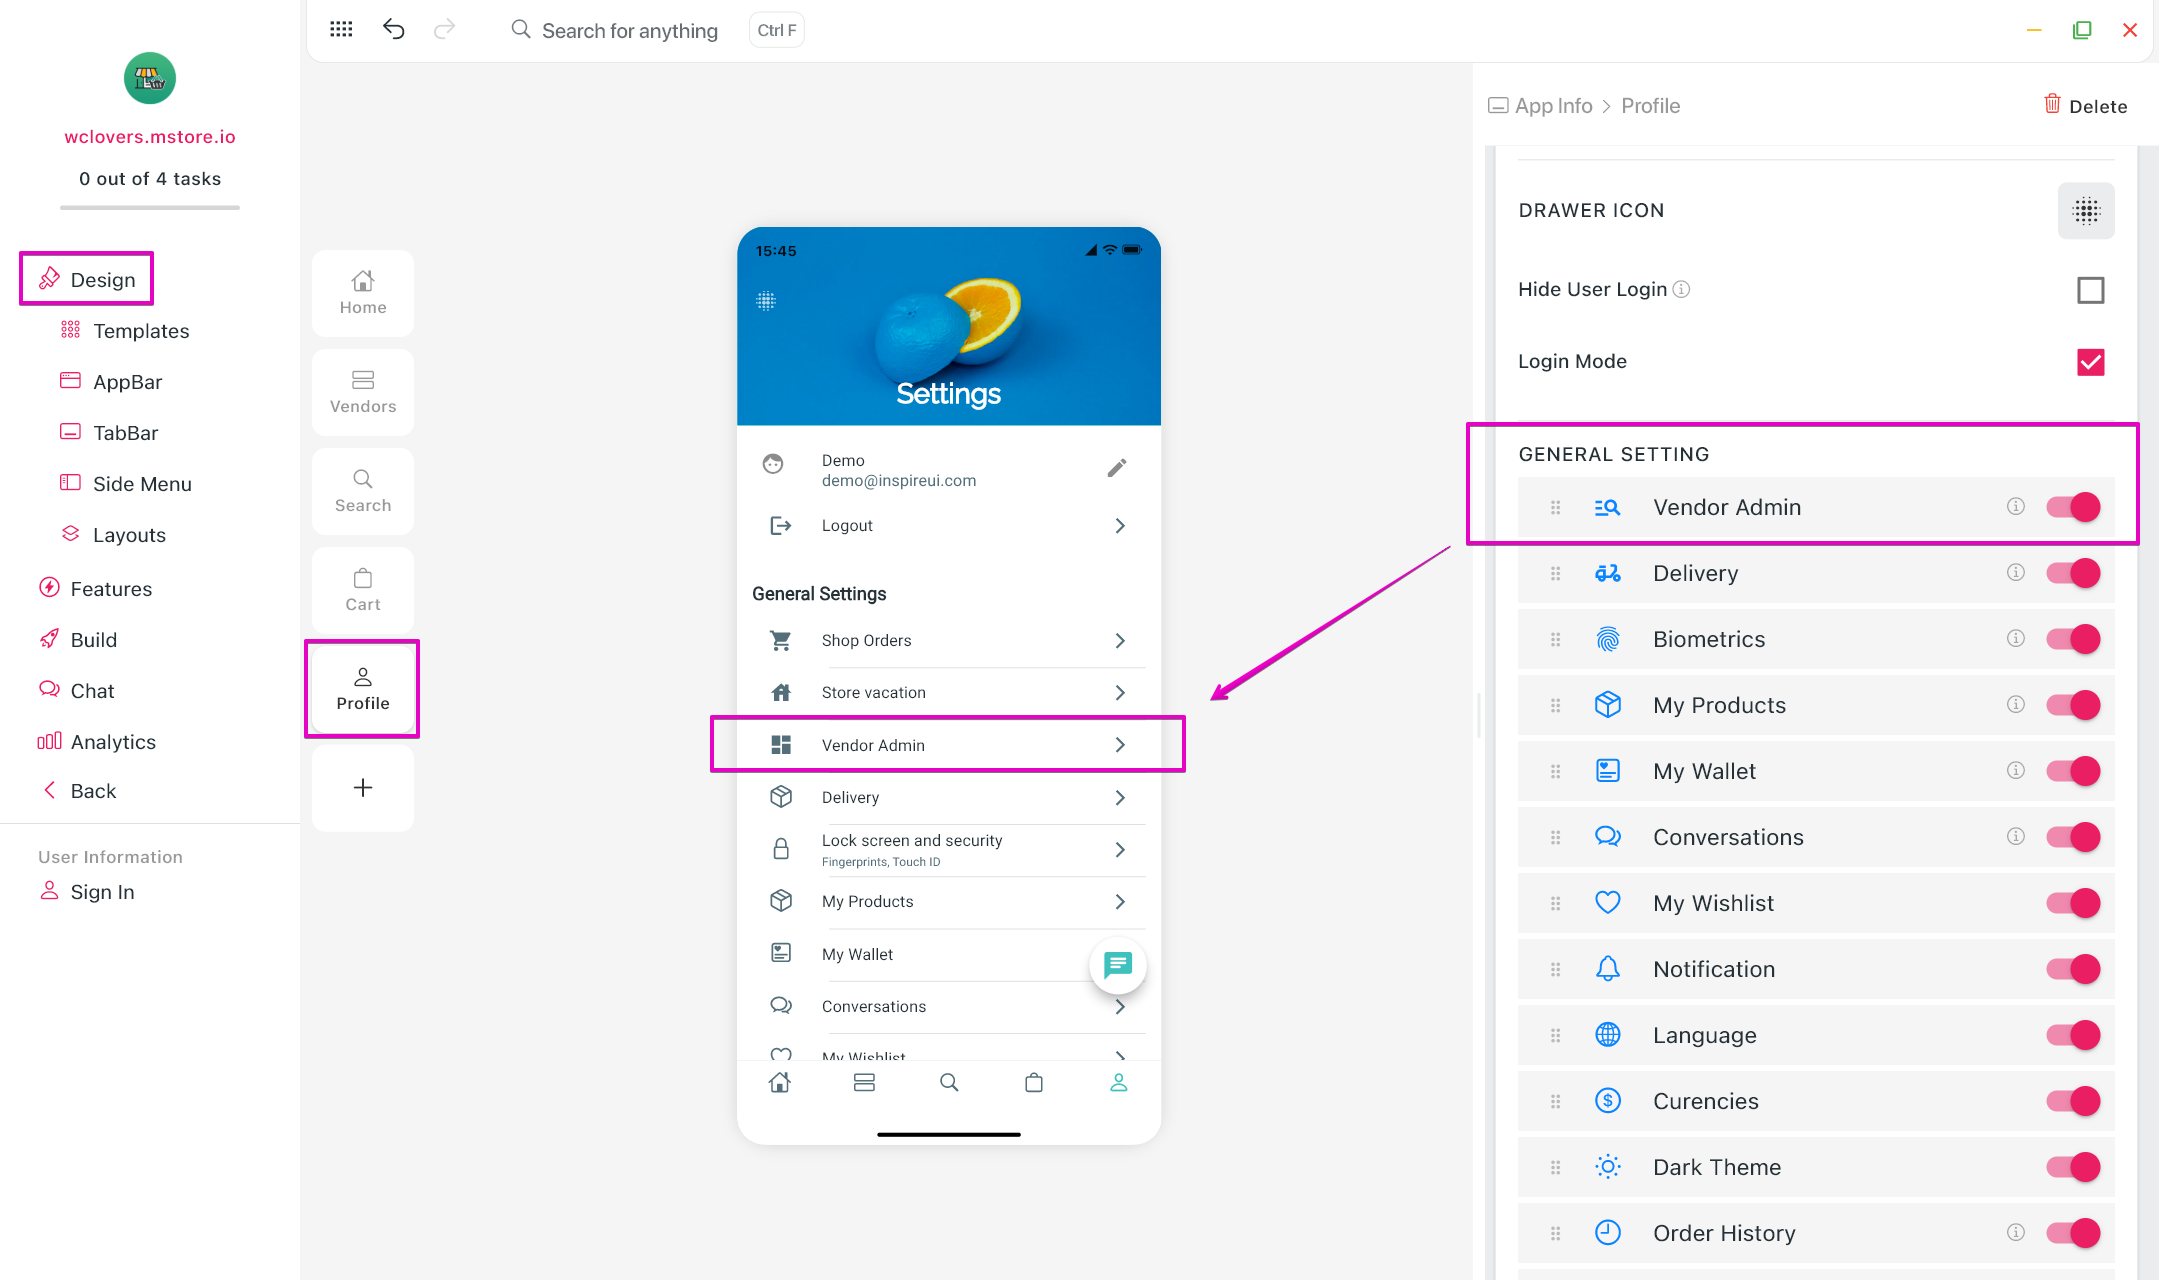
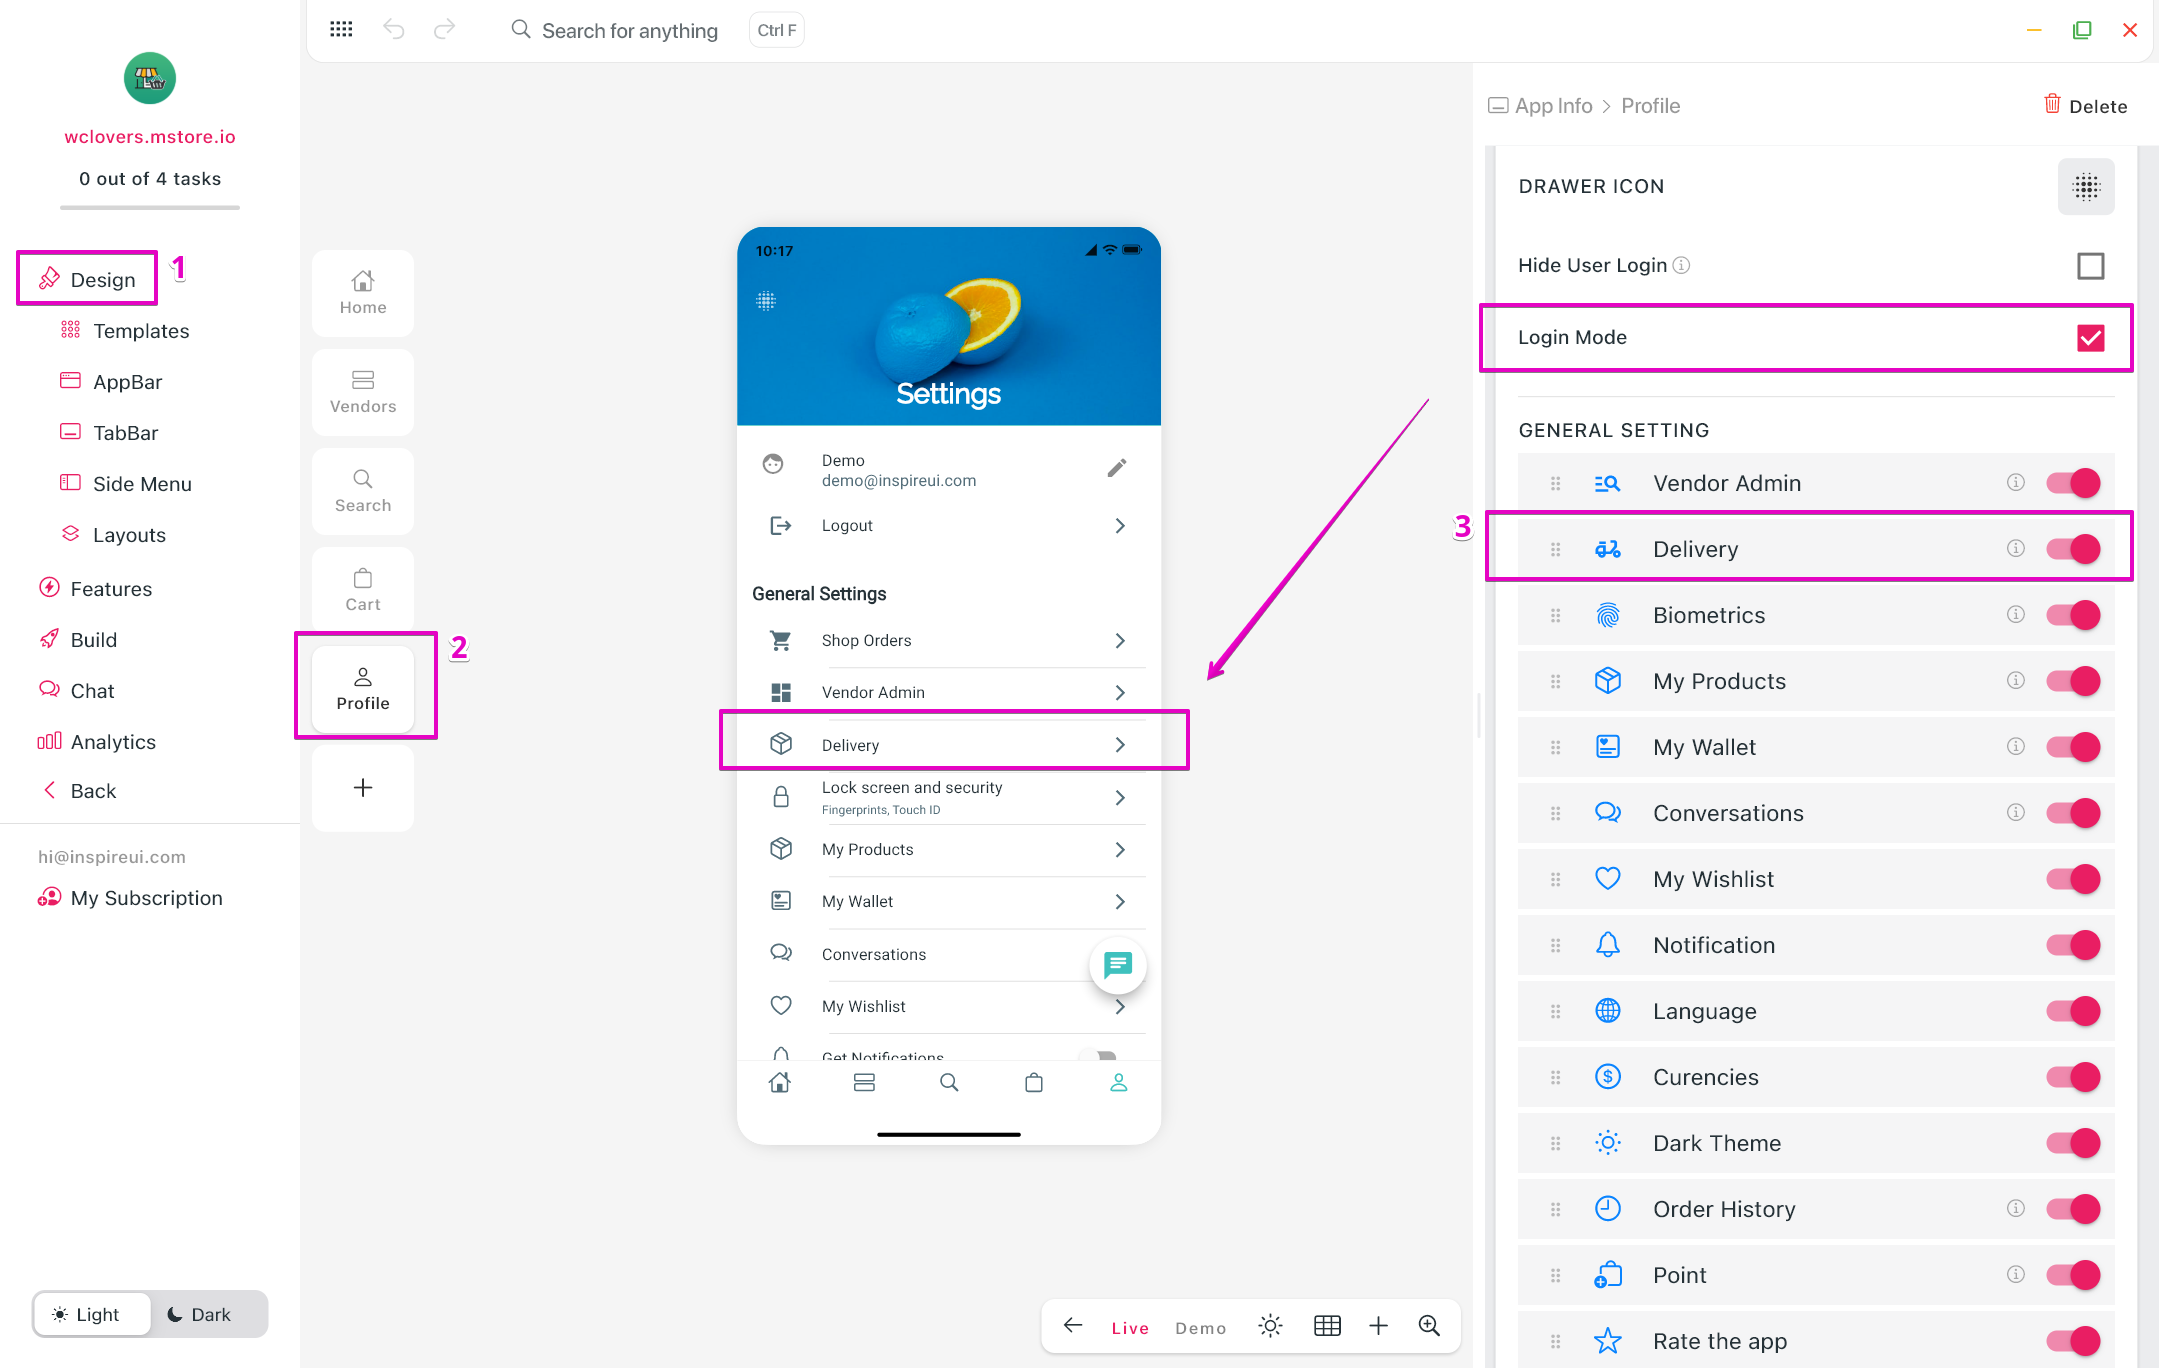
To show Vendor Admin on app:
- Open your app on FluxBuilder.
- In Design, open the Profile tab.
- Enable Vendor Admin in GENERAL SETTING.
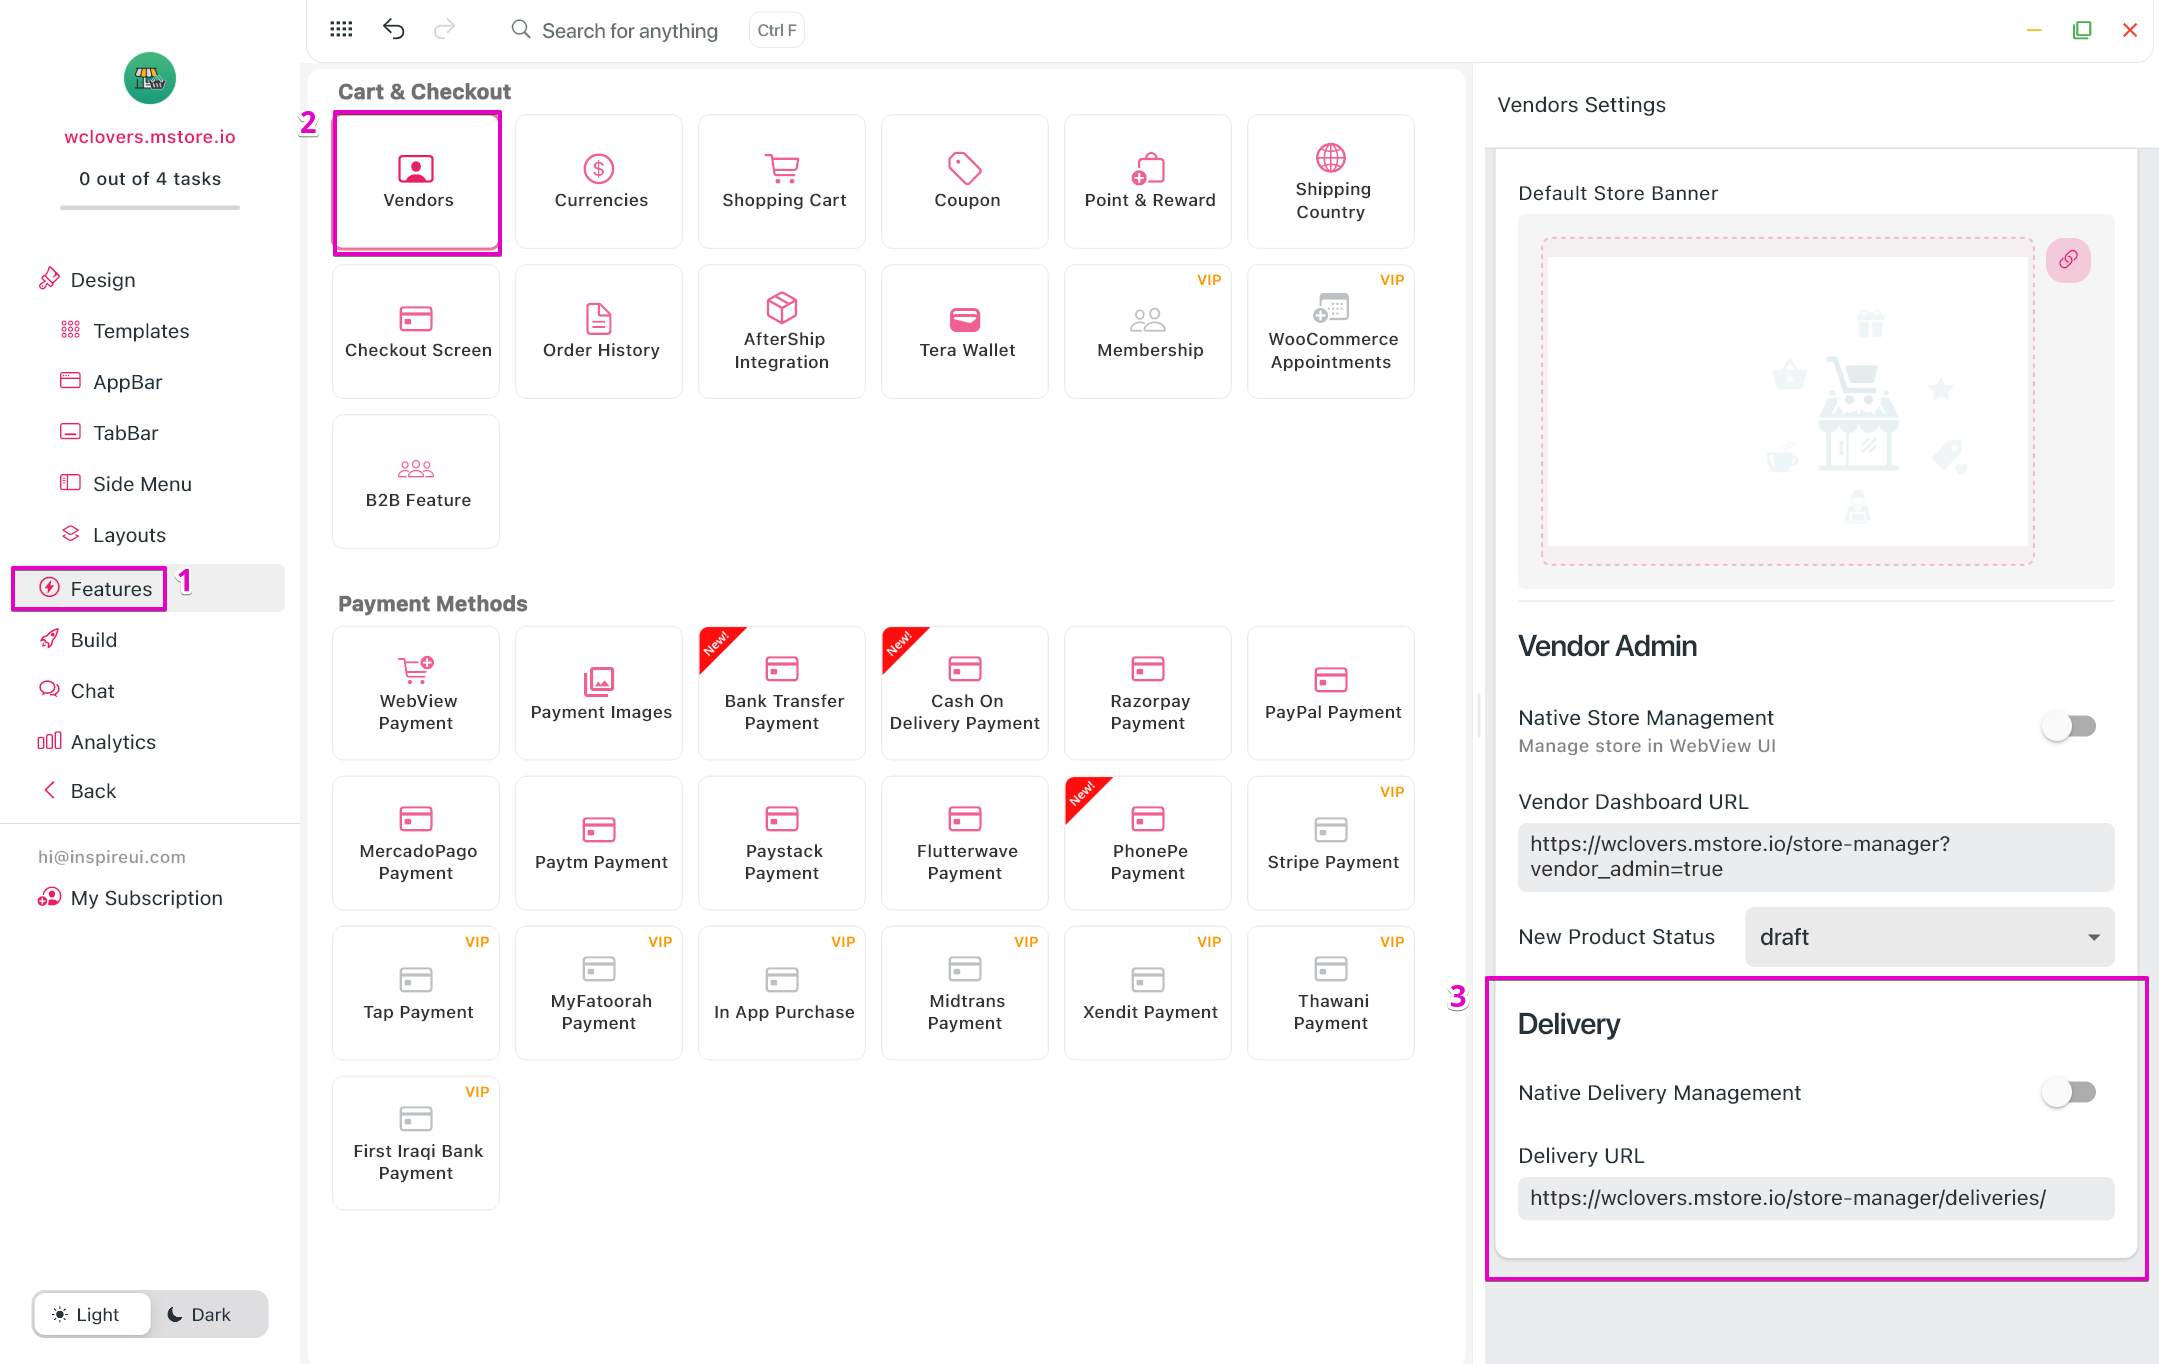
Vendor Admin (webview)
- Open your app on FluxBuilder.
- Go to Features > Vendors.
- In Vendor Admin, disable Native Store Management.
- Input Vendor Dashboard URL.
- Select New Product Status as default.
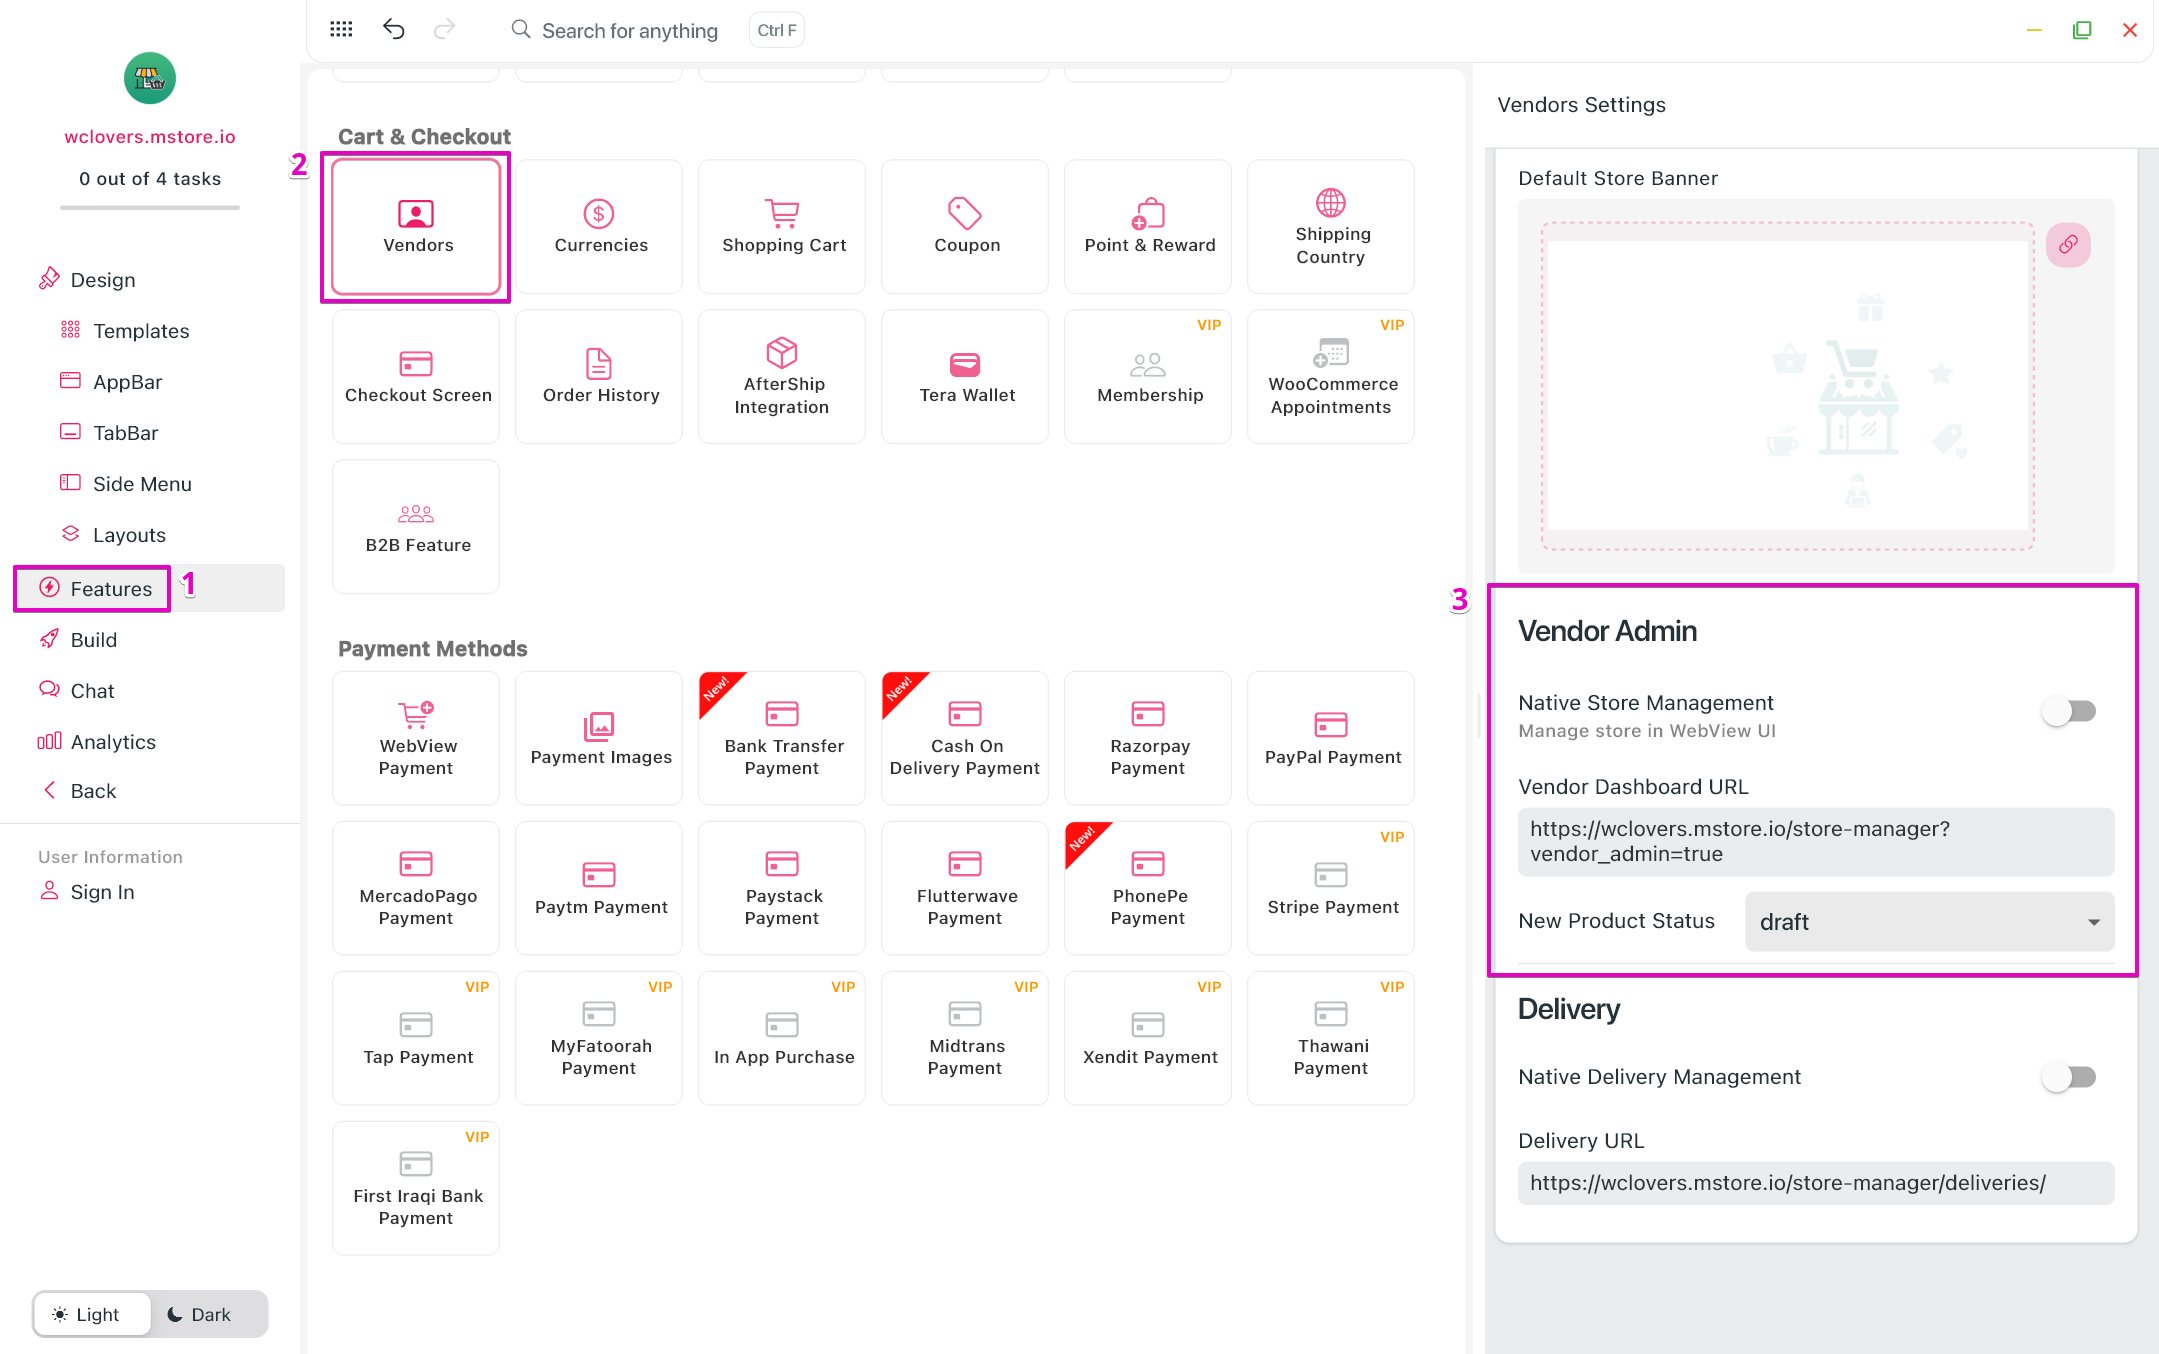
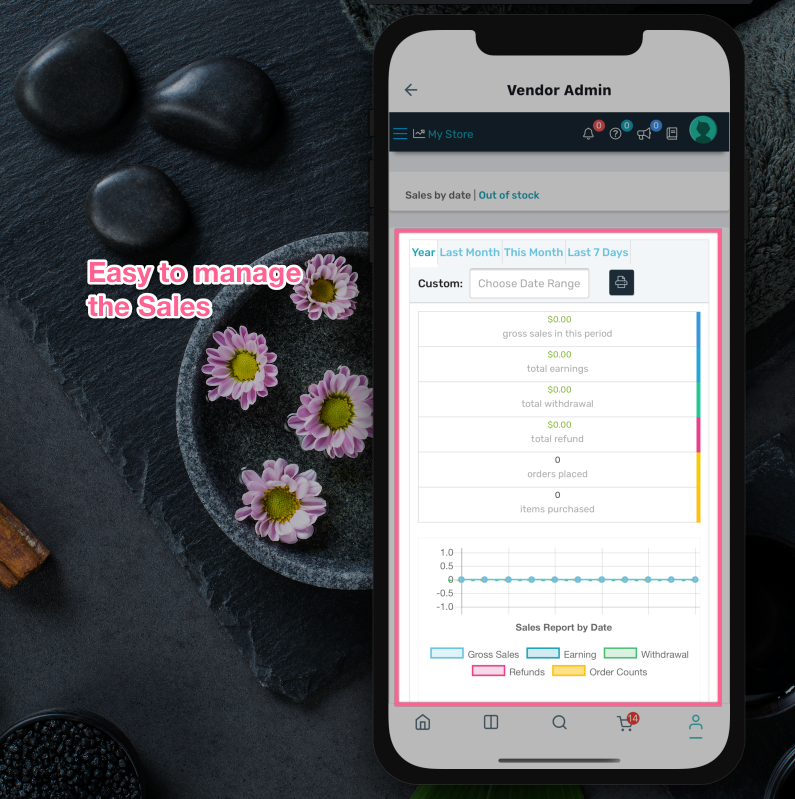
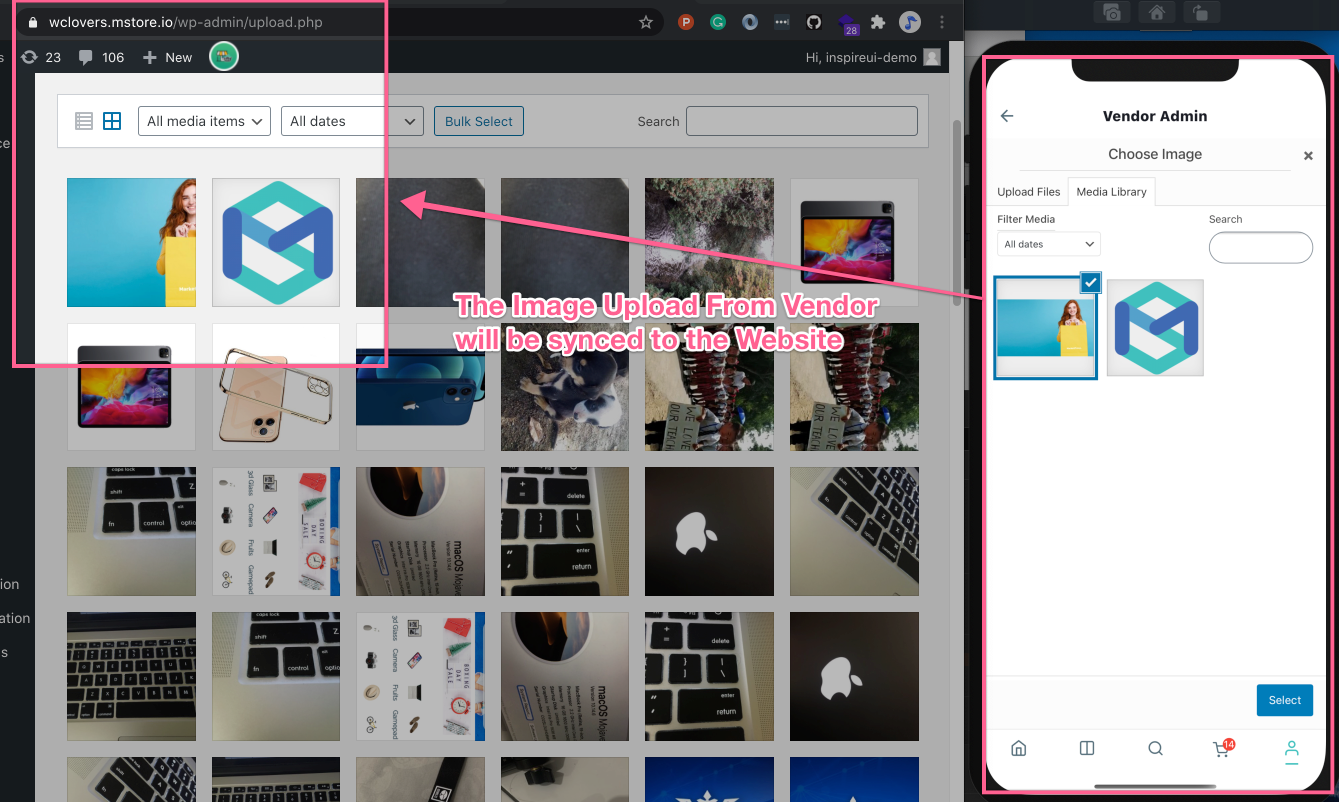
This is an amazing feature to support Vendor Admin being able to manage everything related to their store. All the features will be the same as the features on the Vendor Admin website.
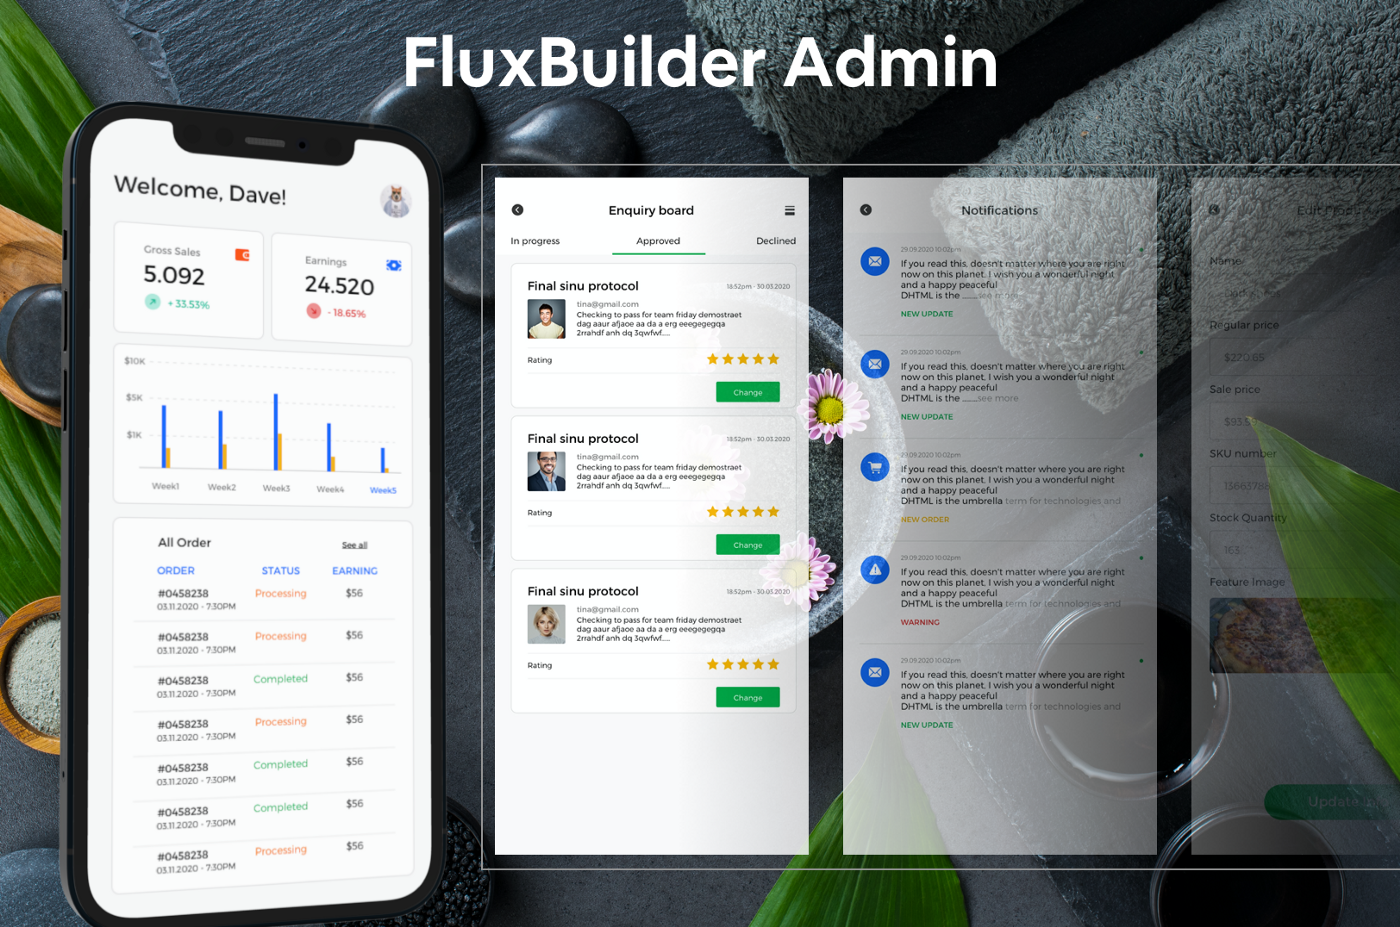
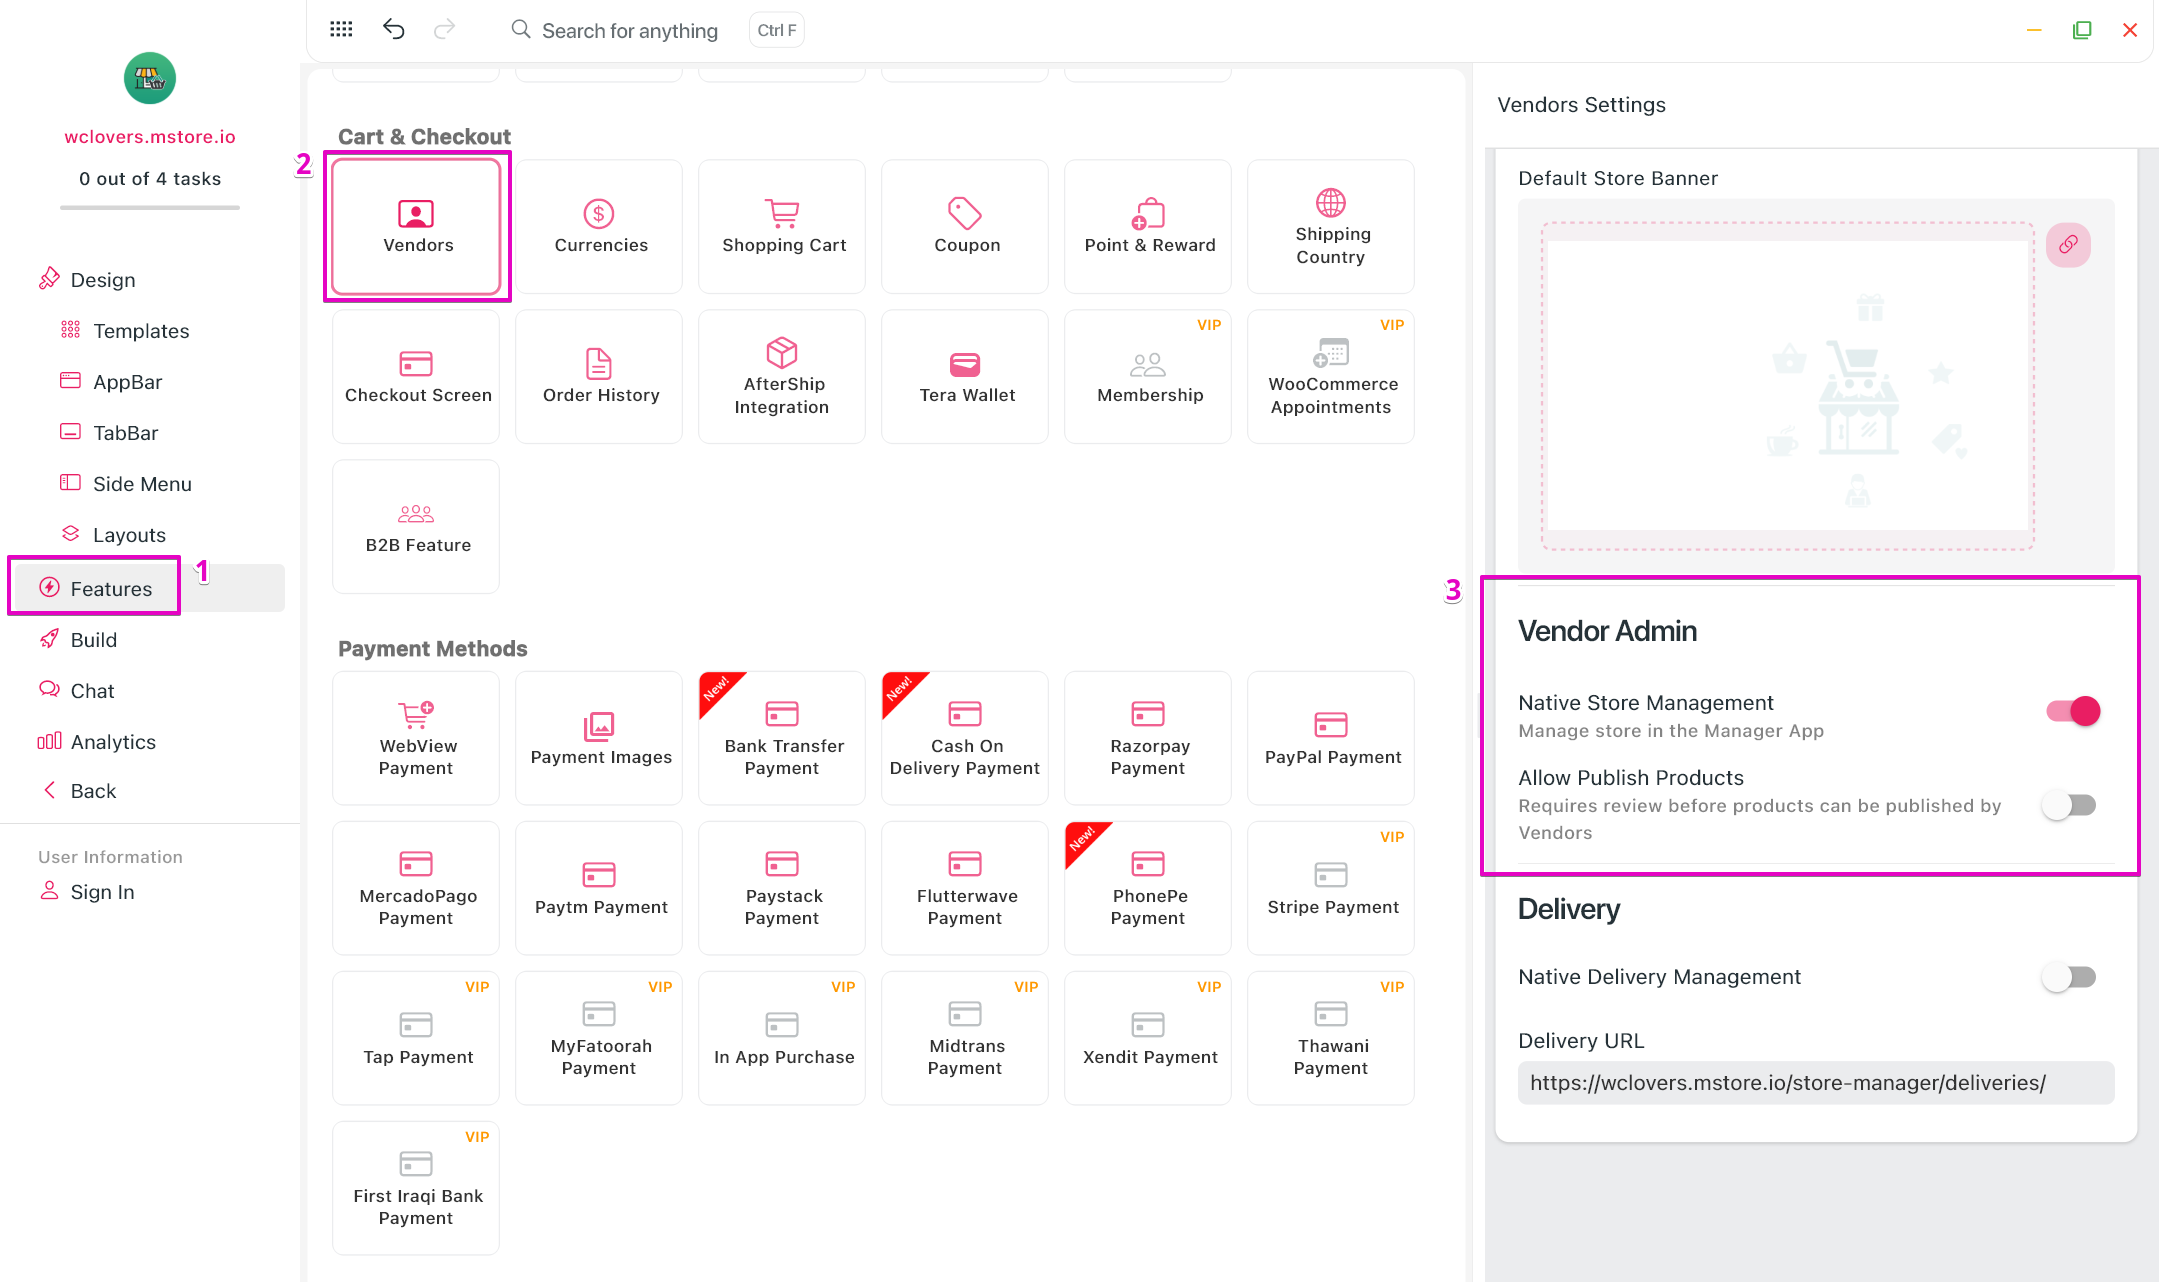
Vendor Admin (native)
As the current Admin is an All-In-One solution for Vendor admin on Multi Vendors app, it has a limit with WebView solution. For the Native vendor admin, you can combine with the Manager app that is full of native UX.
- Open your app on FluxBuilder.
- Go to Features > Vendors.
- In Vendor Admin, enable Native Store Management.
- Enable Allow Publish Product (vendors can publish products directly) or disable Allow Publish Product (products are asked to be reviewed before publishing).
5. Delivery
Users logging in with a Delivery account can directly access the Delivery Management page within the Multi Vendors app.
To show Delivery on app:
- Open your app on FluxBuilder.
- In Design, open the Profile tab.
- Enable Delivery in GENERAL SETTING.
After selecting Delivery on the Settings page of the Multi Vendors app, users will be directed to the Delivery page. You can configure the app to display the Delivery page in either Webview or Native mode.
- Open your app on FluxBuilder.
- Go to Features > Vendors.
- In Vendor Admin, disable Native Delivery Management to open the Delivery webview page.
- Input Delivery URL.
Note: If you already have Delivery app, you can enable Native Delivery Management to open the Delivery native page.
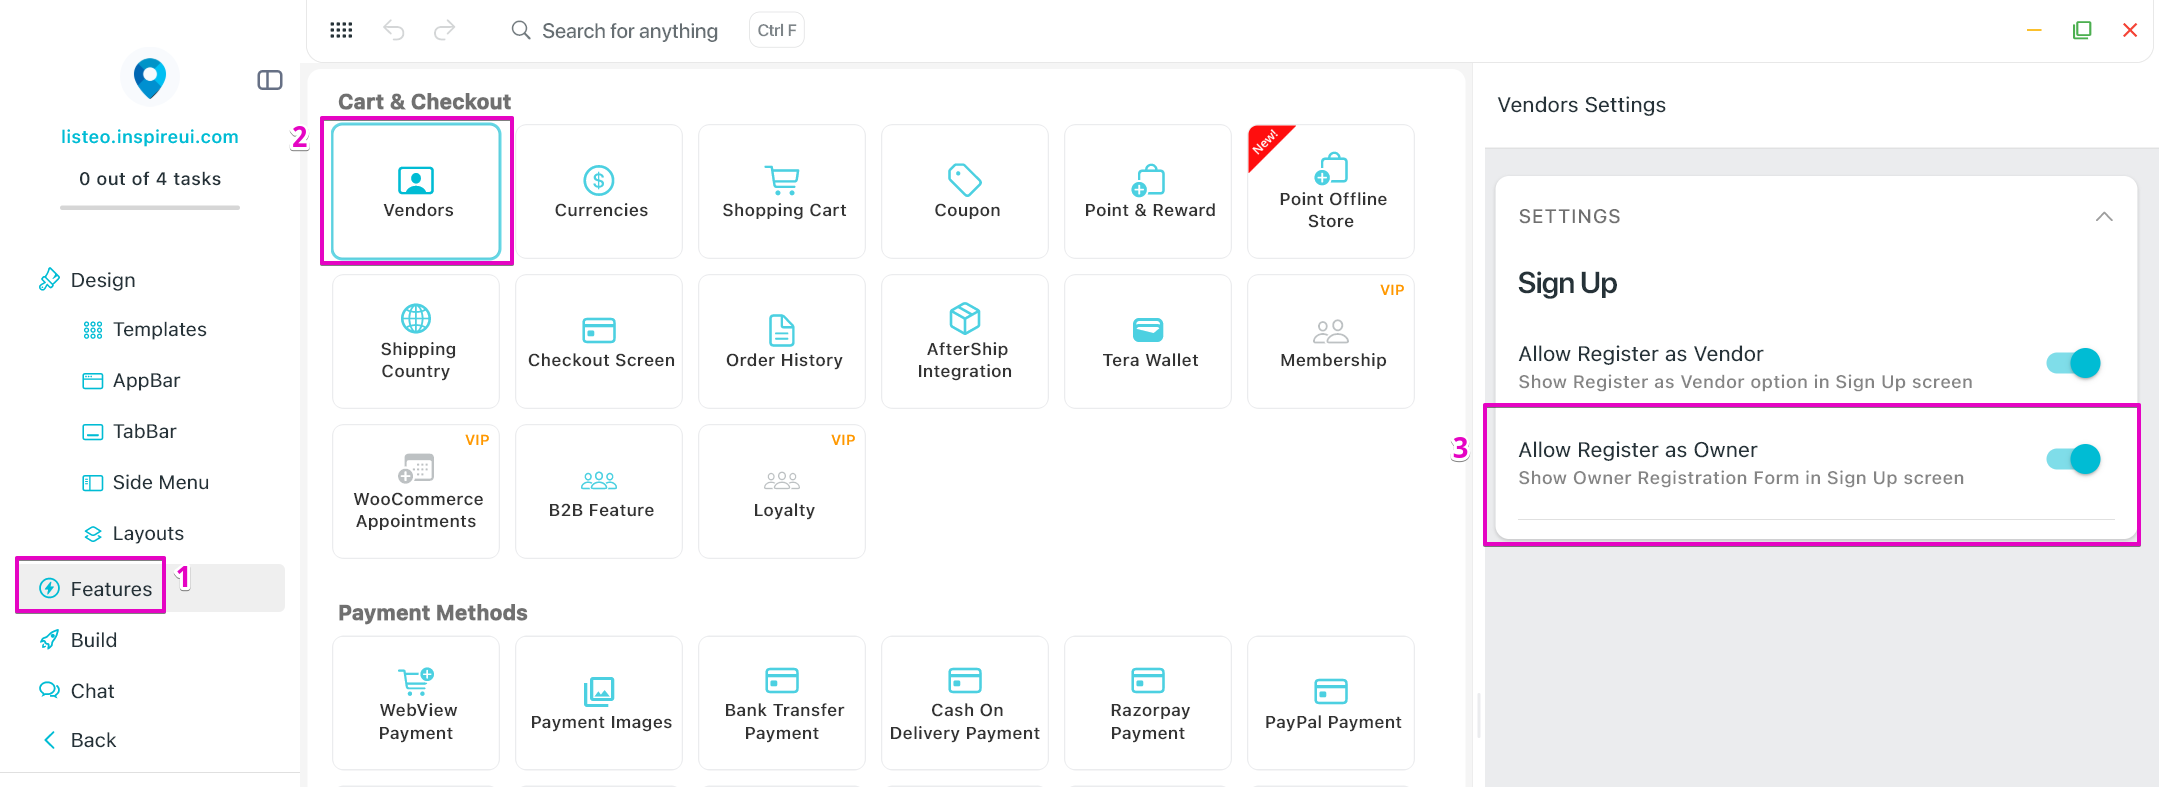
6. Listing: Allow Register as Owner
This update introduces support for owner role registration within the Listing app. Users can now register as business owners directly from the app interface.
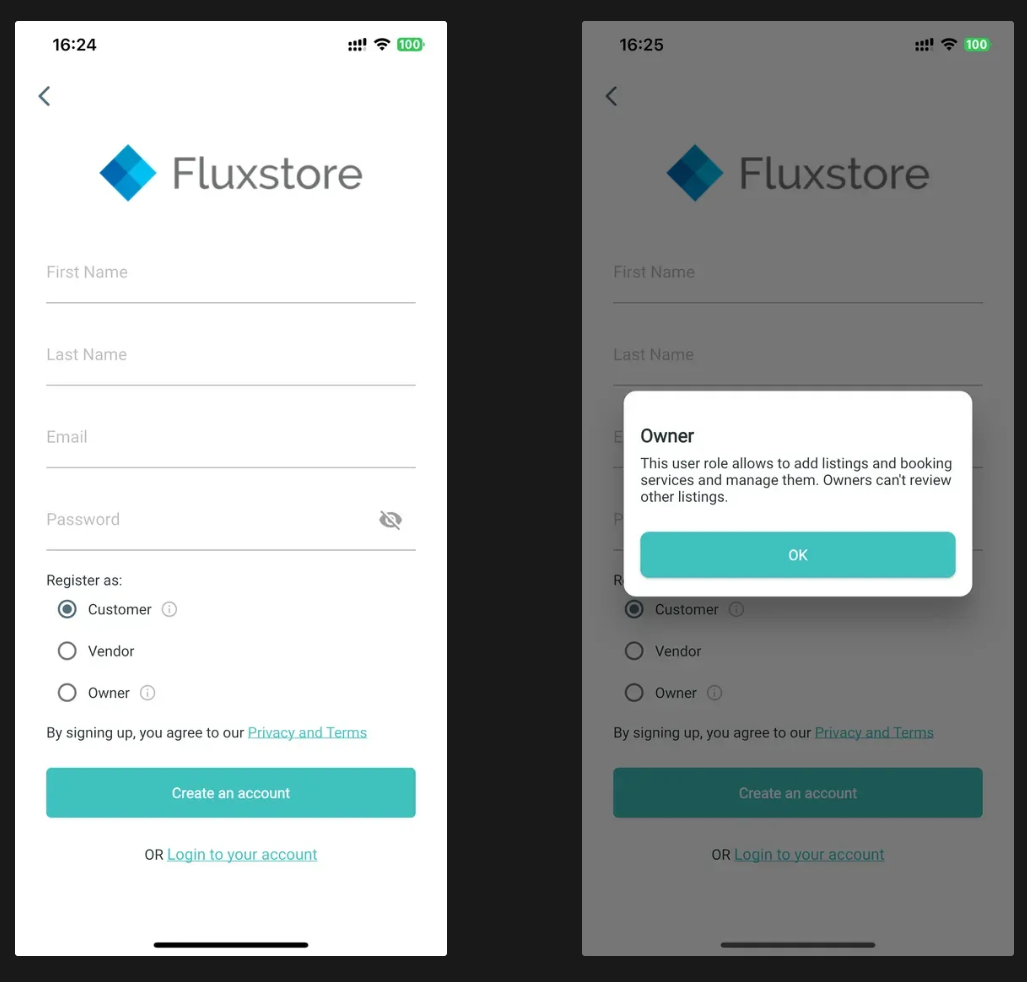
- Open your Listing app on FluxBuilder.
- Go to Features on the side menu
- In Cart & Checkout, open Vendors.
- Enable the Allow Register as Owner option.