FluxBuilder Dynamic Links
FluxBuilder Dynamic Links is the top alternative to Firebase Dynamic Links. A new powerful sharing system that makes it easy to share product pages, categories, or blogs with deep links. This system is fully integrated into FluxBuilder app builder for better reliability, customization, and branding.
You gain full control to edit, analyze, and manage all links and clicks in real-time, ensuring better branding and reliable tracking across iOS and Android.
Step-by-step video tutorial:
Step 1: Enable FluxBuilder Dynamic Links
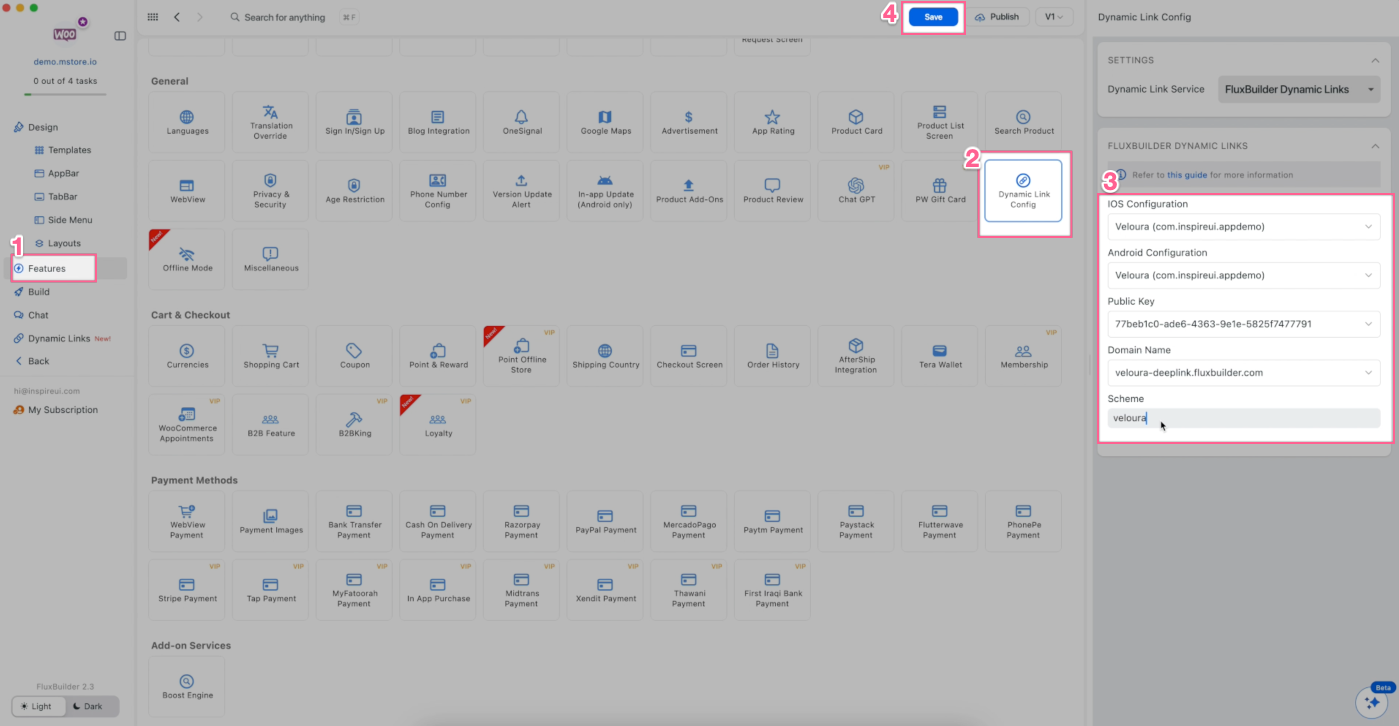
Steps: Open your app > go to Features > General > Dynamic Link Config. On the Dynamic Link Service dropdownlist, select FluxBuilder Dynamic Links:

When configuring FluxBuilder Dynamic Links in your app, some fields are required. Please refer to the following instructions (see Set Up FluxBuilder Dynamic Links for full details):
- iOS and Android Configuration – Select from the iOS Configuration and Android Configuration you’ve already added (explained in the next guide).
- Public Keys – Choose the corresponding key from API Keys.
- Domain Name – Use the subdomain provided when starting your new project.
- Scheme – Enter a unique name to define the FluxBuilder Dynamic Links scheme for this app.
Step 2: Set Up FluxBuilder Dynamic Links
The guide to set up your FluxBuilder Dynamic Links:
Start New Project
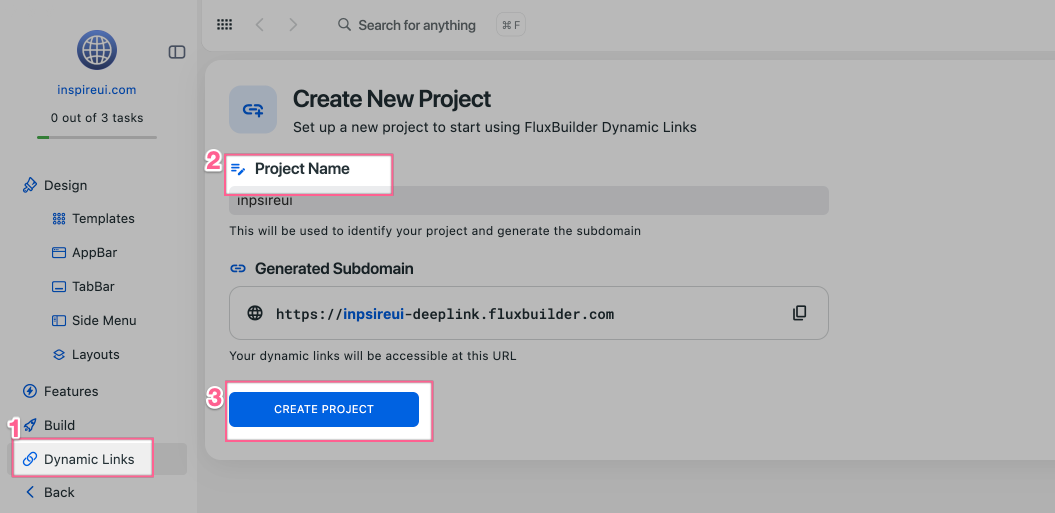
- Open your app on FluxBuilder.
- Select Dynamic Links on the left menu.
- Update the Project Name to make change for the Generated Subdomain.
- Click the CREATE PROJECT button to start your new project.
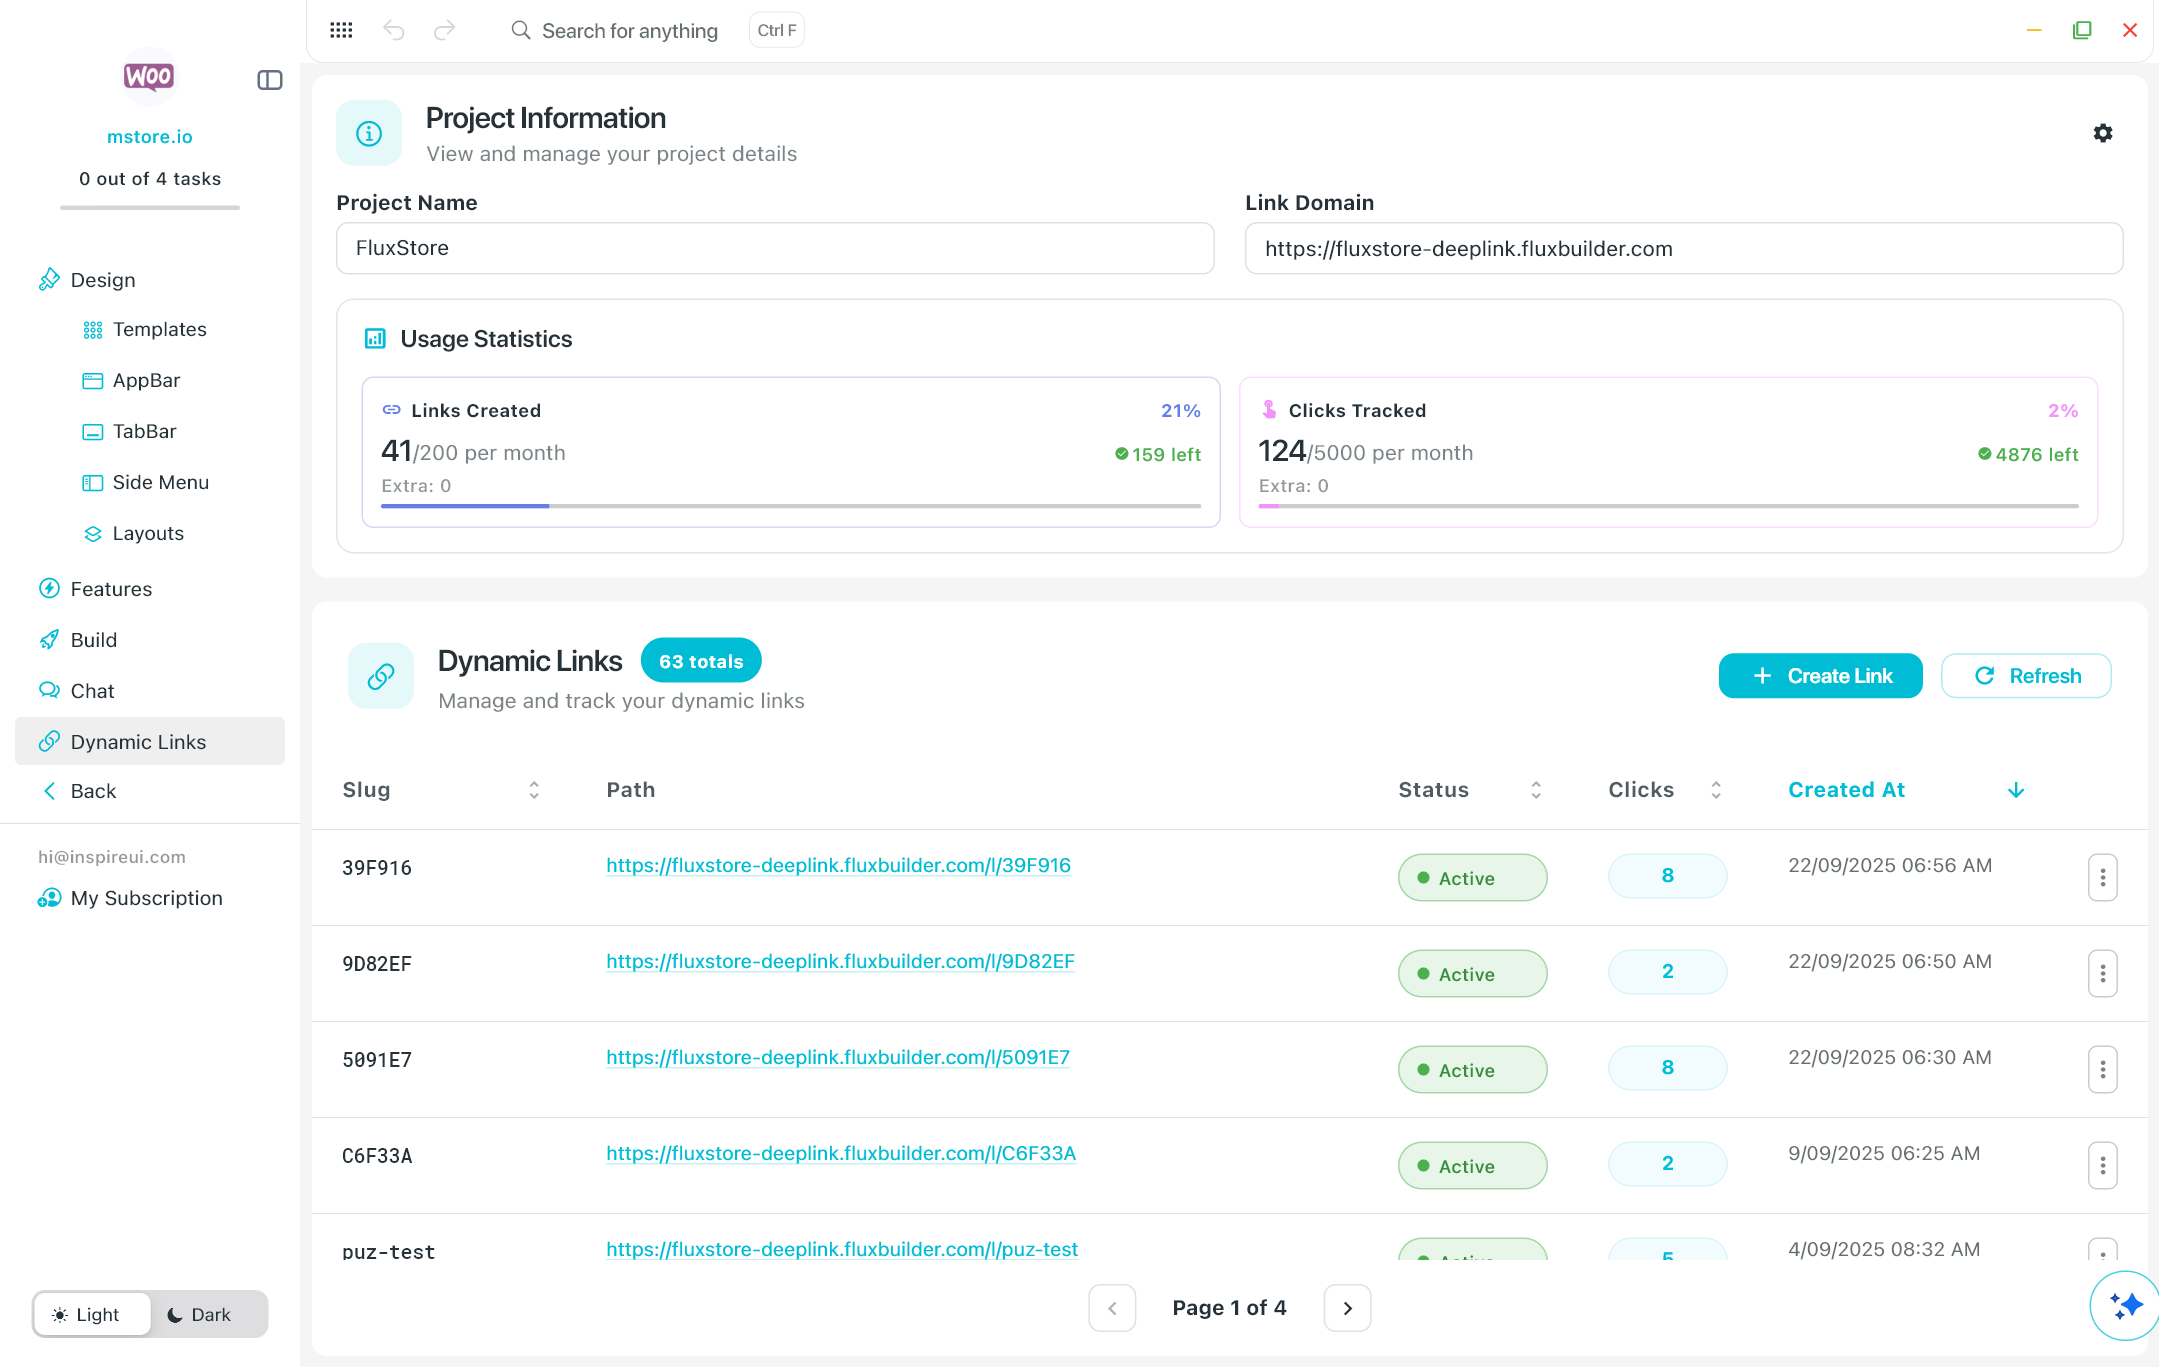
After creating project successfully, you will be navigated to the FluxBuilder Dynamic Links dashboard. Here, you can:
- Create links directly in FluxBuilder.
- Edit, analyze, copy, and delete links easily.
- Create API Keys.
- Update iOS and Android Settings.
- Track created links and clicks in real time.
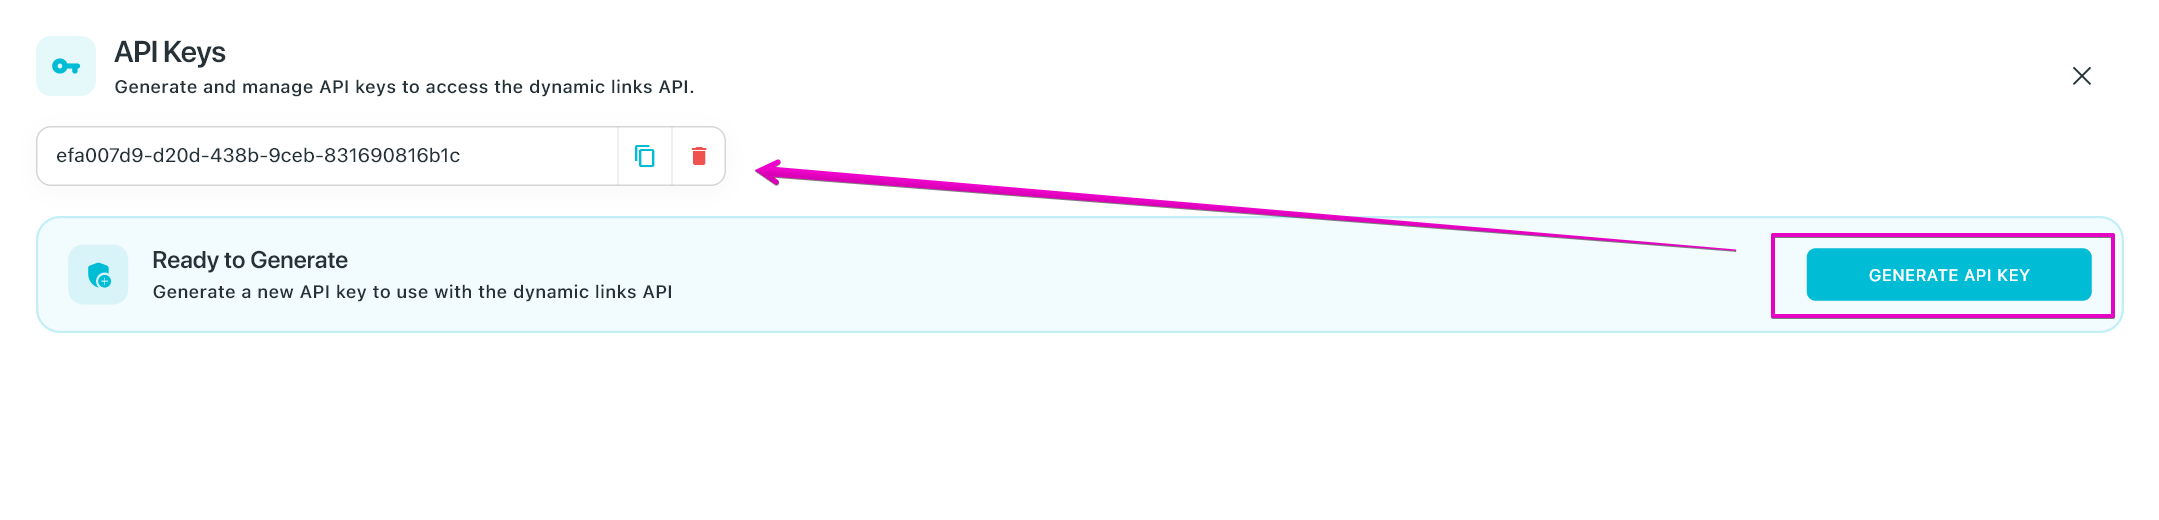
💠 Add API Keys
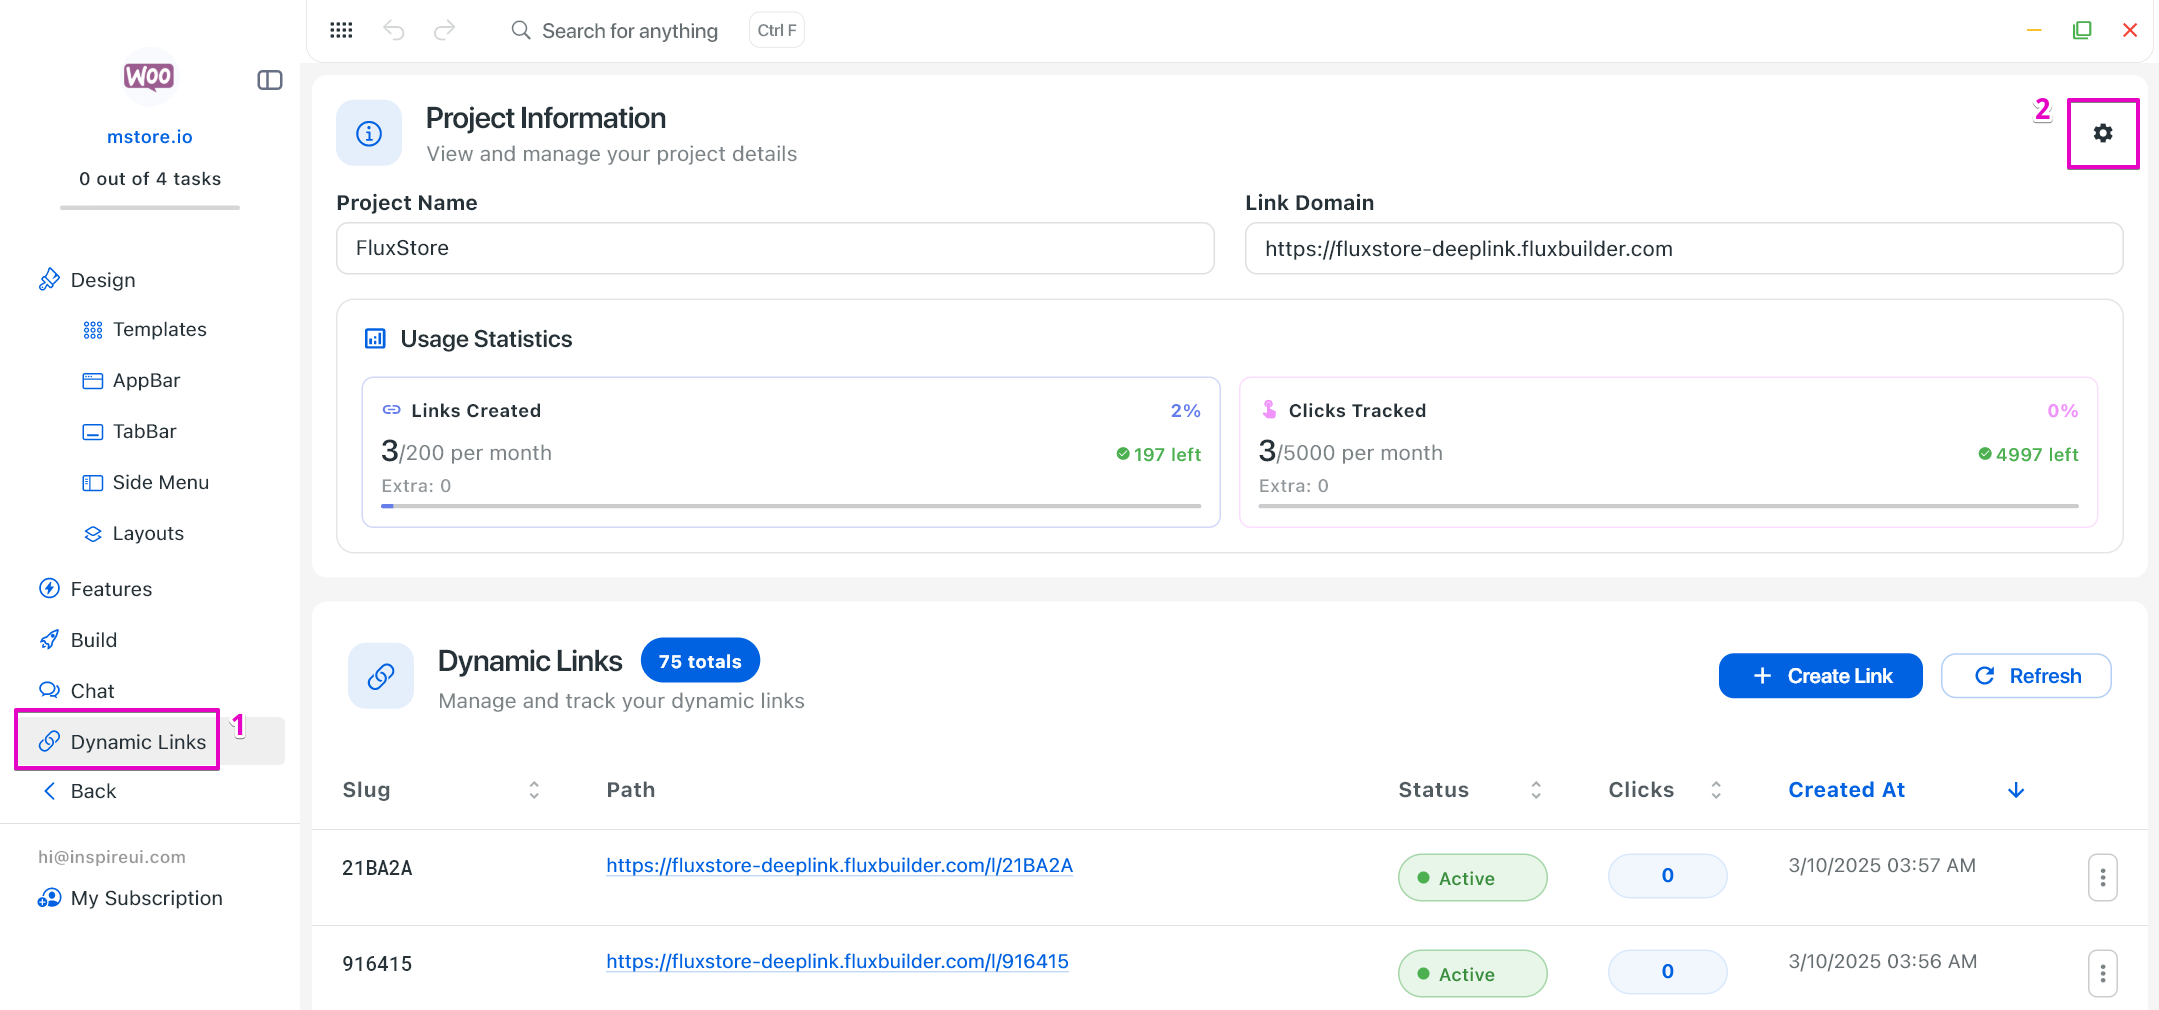
- Open your app on FluxBuilder.
- Open Dynamic Links.
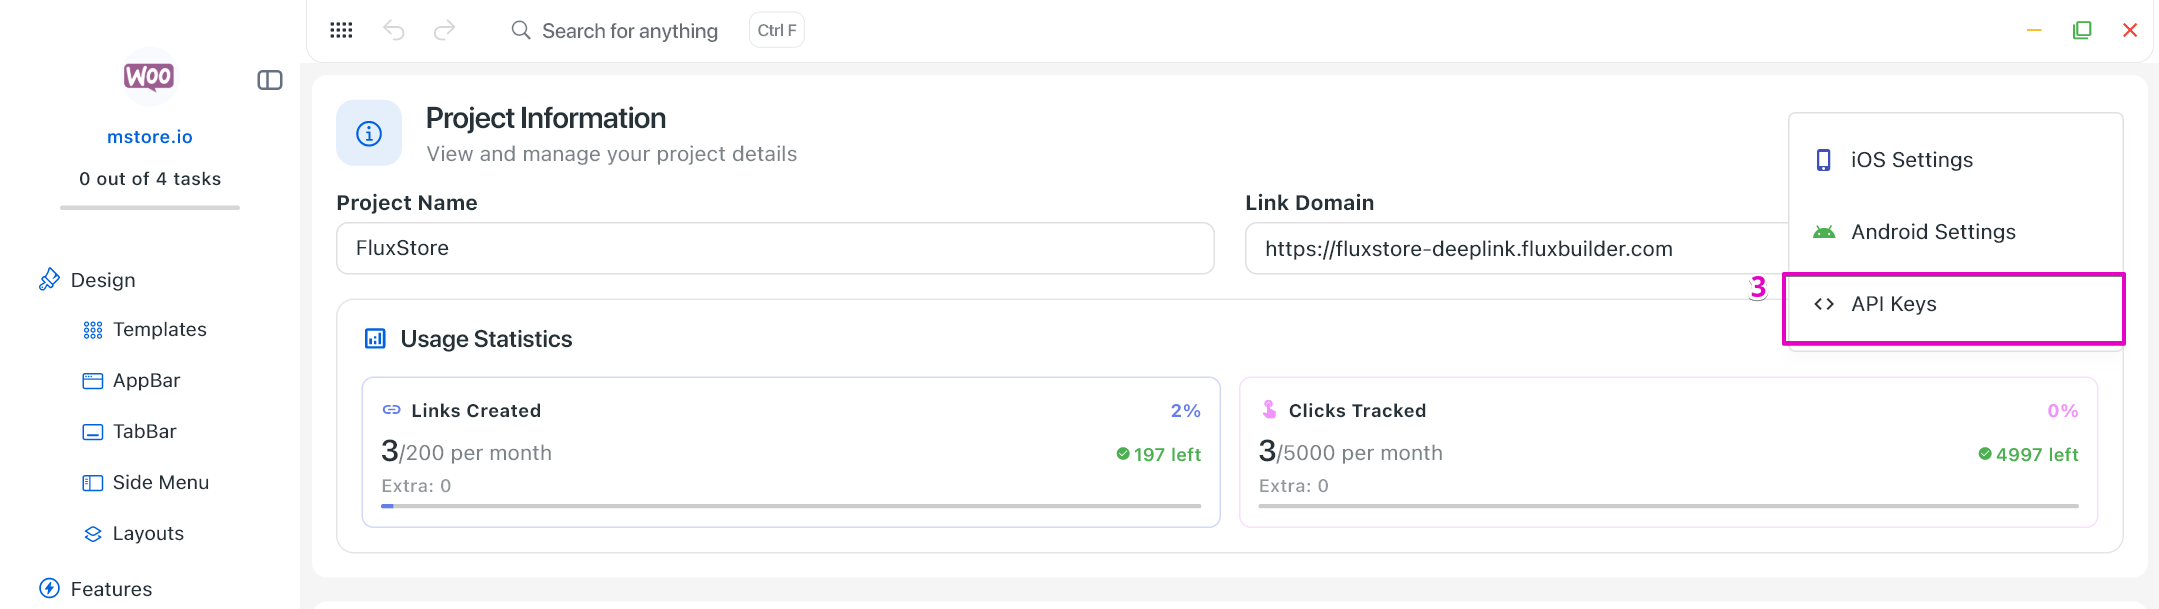
- Click on the Settings icon, select API Keys.
- Click the button GENERATE API KEY.
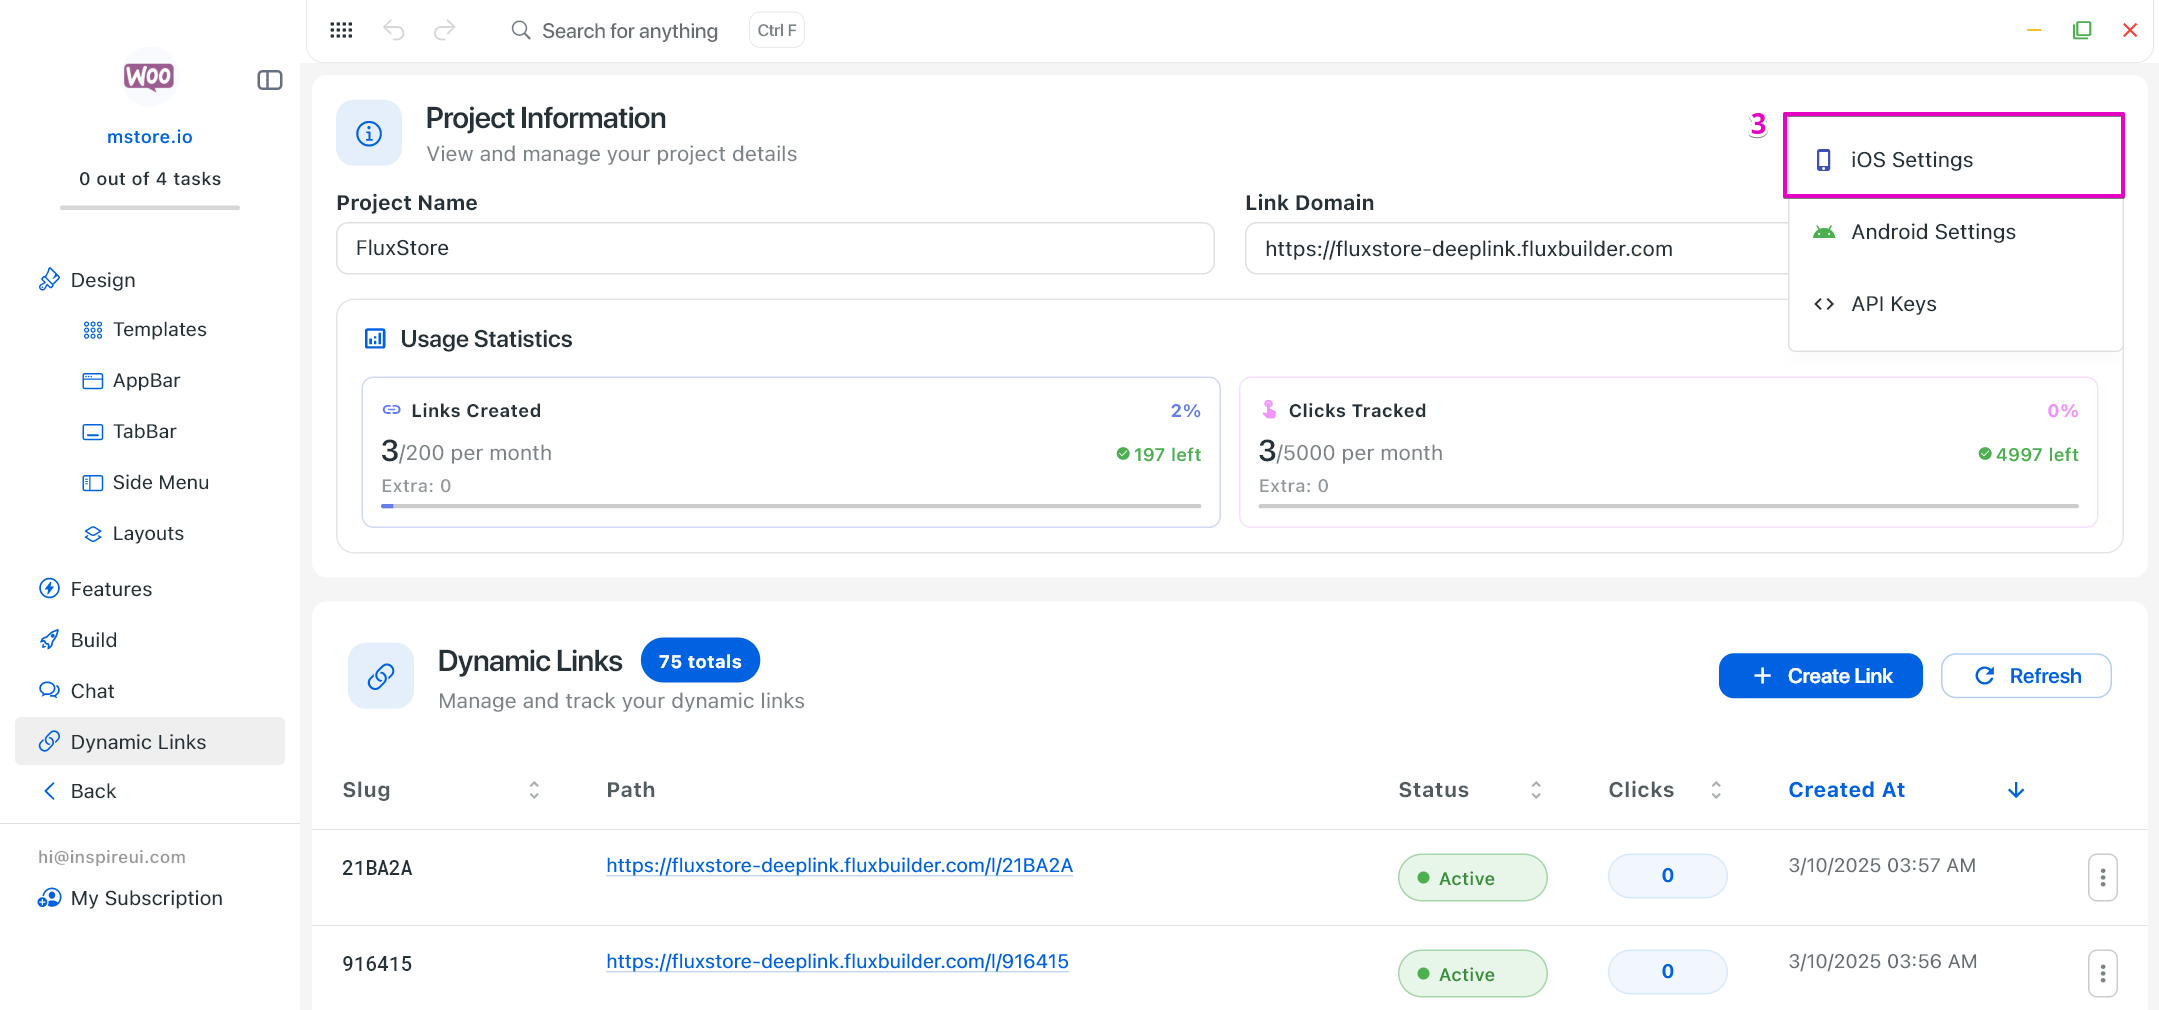
💠 iOS configuration
- Open your app on FluxBuilder.
- Open Dynamic Links.
- Click on the Settings icon, select iOS Settings.
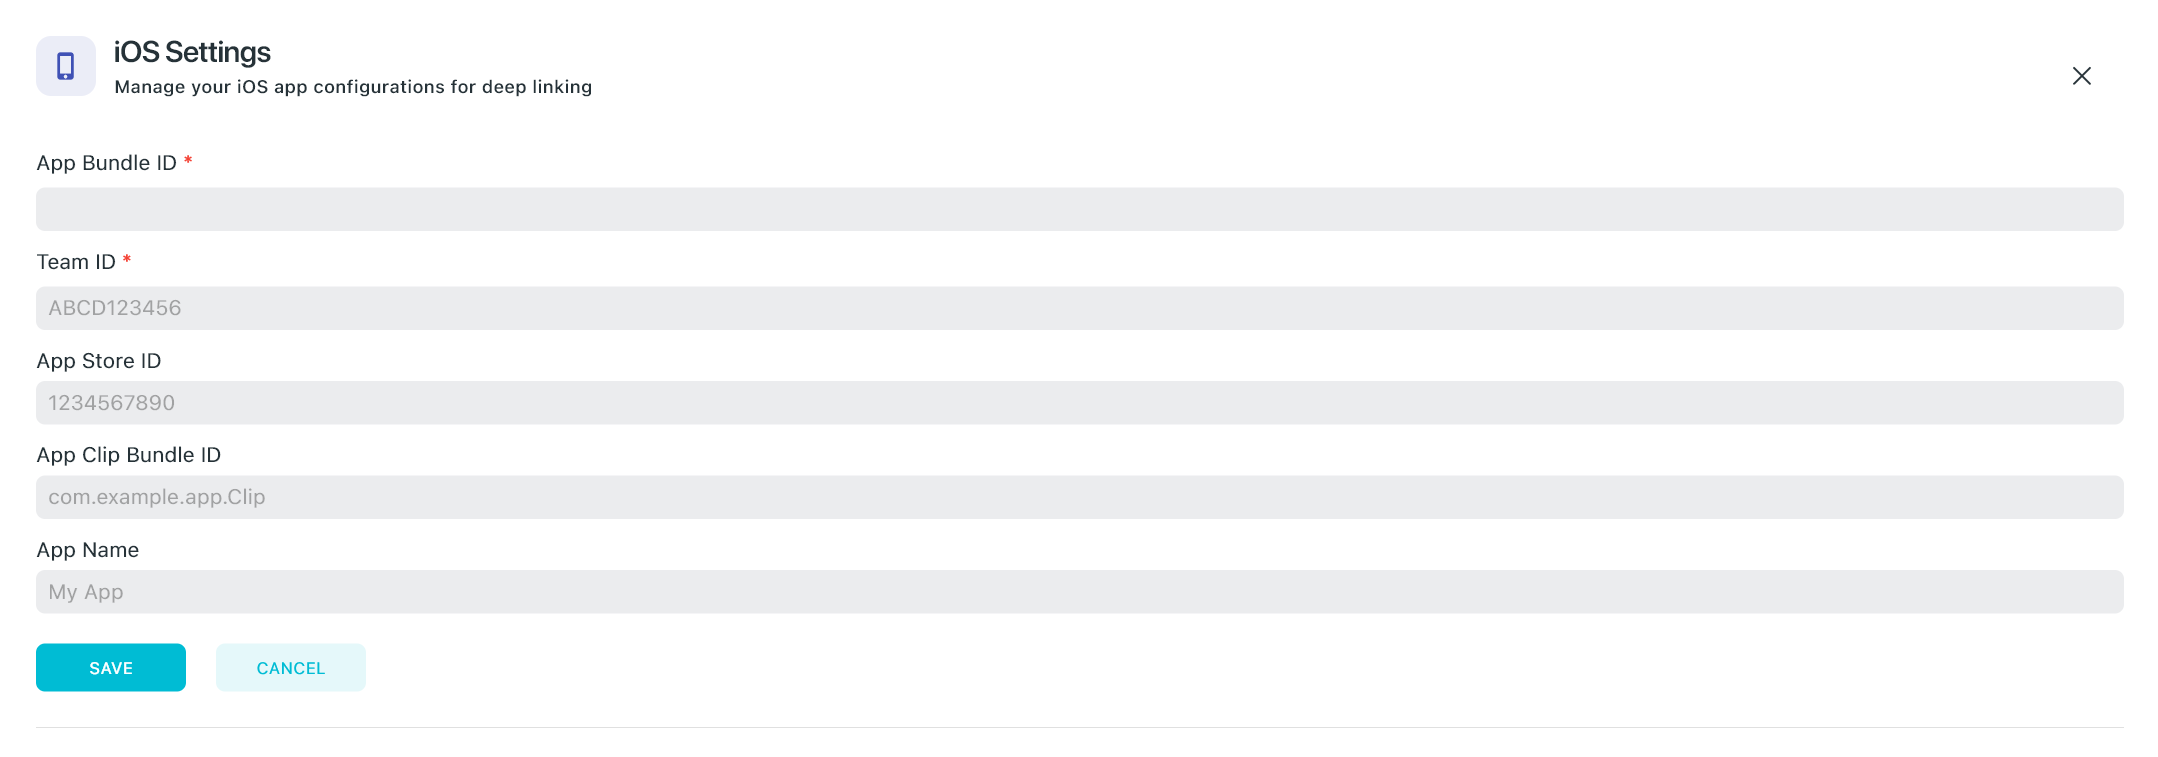
- Click the button ADD IOS CONFIGURATION.
- Input all required fields and click the button SAVE.

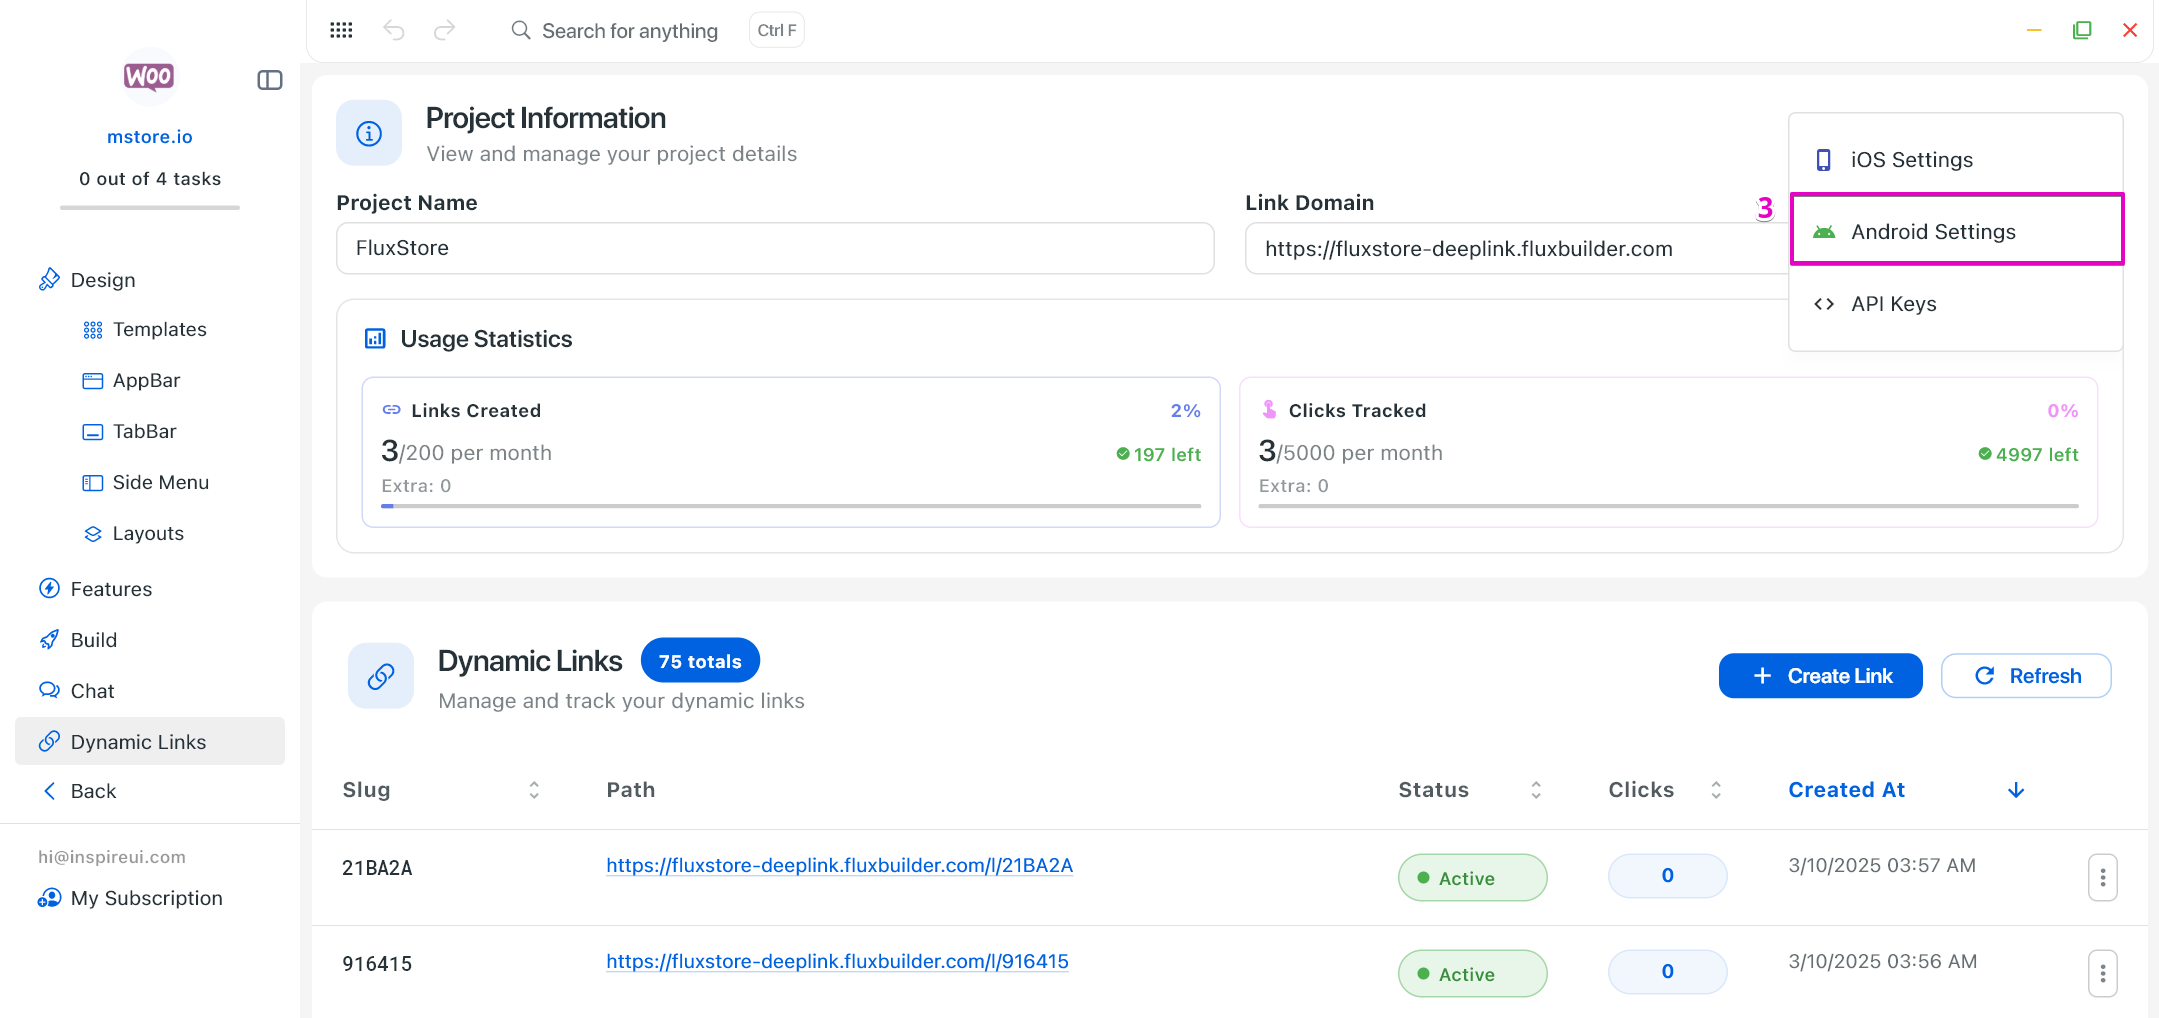
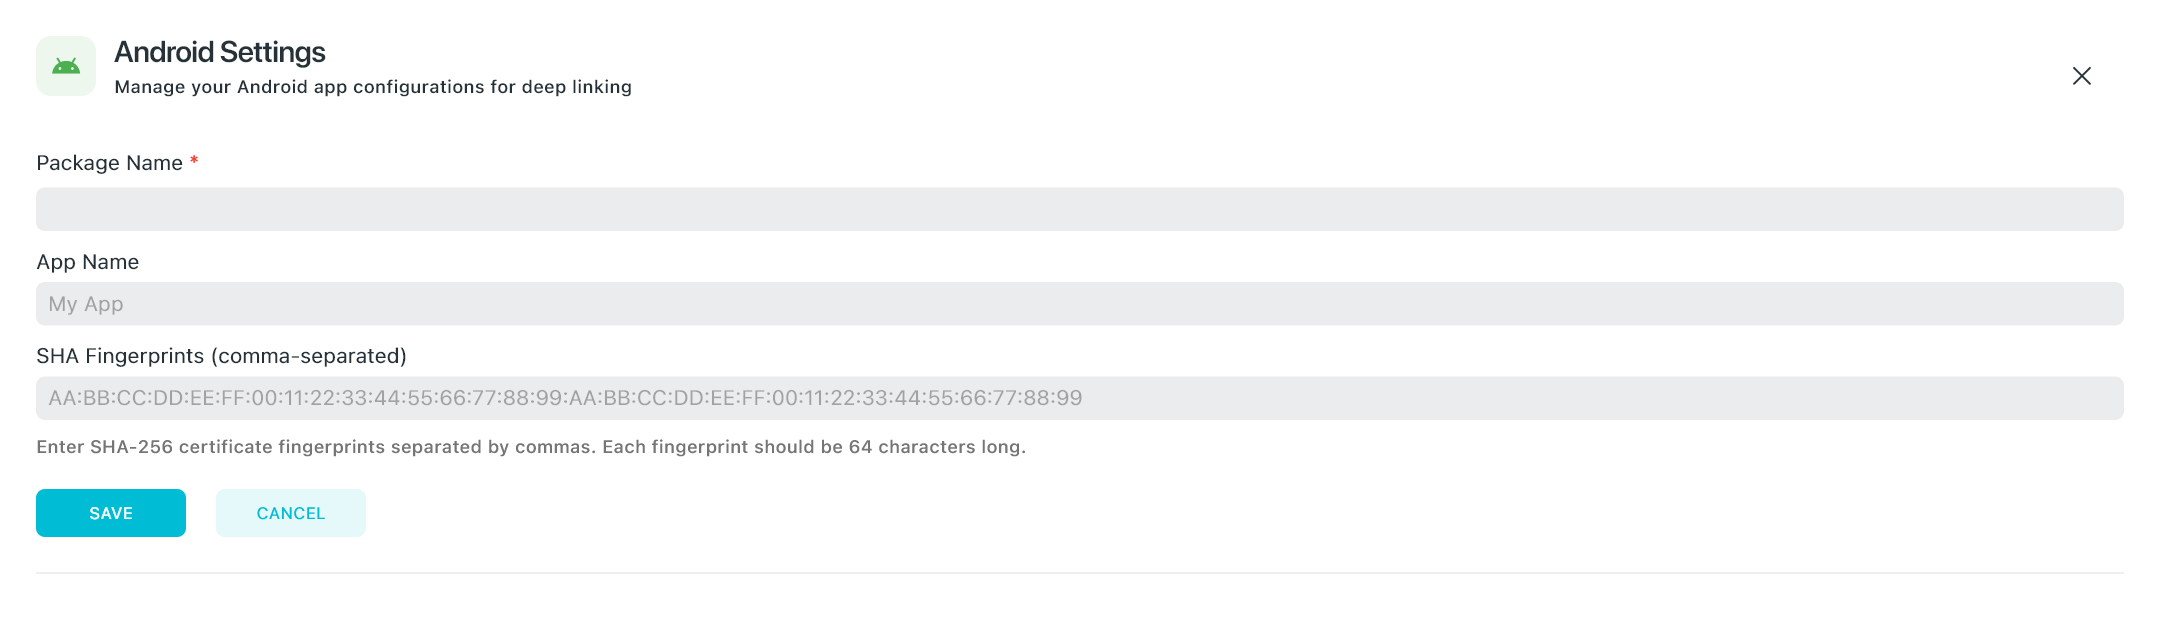
💠 Android Configuration
- Open your app on FluxBuilder.
- Open Dynamic Links.
- Click on the Settings icon, select Android Settings.
- Click the button ADD ANDROID CONFIGURATION.
- Input all required fields and click the button SAVE.

💠 Domain
The feature is available for Professional plan only. Each account is allowed to add 5 domains.
FluxBuilder Dynamic Links supports custom domains so you can replace the default FluxBuilder link (e.g.
https://scheme-deeplink.fluxbuilder.com/...)
with your own domain, such as:
https://scheme-deeplink.yourdomain.com/...
Follow the steps below to set up your personalized domain.
Step 1: Add domains on FluxBuilder
Open your app on FluxBuilder.
Open Dynamic Links.

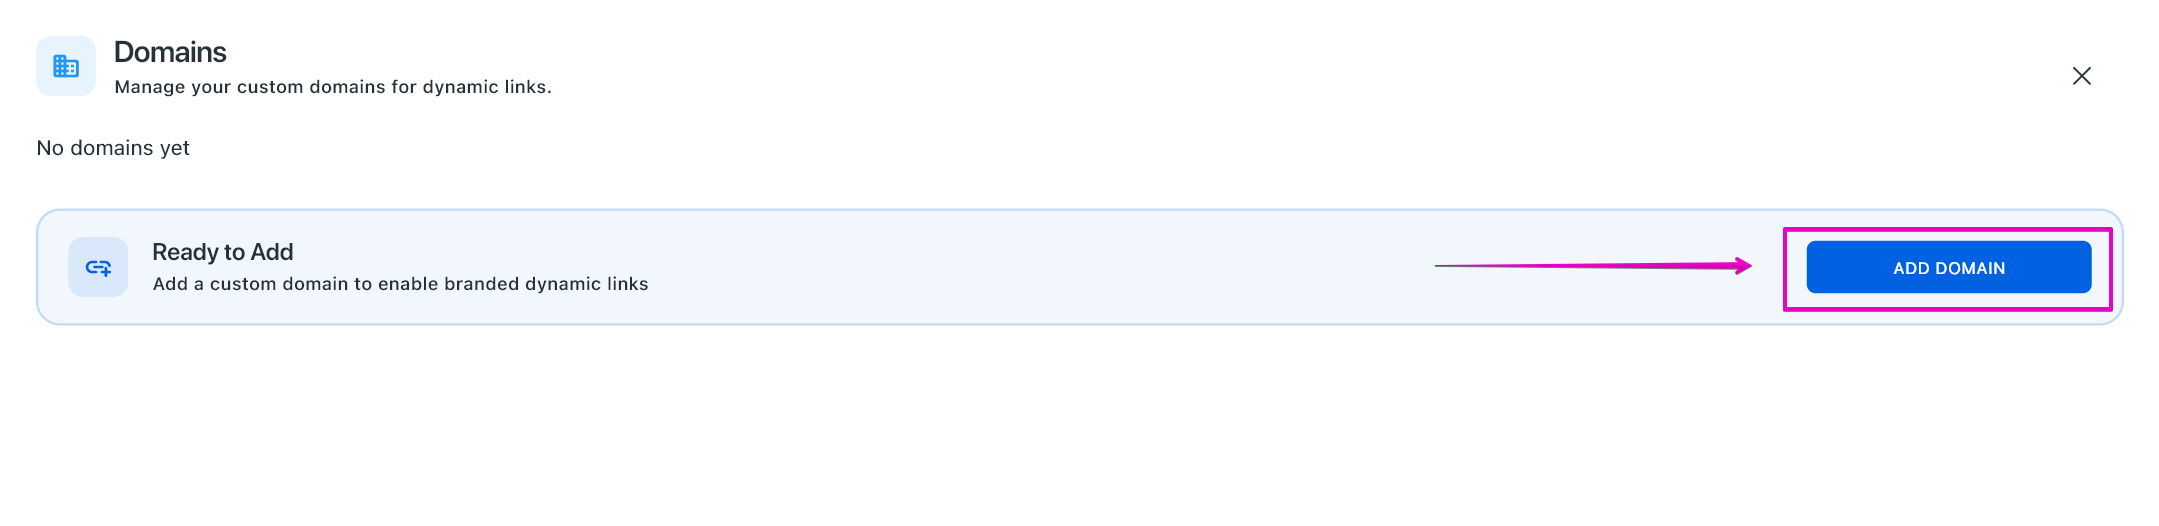
Click on the Settings icon, select Domain.
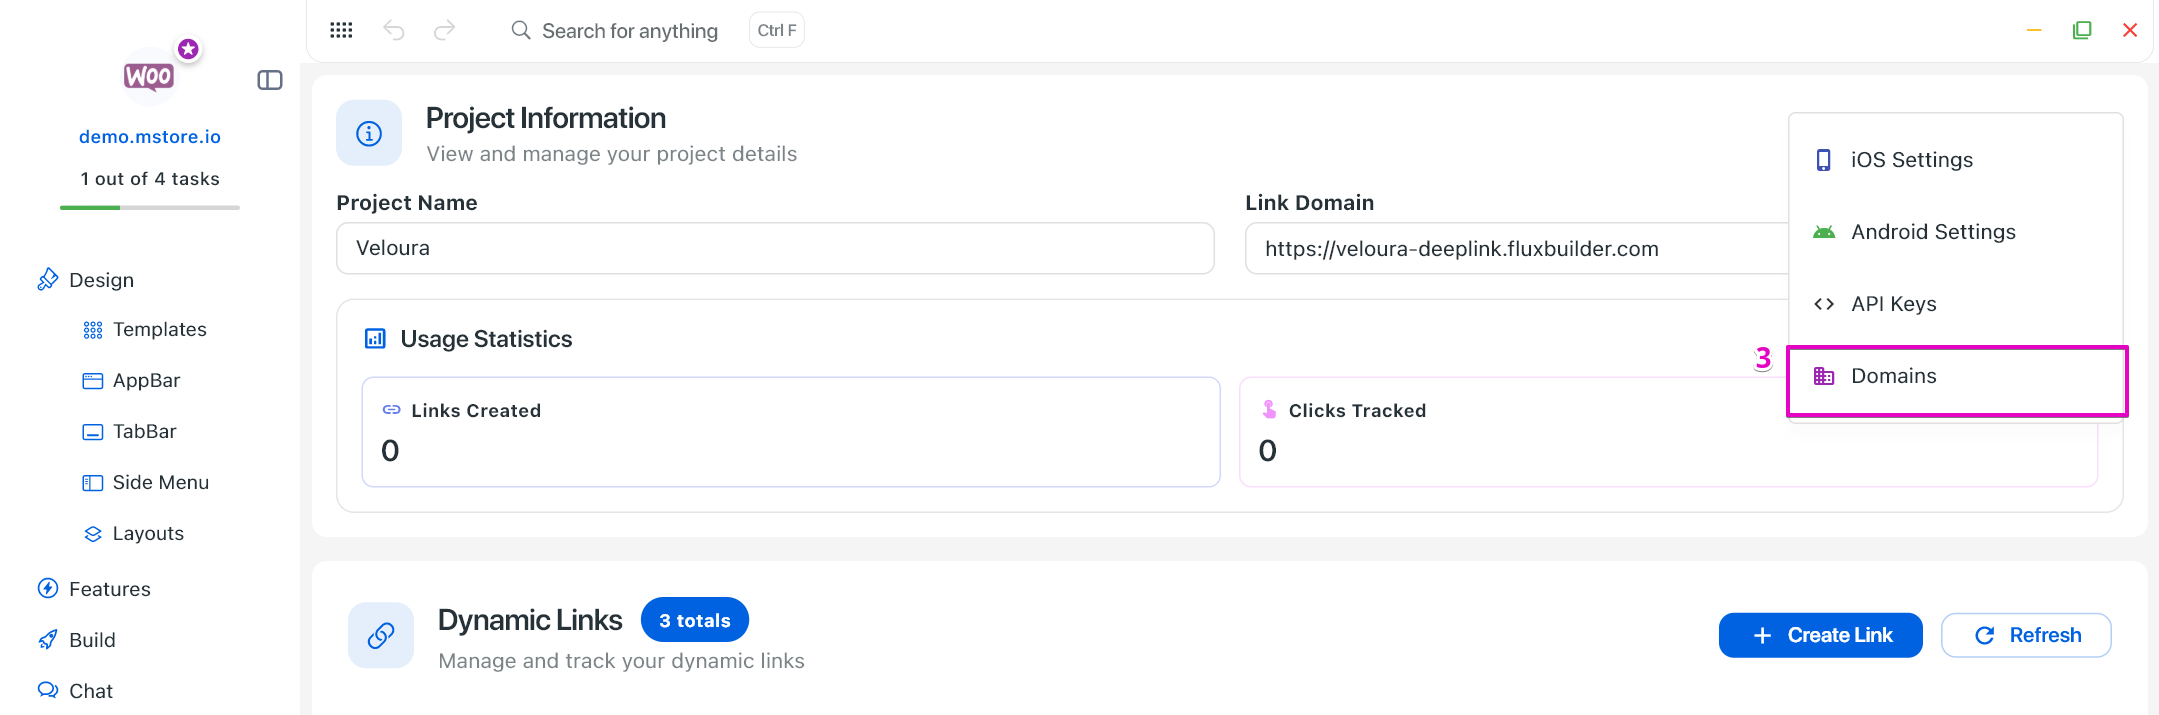
Click the button ADD DOMAIN.
Input the domain without
http://orhttps://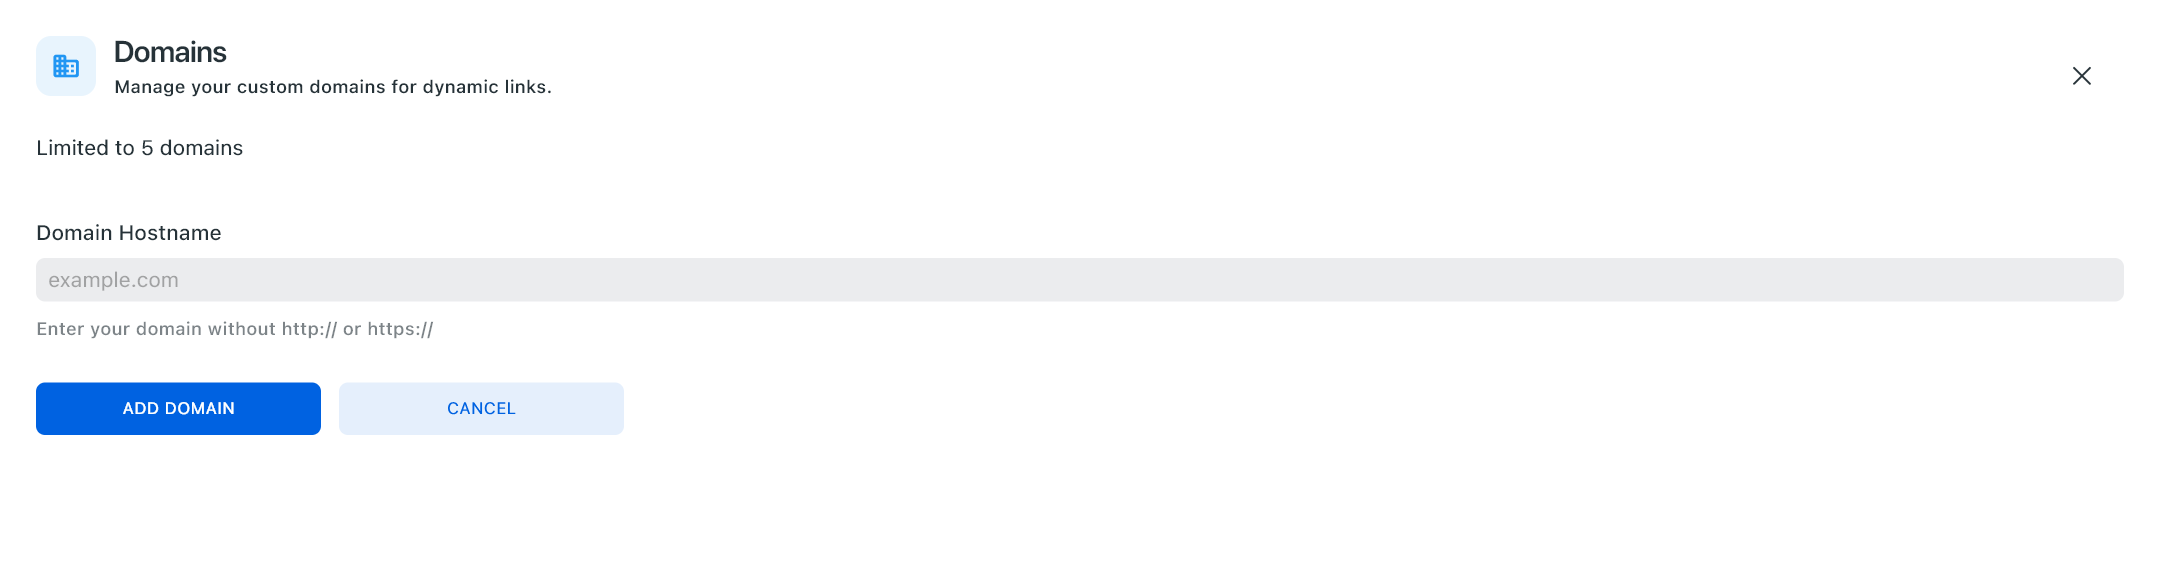
When setting up your project domain, please make sure to enter a fresh, unused domain or subdomain that has not been used before. Some users accidentally input their current live domain — for example, their main site — which leads to conflicts or broken configurations.
Example
If your main domain is:
mstore.io
Then the input domain should be different and unused, such as:
abc.mstore.io
newdomain.com
- Click ADD DOMAIN button to finish.
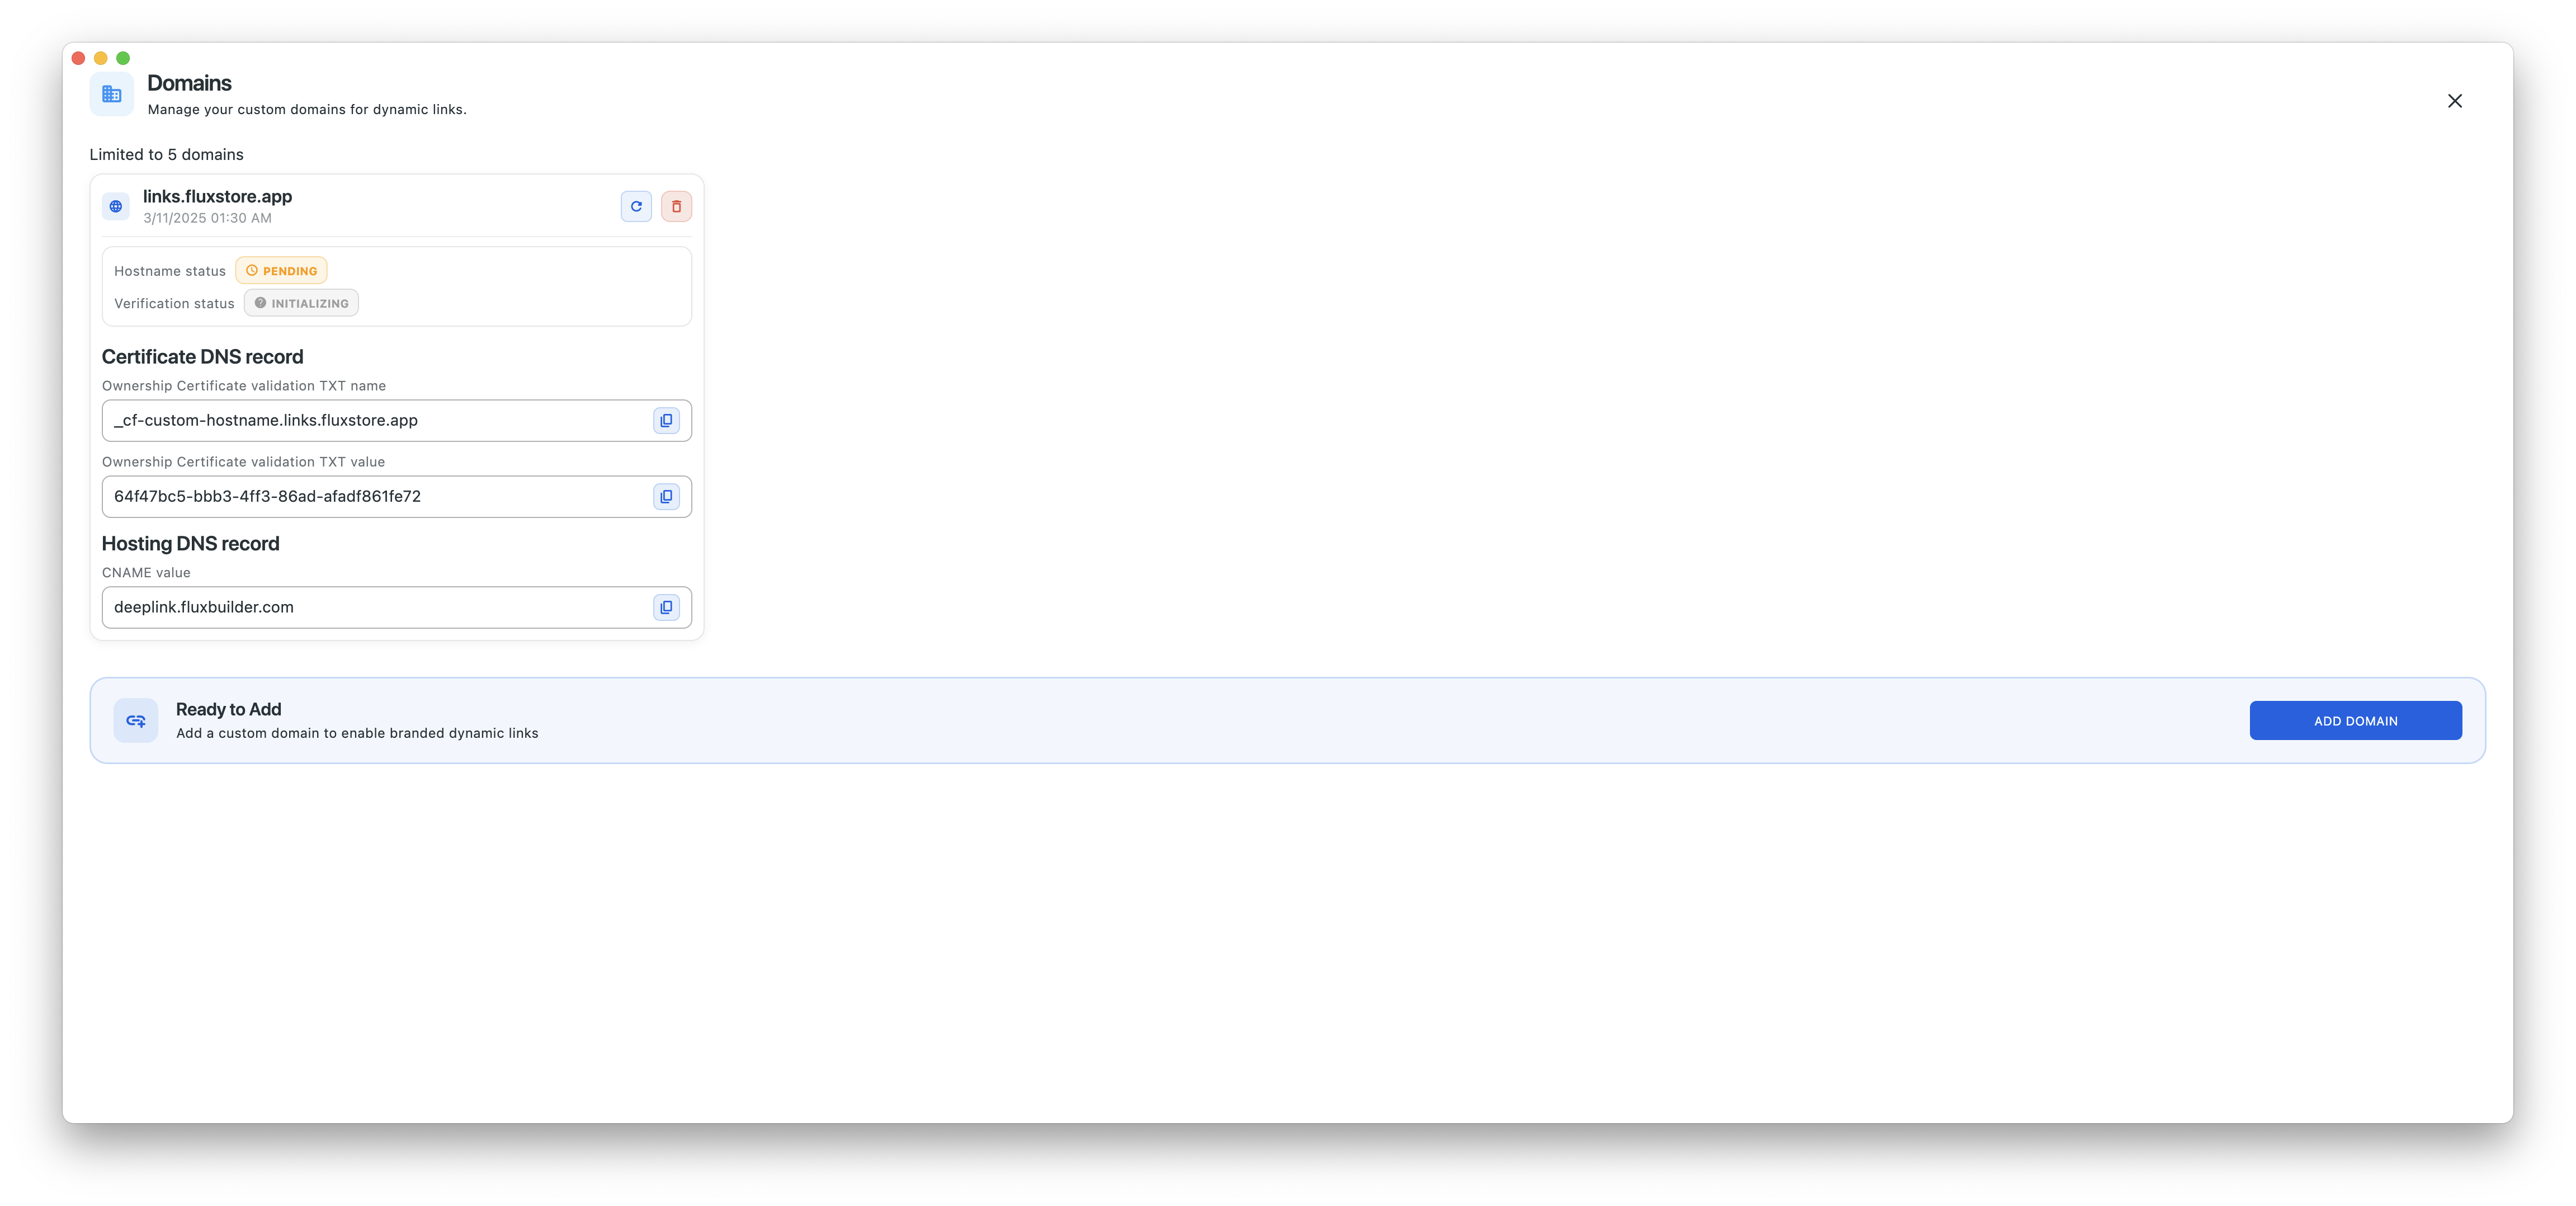
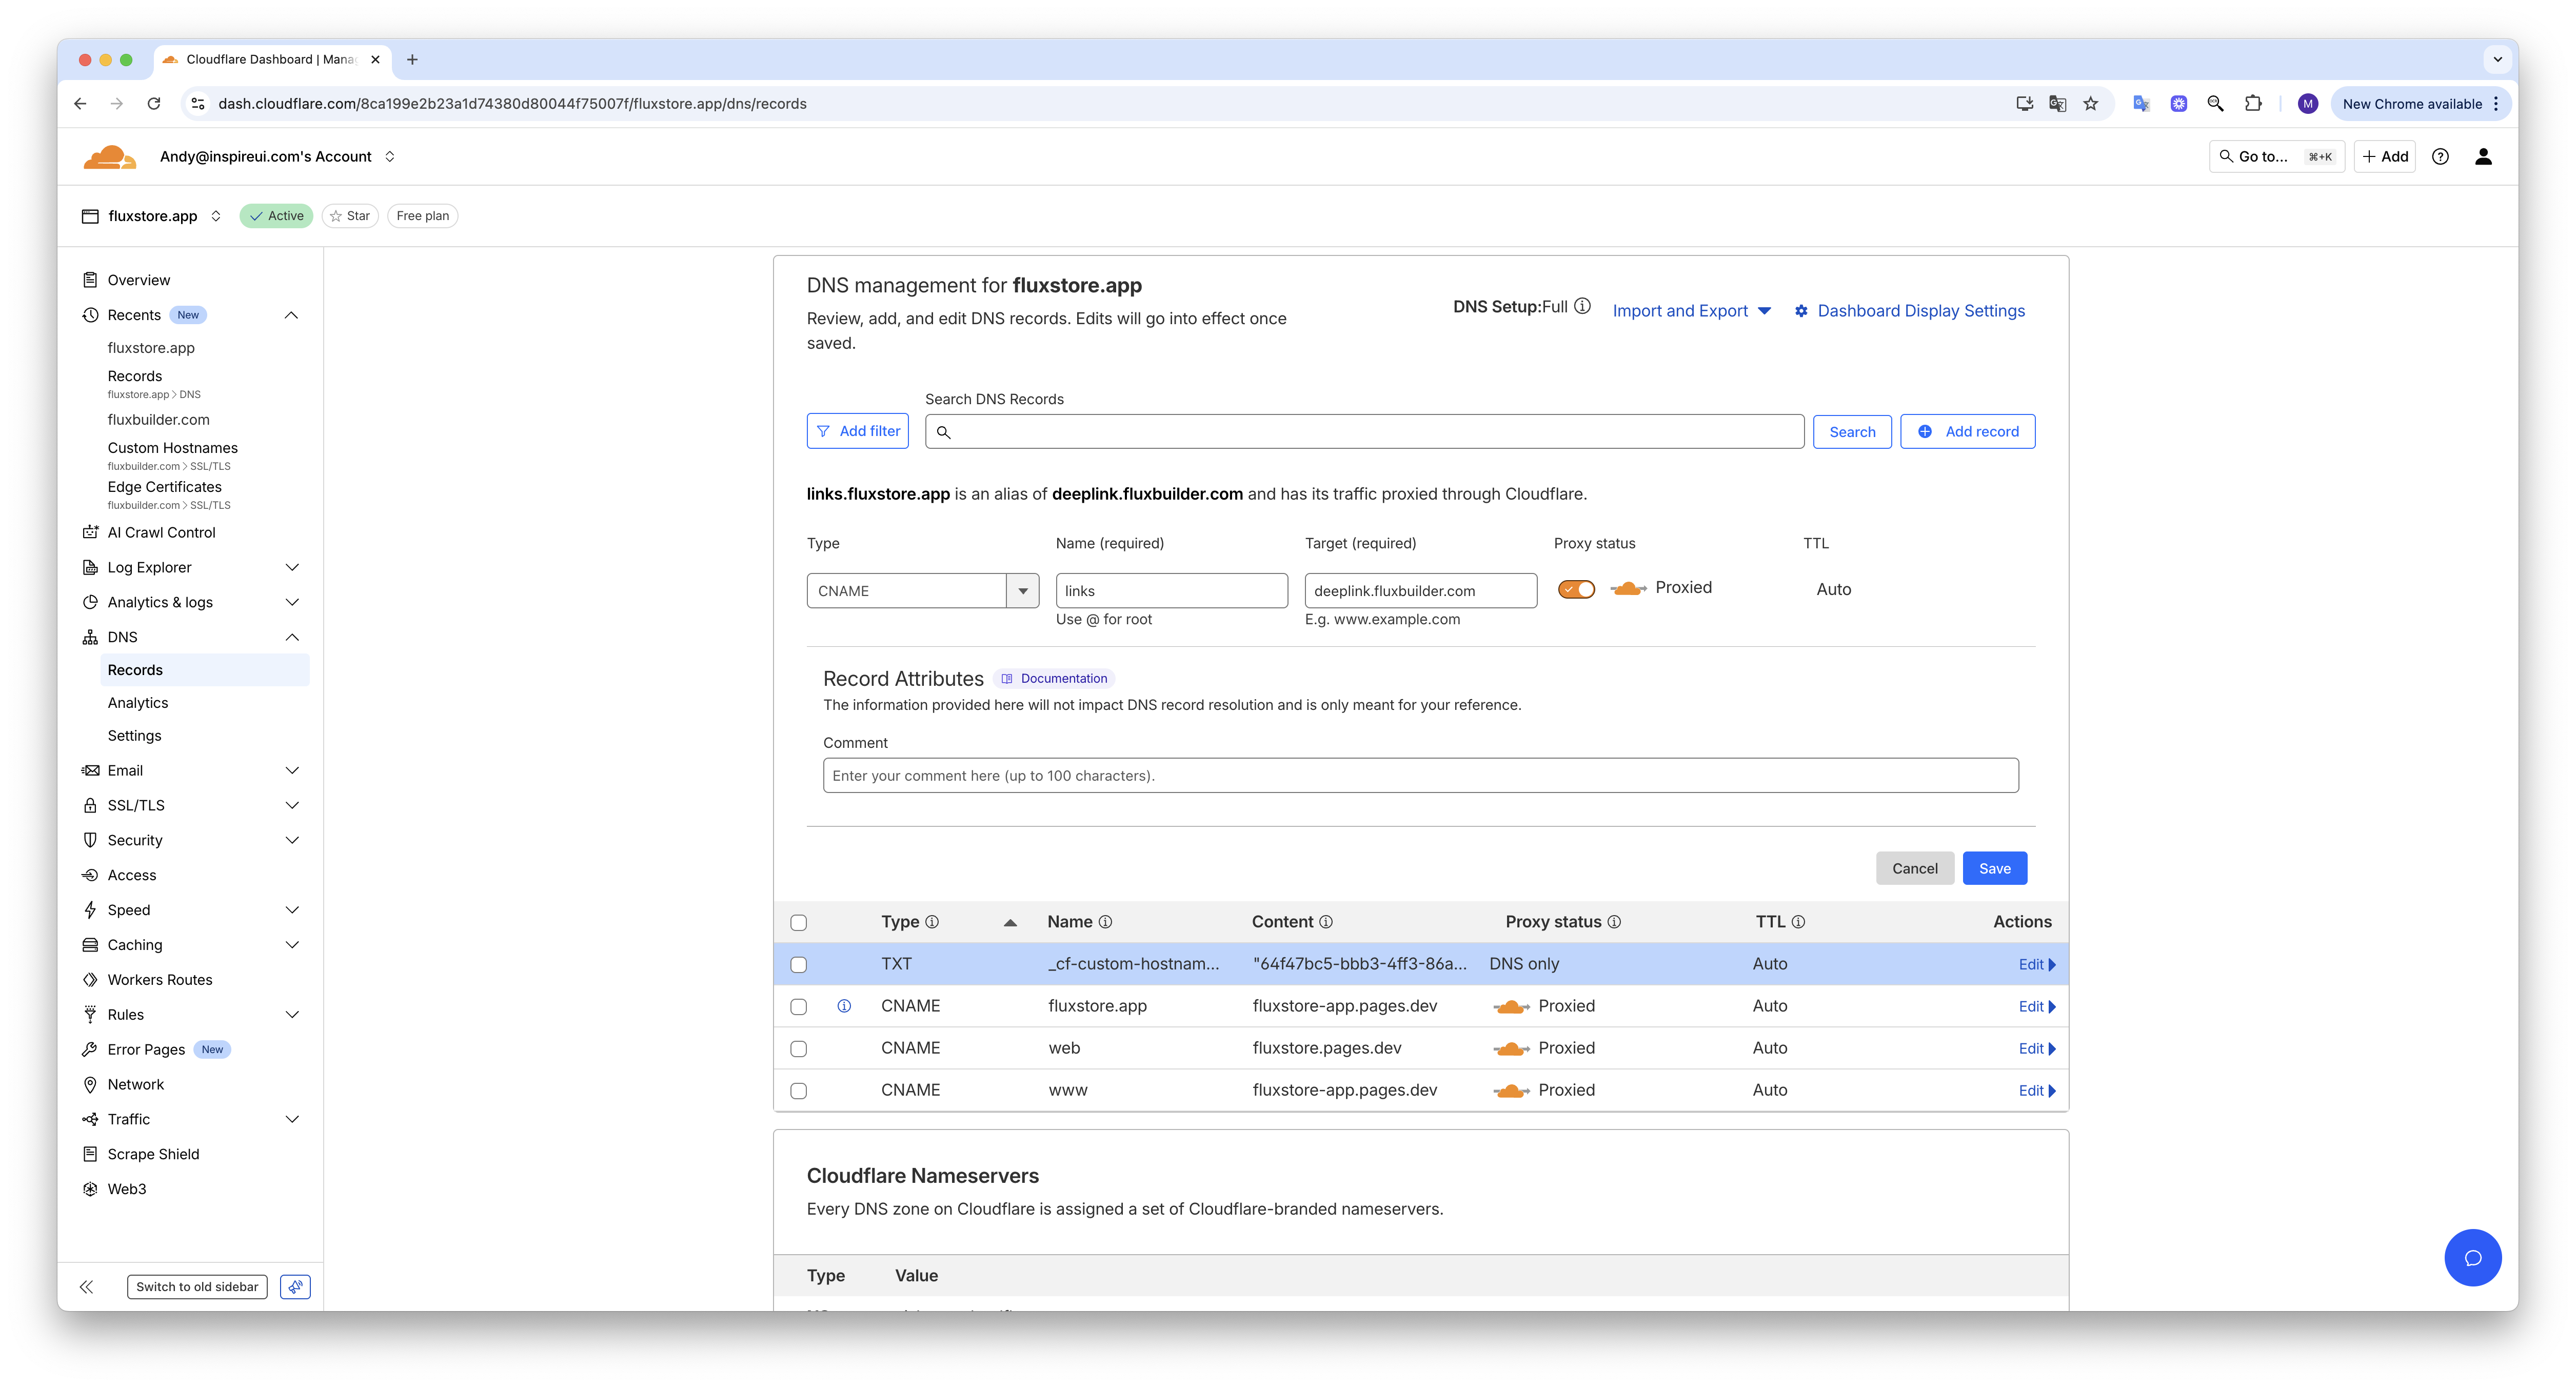
Step 2: Add the certificate DNS record to your hosting domain
Below is an example using Cloudflare as the hosting provider:
Add the ownership certificate DNS record.

Add the hosting DNS record.
After adding the records, back to FluxBuilder and reopen Domain page. If the records do not appear immediately, please wait 2–3 minutes and try again.
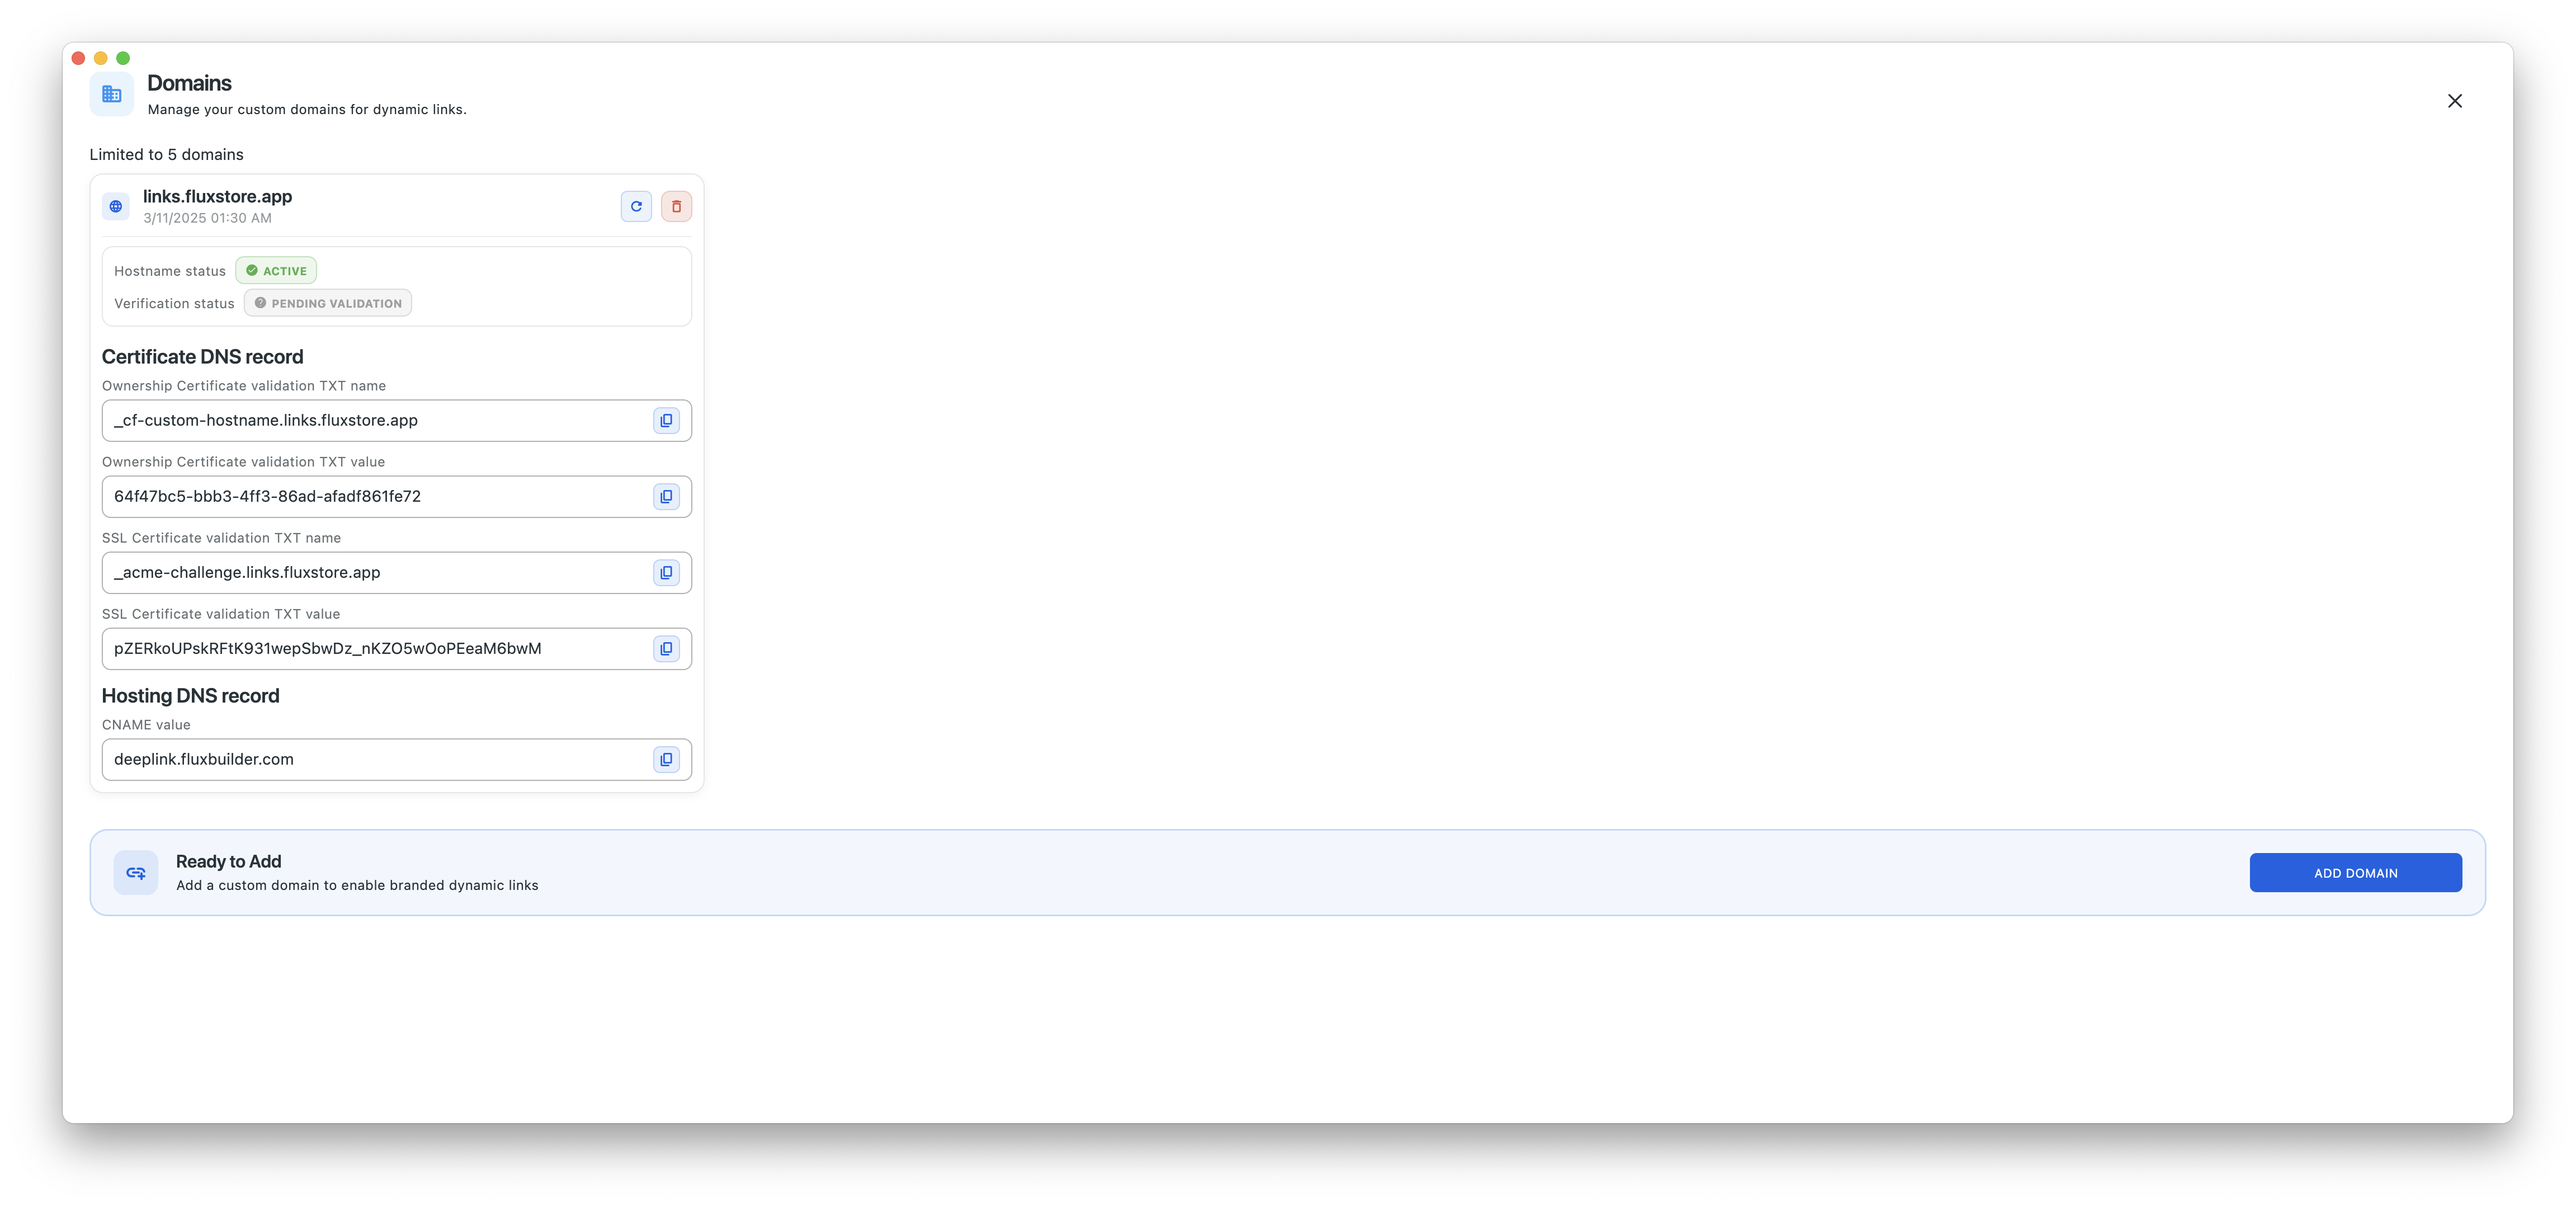
Add the SSL certificate record (if required by your hosting setup).
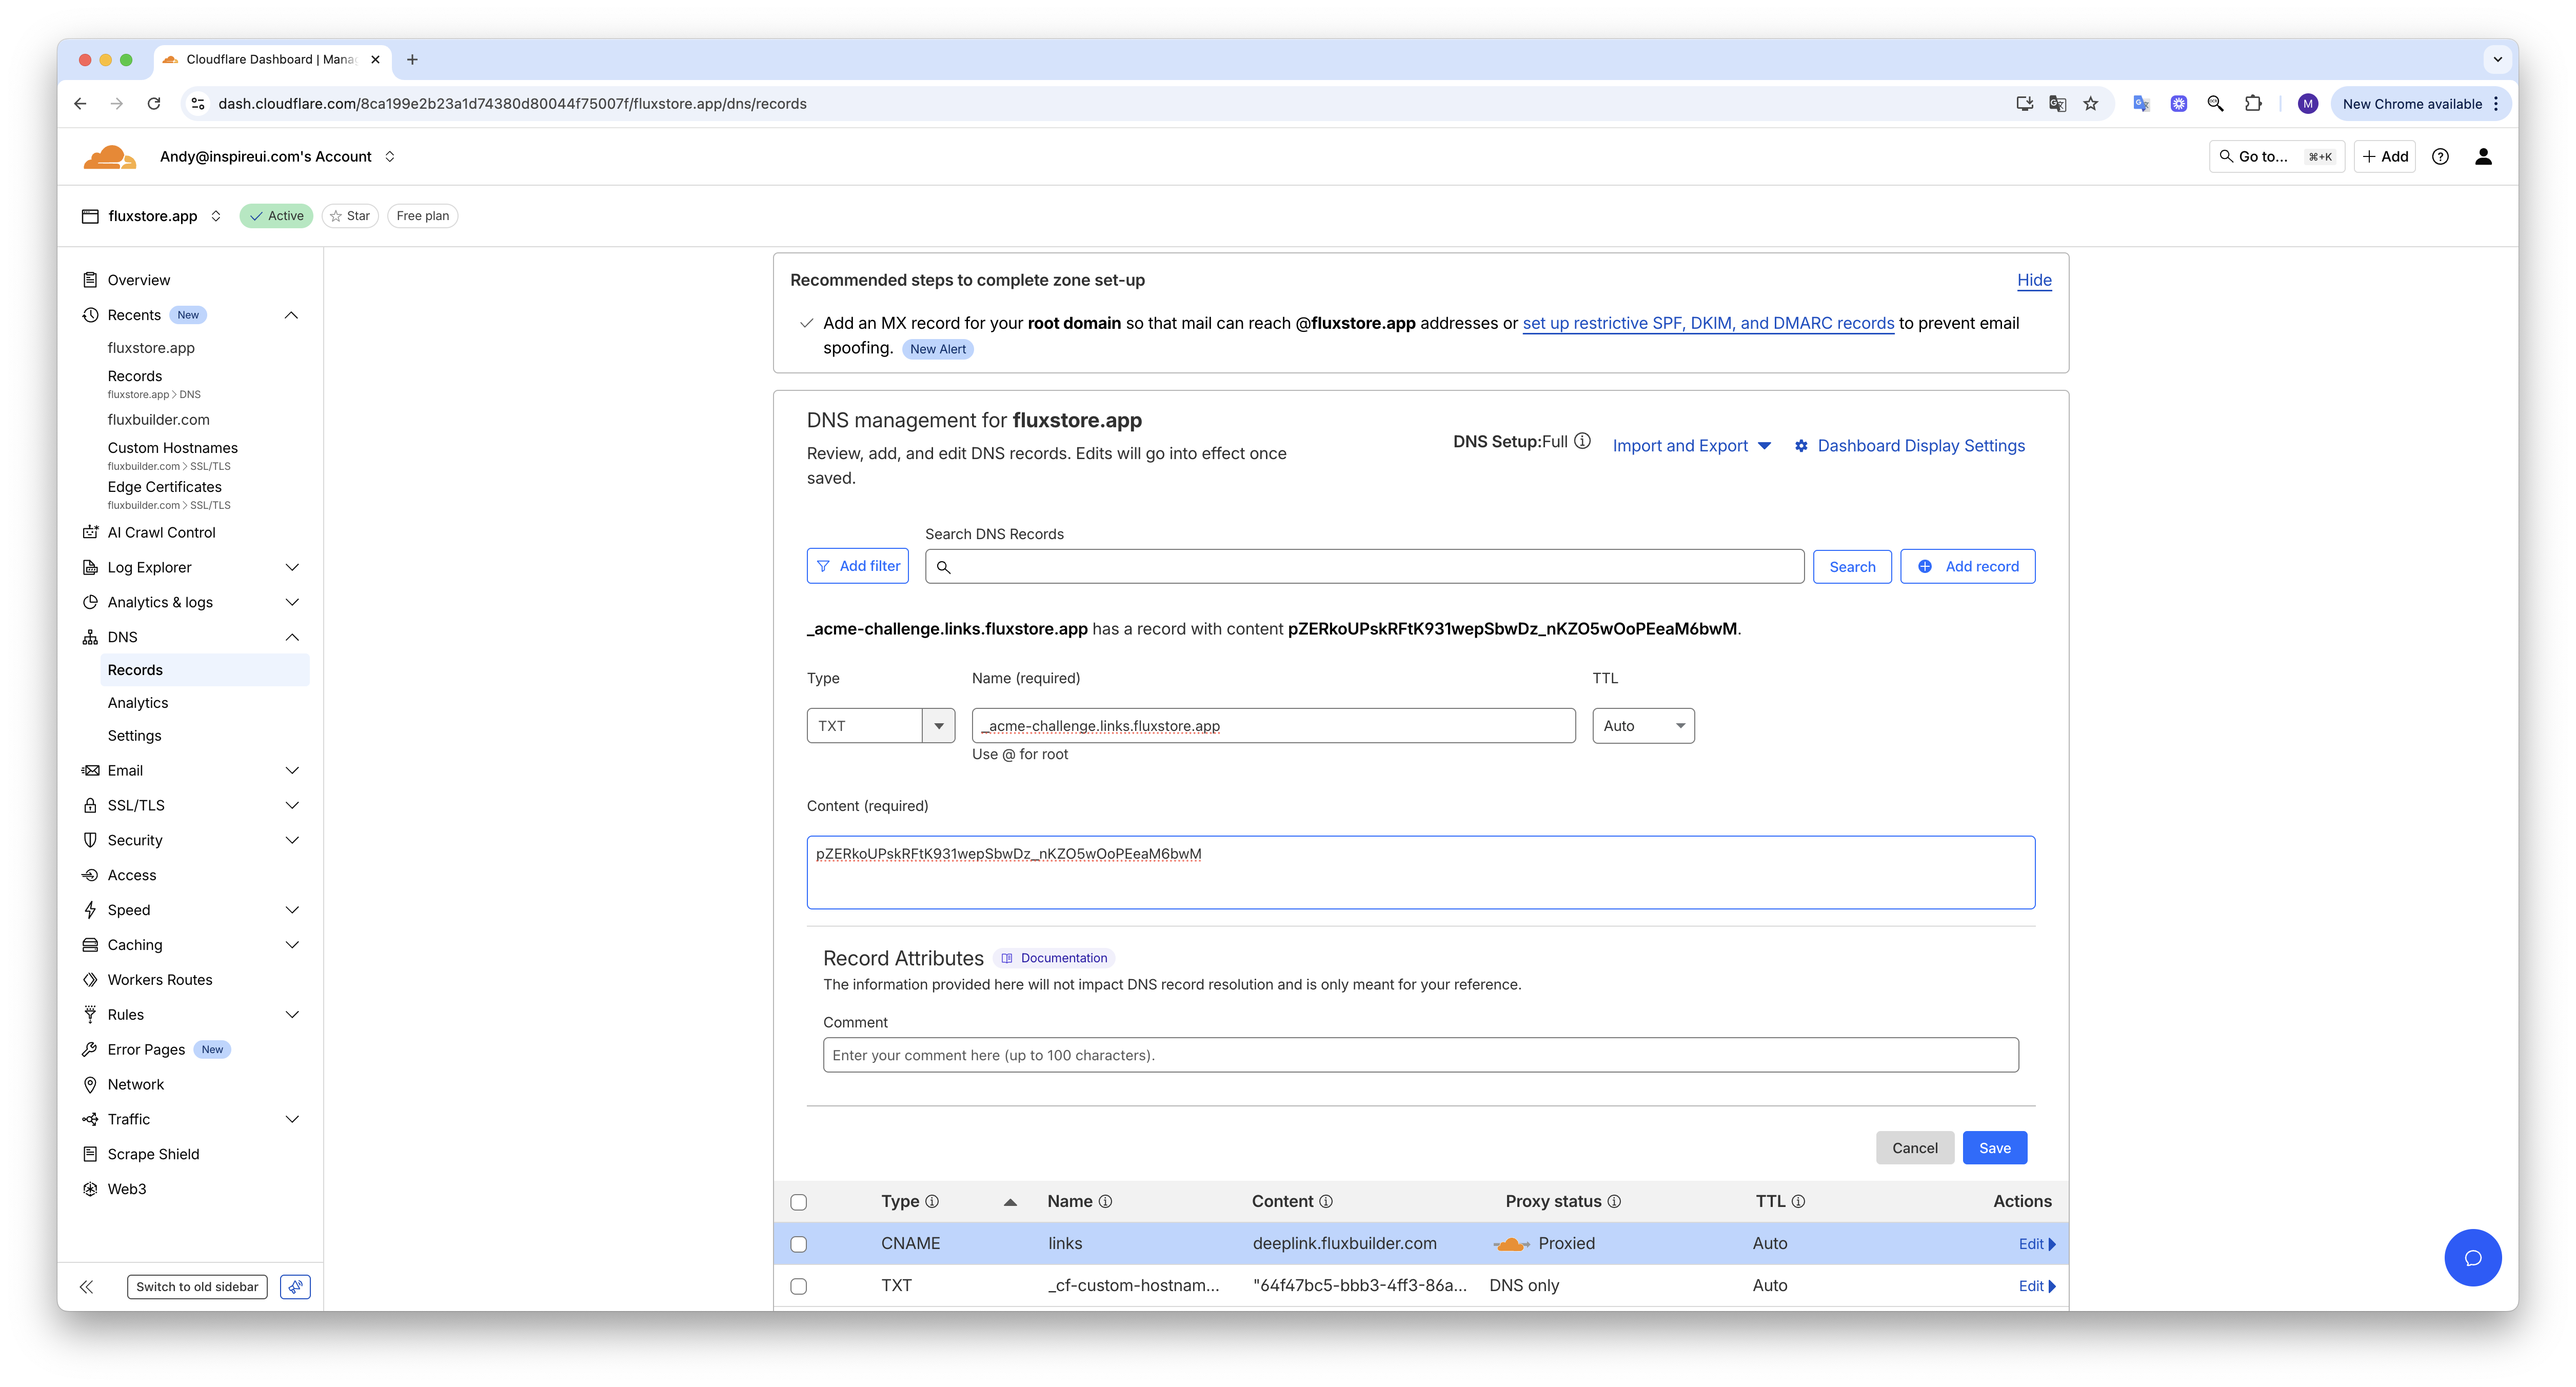
Once the records have been added, please wait a few minutes and continue with FluxBuilder. open the Domain page. If it appears as shown below, the setup has been completed successfully.

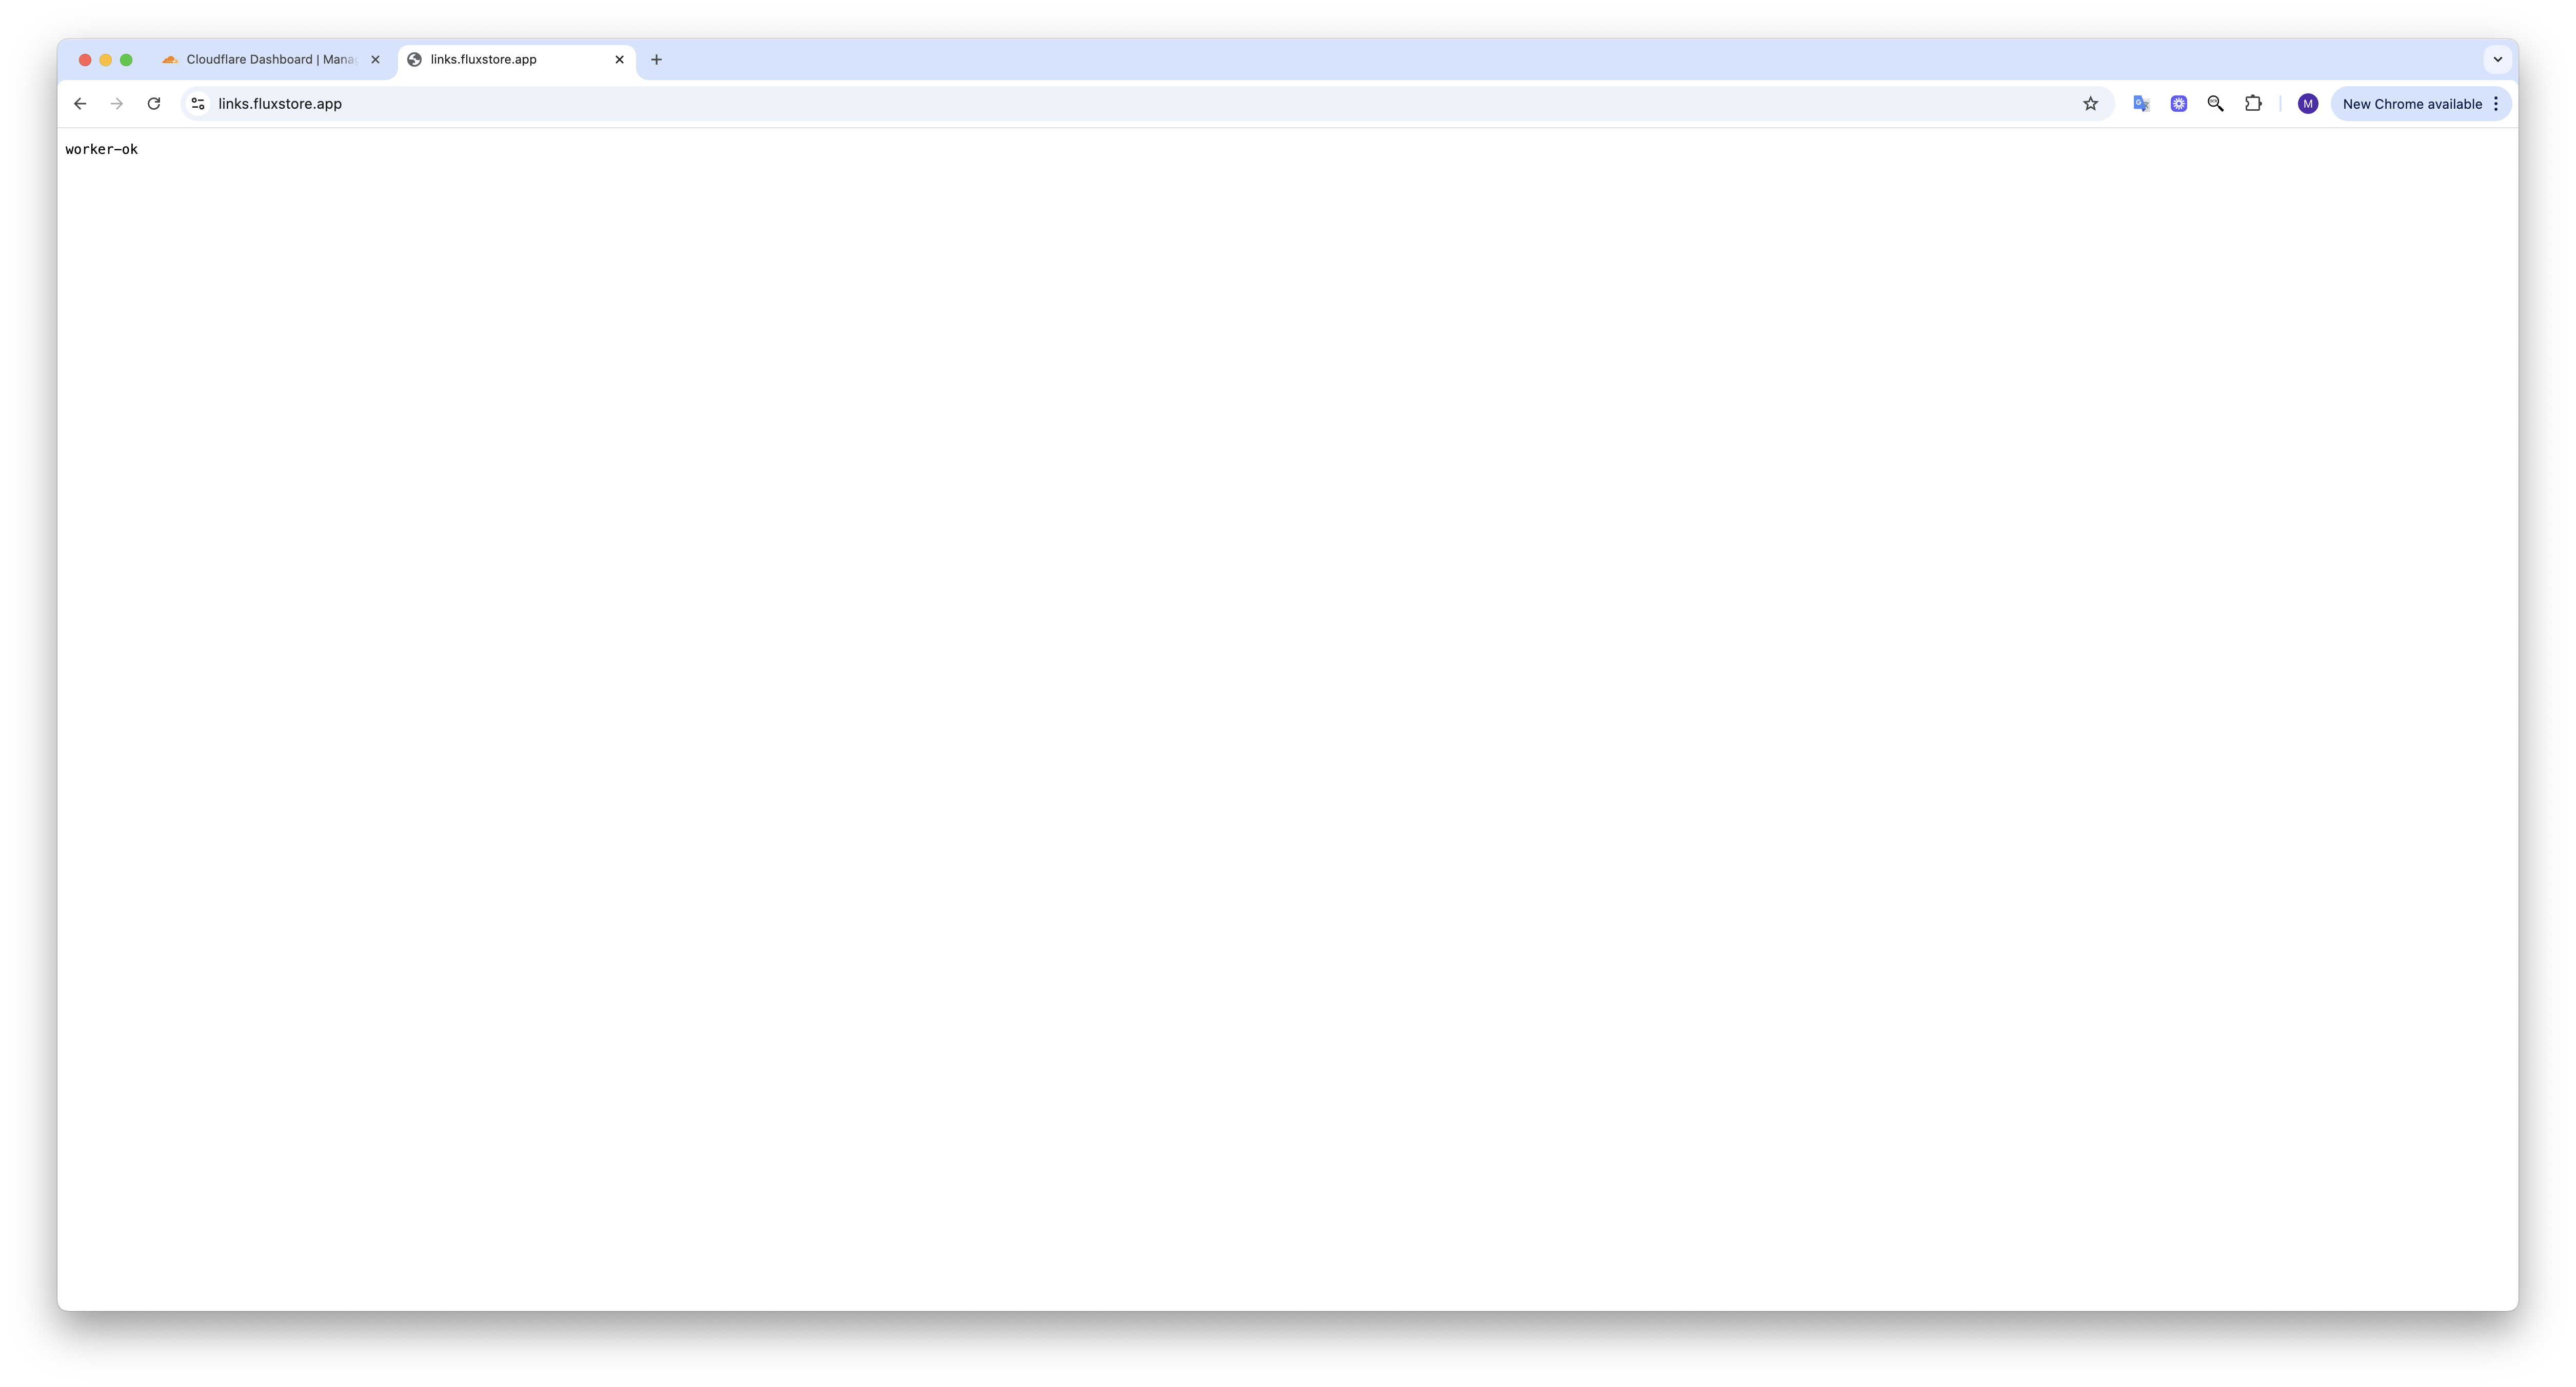
To verify that everything is working, open your domain in the browser. Check if there is the line “worker-ok”.
Create New Links
Open your app in FluxBuilder.
Go to Dynamic Links.
Click Create Link.
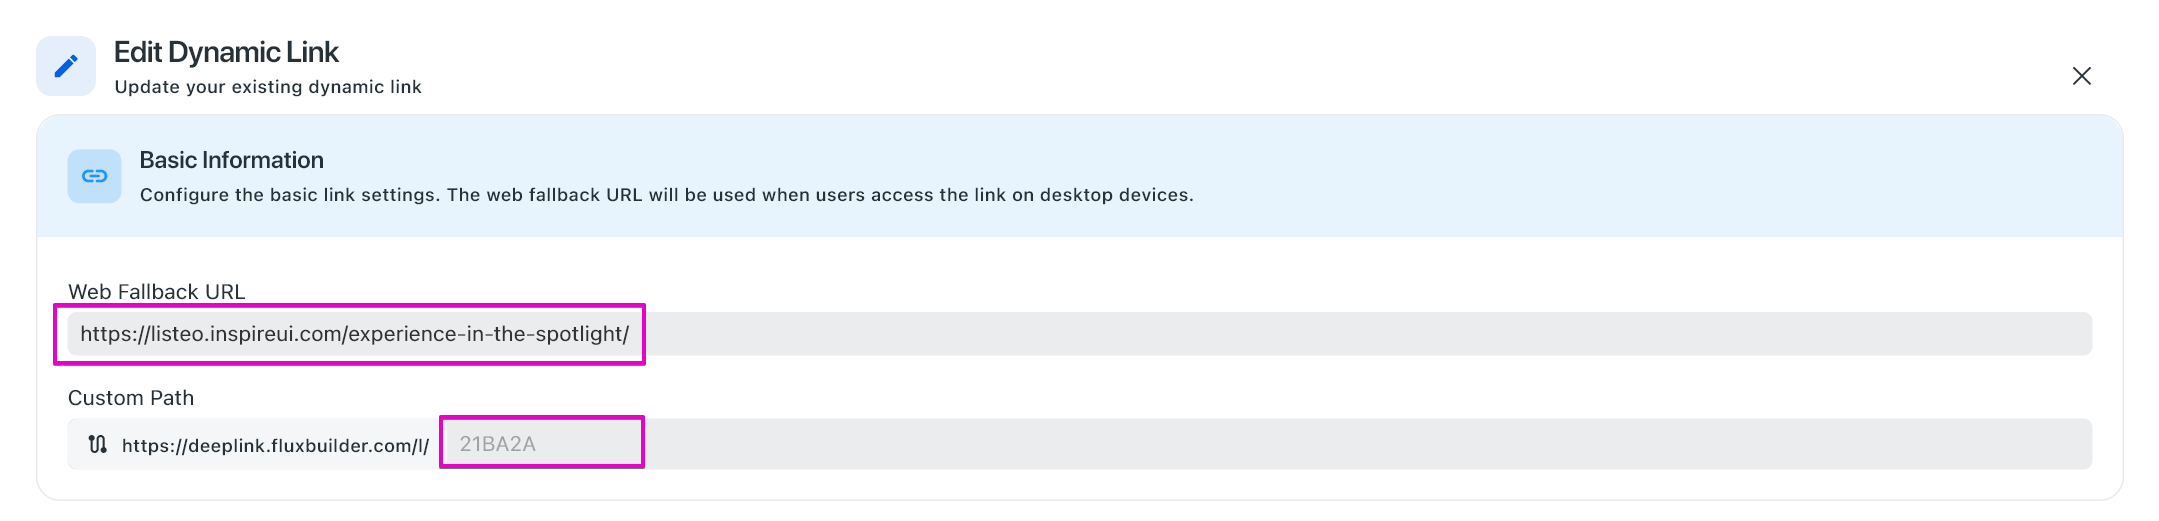
Fill in the Basic Information (required):
- Enter the Web Fallback URL (a product, blog, or category URL).
- Enter the slug into the Custom Path.
(Optional) Add Mobile App Information so the link can open inside your app:
- Select iOS and Android Information from the existing data created in the Full Settings Control guide.
- Enter your App Store URL and Play Store URL.
- Enter your Android Package Name.
- For iOS Deep Link and Android Deep Link, use the format:
<app-scheme>://<project-subdomain>/custom-path-slug
For example:
fluxstore://fluxstore-deeplink.fluxbuilder.com/21BA2A- Please note that the
app-schemeis defined by you. Make sure it matches the Scheme configured in Features > Dynamic Link Config > FluxBuilder Dynamic Link > Scheme.
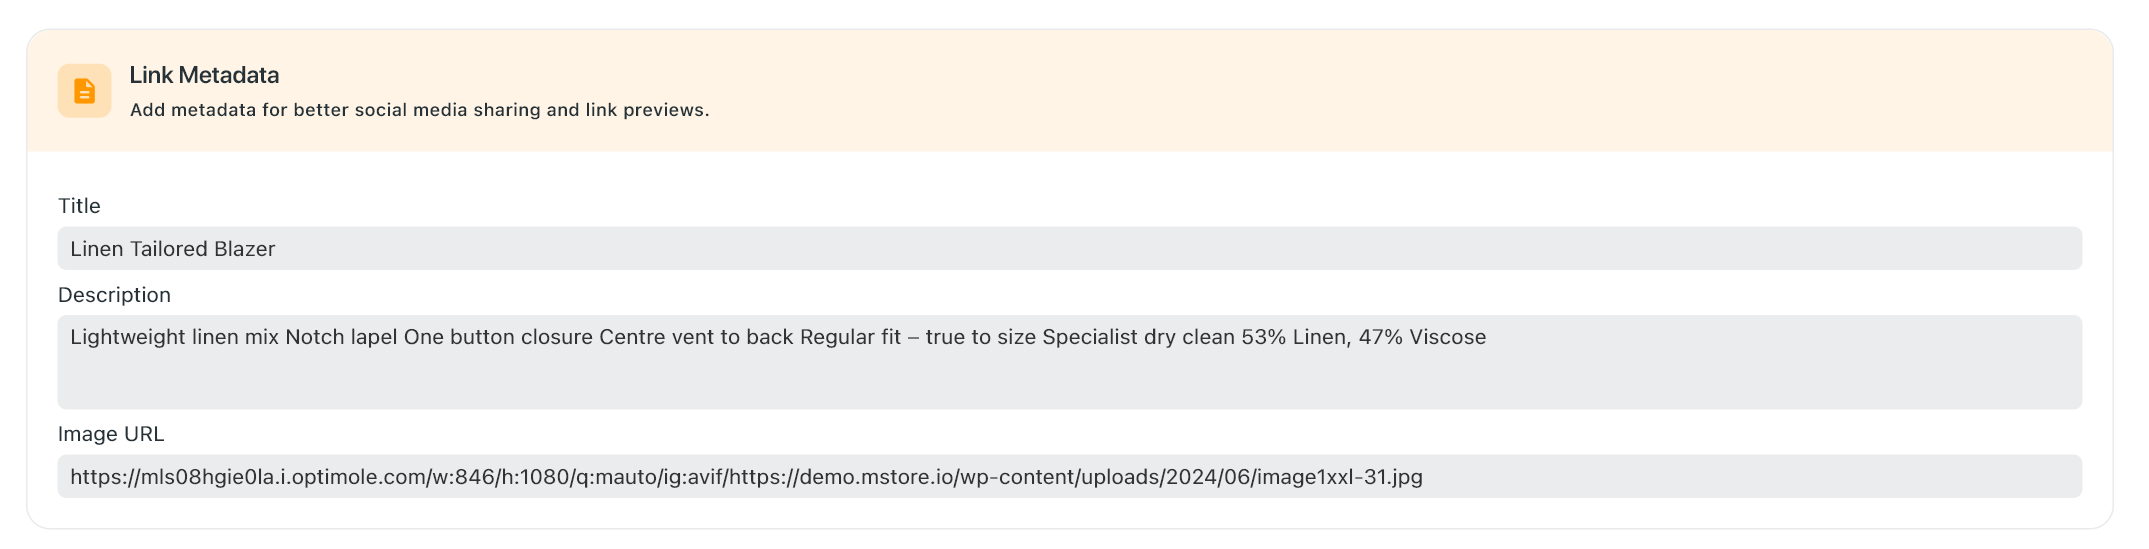
(Optional) Add Link Metadata (Title, Description, Image URL) for better previews on social media.
Example for Metadata
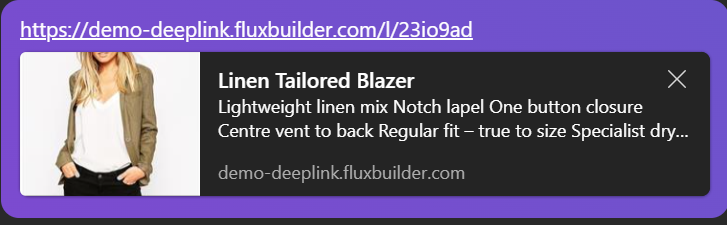
Shared and Link Preview without Link Metadata

Shared and Link Preview with Link Metadata
(Optional) Set an Expiration Date and Time for the link.
Click CREATE LINK to finish.
Link Management
- Open your app on FluxBuilder.
- Open Dynamic Links.
- Click the Settings button of a specific link. Then, continue to select:
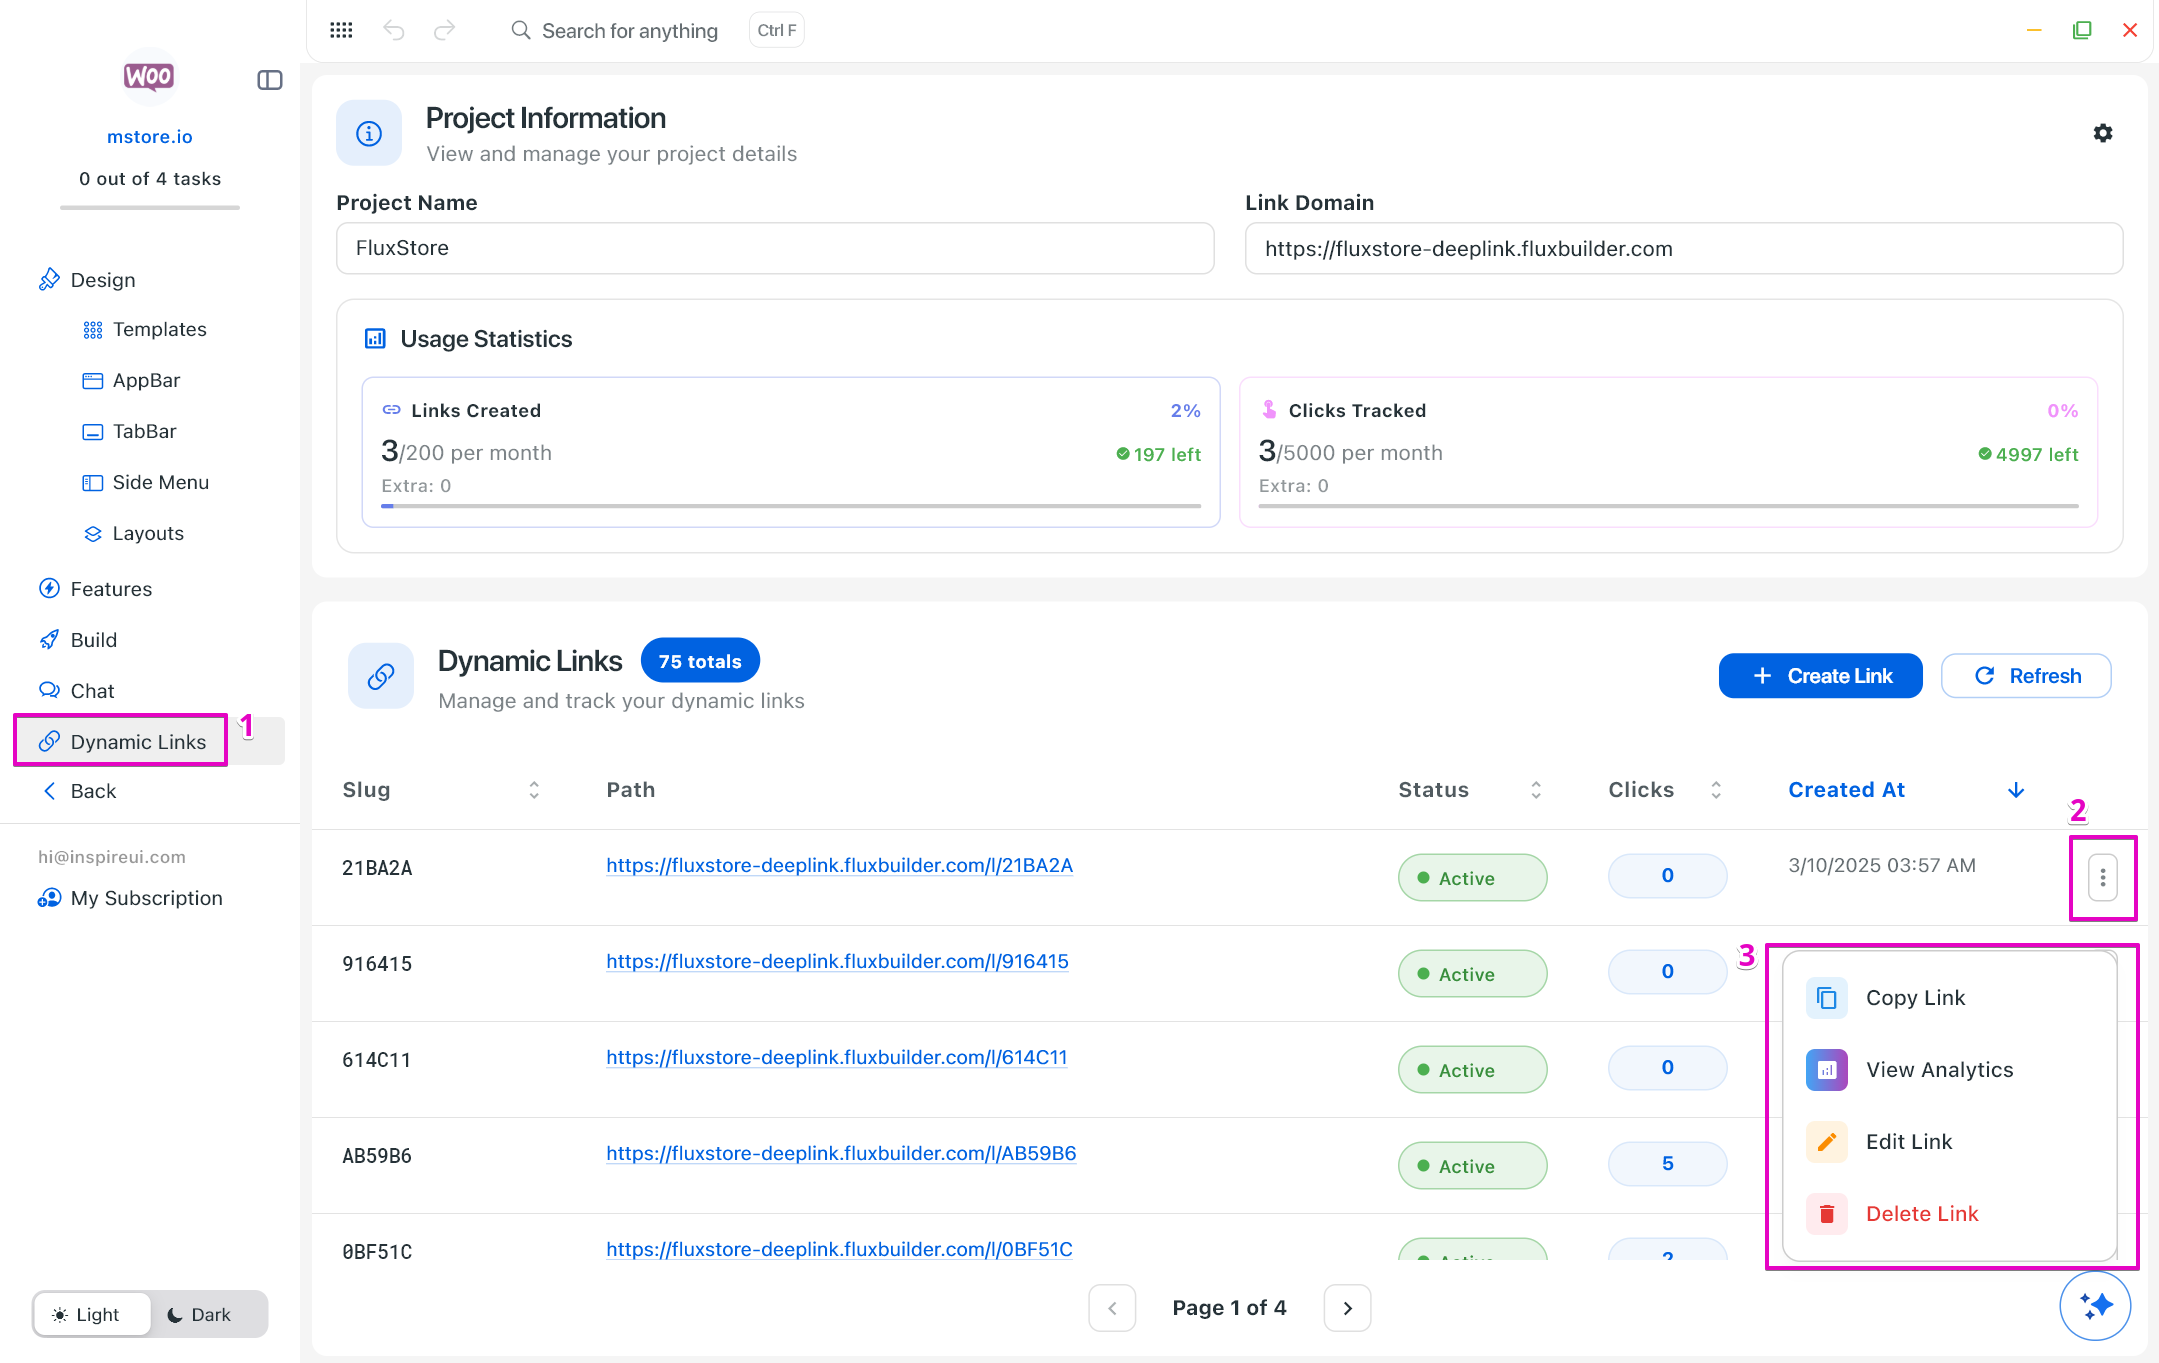
- Copy Link.
- View Analytics to open the Link Analytics Dashboard.

- Edit Link to update the link.
- Delete Link to remove it.
Step 3: Update Dynamic Link Config
Finally, remember to update all information in the Dynamic Link Config.
Steps: on the left menu, click [Features] > under General, select [Dynamic Link Config] > update all information > click [Save] button.
That’s all ☺️